Finishing a Blue Guitar, Final sanding and rubbing out
Part 6: Dan Erlewine uses sandpaper and polishing compounds to achieve a PRS-style finish using liquid stains and aerosol lacquer.
Part 6: Final Sanding and Rubbing Out
This is how the final coats look after drying for a week — lots of pebbly "orange peel". I did very little sanding throughout the clear coat process (Part 5): I sanded lightly after the first lacquer coat to remove only the fir (I accidentally sanded-through, also). Then I thoroughly level-sanded once after the first four heavy "double-coats." I continued to spray, having a few spits and problems along the way which we corrected, and used up all three cans of clear lacquer — quitting when the cans felt about 1/8 full.
The last can I emptied entirely because it just happened to be running out as I was spraying my last "double-coat" (two passes around the body in one session — waiting a minute or two while hold the body level for any heavily-sprayed area to set to avoid a run).

I laid the guitar on clean cardboard for sanding the face and back. I sometimes use a soft towel instead of cardboard. As long as the body doesn't move on the surface that it's resting on you're fine (my body holder is clamped into a vise).
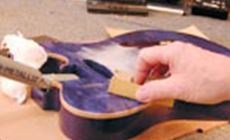
I level-sanded using a rubber backing pad with 800-grit Fre-Cut sandpaper. I worked carefully, dusting off any built-up particles on the sandpaper to avoid scratching my final finish, changing sandpaper often, and keeping the surface that the body rests on free of dust.
This time I eliminated all the "shiny spots," except for a very few which were slightly lower than the finish and I knew these would disappear with the rubbing out.
Sanding the cutaways, waist, and around the neck pocket is the toughest since the areas are small and you have to use small sanding strokes. Here, I rarely use a backing pad.
I put my ShopStand to use anytime I get, and here its supporting a series of vises that hold the guitar firmly, just where I want to work comfortably.
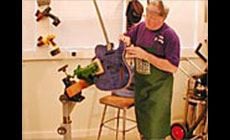
I can hold the guitar in almost any position — making sanding the hard areas easy and it's even better when hand-rubbing these areas later since it takes a lot of pressure to rub.
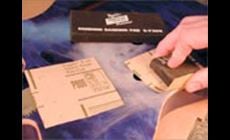
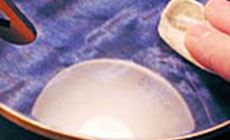
After the dry 800-grit sanding I switched to wet-sanding with 1200-grit micro finishing paper. I let the paper soak in the water for half a day before using it (it clogs less, and works better, when it is soaked). I kept paper towel and clean rags handy to keep drying up any excess water and to keep it from running into open holes (this can cause the wood to swell and split the finish around the holes).

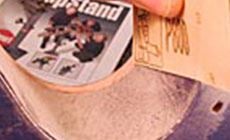
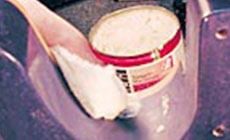
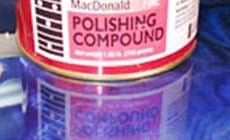
To rub the finish out, I started with coarse polishing compound on a foam polishing pad mounted in my electric hand drill. Here I have switched to a medium compound on a separate foam pad — use separate pads for every grit. I wiped a streak of the compound along the edge of the guitar and picked it up on the pad.
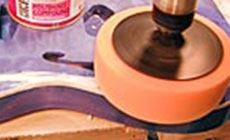
I will also apply compound directly to the pad with my finger — building it up on the edges especially...
...since I like to tilt the pad very slightly as I work. It is impossible to hold the spinning pad absolutely flat — it will jump around the surface. Cover the area slowly, but keep moving. The heat and friction, along with the compound as it works into the foam pad, create the shine.
Don't touch a buffed surface for ten minutes! Give the lacquer time to cool off before wiping away any residue lightly with a soft clean rag.
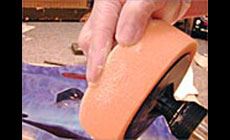
The cutaways you will have to polish by hand.
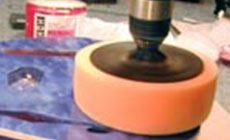
I went through all three compounds, ending with fine compound. I never stayed with any one too long once the initial coarse compound gave me a gloss. The medium and fine compounds do their work quickly.
If you spend too much time with anything — sandpaper or buffing compound — or don't keep moving, you can sand or rub through. I never had a rub through on this job — I was lucky!
The final gloss!
More In This Series
| Introduction | Finishing a Blue Guitar |
| Part One | Wood preparation |
| Part Two | Staining the guitar |
| Part Three | PRS-style binding |
| Part Four | Sealer & scuff sand |
| Part Five | Topcoats & touchup |
| Part Six | Final sanding & rubbing out |

