Finishing a Blue Guitar, Topcoats and touchup
Part 5: Dan Erlewine sprays the clear topcoats to achieve a PRS-style finish using liquid stains and aerosol lacquer.
Part 5: Topcoats and Touchup
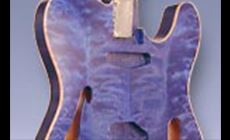
Still using the outdoors as my spray booth (temperature around 38°) I began spraying clear lacquer. The sealer coats were well leveled — "scuff-sanded," as we say — and I had a good flat surface to spray on. I sprayed around the guitar in two medium-wet coats, stopping for a minute between. The second time around gave a good wet look. Get it too wet and you'll get runs...

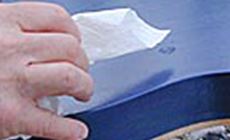
...or worse, a large droplet spit out right when I least expected it. Holding the guitar level, I touched the dime-sized droplet with the tip of a paper towel to absorb as much of the unwanted lacquer as possible and set the guitar aside to dry.
StewMac Tip!
Before spraying, we recommend placing your spray cans in a container of hot tap water. The increase in temperature helps the lacquer flow better and reduces unwanted spitting. When an aerosol can starts to feel cold during use, we recommend switching to a warmed can as chilled cans are more likely to spit. Place the chilled can back in the hot water so it can be warmed back up and used again!
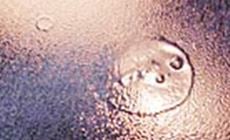
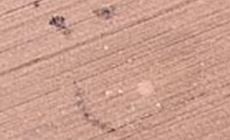
Later, when the finish was very dry, I inspected the damage. The reflected light shows the large droplet and a smaller one in the upper left. This view also shows the "orange peel" effect of the sprayed lacquer. This is normal, and it's even common with professional spray equipment. Orange peel sands away easily to a level surface.
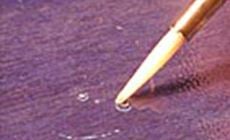
I decided not to sand the two bubbles which were caused by touching the droplet with the paper towel (I should have left it alone, I think). If I sand the bubbles, their tops will be cut off and an open crater will be left that might show a shadow. I decided to fill these recesses. First, I touched lacquer thinner over the bubbles and let it sit for one minute.
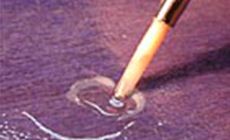
Then I drop-filled clear lacquer onto the area. The haze around the droplet is caused by the thinner — it's a "blush" actually — and will disappear once the area dries, and then I can level sand it and hope for the best.
Once the drop-fill dried, I level-sanded a large area around the droplet — as if it wasn't there. I wouldn't concentrate on the actual area or else I might sand a dip into the finish that would always show.
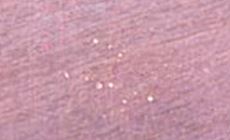
It leveled well, but several small pinholes show as whiteish dots.
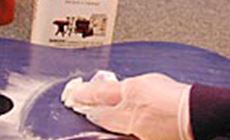
A wipe with naphtha (or water) cleans the dust and lets me see the finish as it really looks (for just a second before the naphtha evaporates).
The pinholes still show. They're smaller, but still there.
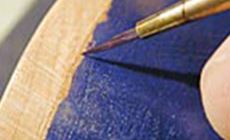
I covered the white with a weak mix of lacquer thinner and a touch of Colortone blue.
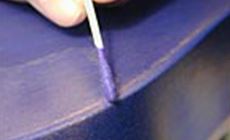
When lightly sanding the first lacquer coat, I went through on a corner into bare wood. I mixed Behkol (denatured alcohol) with a little Colortone blue stain...
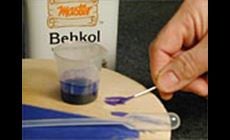
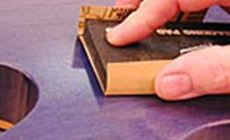
...and used a cotton swab to touch the area.
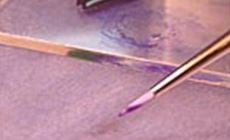
I touched up a bare spot on the f-hole with the same swab...
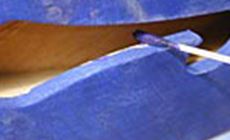
...as well as the edge of a section of the "binding" which didn't quite get the color it should have. These touch-ups will blend in with successive coats of clear lacquer.
After 4 "double-coats" of lacquer I block-sanded the entire body with 400-grit Fre-Cut sandpaper...
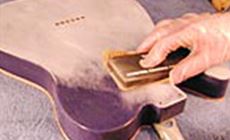
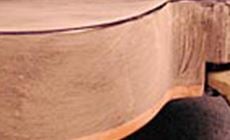
...everything but the shiny edges. Never sand the edges. Let all the lacquer build up on the edges that you possibly can!
After level-sanding I sprayed four more "double-coats" of lacquer. Always hold the body level when possible to avoid runs.
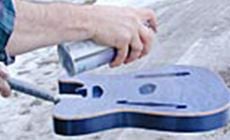
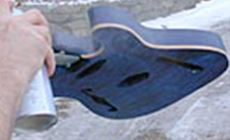
The cutaways are always tough to spray. I am wearing a spray mask, by the way, even though I'm spraying outdoors. You should, too.
The body now has approximately 8 coats ("double-coats," as mentioned previously) of lacquer. I will let this dry overnight at least, then — without further sanding — spray at least two more coats, or whatever I can safely get out of the remaining lacquer.
So far I have used 3 cans of clear lacquer. I emptied the first two cans to about one-third full to get six coats, then switched to the third can for the last two coats. The partially-filled cans I used to add extra-build on the edges, but I don't try to spray an entire wet coat with a can only a third full because I don't want to have to stop spraying to switch cans if I can avoid it. I don't want any spitting — which can happen when a can is running low.
The third can, which gave me my last two coats, should be good for at least two or three more coats, and then I should be done. If I start a 4th can of lacquer, I will let you know. I will let the final coats dry for 5 or 6 days before Part 6: Final sanding and rubbing out
More In This Series
| Introduction | Finishing a Blue Guitar |
| Part One | Wood preparation |
| Part Two | Staining the guitar |
| Part Three | PRS-style binding |
| Part Four | Sealer & scuff sand |
| Part Five | Topcoats & touchup |
| Part Six | Final sanding & rubbing out |

