Finishing a Blue Guitar, Wood preparation


Part 1: Dan Erlewine shows how to prepare the wood for a PRS-style finish with stains and aerosol lacquer.
Part 1: Wood Preparation
My guitar body arrived very well sanded but I'll want to sand it a little more after I fill some of the grain. Check for any fissures or voids in the wood—especially the alder, which often has tiny cracks.
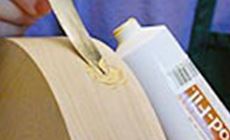
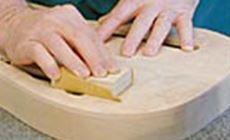
I found one and filled it with water-based filler, and let it dry. Next I sanded it smooth by level-sanding with 220-grit Fre-Cut sandpaper wrapped around a leather-faced wood block.
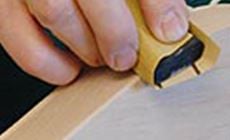
Lacquer builds film thickness slowly on edges—especially sharp edges. Gently radius the sharp back edge to avoid constant "sand-throughs" (going through the finish and the color and hitting bare wood) on the edges when you sand the finish coats. Leave the sharp top edge alone, you'll be scraping and sanding it later which will remove its sharpness). Later you'll spray extra coats of finish to gain extra thickness on all edges.
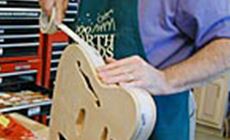
Damp the entire body with a rag soaked in clean water and well squeezed-out to raise the grain. Small fibers will raise up and you'll sand them off before staining.
Hang the body to air-dry, then level-sand again with 220-Fre-Cut.

My hanger is a piece of 1" PVC electrical conduit softened with a heat gun so that the end can be squashed flat and bent. A hole drilled through the other end lets me hang it on a hook from the ceiling. I use #10 sheet-metal screws screwed into the body neck-mount holes—they grip the wood but don't leave marks that show later.
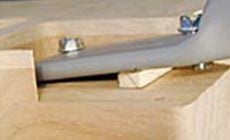
The small shim angles the holder so that lacquer can flow inside the cavity and roll over the edges. Sand the inner-edges of the f-holes or they'll fuzz up when the lacquer hits them. I just wrap some sandpaper around a dowel stick, or one of these sanding sticks (used in fret dressing).
When you're done sanding, vacuum all the dust from the inside and the outside (or blow it off with compressed air).
I made a step-down adapter for my vacuum that brings the large diameter hose down to smaller sizes (1", 3/4", and 1/2") that reach inside guitars with ease.

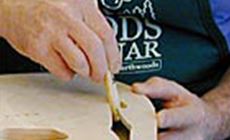
Tape the edge of the maple top with latex pinstriping tape for a clean edge to protect what will be the exposed the maple "binding" from the top staining.

Further protect the sides with a light-stick mask such as Sherwin William's™ "Painter's Tape" to protect the sides from any stain that might run (it didn't—I was careful).
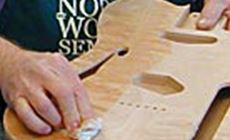
I stuffed paper towel into the F-holes to protect the interior from drips of stain—I'll remove it after the staining because I don't mind a bit of lacquer making its way through the F-holes and onto the back.

This guitar is now ready for Part 2: Staining the body.
More In This Series
| Introduction | Finishing a Blue Guitar |
| Part One | Wood preparation |
| Part Two | Staining the guitar |
| Part Three | PRS-style binding |
| Part Four | Sealer & scuff sand |
| Part Five | Topcoats & touchup |
| Part Six | Final sanding & rubbing out |