Making a Nut, Step-by-Step
Dan Erlewine, of Stewart-MacDonald's R&D Team, walks you through making and installing a new nut.
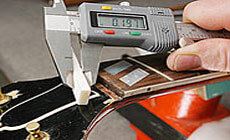
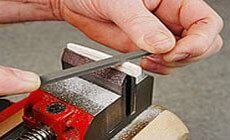
By tapping the side of the old nut, you can dislodge it. Before you do, use a sharp blade to score a line on the finish around the nut. This way, the nut will break out of the finish on your scored lines, and chipping the finish will be kept to a minimum. Nuts tap out easily on old guitars, but not on new heavily-finished ones; sometimes you'll need to saw through the nut to get it out. To do this, cut it lengthwise (across the string slots), stopping when you're almost down to the bottom. Now you can collapse the nut inward on itself and remove the pieces. Scrape out old glue residue, and make the slot square and clean without removing wood. (Good tools for this are Micro Chisels and Nut Seating Files.) We like Bone Nut Blanks for most situations, except when used with a tremolo. Tremolos work well with slippery nut materials like Tusq and Black Tusq XL made by GraphTech. Carefully square up the blank to fit the nut slot by using sandpaper on a flat surface (use double-stick tape or self-adhesive sandpaper). Start with 120-150 grit, and work your way through 220 and 320-grit. Calipers are a big help in accurately sizing the nut. The top of the nut will be shaped to follow the radius of the fretboard. As a starting point, place the blank in the slot and trace the shape of the fretboard onto it. To determine the height of the nut, add the height of the frets to this traced line, then add an additional .030" for string clearance (the space from the bottom of the strings to the top of the first fret). This will give you a good starting point; later you'll fine-tune string heights, bringing them down just a little. A Radius Gauge is a good template for drawing this curved line for top of the nut. File the nut to the shape you've drawn. Don't try to final-shape it yet — at this point, you want to leave yourself enough material to work with when you're fine-shaping later. Determine the spacing you want between the outside E-strings. A good measurement is .050", or about 1/16", in from the top of the beveled ends of the first fret. Looking straight down on the top of the nut, use the String Spacing Rule to find the proper spacing for the remaining four strings. Use a scribe or very sharp pencil to mark their locations. Now you're ready to cut small "starter" slots. Be careful not to cut too deep. The .010" Gauged Saw is excellent for starting slots. The Gauged Saws are best at "moving" the slots from side-to-side if they stray from your marks, but they do lower the slots fast. (Besides, you shouldn't rush this!) Choose nut slotting files that are the same size or no more that a few thousands larger than your individual string gauges. A smaller file can also be rocked side-to-side to widen a slot to the desired size. For example, you can cut a .043" slot with a .042" file by moving it around a bit. To avoid marring the guitar, consider shaping the slots with the nut blank held in the Nut and Saddle Vise. File down the excess nut material from the top as the slots get deeper, so there's room for your file to cut. Frequently check the slot locations with the String Spacing Rule, and move the slots from side to side if needed. When the slots are well defined, but not to final depth, put the nut back in the slot and string up. Take the slots to their final height with all the strings on and tuned to pitch. Double-edge Nut Files are good for this job. As you get close, use stacked feeler gauges as an accurate way to stop at the string height you're after. (Our frets in this example are .040" tall, so when we add .030" for string clearance we get a slot height of .070".) Stack the feeler gauges to this combined measurement, and file the slots until the file just nicks the feeler gauges. Now you've got a good general string height, and you're ready to fine-tune it if you like: leaving the heavier strings a bit high, while the treble strings get lowered, following the radius of the fretboard. Many pro players prefer to set the low-E string clearance to about .020", and the treble E-string at .010" (give or take a few thousandths). The strings between are at graduated heights following the fretboard radius. Mark all around the overhanging nut edges with a scribe or knife, then put it back in the vise to trim off the excess nut material. Work carefully up to your scribed lines with the smooth side of the Nut Shaping File. Take your time — it's easy to "blow a nut" at this stage! Final-sand and contour the nut's shape using ever-finer sandpaper (220-, 320-, 400-, and all the way up to 1200 if you wish). Follow this fine-sanding by polishing with a soft rag and polishing compound. String the guitar to pitch, and final-check the nut shape and string heights with a String Action Gauge. If you're happy, loosen the strings and glue the nut in lightly with 2 or 3 small drops of Titebond glue. Replace the strings quickly, tune back to pitch, and slide the nut from side-to-side to align it while the glue is wet and slippery. Leave the strings on, to provide clamping pressure. After the glue dries for an hour, you're ready to play.Dan Erlewine, of Stewart-MacDonald's R&D Team, walks you through one of the key skills in any repair shop.
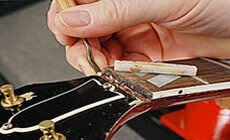
Clean the nut slot
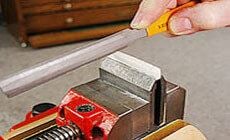
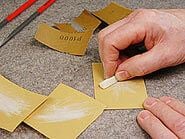
Choose your nut material
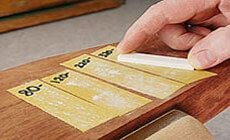
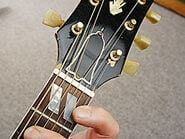
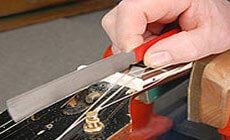
Roughly shape the nut
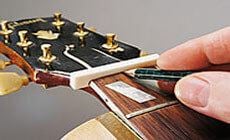
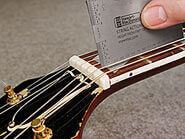
Lay out the spacing
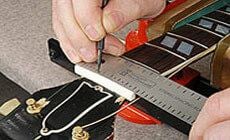
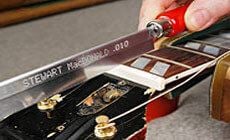
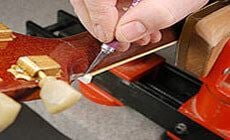
Cut starter slots
What files do I need?
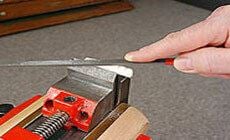
Remove the nut to protect the guitar
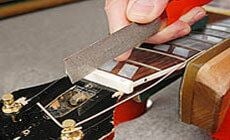
Final slot height

Mark the final size
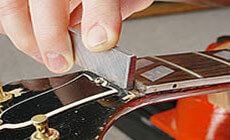
Final shaping
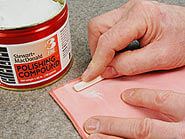
String it up!