Episode 2: MIXING COLORS+FINISHING
V-MINIEP2
If you ever wanted to build your own guitar, but didn't know where to begin, this live build along series will show you every step. Episode 2 shows how to apply the finish.
In this 4-part series we'll show you step-by-step how to build, wire, and set up one of our fantastic mini guitar kits. Even if you are a complete beginner, don't worry, we've made this easy—no workshop is required. You can literally build this on your kitchen table with tools you probably already have. This second episode shows how to mix custom colors, how to make a finish applicator, and how to apply the finish.
Video Transcription
[on-screen text reads: Mini Guitar Kit Live Build-Along - Episode 2]
Nick: Well, welcome back everybody. Welcome to the StewMac Studios. We're here for episode two. I'm Nick, I'm going to be your host for this live build along here. I'm here to answer any questions, take comments, things like that. We've got Blake over here giving us a little bit of background music for now. He's going to be doing our build. We got Rachel over here on the camera and then we got Susan at the console who's going to be handling all that for us. So just to recap of what we did last time, we have our peghead customized if you so choose to do so. And then we've got it finished standard. We've got it all grain filled. We are ready to apply our finish. So that's what we're doing today. We're going to be applying our poly finish and I'll just go ahead and hand it over to Blake and we'll get this thing started. All right.
Blake: Welcome back everybody to day two where we are going to finish our body and we're going to be one day closer to the finished product. So like, whoa.
Nick: Woo.
Blake: We're alive.
Nick: So the joys of live TV.
Applying finish
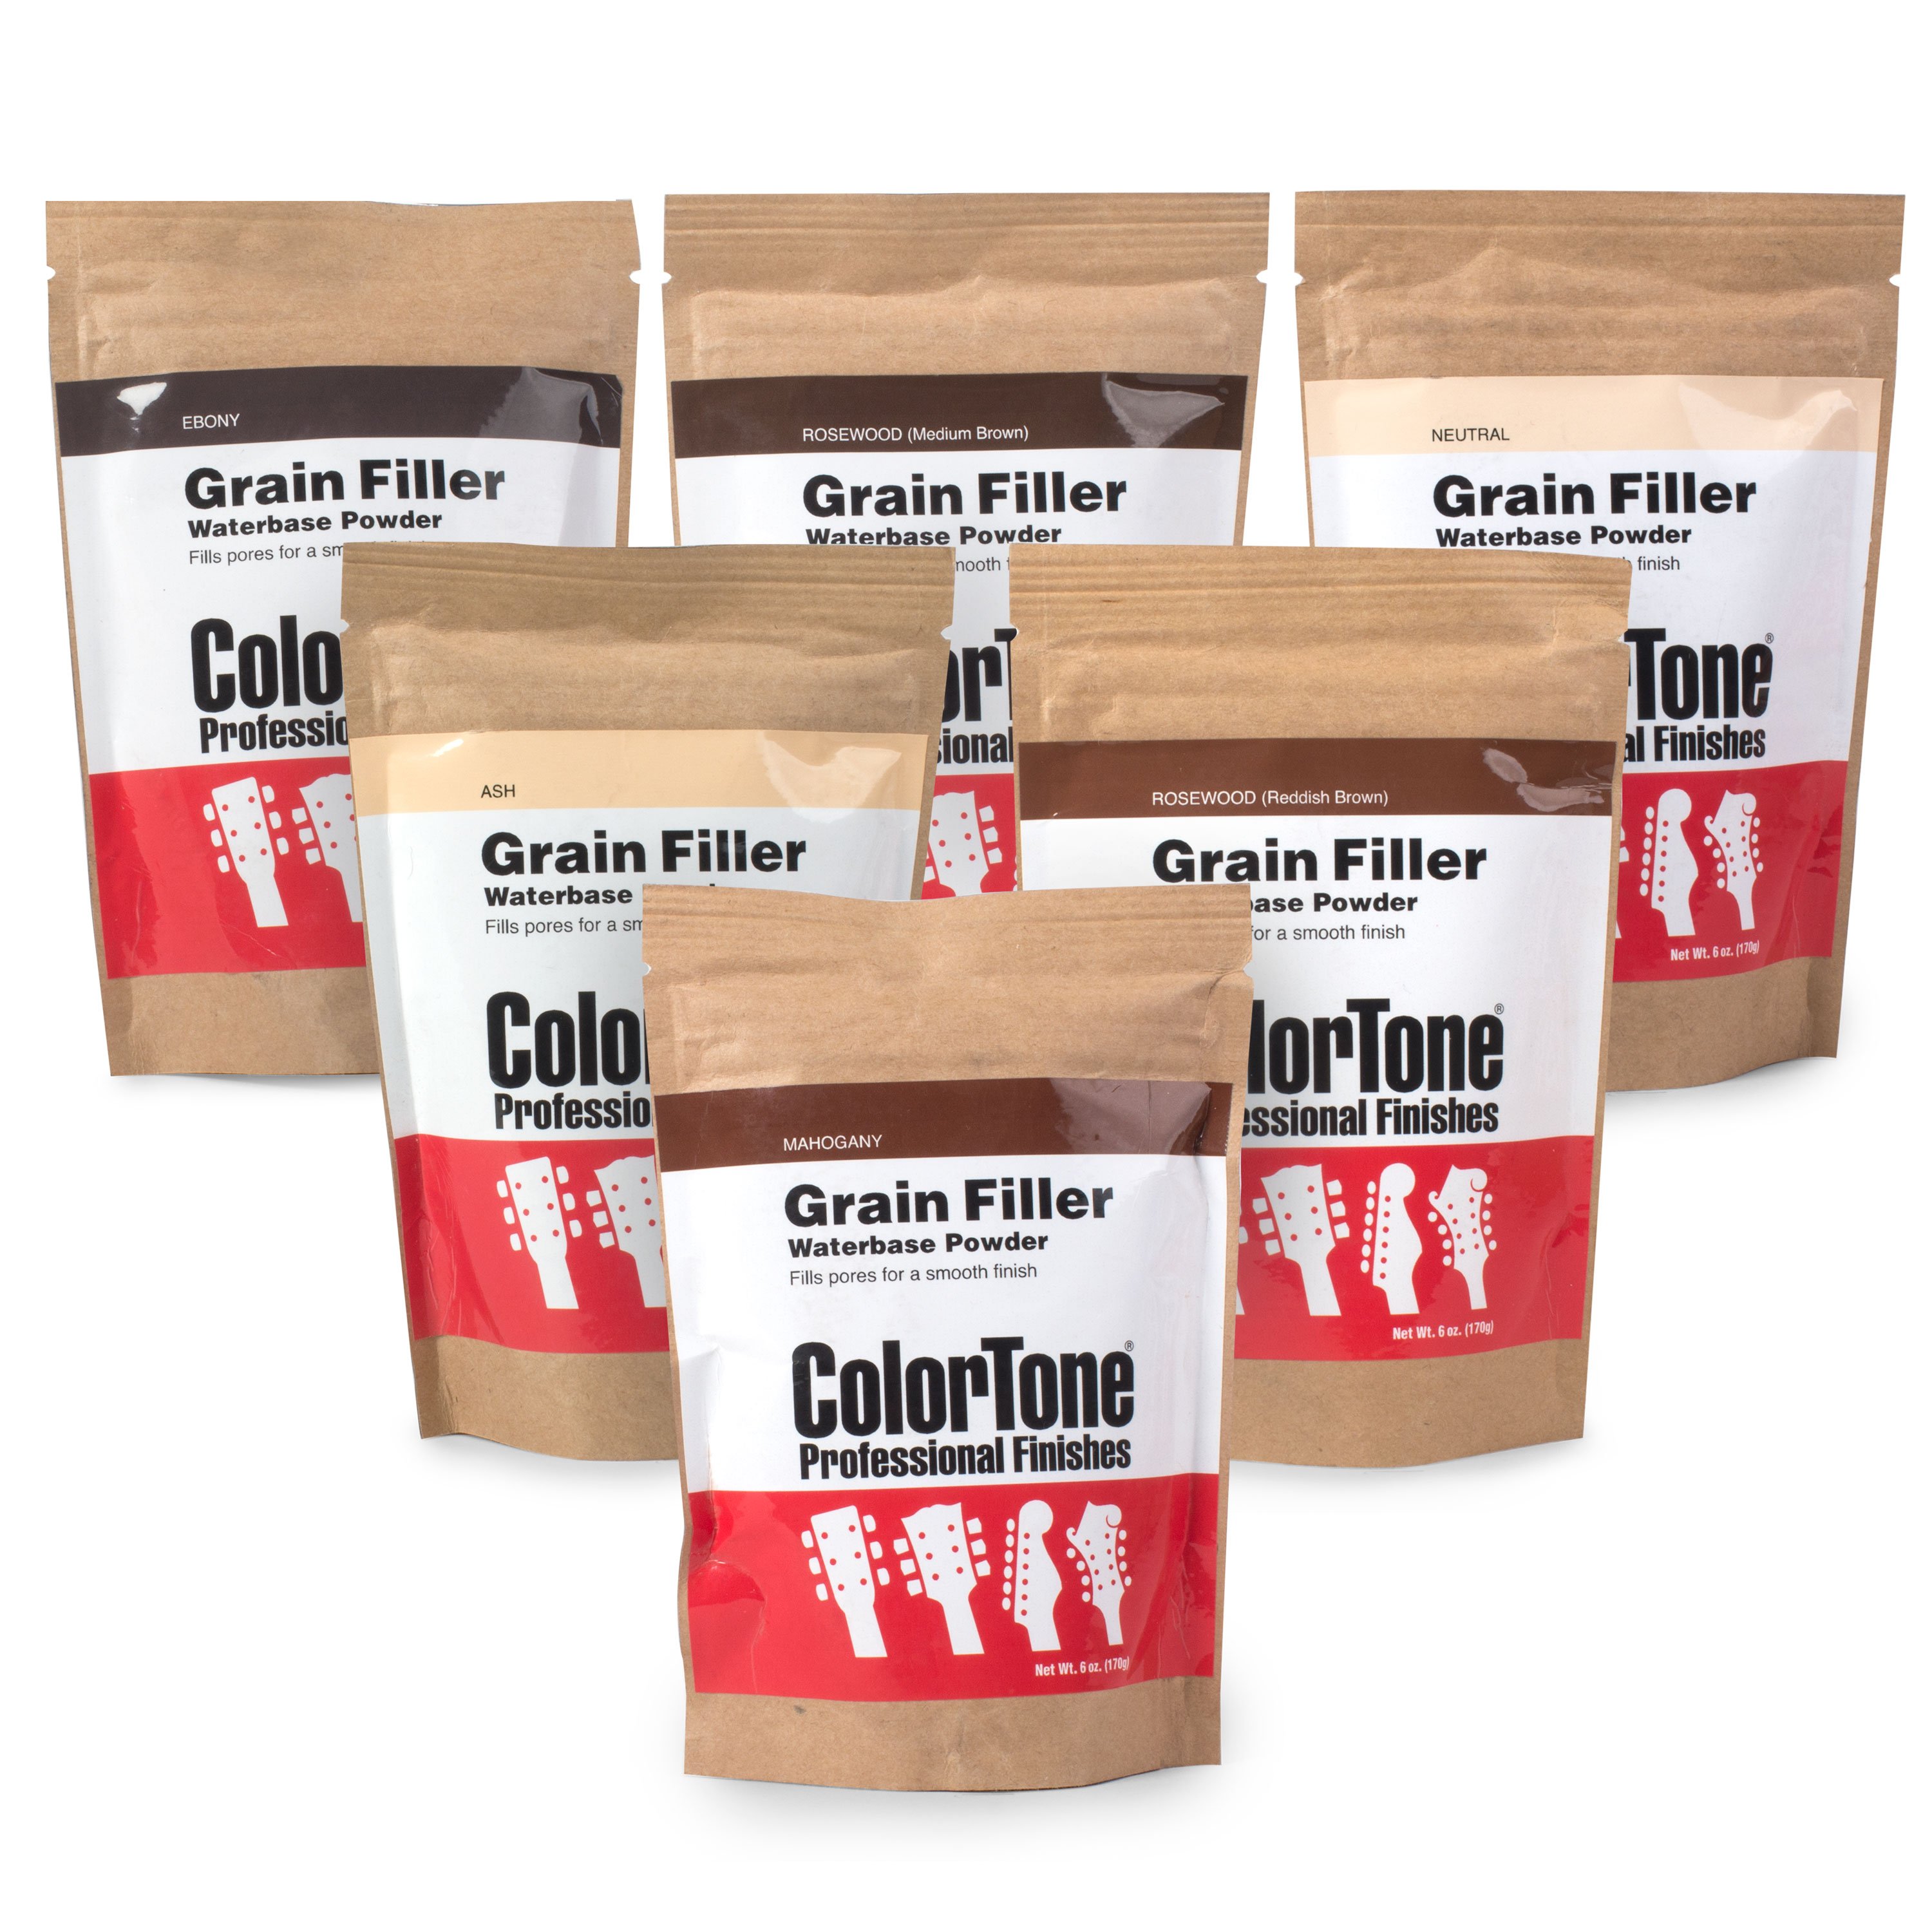
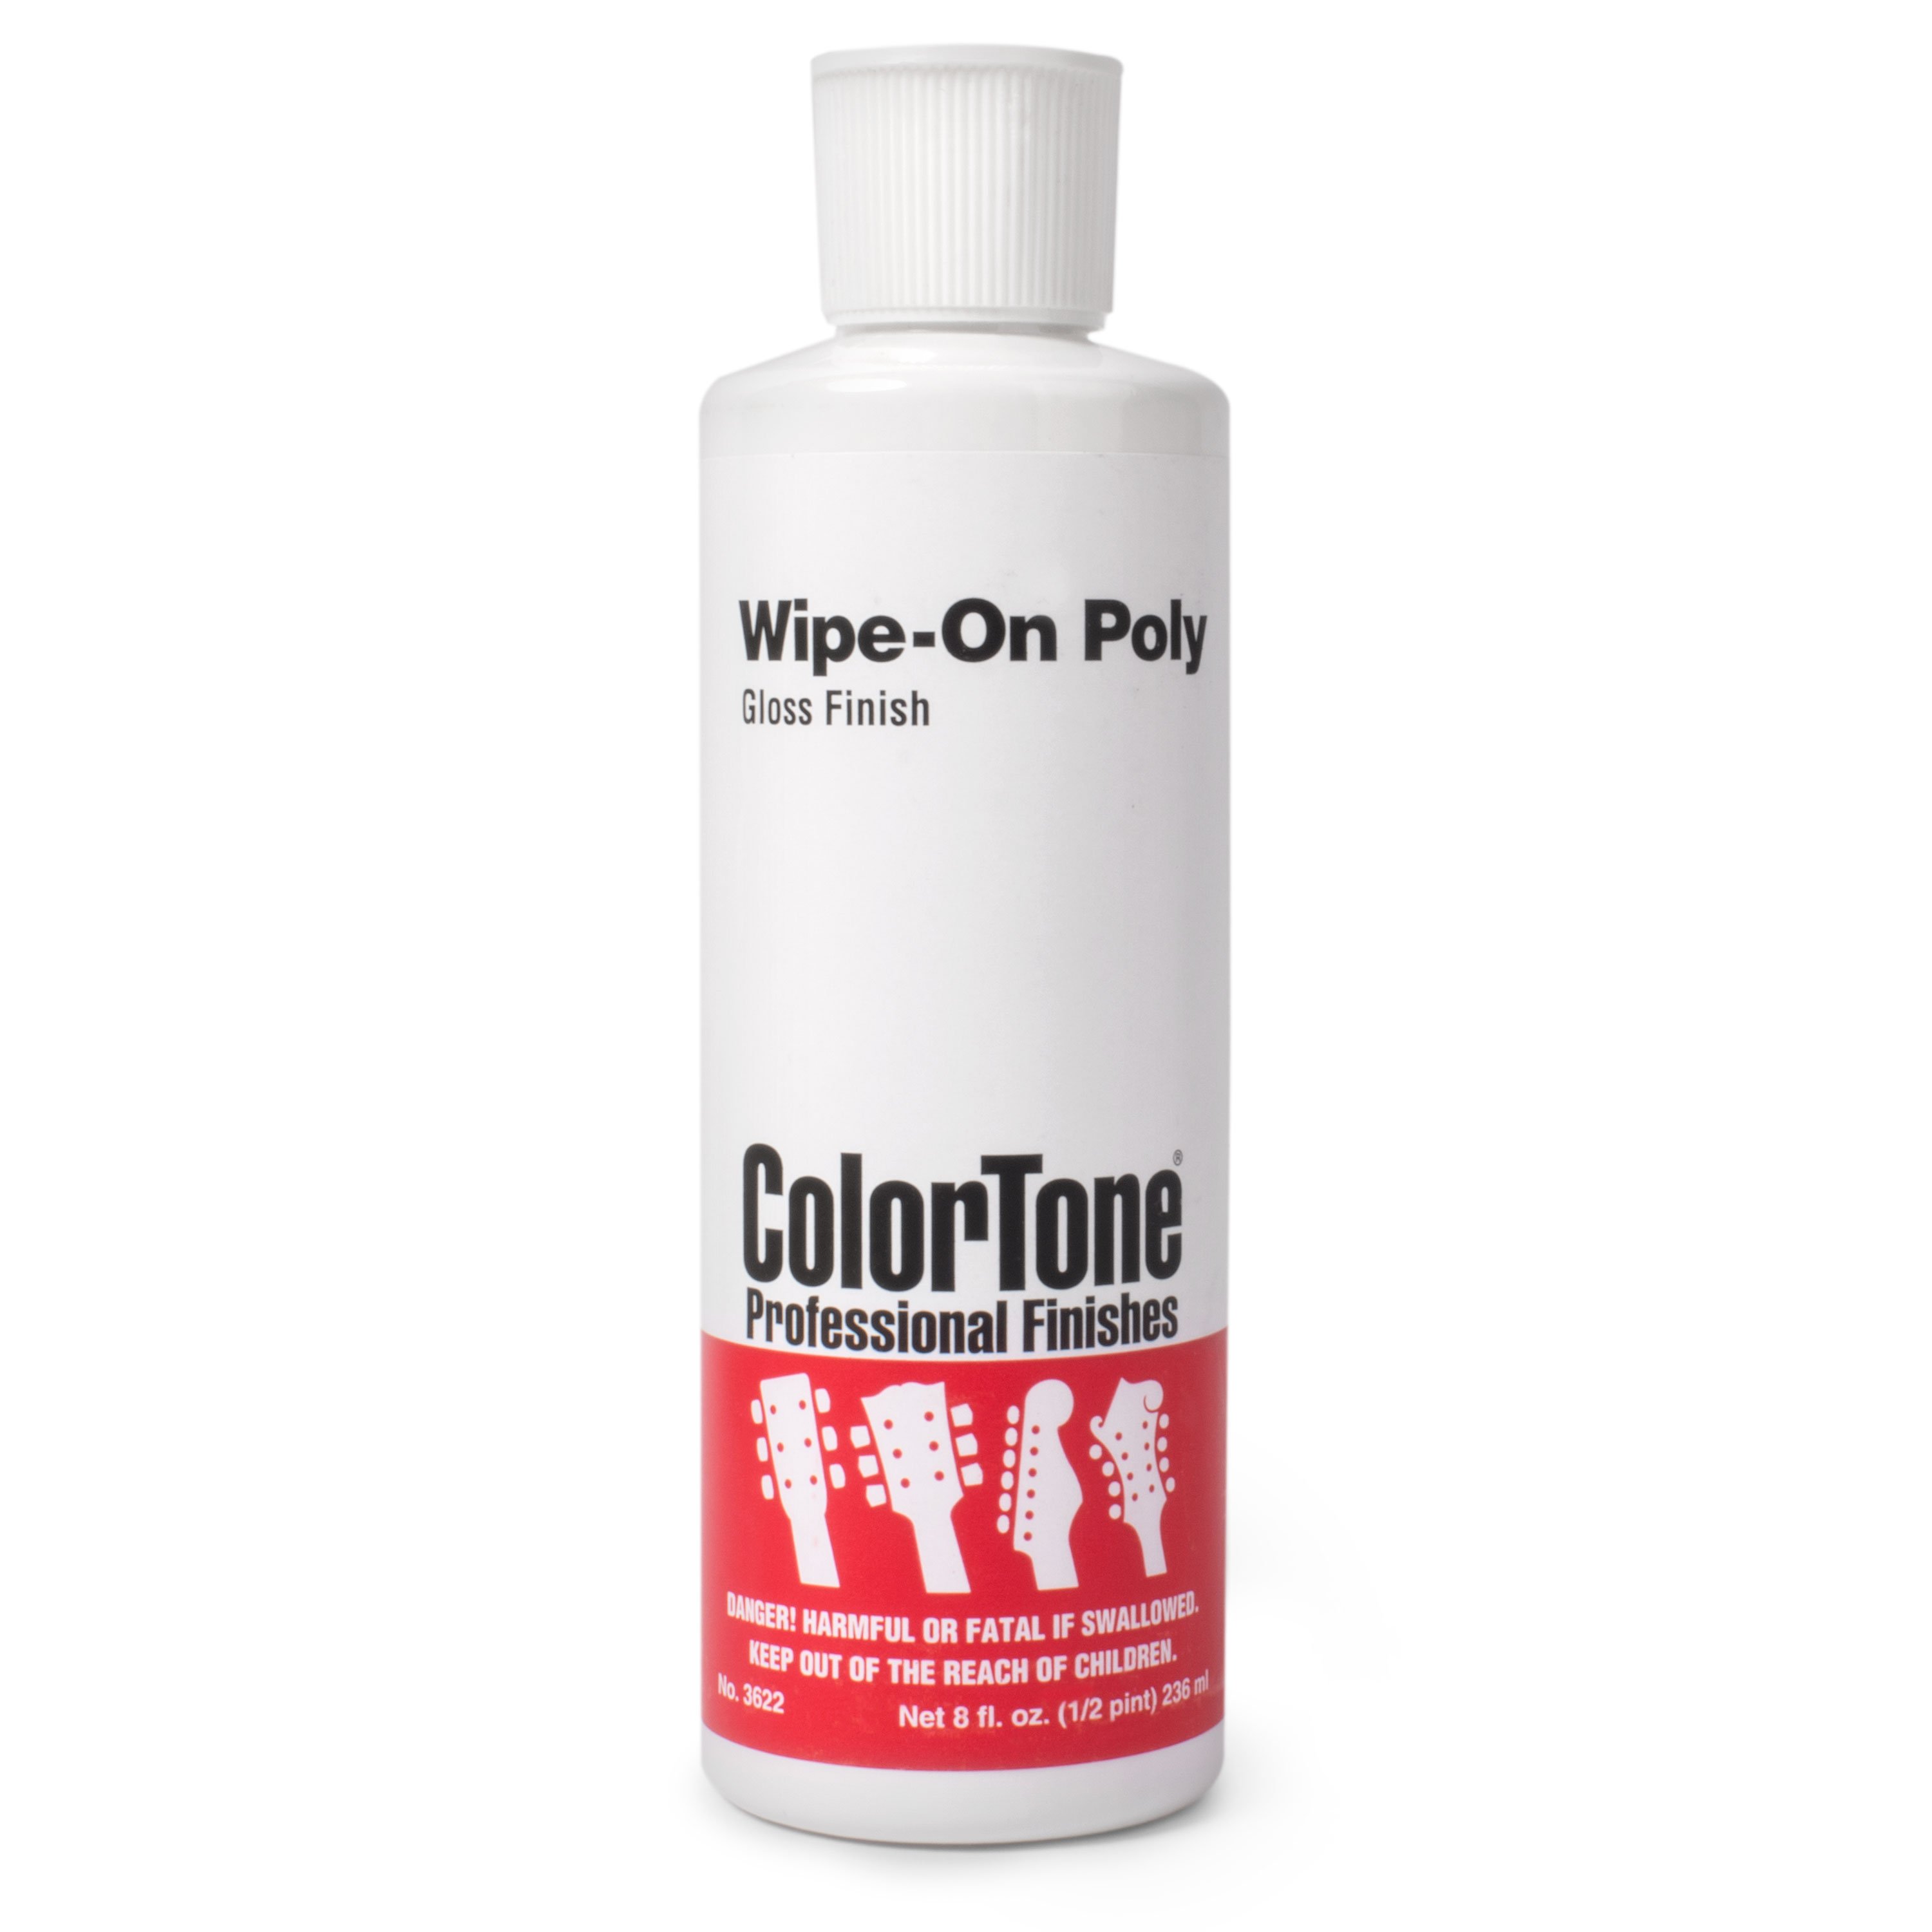
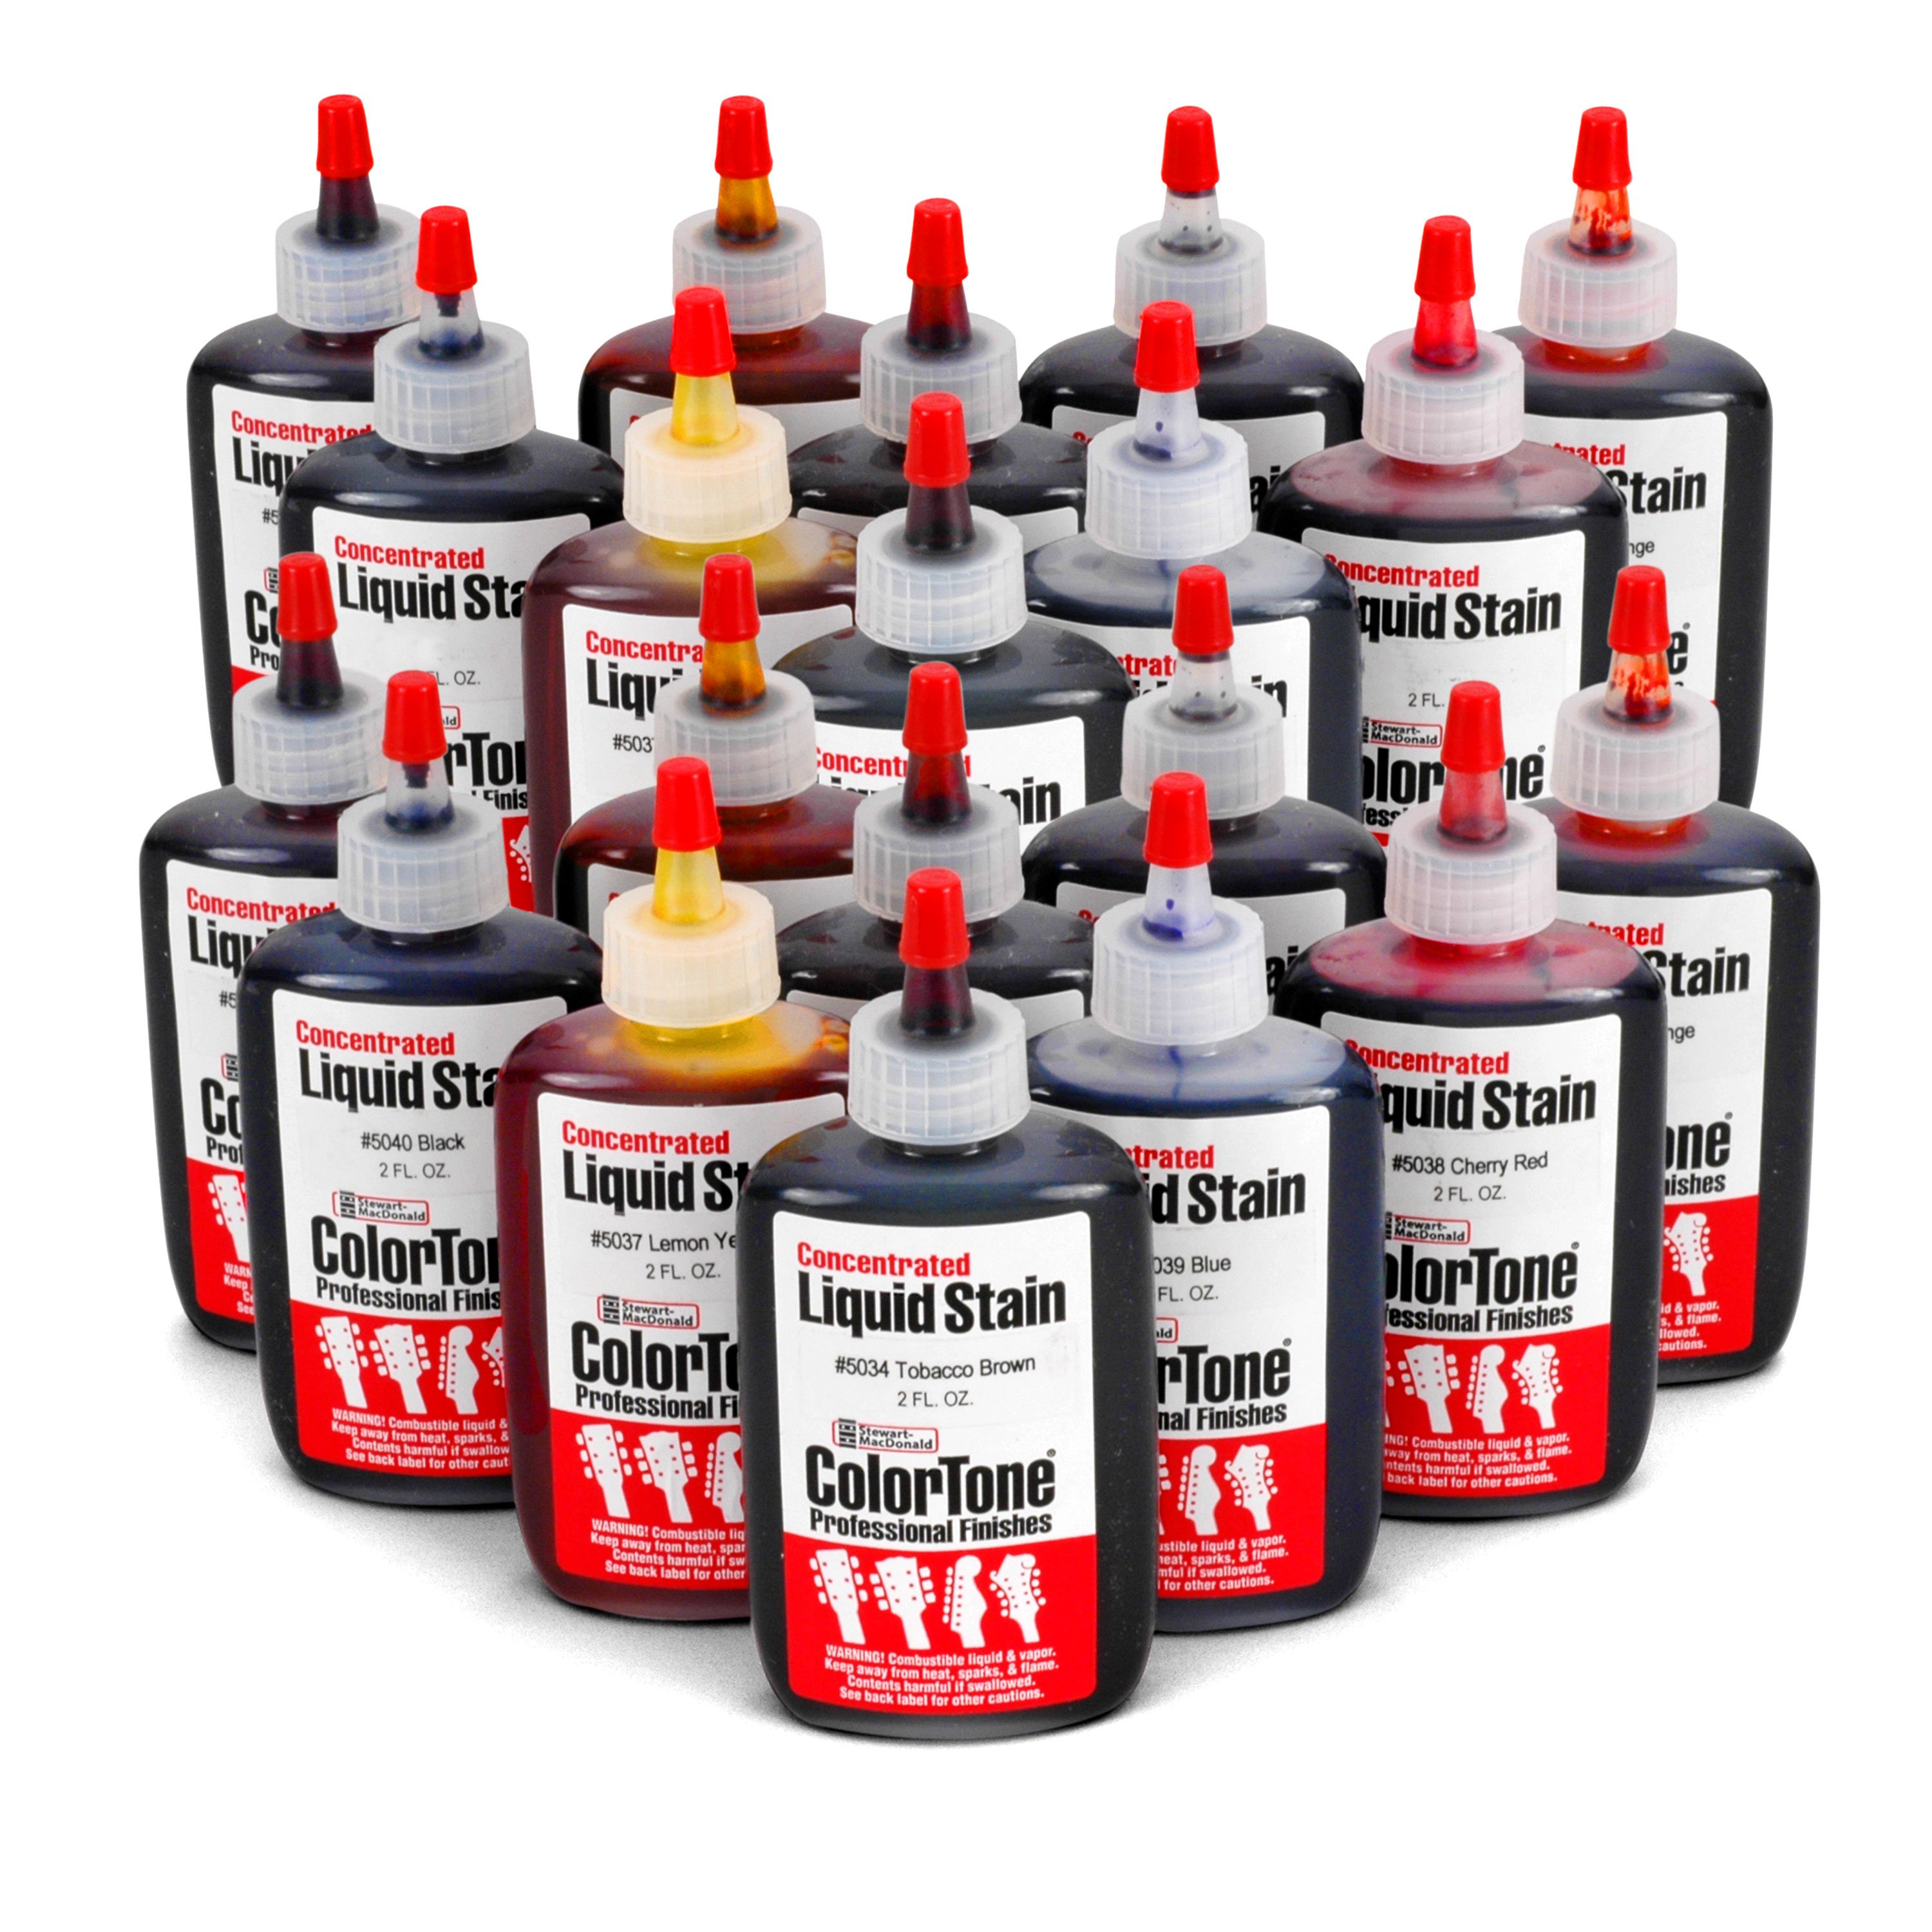
Blake: Anyways, so yeah, we're going to be putting the poly on this guitar today. There's lots of colors you can choose from StewMac. I mean they sell a ton of different types of tints and stuff like that. We're using wipe-on poly, like we've said before, we got a lot of requests to do some pretty fancy finishes, like some Gibson Custom Shop, Fender Custom Shop kind of stuff. We don't have the time to do that, but I went ahead and ran through about eight different colors that StewMac has. Ones that I thought would might be fun and did a bunch of different little tests on this, some scrap wood. And it's really good that you test your color on scrap wood so you can get the right mix and you get the right color that you want.
So out of these eight, I decided to go with red mahogany for the body and the straw for the neck. The instructions already recommend straw, but you could do whatever color you want. You could do an electric violet neck and a blue body. It's up to you. One thing I did happen to learn though while doing these tests was that the lighter colors or the colder colors, weren't as strong as the reds. So it took more stain to get a color that was dark enough to really see. But with that being said, red mahogany and straw for today. All right, let me get the rest of these out of the way. Cool.
Nick: And also just so that you're aware, you can do mixing of these tints too. So I mean those are the basic colors that we have, but you can mix them up. You can make them darker or lighter or use your color spectrum to make whatever you want. So again, we're just showing you what we've decided upon so you can do whatever you want. Choose your own colors, customize it how you like.
Blake: So in the instructions when you're mixing your colors, you're looking for a quarter ounce of your stain and four ounces of poly for the body. And for the neck you're looking for exactly half of that, an eighth of an ounce of stain and two ounces of poly. All right, so I'm going to show you how to mix those. But before I show you how to mix those, I'm going to show you how to make one of these. This is what we're going to be applying it with. So you just dip this down inside the poly and then you rub it in circles all across the body and then you do long streaks on the body. And this is just some cloth that I bought at the hardware store. It's somewhere in between a T-shirt and a paper towel and I don't know, I just like it. It's pretty nice stuff.
Make a finish applicator
So I'm going to move this stuff out of the way as well. Bring in some of my cloth that I already have cut up. All you need is just a little bit of cloth and rubber bands. That one's a little big. Here we go. So basically I just have the big piece of cloth and then I have these little pieces of cloth that are just cut up into smaller pieces. I like to just wad these guys up into little balls and we're going to use these as filler. So I just get about three pieces of that and I take this and I just create the little hole. Gotcha. And go ahead and stuff it down in there. This is a bigger cloth, so I might add one more. I'm going to take it.
Nick: That looks like a little ghost when you're done.
Blake: There you go. Spooky season, start twisting it up a little bit. I'm going to take this rubber band, I'm just going to keep winding it on there until I get it tight where I want it. We're going to have six of them handy. Depending on how this goes we might need one more, but I doubt we'll need this many. But it's good to have too many than too little and have your stuff drying on you. So there you go. That's all we need. So put that there with the rest of the pile. Get these rubber bands out of the way. It's also important that since we're using two different stains, we have two pairs of gloves. So as I'm bouncing back and forth between the colors, I'm going to be bouncing back and forth between my gloves because I don't want to contaminate my samples. I don't want to get any of that straw in my red and I don't want to get any red in my straw.
Mixing the stain
Nick: And something to keep in mind too, these stains are super duper strong. So even though Blake does happen to look quite dapper today, I would recommend wearing clothes that you're not too worried about. Because if you're wearing your nice pants, they're going to end up being your work pants by the end of it. So just be aware of that. They're very, very strong. They will stain and they will not come out.
Blake: So I'm going to start with my red mahogany here. Like he said, these are super potent. And another really important thing is that these little red caps, you don't want to mix these up if you have a lot of stains on your bench because that red gets down in there and if I put this cap on my straw then I'm going to contaminate that straw basically forever. You might as well just toss it out because you're always going to have some red in there. And I ended up poking a little bit bigger hole in here. Usually when I use these for repair, I just put a little tiny pinhole so it doesn't come flowing out. But it takes forever when you're trying to get a substantial amount.
Nick: Gotcha.
Blake: So our little mixing cups here go from a quarter ounce to one ounce and five milliliters to 30 milliliters. So we're going to this first line right here on the ounces side and that's going to be stain.
Nick: Gotcha. Yeah, so we actually had a quick question from Eddie and some people did actually mildly answer it. So what we're doing is actually adding the stain to the finish, to the poly, so it's hard to just describe that way. But yeah, a paint and a stain are very different. What we're doing is just adding the stain to the paint, if you will, our poly, our finish that we're adding to the guitar. So it's just tinting the finish.
Blake: All right, so there's our red mahogany, right? That's a stain. Now we're also using the wipe on poly super forgiving. It drives much faster than nitro and that's why we're using it. So I'm going to ahead shake this up like the directions, say, just give it a little shake for a minute. And this just has this white milky look to it but it dries clear. And then we're going to fill this up to the one fluid ounces four times because we need four ounces. Cool. And since this poly's going to go back in with the red stain, I'm not afraid that there's already staying in this cup, right? So there's one.
Nick: That's a great comment. We got a comment from Jeb. He says he had a heap of luck and I'm assuming that's a little bit of a sarcasm there. So he was recommending to do test pieces even when you're grain filling, just to check and make sure you've got the hang of the technique there. That's a great, great thing to do. And we're actually going to reiterate that with these stains and stuff too about using test pieces to check your colors and things like that. So we appreciate that.
Blake: Those test pieces are grain filled. Those were the pieces I tested my grain filling on too. Thank you for reminding us of that. All right, so there is number four. So that's four ounces of poly, quarter ounce of stain. Put the lid back on it and there's our red mahogany. Good.
Rachel: Look at that.
Nick: Cool. We actually got a question about if we sell this poly in Europe. I believe that we can ship this overseas because it is not flammable. So please I'd like to have the admin correct me if I'm wrong, but I'm pretty darn sure that we can ship this overseas. So that the answer to that question essentially is yes, we do offer it.
Blake: So now I'm taking my gloves off trying to make sure I don't get any stain on my hands. I'm going to put them right there, get my red mahogany jar on it so I know that's the red gloves, get my straw jar out and get some new gloves on. Go ahead and crack this jar open and start doing the straw.
Nick: Cool. And I guess it's worth it to talk a little bit about other finishing options. So today we've chosen to use a poly finish because it's very user friendly and I touched on that last time too. But we also do sell nitrocellulose lacquer and aerosols and we also sell it for adding to a spray gun. So if you've got some experience with that or you want to get crazy and try that, please feel free to do so.
We had some comments about some folks wanting to see some crazy finishes, like some burst and some more technical style stuff. We're doing it this way today because we've only got an hour for this episode. So we're really trying to keep it concise and do something that hopefully we will be extremely user-friendly and there's plenty of great resources online. We have our nitrocellulose finishing schedule that you can check out if you want to go that route. And yeah, if you've got any questions about that you can email our service department, our customer service department, that's service@stewmac.com and they can get in touch with the tech and they can walk you through all those more technical styles of finishing.
Blake: Also, yesterday we got a question about any prefinished kits and we did get some more info on that. Nick, do you want to tell the people?
Nick: Say that one more time Blake, I'm sorry. I was reading a comment.
Blake: The prefinished kits that we are going to have in stock in November.
Nick: Oh, that's right, absolutely. Yeah, we had a question yesterday about kits that have been prefinished and I was unaware of this, but actually the marketing and purchasing department got ahold of me and said that we will possibly be offering prefinished preassembled kits some point in the future, maybe around the end of November, I'm not sure, but just keep an eye out for those kits. We will definitely make sure that you guys know, we'll send out some emails and it'll be advertised on the site as well.
Apply the color to the body and neck
Blake: All right, so now that we have our colors mixed, it's time to go ahead and start putting the color on the body here. So I got my straw gloves on, we're going to do the neck first, so I'm going to take a little ball here and we're going to start applying it. I mixed it up, I just shook it in the jar a little bit, just real lightly to get this stain mixed around that poly. And I'm going to start off with the back of the headstock here and just dipping it in there [Blake dips the applicator ball into the stain and starts applying the stain to the peghead with a circular motion]. And we're going to be working in a circular motion. All right. The circular motion helps to get an even build across the back of that or across any surface. And I'm going to follow it up with some long streaks. Try to make sure I have a nice even looking color all the way across.
Nick: And you can see as he's doing this, that grain filler just makes it pop. It's crazy. It's so amazing how it transforms. It looks so good.
Blake: And the back of the neck, because it's a curve surface, it's got that radius. I'm just going to do some long streaks across it and try to make sure I'm putting as much of an even color on it as I can.
Nick: That's right. Yeah, Gary said, "Oh, it doesn't get rid of the filler." No, that's exactly right. Actually once you start applying the poly, it actually brings the color of that filler out like crazy. It looks awesome I think.
Blake: So this is starting to dry up a little bit. I'm going to go ahead and dip it in, get a little bit more. And I just went ahead and made some sticks out of maple. This is just some scrap maple we have laying around in our shop so that way I can not touch the neck once I start getting this poly on it.
Nick: Absolutely. That was something-
Blake: You don't want to get your fingertips on.
Nick: I was thinking. Right, exactly. That was something I was going to mention too is that we've got one for each, one for the neck and one for the body. So the one for the body's going to be of course in the neck pocket and then the one for the neck is just on the heel because you won't be seeing that part of the guitar once it's all put together. So that's something to think about prepping before you start doing this so that you can... We're also going to hang them up after we're done so that they can dry properly and they won't be touching any other surface.
Blake: So I'm just giving it some long streaks there. Come around to the inside. Make sure I do the top of that right there. [Blake applies the finish to the edges of the peghead]
Nick: I had a comment about how shipping is quite expensive overseas. We actually do have a membership program that offers free shipping. It is 40 American dollars per year, well it's $39.95 American dollars per year. So if you're planning on maybe ordering this kit and then something else, generally we say domestically if you're going to order more than four times in the year, it's worth it to get that membership. Overseas, it probably pays for itself even a little bit faster than that. So that's something to consider. If you're only going to be ordering the one kit then it may not save you money in that way, but it's something to consider and think about.
Blake: All right, so there's a nice coat. I'm not worried about this area right here where the heel meets the body. Under here, this is all going to be covered. I just stained right there because that part's just still a little visible. I got a nice little streak right there, but I'm just going to go ahead and let that dry and we're going to move on and do the body and then we'll come back and do another color coat. All right. Cool.
Nick: It's amazing how it transforms so fast.
Blake: And I just borrowed this C-Span little camera hanger from our wonderful camera crew and I just used some coat hangers there, some wire coat hangers.
Rachel: Did you say C-Span?
Blake: Yeah. What is it? What's it called?
Rachel: C-Stand.
Blake: C-Stand. I was told to say that.
Nick: C-Span's the political networks or something is it. I don't know what else.
Rachel: Yeah, yeah.
Blake: All right, so there's our straw. Get our red mahogany gloves back on to do this body.
Nick: Absolutely. It's worth it to remind folks of that, you should use different gloves for your different stains because he's got dark gloves, you won't be able to see the stain on those gloves. So you might make a mistake and if you're doing coral blue on the neck or something and you're doing, I don't know, pink on the body, that would definitely contaminate that. So be careful of that. Be aware.
Blake: All right. And in the instructions, it says to wait two to three hours between your color coats. Because we're building this kit in four hours, we're definitely going to rush that. But like yesterday with the grain filler, I recommend you follow the instructions.
Nick: Gotcha. And we actually just had a question from Johan about that. So we're going to be doing... I can't remember. How many layers of the color coat are you going to be doing?
Blake: So today we're just going to be doing two coats of the color.
Nick: Okay.
Blake: Right
Nick: Okay cool.
Blake: You can do as many or as few as you want.
Nick: That's exactly what I was-
Blake: That's entirely up to you.
Nick: Great. And the complete curing time is about 14 hours. So once we're completely done then you can finish it in the evening and then leave it overnight. And by the time we start at two o'clock tomorrow you should be ready to go. It's recommended about 14 hours to cure. So it's really not a long wait time at all. It's already looking good.
[Blake is applying the color finish to the guitar body with a circular motion using the cloth applicator ball]
Blake: So now I'm just going to follow up with some long streaks and try to get rid of those little circular patterns that I just put in there. Get a nice even cool color coat across that.
Nick: We actually just had one of our guys say that they're going to head out to get some gloves so that's worth it for me to just say this will be left up online. So just in case if you have to leave or if you miss one of the episodes, we're going to leave them online so they'll be there if you need to pause it and go take a break, do whatever you got to do. No worries. You can always come back to reference this.
Blake: And that's looking pretty good to me. I think with another coat that's going to dry nice. So now I'm just going to work on the sides here. I'm going to go ahead and get another dip. [Blake dips the cloth applicator into the stain jar and starts applying the finish to the sides of the guitar body]
Nick: And it's worth it to add something, the reason why we decided to do this finish, as I said is it's quite user friendly. One of our viewers asked a question about how long the wait time is until you can start putting on hardware. So once we're done with clear coats and everything's finished, it's about 14 hours. As opposed to a nitrocellulose, that's 10 to 14 days. That is a huge, huge difference. Now you can do a lot more with nitrocellulose, however there's lots of drawbacks to that. It's harder to work with and the cure time is exponentially longer, it's 10 fold longer. So more than that, I can't even do the math on that. But it's a whole lot longer.
Blake: So now I'm going to try not to put that back on the table. I might.
Nick: So as he's doing this I can show you guys these couple other kits in case you didn't see yesterday, we've got other kits to choose from. And you can also see that this has been done with one of the orange stains as opposed to the red mahogany. So you can do this. This is also done with the straw. You can definitely see that. So this is our S-Style kit. I mean this thing's awesome. I was talking about it yesterday. I'm a Telly man all day long. But I love this kit. I don't know what it is about it. It's awesome. I mean you've got all three your pickups, which is crazy in this tiny little guitar. Yeah plays great. And I'll show you this other one we got going on here.
Got our LP Junior Style for the Humbucker fans out there. This guy's done all in lemon yellow. And yeah, this looks awesome as well. And again, I mean like I said, the way I describe they play like mandolins, but even more player friendly than a mandolin. The frets don't get quite as small as they do up in the really high registers in a mandolin. But yeah absolutely, so you don't necessarily have to do just the T kit. That's just the one that we chose to do and you can pick from any three of these mini kits and then be on the lookout for the new ones that are coming out around Thanksgiving.
Blake: It's just end grains being stubborn for me. It soaks it up differently than the top and the back too. And I'm having a hard time getting right up against flush this little piece right here. So I might come in with a Q-tip on just a little bit of stain and get that here in a second. But I'm going to have to go off camera to get that Q-tip.
Nick: Gotcha. So-
Blake: But I'm just go ahead and get another dip. Go ahead.
Nick: Sorry about that. I didn't mean to talk over you, I'm just trying to jump on some of these questions and comments. Let's see. Risaldi asked about the scale length and if I'm not mistaken from yesterday, it's 19.3 inches as a scale length on this guitar. Let's see here. And yes Gary, that's the recommended tuning is one octave higher. That's correct. Think of it as an octave guitar. Let's see here. Checking it. Cool. And yeah, absolutely Andy, there's tons of options. Tons of options for finishes. We just chose to do a poly today rather than a nitro just because we find it to be a little bit more user friendly and we can condense the process into an episode. That's why we chose to do it this way. Let's see here.
Blake: Now I'm going to follow it up with some long streaks, just like we did on the back. Cool.
Nick: We also had a comment. So we had a little bit of a difference of opinion on whether or not to use grain filler. And that is a great comment from one of our viewers here that says the end grain is where you're really going to be happy that you used grain filler. That's going to soak up a lot of the finish and it's not going to be as smooth if you have been grain filled. So thanks for that. We appreciate that comment a lot. I don't believe you're worried about staining any of the cavities, right?
Blake: Nope, because all that's going to be covered by hardware. So somebody who was really picky about it, which there's plenty of people out there who are really good at building who take those kinds of details into consideration and they would probably just tape it off.
Nick: Gotcha.
Blake: It's not something I'm too concerned about today.
Nick: Right. So to answer that question, no we won't be staining the cavities. I didn't think so. And also that can come down to personal preference, if you want to go that way with it absolutely. No problem there.
Blake: All right. So I'm just giving it-
Nick: It's looking good.
Blake: A once over real fast and I'm going to let this first coat dry and I'm going to come back and do it again.
Nick: Cool. Just so that we are aware, we're expediting this process a bit. So it generally says to let the color coats dry for two to three hours. Now they dry pretty quick, fast enough that we're actually able to add more color coats here today within just about maybe 10 to 15 minutes or so. But we definitely recommend to stick to the recommended time. So do a couple of coats, two or three, two or three hours apart. And then finally do your clear coats, which have much, much less time in between. They say about 30 minutes between that, so you can get those done in a couple hours and then 14 hours later you are ready to go. We'll be ready to put on all the hardware.
Blake: It's hard when your hands are sweaty.
Nick: Knees weak. I'm just kidding. Not going to go there with it.
Rachel: Palms sweating.
Nick: Almost. That's right.
Blake: Palms are sweating.
Nick: Almost started quoting Eminem, but let's just not do that. Let's keep it professional.
Blake: It's warm under these lights. It's right. Under the watchful eye of the YouTube people. All right. Now theoretically when you're doing this, this will be two to three hours after the first coat. So just like before, get a little dip.
Nick: Right. But even so, even after just the short time that we waited here, you can already tell, I mean look, it's amazing how much it transforms it already. It's even darker now. These guys say baby powder and makeup, I'm not sure. We did not make up for this one today, but baby powder for the gloves is actually a great tip. Helps you get them on and off.
[Blake applies the finish to the headstock using long straight line strokes]
Blake: Here's my headstock, I'm trying to work up into that area, into that end grain. Give me some long even strokes right here. Different strokes for different folks.
Nick: Let me check on that for you, Johanna. I know that we have aerosols for nitro and we also have just nitrocellulose lacquer that comes in a can, but that is meant to be added to a spray gun. Let me double check if we have a water based wipe on finish that is not poly. Let me just double check.
Blake: I'm going to go ahead and get another dip.
[Blake continues to apply the finish to the peghead using the cloth applicator ball]
Nick: Okay, so I can answer that question now. It does look as though the only lacquer that we do have here that is meant to be wiped on in the same method, I believe, we have a vinyl sealer that is meant to be wiped on. I'm sure you can use it as a... Okay, no, sorry, I'm sorry about that. No, it's meant to be sprayed as well. So that is my fault. I'm sorry to get your hopes up. But yeah, so all our nitrocellulose lacquers are meant to be sprayed.
Blake: I'm looking. I'm feeling good about this. When this is dry right here, I might just come back and hit this little spot right here. Well yeah, I'm not going to try too hard to get up in there. I'll do that whenever I take the neck bolt off. All right, so there's that one. That's the last major coat of color we're going to do on that.
Nick: Cool. And this might be a question for you Blake. So one of our viewers, Eddie, is asking if you can stain a maple fretboard that hasn't been finished. I'm assuming the answer's a yes.
Blake: Yeah, if you want to, why not?
Nick: Yeah. It's got to be working from the bare wood, but-
Blake: I love the look of those roasted maple necks.
Nick: Yeah, that's right.
Blake: They just have that-
Nick: That's right.
Blake: Brown hue to it. I have one of the Suhr copper strats with a roasted maple neck on it. It's got satin finish in my shop right now. It's awesome.
Nick: Nice.
Blake: Such a good guitar. All right, we're going back to the body.
Nick: Cool.
Blake: I can get this out of the way.
Nick: And again, just to reiterate our instructions do recommend two to three hours in between these coats. Again, we're expediting this just so that we can show you the process, that's more so what we're doing. The finish is going to be more accurate and better looking if you take the time to let those dry completely. But still, as you can see, it's amazing. I mean, you can pretty much tell from the camera that it's already dried there, but it's becoming richer with every coat.
Blake: And I just love the way that this red mahogany looks. It's not as red as that cherry and it's not bright orange, which I'm not a huge fan of that color. But this red mahogany is just killing it and that's why I chose it. So I'm going to follow that up with some long streaks.
Nick: And I think be before it's over, we'll show you guys again some of those samples that we had. So you can see a few of the other stains that we do have, other things to choose from.
Blake: And this poly, it's already starting to have a slicker feel because that first one's already set up a little bit. I can get a little bit more. I'm going to start on this side over here.
Nick: Right, exactly Gary. It's not as important to follow the grain when dealing with this because we've already filled the grain and we've already sanded it down so that's not as important. The stain will take much better. There's a reason why we're following the grain with the sandpaper because it hides the scratches. So just applying the stain, it's going to soak into the wood anyway you choose. What he's doing when he is making the straight lines is just smoothing it down so you don't see any swirls.
Blake: So the reason I'm doing the swirls though, because that helps get an even build across the guitar. The more you do it, it just evens it out. It's like it's one of those spinning floor buffers that you see janitors using stuff like that. I'm doing the same thing but with this poly and then I follow it up with these long strokes to try to get rid of those swirls. I'm trying to even it up because you don't want it to be streaky. Now since this is the last color coat we're going to do, after this we're going to be applying some clear coats. And it recommends that you wait 30 minutes in between clear coats, but we're obviously doing it a little bit quicker than that. And the clear coats are going to be just regular wipe on poly without any stain in it.
And another important thing I should say is that you do not want to sand your color coats because if you ended up sanding through, then you're going to have an uneven look. Some bare spots in some places. So what you want to do is get as many color coats on as you can or as you want. And then after you get about four to six clear coats of poly, then if your heart desires you can sand those back a little bit and try to get an even flatter finish. And once you have the desired look, you can apply more coats to poly, you can buff it, you can do anything with it. Wet sand it, it's all up to you. I'm going to go ahead and I'm going to get another little ball right here. Cool. That one's starting to load up and dry out on me.
Nick: Right. That's what I was going to say. We were talking about this yesterday, how we have a few of these around. We've only got two stains, but we've got a few of these applicators around because the poly will start to dry and as you said, the applicator gets a little loaded and a little bit crusty from drying out, which shows you how fast poly will dry. And what's nice is after we've got this done, then it gets real man. After this is all over and this is all dry tomorrow, we're going to be putting this thing together and we're going to have ourselves a fiddle.
Blake: So at the end of tomorrow's episode, we should have strings on it.
Nick: That's right.
Blake: Which is-
Nick: Exactly.
Blake: Exciting that in such a short amount of time you could have a guitar that's making sounds.
Nick: We'll have it playable. We're going to get it all set up and playing beautifully in the last episode. But if you want to make a few sounds with it, you'll be able to.
Blake: All right. So I'm feeling pretty good about that. You got to think about how much of this is going to be covered by a pickguard too.
Nick: And that's exactly right. We're just going to be putting strings on it, probably lights, but that's again, depending on your preference. There'll you just be a lot more of the string off than you would on a normal full scale length guitar. So yeah, just normal electric guitar strings. And Gary says he demands that you play Eruption on the next bid. So get to practice in, Blake.
Blake: Rest in peace. StewMac should do an Eddie Van Halen tribute.
Nick: We should.
Blake: Not that we are affiliated. RIP. And once again this cut out, this cutaway, man, this is the hardest thing to do right here. It's hard to get an even coat in there with grain filler, sanding, putting color in there. It's hard to spray in there if you're spraying. All of the above. It's just a difficult area to work in, especially on these mini guitars because it's even smaller than a normal guitar.
Nick: That's right.
Blake: You make sure you come across this horn real nice.
Nick: Cool. And it's worth it to mention it again, just because I know people are coming in and going out that if you have any questions or comments, please feel free to put them into the live comment feed. And if we don't get to them or if you've come up with another question afterwards, you can always contact us through service@stewmac.com. We got our CSRs, our customer service representatives, can help you guys out or they can get you in touch with a technician [on-screen text reads: If you get stuck we are here to help - service@stewmac.com] if it's a super technical question. So please, send us your feedback and questions, all that stuff, we love it. So please feel free. Thanks.
Blake: Don't forget to work on your round over. Like I said yesterday, you want to make sure that's nice and a smooth round over so we can get even builds on it. And that's going to come into play when we start putting clear coats on there. But just make sure, because it's pretty easy to glance over it because you're focused on doing the top and the back and the sides. But it's easy to glance over that corner and not have an even amount. So I might even just take a second and just run down it. I'm looking dry right here across the bow. This might give myself a couple extra little-
Nick: Man, it's looking good.
Blake: I'm going to give myself just a little bit more right here and it's really great in all steps to the finishing part to take your time. Don't rush. It's really exciting to want to have the guitar on your hands right now and get strings on it and get playing. But you're going to be more satisfied if you take your time, I can promise you that. All right, so that's all I'm going to do. I think that concludes our color coats. [on-screen text reads: Live Build-Along! Mini Guitar Kit] So I'm going to de-glove. I'm going to go ahead and put the red mahogany one back on.
Nick: And just to reiterate this for Johann and Jeb here. Yeah, unfortunately we cannot ship any of the nitrocellulose lacquers outside the US. We can't ship them outside of the US. We can't even ship them to Canada unfortunately because it has to go by air and they're flammable. These polys and the stains will ship overseas. So if you'd like to follow our mold in this way and finish the guitar in the way that we're doing it here, you can absolutely do it with no problem.
Apply clear coat
Blake: So next we're going to be putting some clear coats on these things. This is theoretically in your time when you're building this two to three hours after you put your second coat color on. Then we're going to put some clear coats and it's just going to be this wipe on poly with no finish or no stain. I'd shake it up again and then put it in the jar. I got some clean gloves with no stains because we don't want to contaminate our clear coats. And let me think if I can think of anything else. I can't.
Nick: Jim, our colleague Jim is asking when we're going to do a mini cello kit. I don't know, but I'm in. You tell me Jim, I'm there.
Blake: We got some mini mandolin kits. Oh, one more thing. I guess we can do that here in a second once we get our color on. I'm going to make another one of our little cotton balls because I'll probably end up needing another one. So our neck's been drying for a minute since we put color on the body, this is what we're looking at so far. Nice golden brown look and set it there. Don't forget to tape off your fingerboard and your nut, you don't want to get that stained up too much. So I'll dip our cotton swab in there. I'll start doing some spins and I'm just applying the clear coats the same way I applied the color coats with just some spins and I'll follow it up with some long streaks trying to get an even coat on there. Cool.
Nick: And absolutely. Yeah, good question Johan. So we actually would recommend grain filling any porous wood because you would definitely run into trouble with the pores soaking up that finish and it would be uneven. So yeah, absolutely. That's why we talked about that in our first episode. We grain fill the entire guitar so that it's much easier to apply this finish without it seeping into the pores and you got a nice smooth finish in the end.
It's already getting a nice gloss to it. Of course, it'll dull up when it dries a little bit to it.
Blake: It got a little built up. Cool.
Nick: And I'm having the slightest little technical difficulty just with watching the feed. There we go. Now I can see it again. Cool.
Blake: Just making sure.
Nick: Absolutely. So as Blake was saying, totally if you guys do... You don't have to do anything fancy, but when you get your finished products and you're proud of it and you want to show it to us, we would love to see that. You can leave a review on the product page and show us a picture of your finished product. Or you can even send it in to the customer service department at service at StewMac and we love seeing that stuff. Get creative if you want, but if not, we still would love to see these finished products so we can share it with everybody else too.
Blake: Because we're moving a little fast, like I said, and we're going faster than the drying times recommend. When I put that last clear coat on there, I got just a little bit of yellow on this, so I'm going to go ahead and make another one so I don't get a little bit of this in my red. All right. And I'll give you guys another chance to see how I'm making these things. So it's always good to have extra prep. I got my big rags already cut and I got my little rags for stuffing the big rags. Go ahead. Wad it up in a ball.
Nick: Almost looks like the beginning to a magic trick or something.
Blake: Right.
Nick: So when does the dove fly out?
Blake: I wish I knew magic.
Nick: Great. So nice to see folks from all over the world joining us today.
Blake: Yeah. Where's everybody from? Start commenting. We'd love to see.
Nick: We've got Andrea from Italy for sure. Let's see here. I believe Johan's hailing from Europe.
Blake: Cool.
Nick: Gary's coming in from San Diego. What's up Gary? He's the one that's been making me laugh most of the time. Thanks for that.
Blake: We love to laugh.
Nick: Got West Texas in the house. All right.
Blake: Just trying to go ahead and get this pad flattened out so we have a nice surface there.
Nick: Oh.
Blake: There's a new one.
Nick: Nice. Denmark, Spain, Montreal. All over the place. This is great.
Blake: Welcome to our little slice of America. Yeah.
Nick: Kansas.
Blake: What's up?
Nick: All over the country too. This is great. Denver. The Netherlands. Nice.
Blake: So now we're going to go ahead and put our clear coat on the back of this first layer, right? Get a nice good amount on this cloth and I'm going to go ahead and start spend-
Nick: Oh gotcha. Oh yeah, cool. We got more people hailing in. We got Britain, Ireland, Brazil, Washington State.
Blake: All over the place.
Nick: We are representing the entire world.
Blake: Cool.
Nick: So glad to have you guys join us, this is a lot of fun, man. And it's experimental. This is really only the second one of these that we've done. So again, as I always said, please leave us comments, feedback and questions. We're trying to make this a more consistent and a better experience every single time. So please let us know how we're doing. Let us know what you think we could do better.
Blake: Give me one second. I'm trying to get these streaks out of here, but you can see we're pushing the envelope just a little bit, getting a little bit of color back on this. That's okay because you're going to follow the directions and you're going to wait, right?
Nick: That's right. Exactly. That's something just to remind everybody of that we're definitely doing this a little quicker, actually a lot quicker than is recommended to the directions only so that you could see the process of us doing it. The whole reason behind this. As he said, we're pushing the envelope a little bit. So definitely take the time and let it dry completely and you'll get a much better result.
Blake: But we're definitely excited to see how good of a finish you guys can put on these things.
Nick: That's right, that's right. Again, share your work, share your treasures.
Blake: Okay, there's that. I'm going to hold this up and do the front now. Oh, getting a good build.
[Blake continues to apply the clear coat to the guitar body with the cloth applicator, starting with circular motion, then long straight lines]
Nick: And that's a good question, Bob. We actually found with the swirling technique that we were able to apply the finish a whole lot smoother that way. We haven't run into any problems with the grain because we grain filled it and then we've put on our bottom coat. So we just decided on that, that was our most successful way of applying this.
Blake: Right. Now I mean with a spray gun, it's a different story. You're just-
Nick: Absolutely.
Blake: Trying to spray evenly and I'm getting swirls, so I'm going to go ahead and start doing my long streaks.
Nick: Exactly. So what we've done, we're swirling a little bit and then we're going back to a straight application to get rid of those swirls.
Blake: I'm trying to get rid of any buildup I see. Spread it around, spread the love. This isn't some million dollar finish, this is not some PRS wood library, crazy stain awesomeness stuff, but this is a really decent looking finish in a very short amount of time and that's great. There's been talks here at StewMac about doing some finishing courses, some really in depth finishing that we might release one day. So for you guys who are really interested in spraying and finishing and the ins and outs of that, that might be coming down the pipe sometime soon. So keep your eyes out, check your emails for StewMac stuff because we can get it for to you.
Rachel: Subscribe.
Blake: Subscribe. Click the link. Like. Subscribe.
Nick: That's right.
Blake: Send me mail. Gift cards to Starbucks please. Oh wait, I can't say brand names. It's live. What are you going to do?
Rachel: Bleeping.
Blake: Bleep me out.
Nick: That's right.
Blake: And on the sides because there's not a whole lot of surface, I mean this is thinner than a normal guitar. I'm not doing any swirls, I'm just doing some long streaks, trying to make sure I just get an even build across the sides of this guitar.
Nick: It's not quite as easy to see on camera, but you'll be able to use your naked eye to see where you've got heavy spots and lighter spots.
Blake: Right. And I'm getting back in this pain spot here. The spot's always-
Nick: That's right. We have a 20 second delay.
Rachel: Okay.
Blake: You want to make sure you get a nice even coat across this horn right here. I'm going to go ahead and get it on the edges too. That little round over, that bevel from the back to the sides. You got to make sure you do that too because if you go into sand your clear coats, you could end up sanding right through your color coats too, if it's not even.
Nick: Nice. Got some folks hailing from Charlotte, North Carolina. What's up man? 704. I grew up in Salisbury so I'm right down the road.
Blake: Hope you guys don't mind if I stand up for a second. I'm trying to sit down so I can stay in frame, but it's definitely easier I think if you can stand up at your bench, give you a nice top down view of what's going on.
Nick: That's a good question from Jim Warner actually that. So the wipe on poly's going to have a semi gloss, is that right? It's not going to be a high gloss finish.
Blake: Right. It's not going to be a modern nitro gloss, but you can buff it up to look real nice.
Nick: Okay, cool.
Blake: You'd be surprised once you get several coats, sand it down, put another couple coats on, take it to a buffing wheel. I mean, it can get nice.
Nick: So again, it possibly depends on how much you build the finish up to. Yeah.
Blake: And so it's the difference between spraying poly and wipe on poly. Wipe on poly's faster and it can still look great. All right. I'm feeling pretty good about this right now and we've done a lot really fast and we're coming right there to the end of our time. So I think with that final clear coat there, I'm going to hang this up and let it dry overnight. You know what? And maybe here in about 30 minutes, I'll do another one and then let it hang overnight. And that will conclude our finishing. That'll conclude the clear coats and the color coats. Let that dry for 14 hours and then we're putting some hardware on tomorrow. So Nick, you want to take it away for me?
Nick: Absolutely. Thanks a lot again guys, for being with us guys and ladies from all over the world. This was super fun. But tomorrow it's going to happen. Tomorrow we're going to be putting this thing together. It's going to be awesome. We're putting all our hardware together. We're going to have a nearly finished product at the end of the episode tomorrow. So absolutely. I want to thank everybody again. Thanks Blake so much for doing this for us. Thanks Rachel for being with us and helping out and thanks Susan on the console there. And until tomorrow, two o'clock, same time, we're going to put this thing together and it's going to look great. I'm super excited about tomorrow's episode and we'll see you all there. Two o'clock tomorrow PM.
Blake: Eastern Standard Time.
Nick: That's right.

