Truss Rod Routing Template Instructions
These are instructions for routing a truss rod channel using our Truss Rod Routing Template.
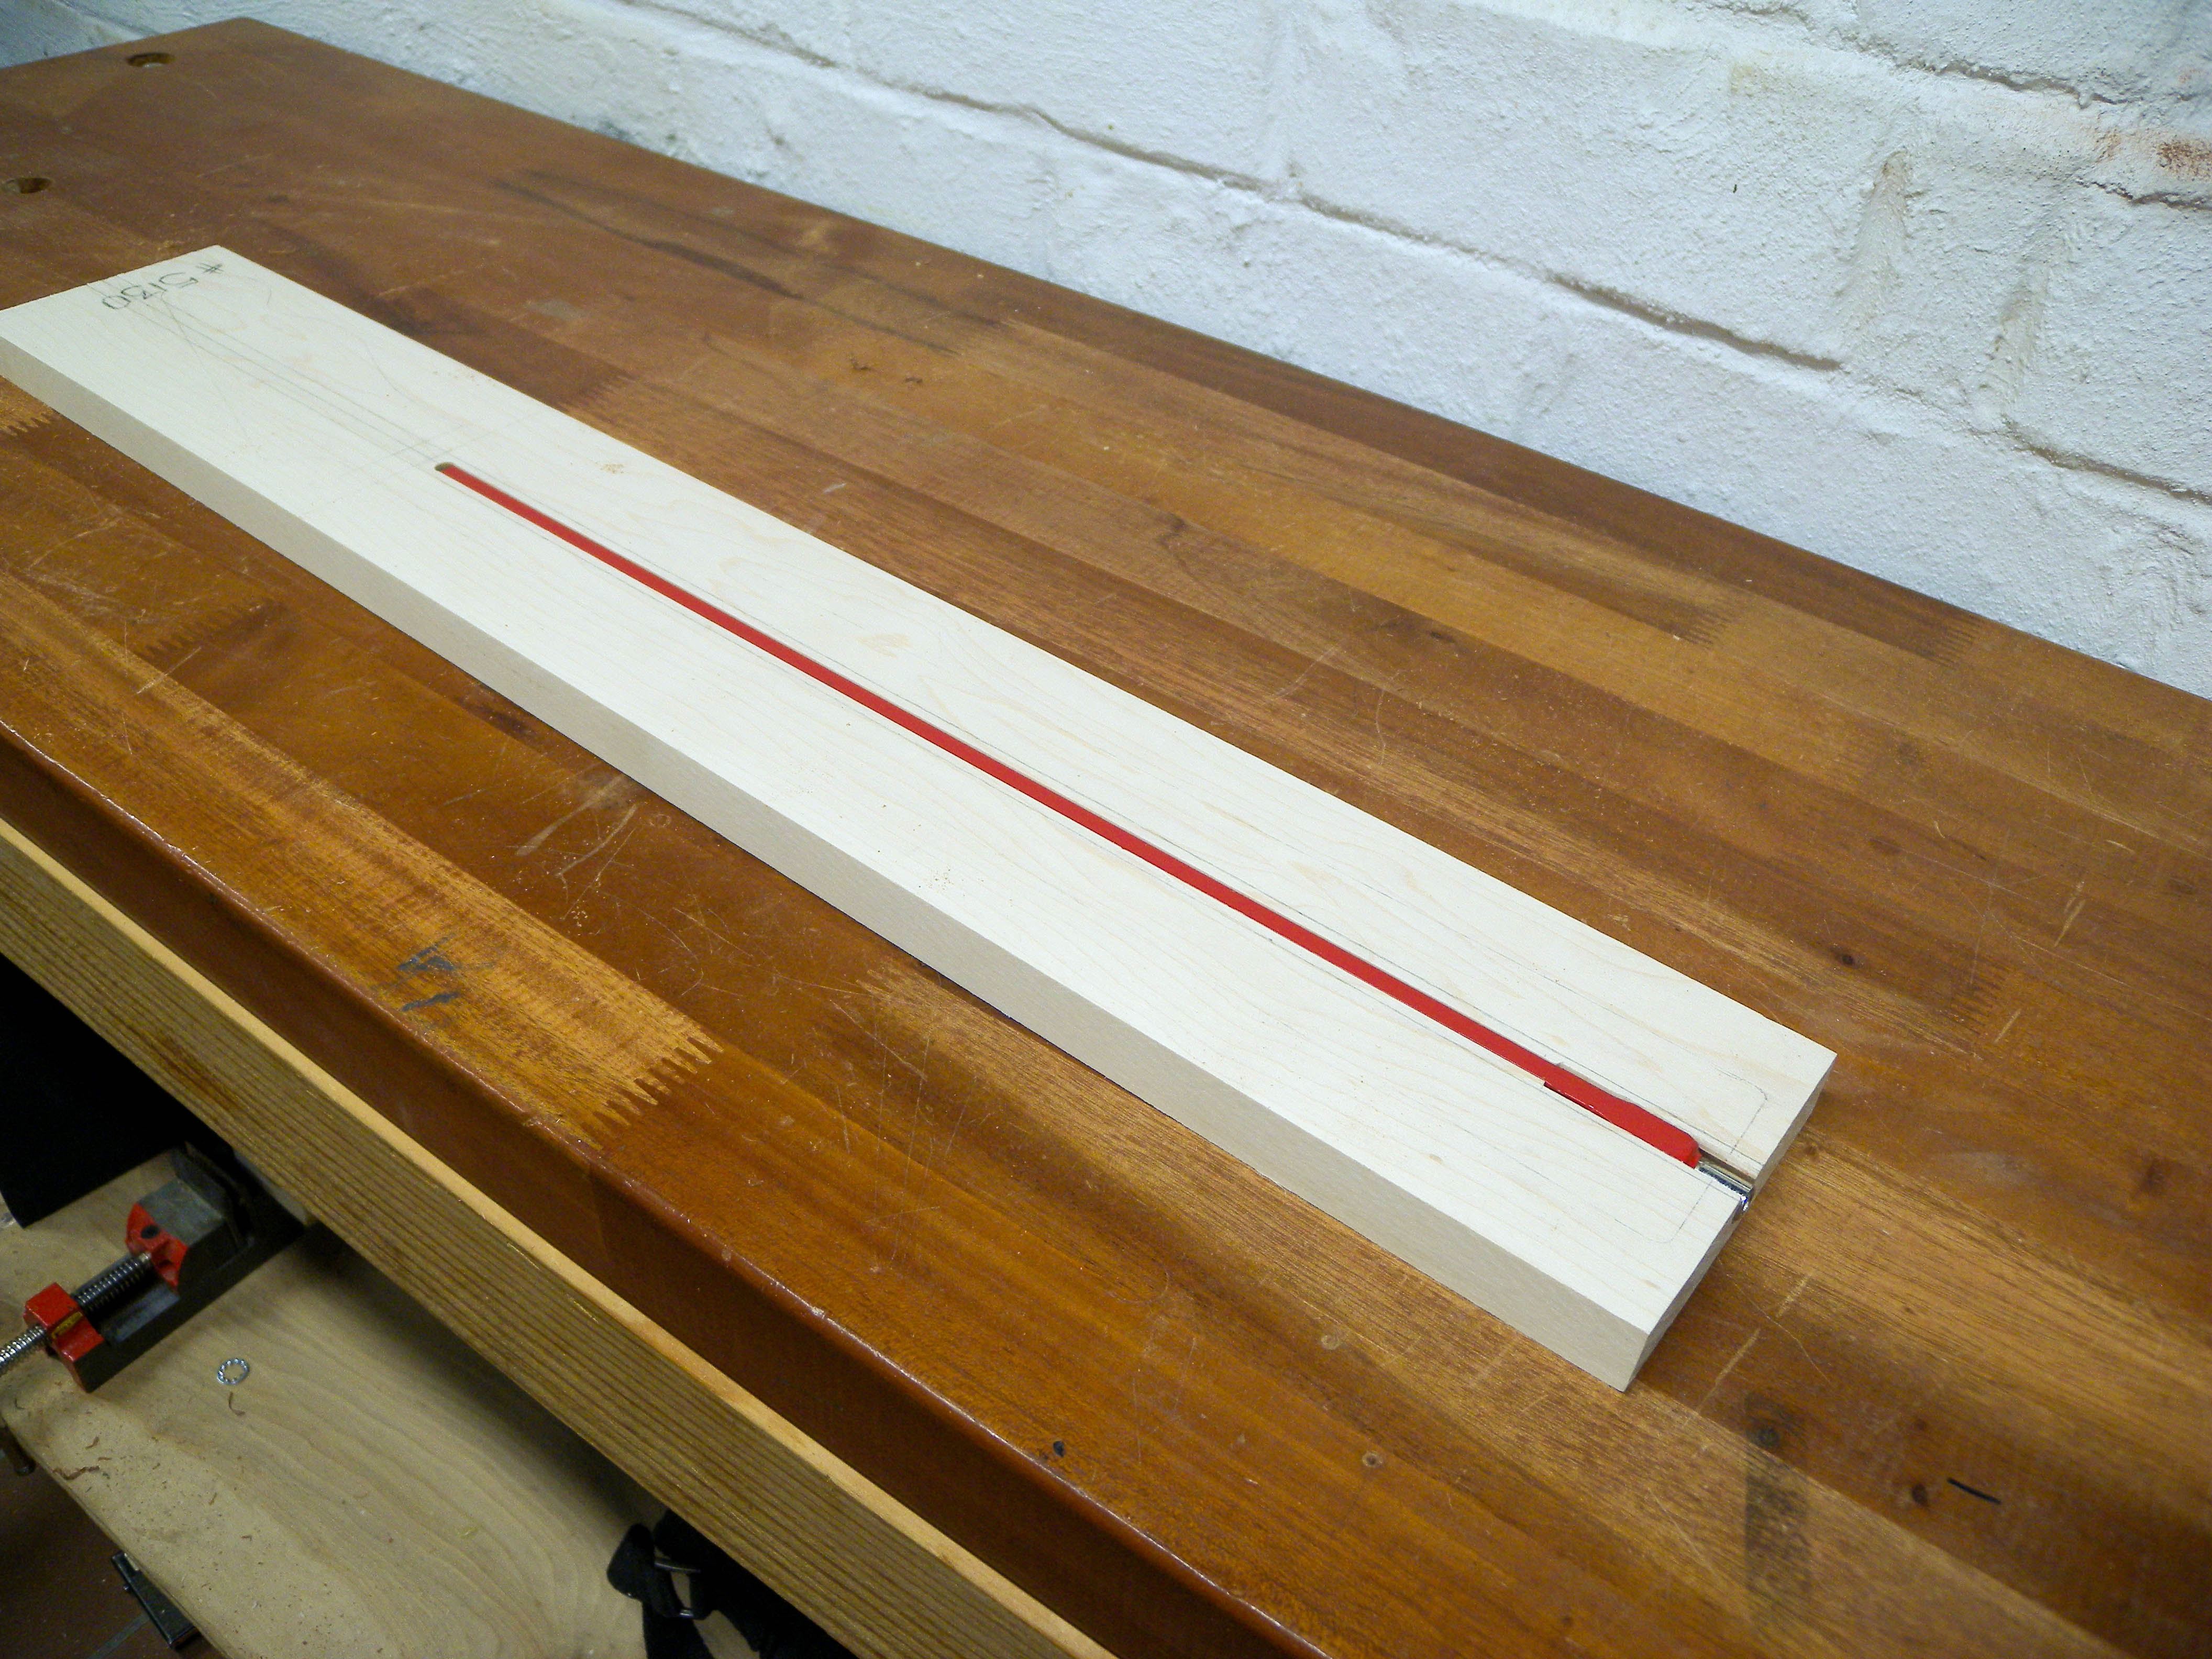
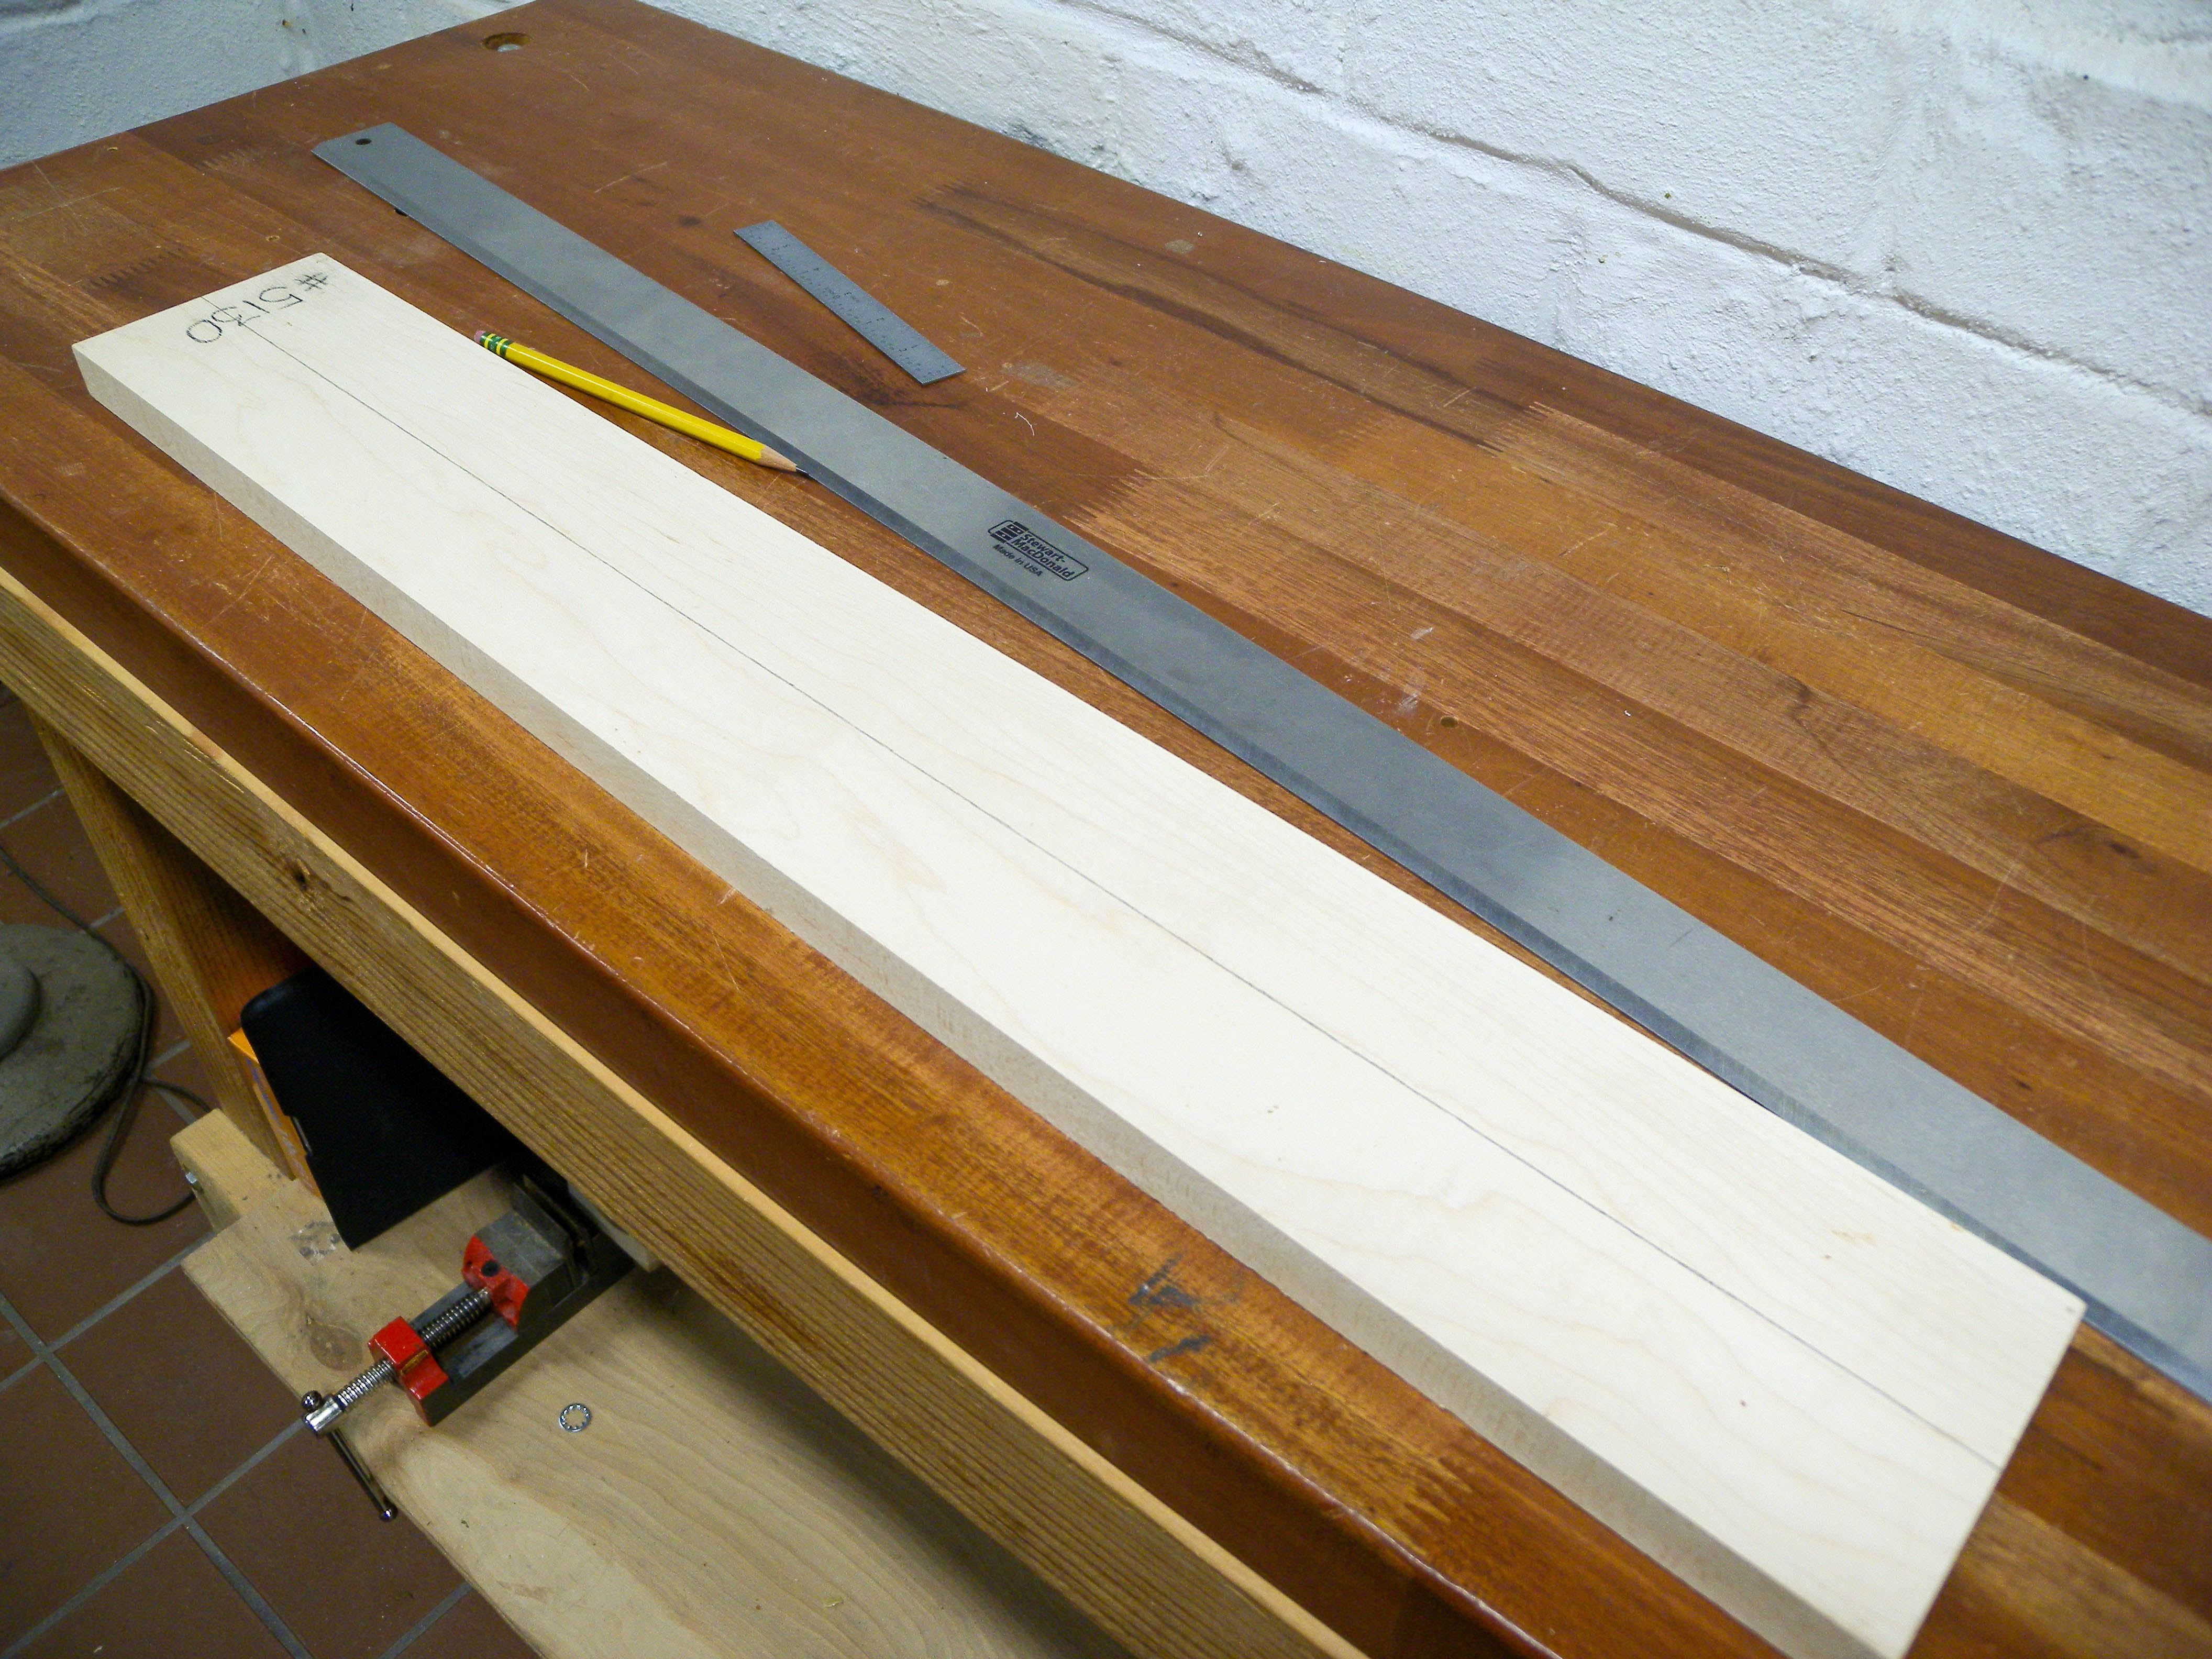
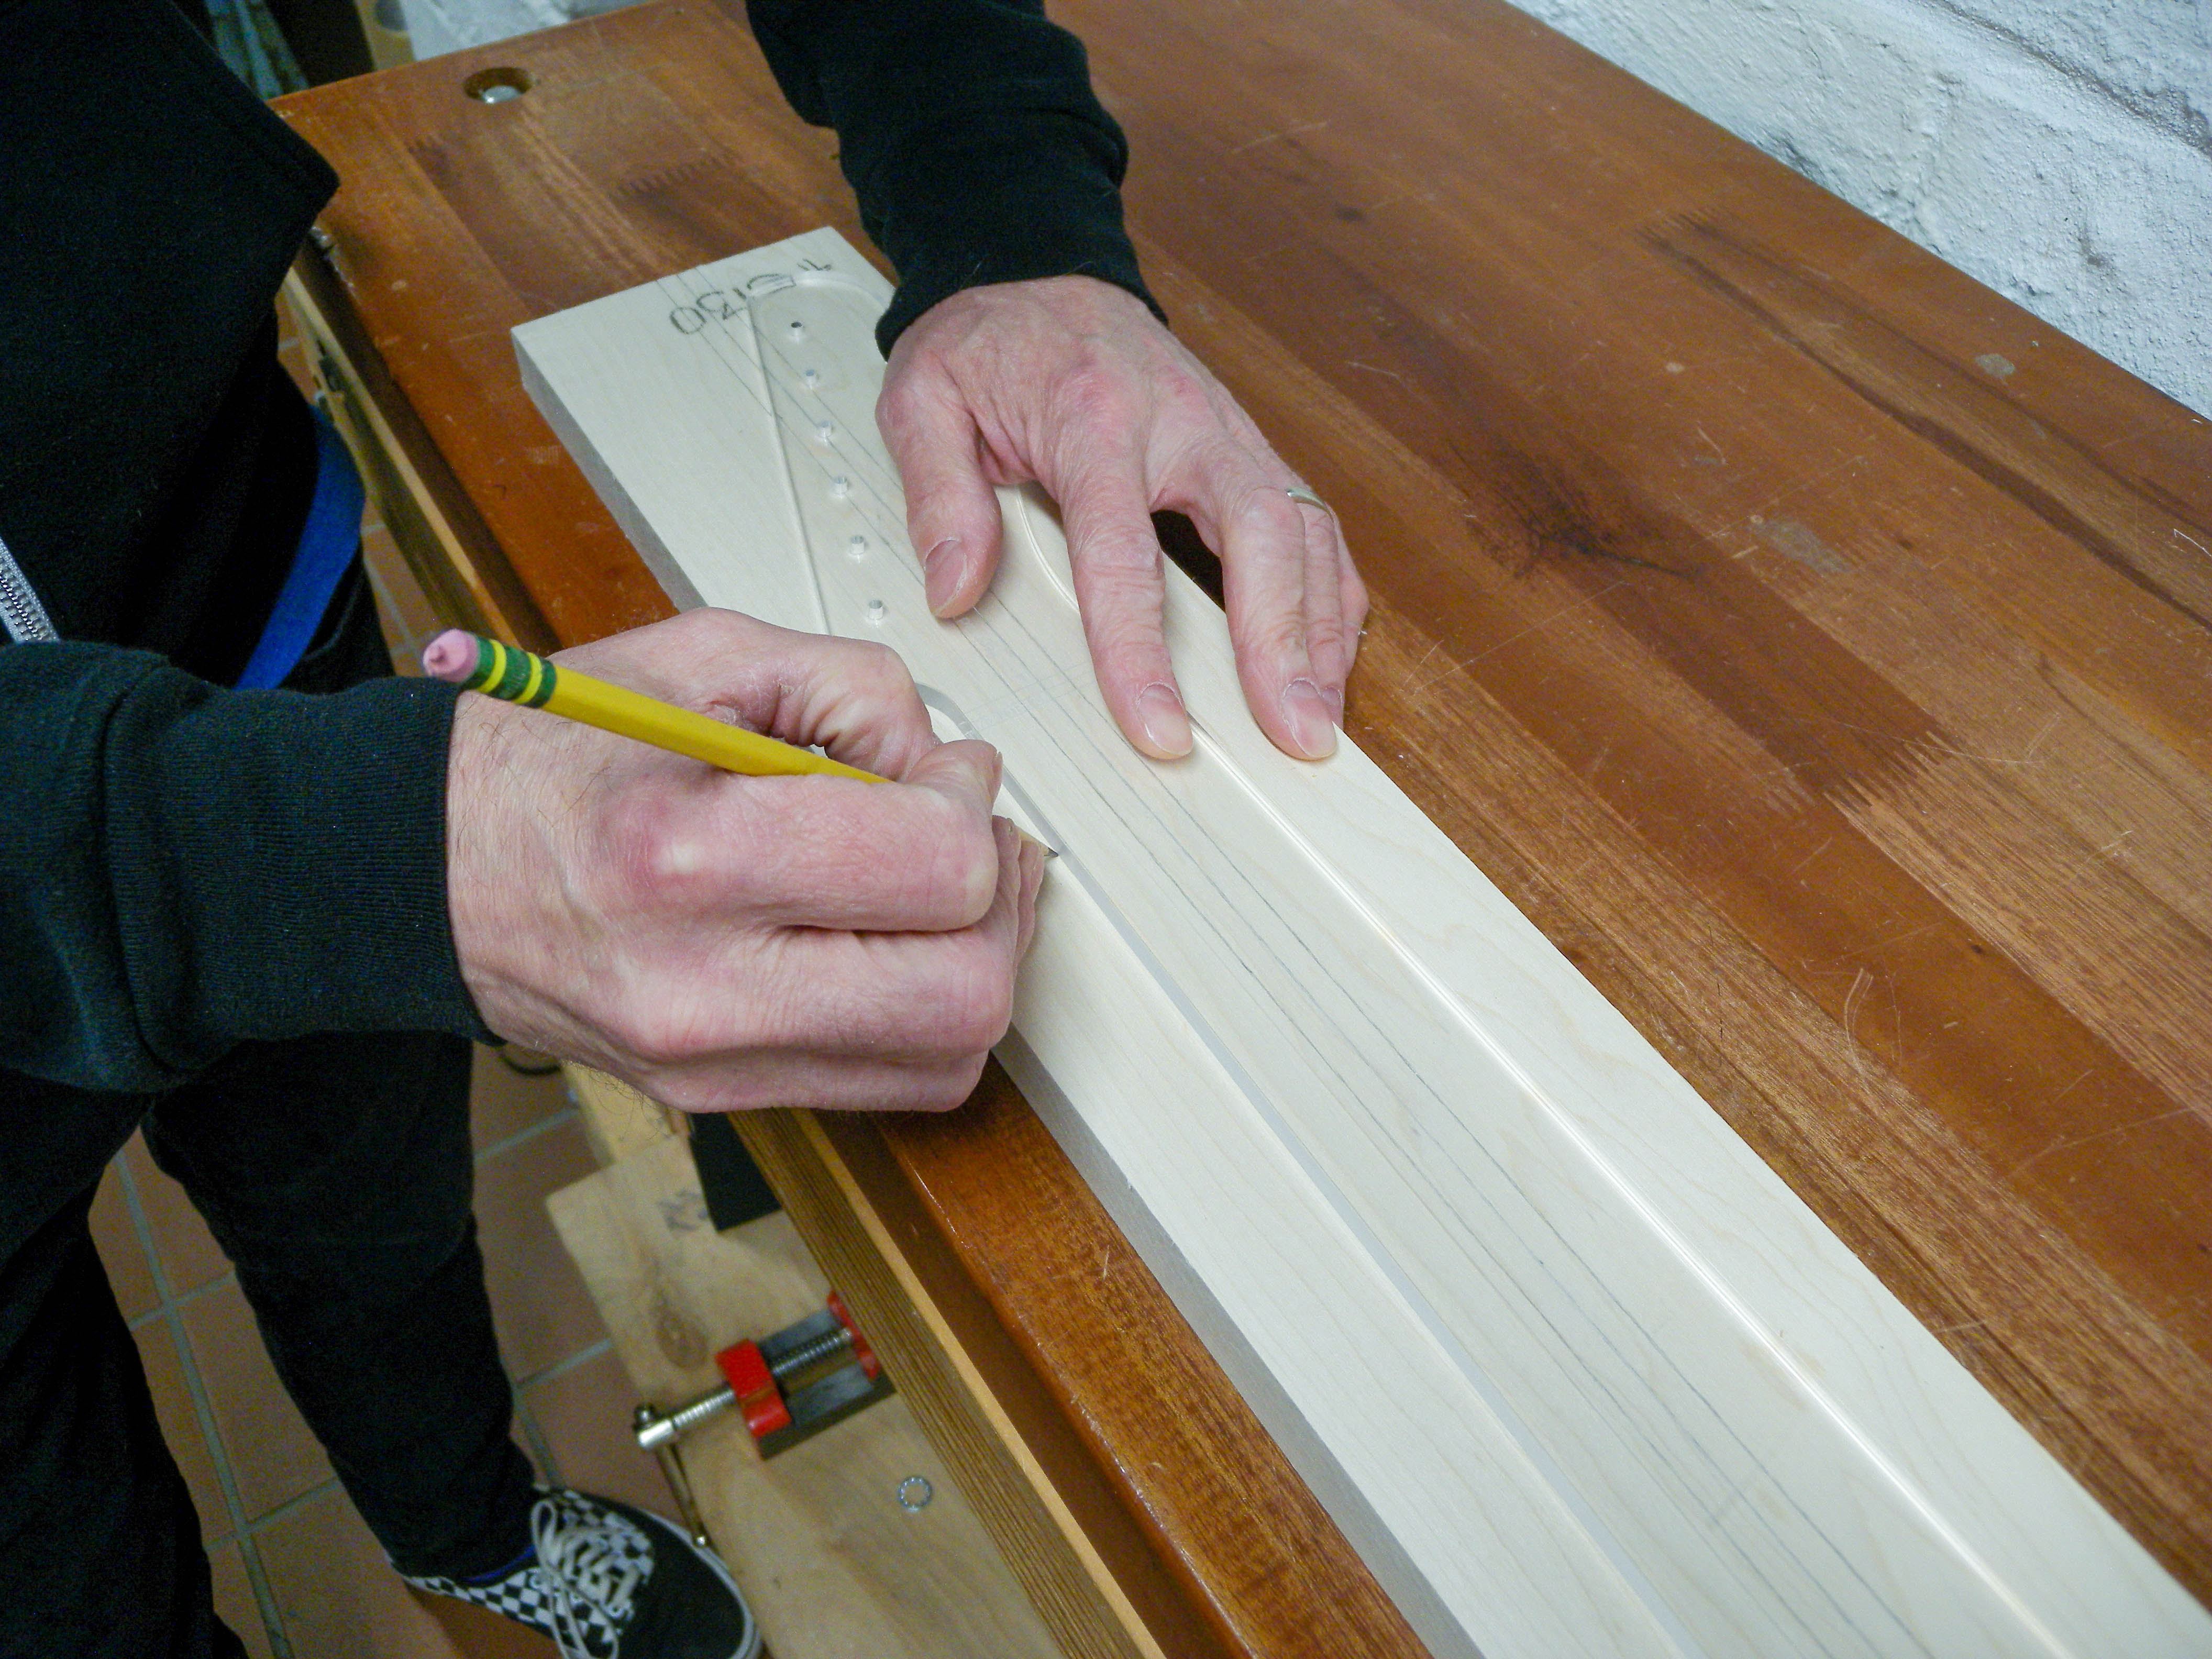
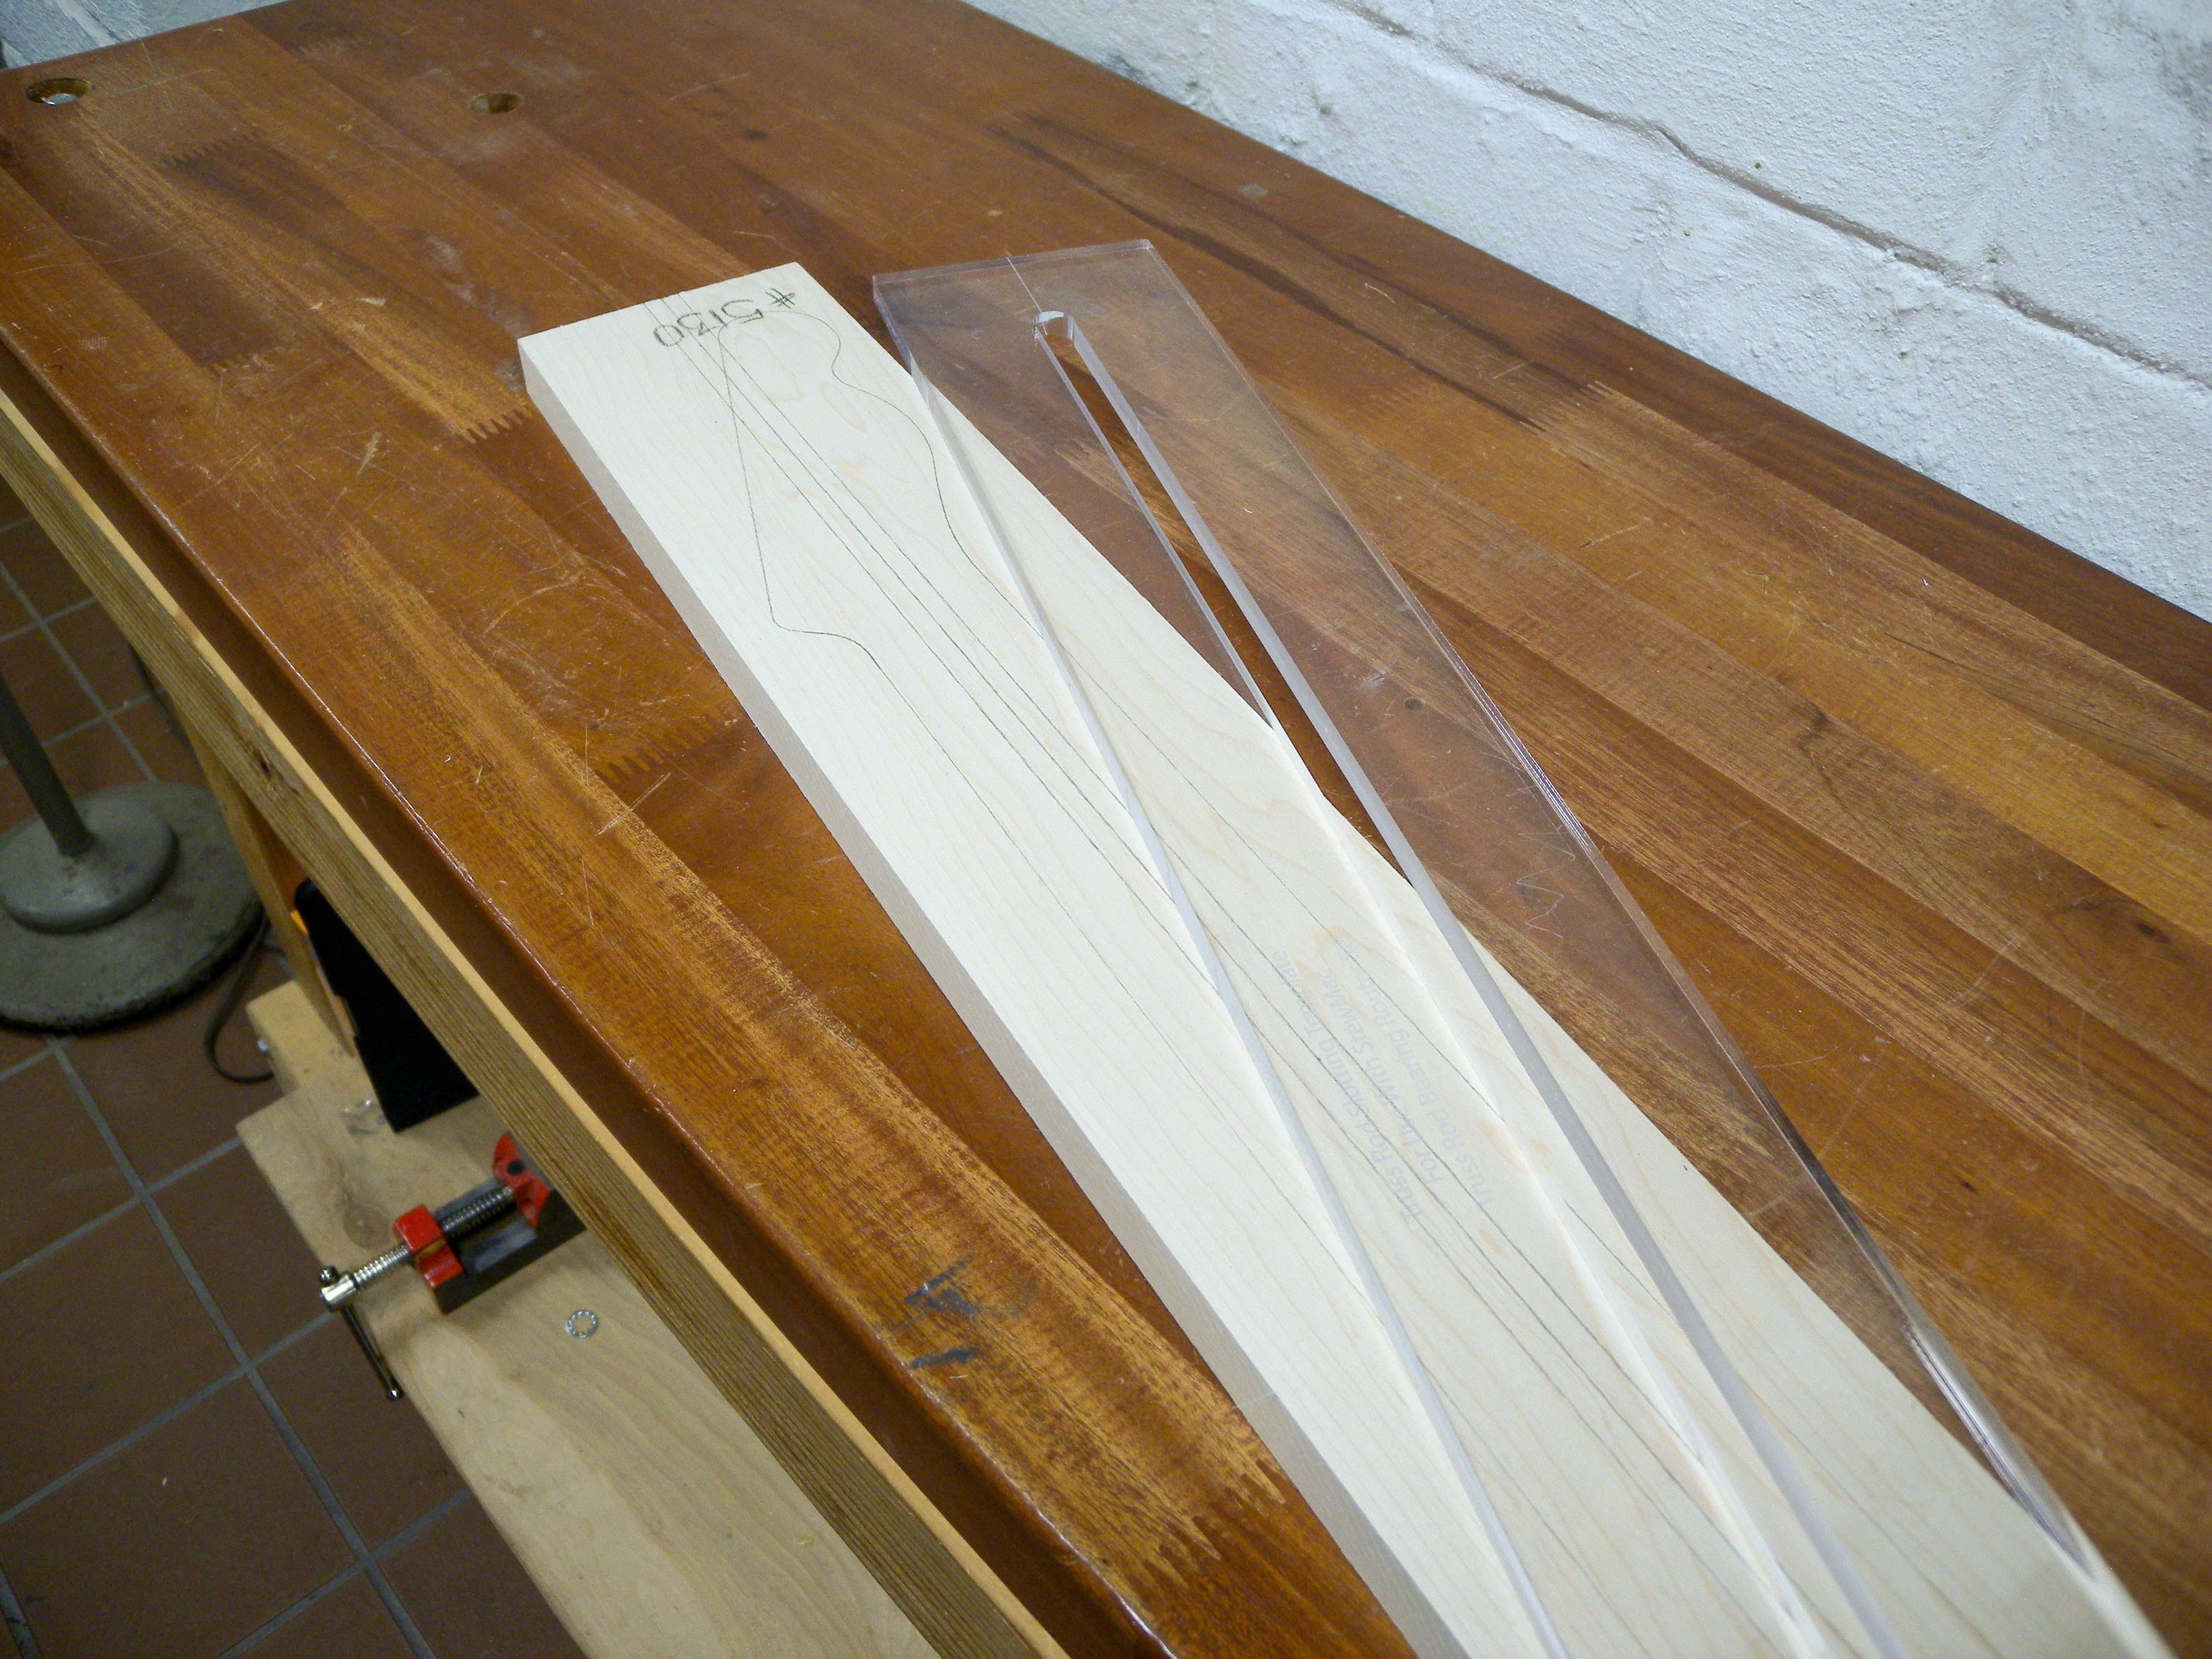
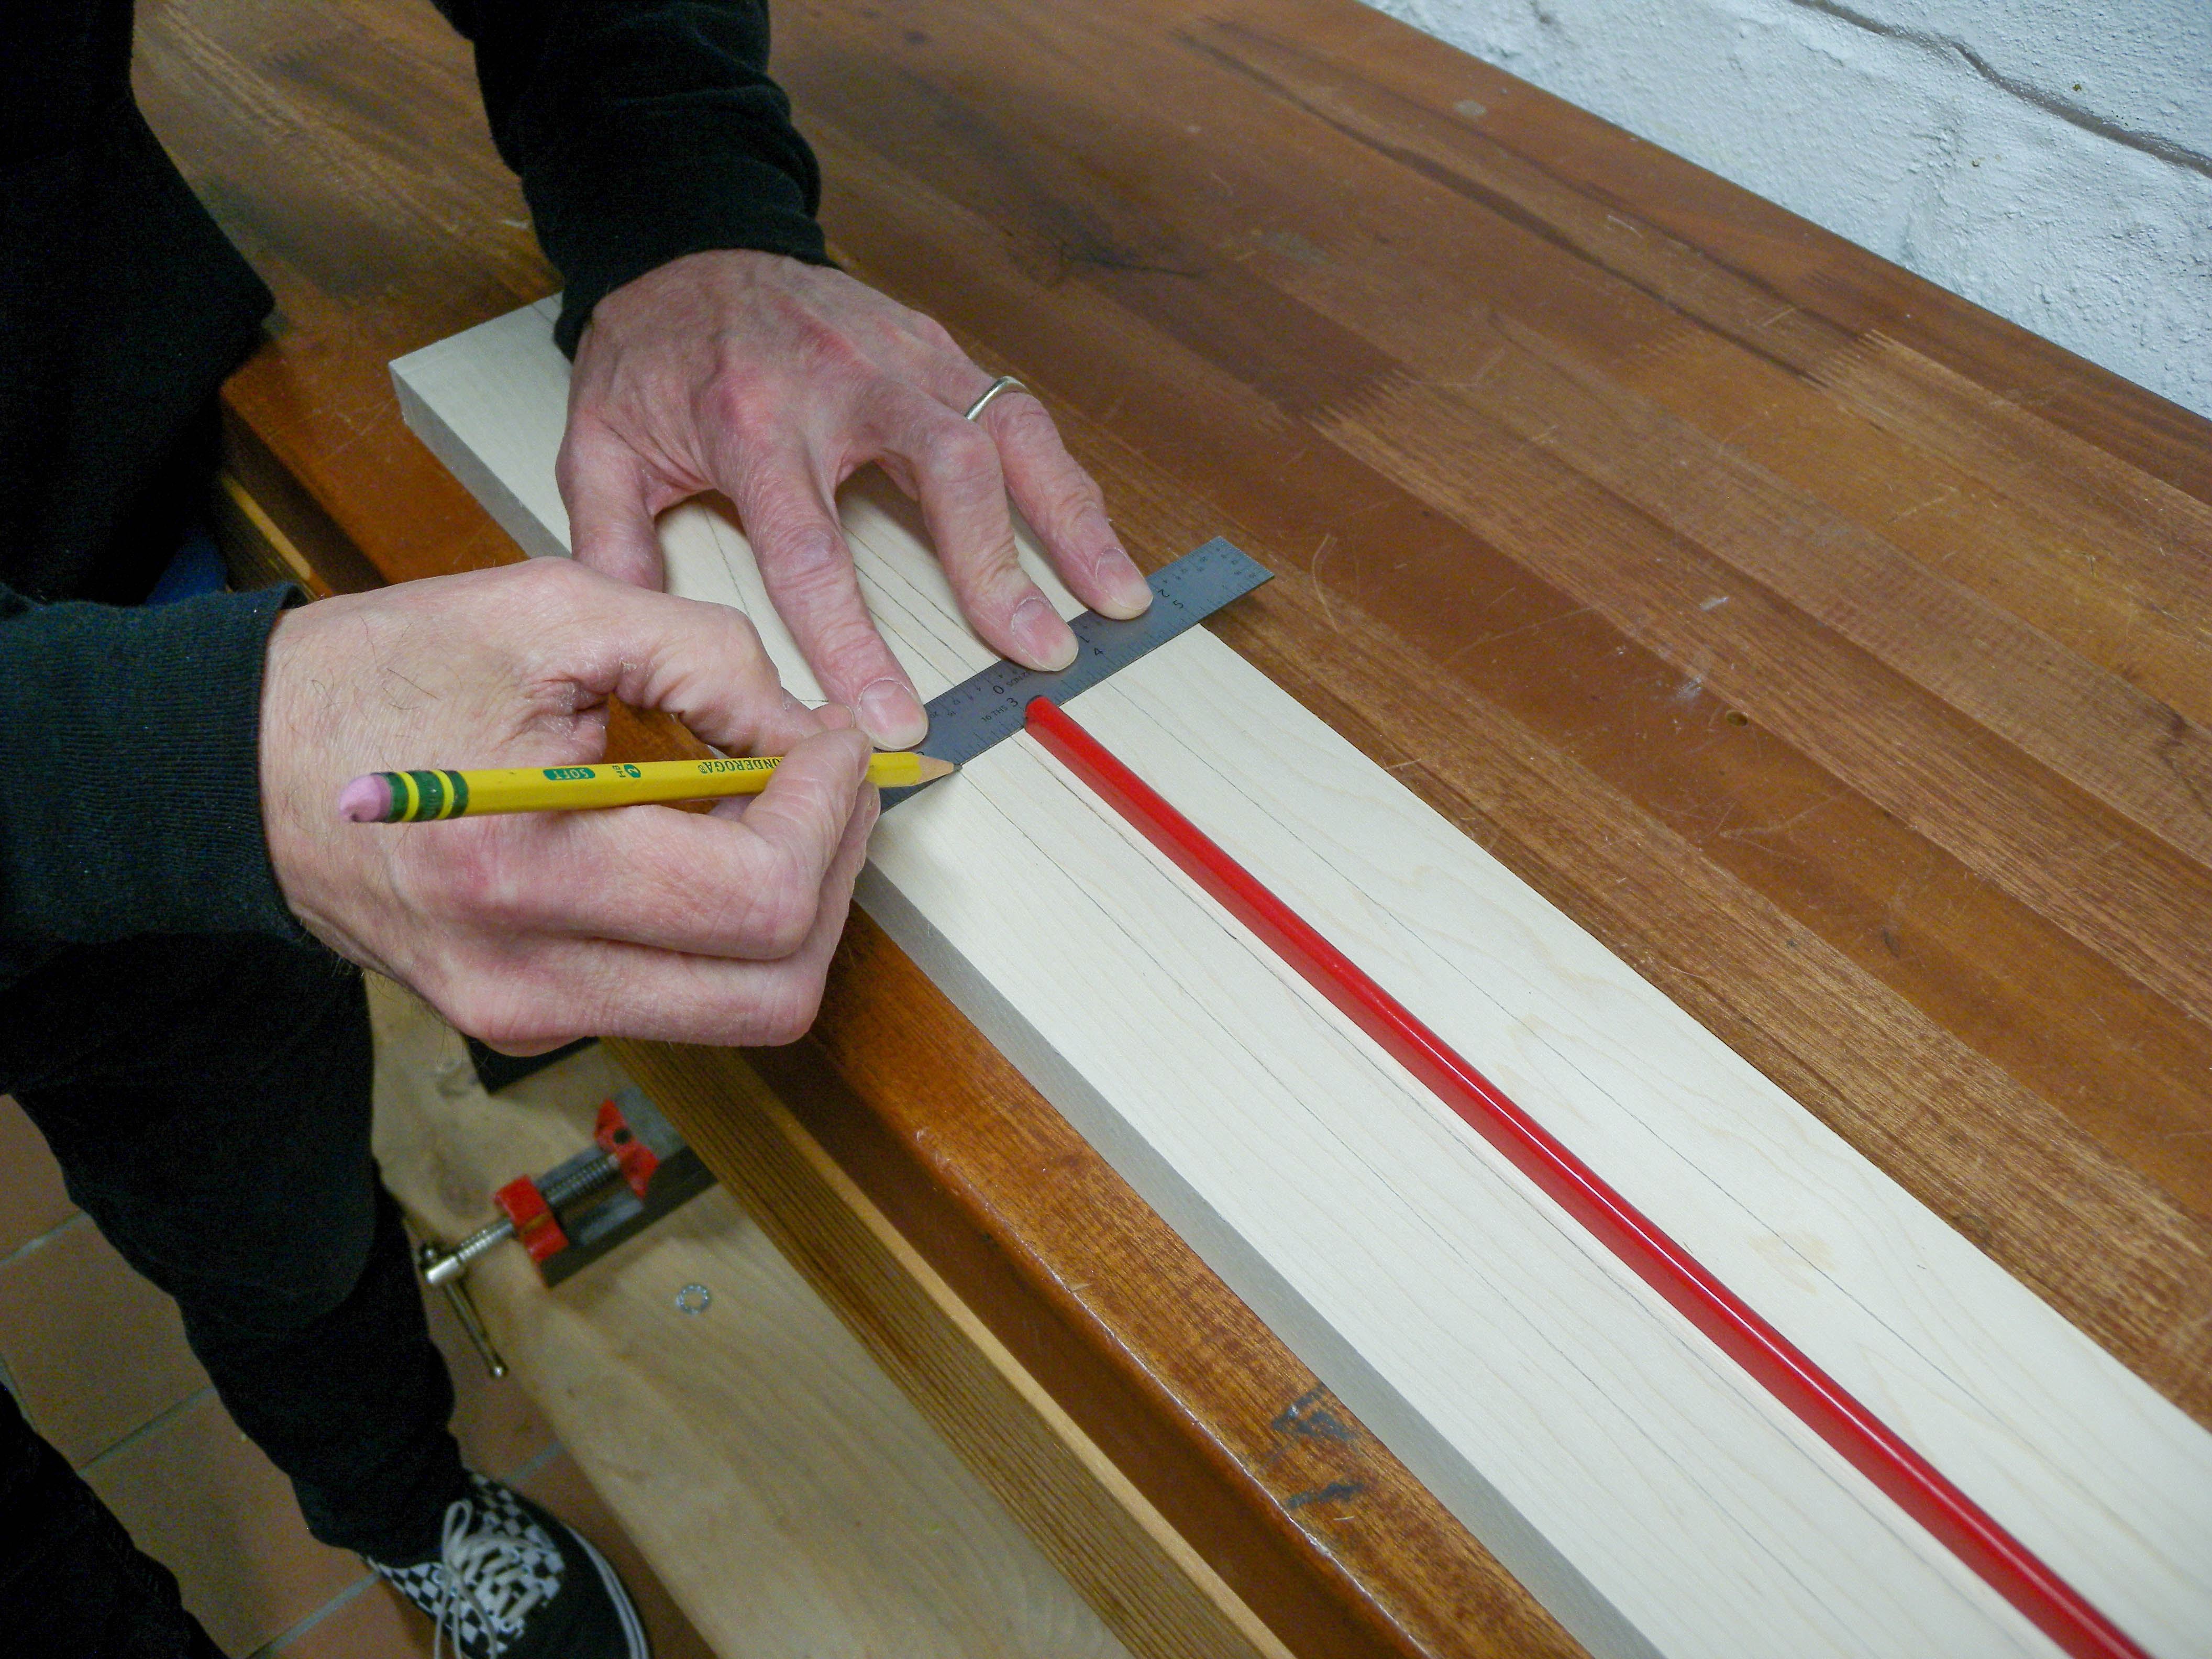
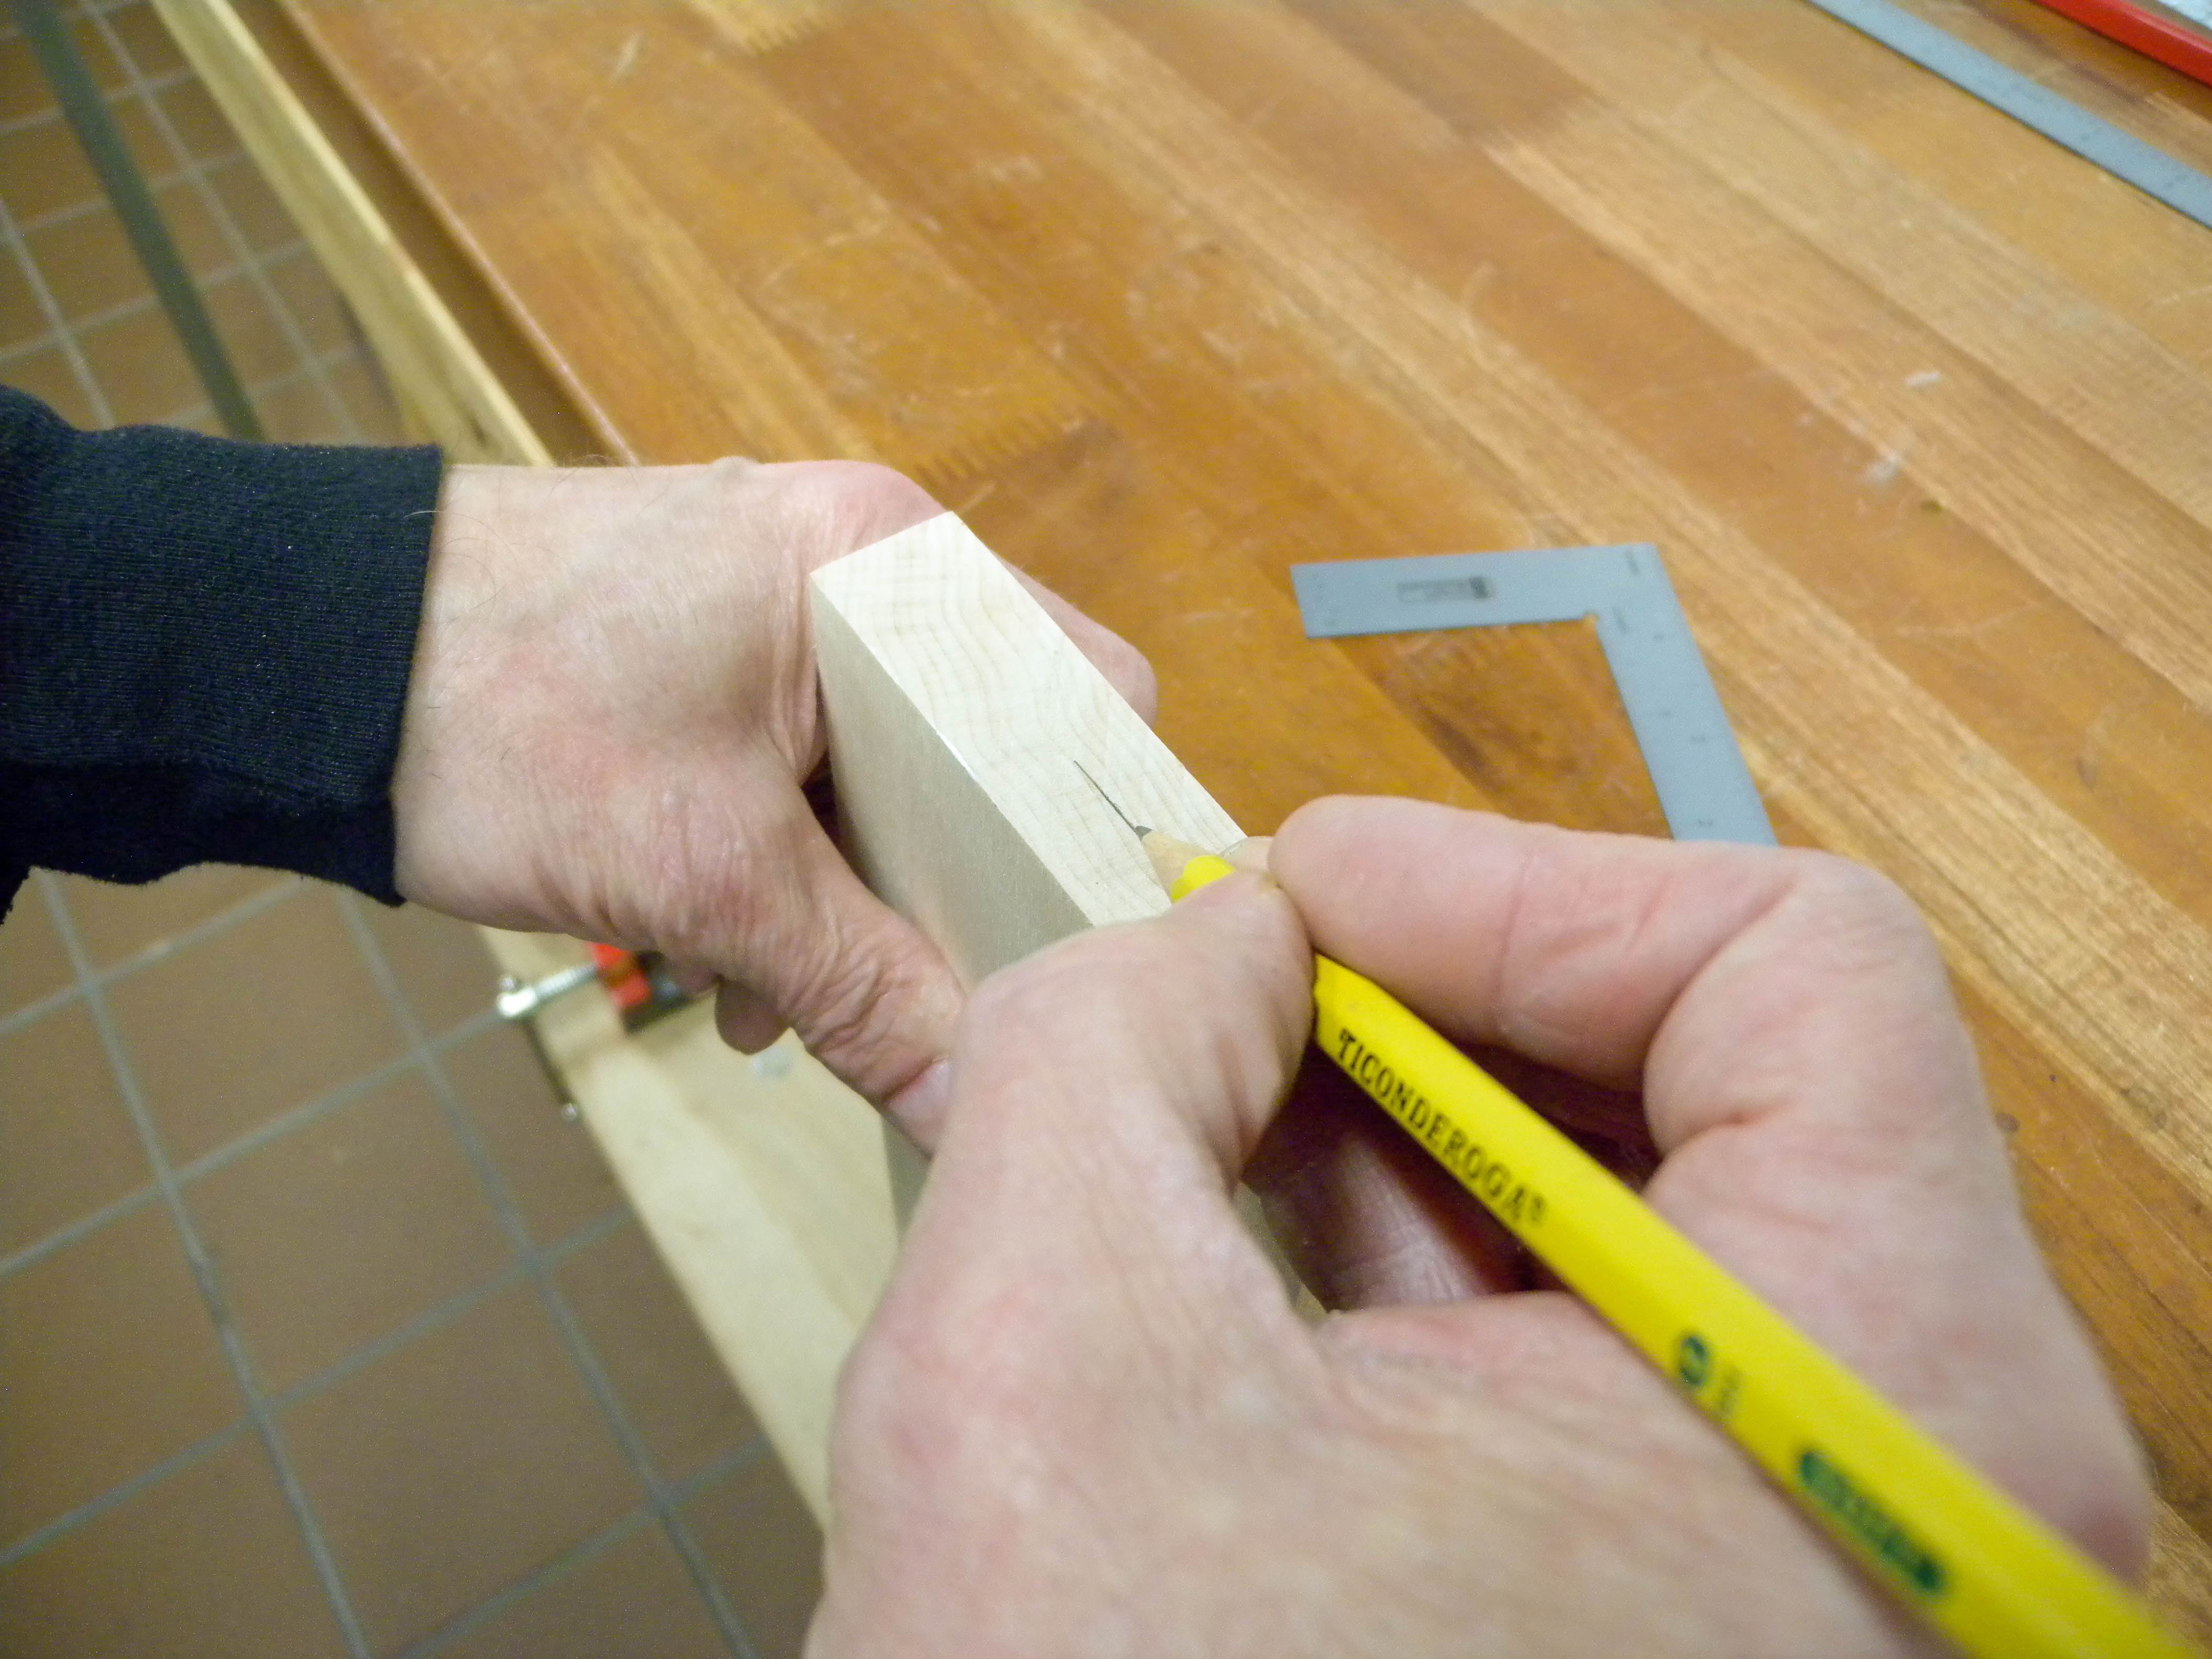
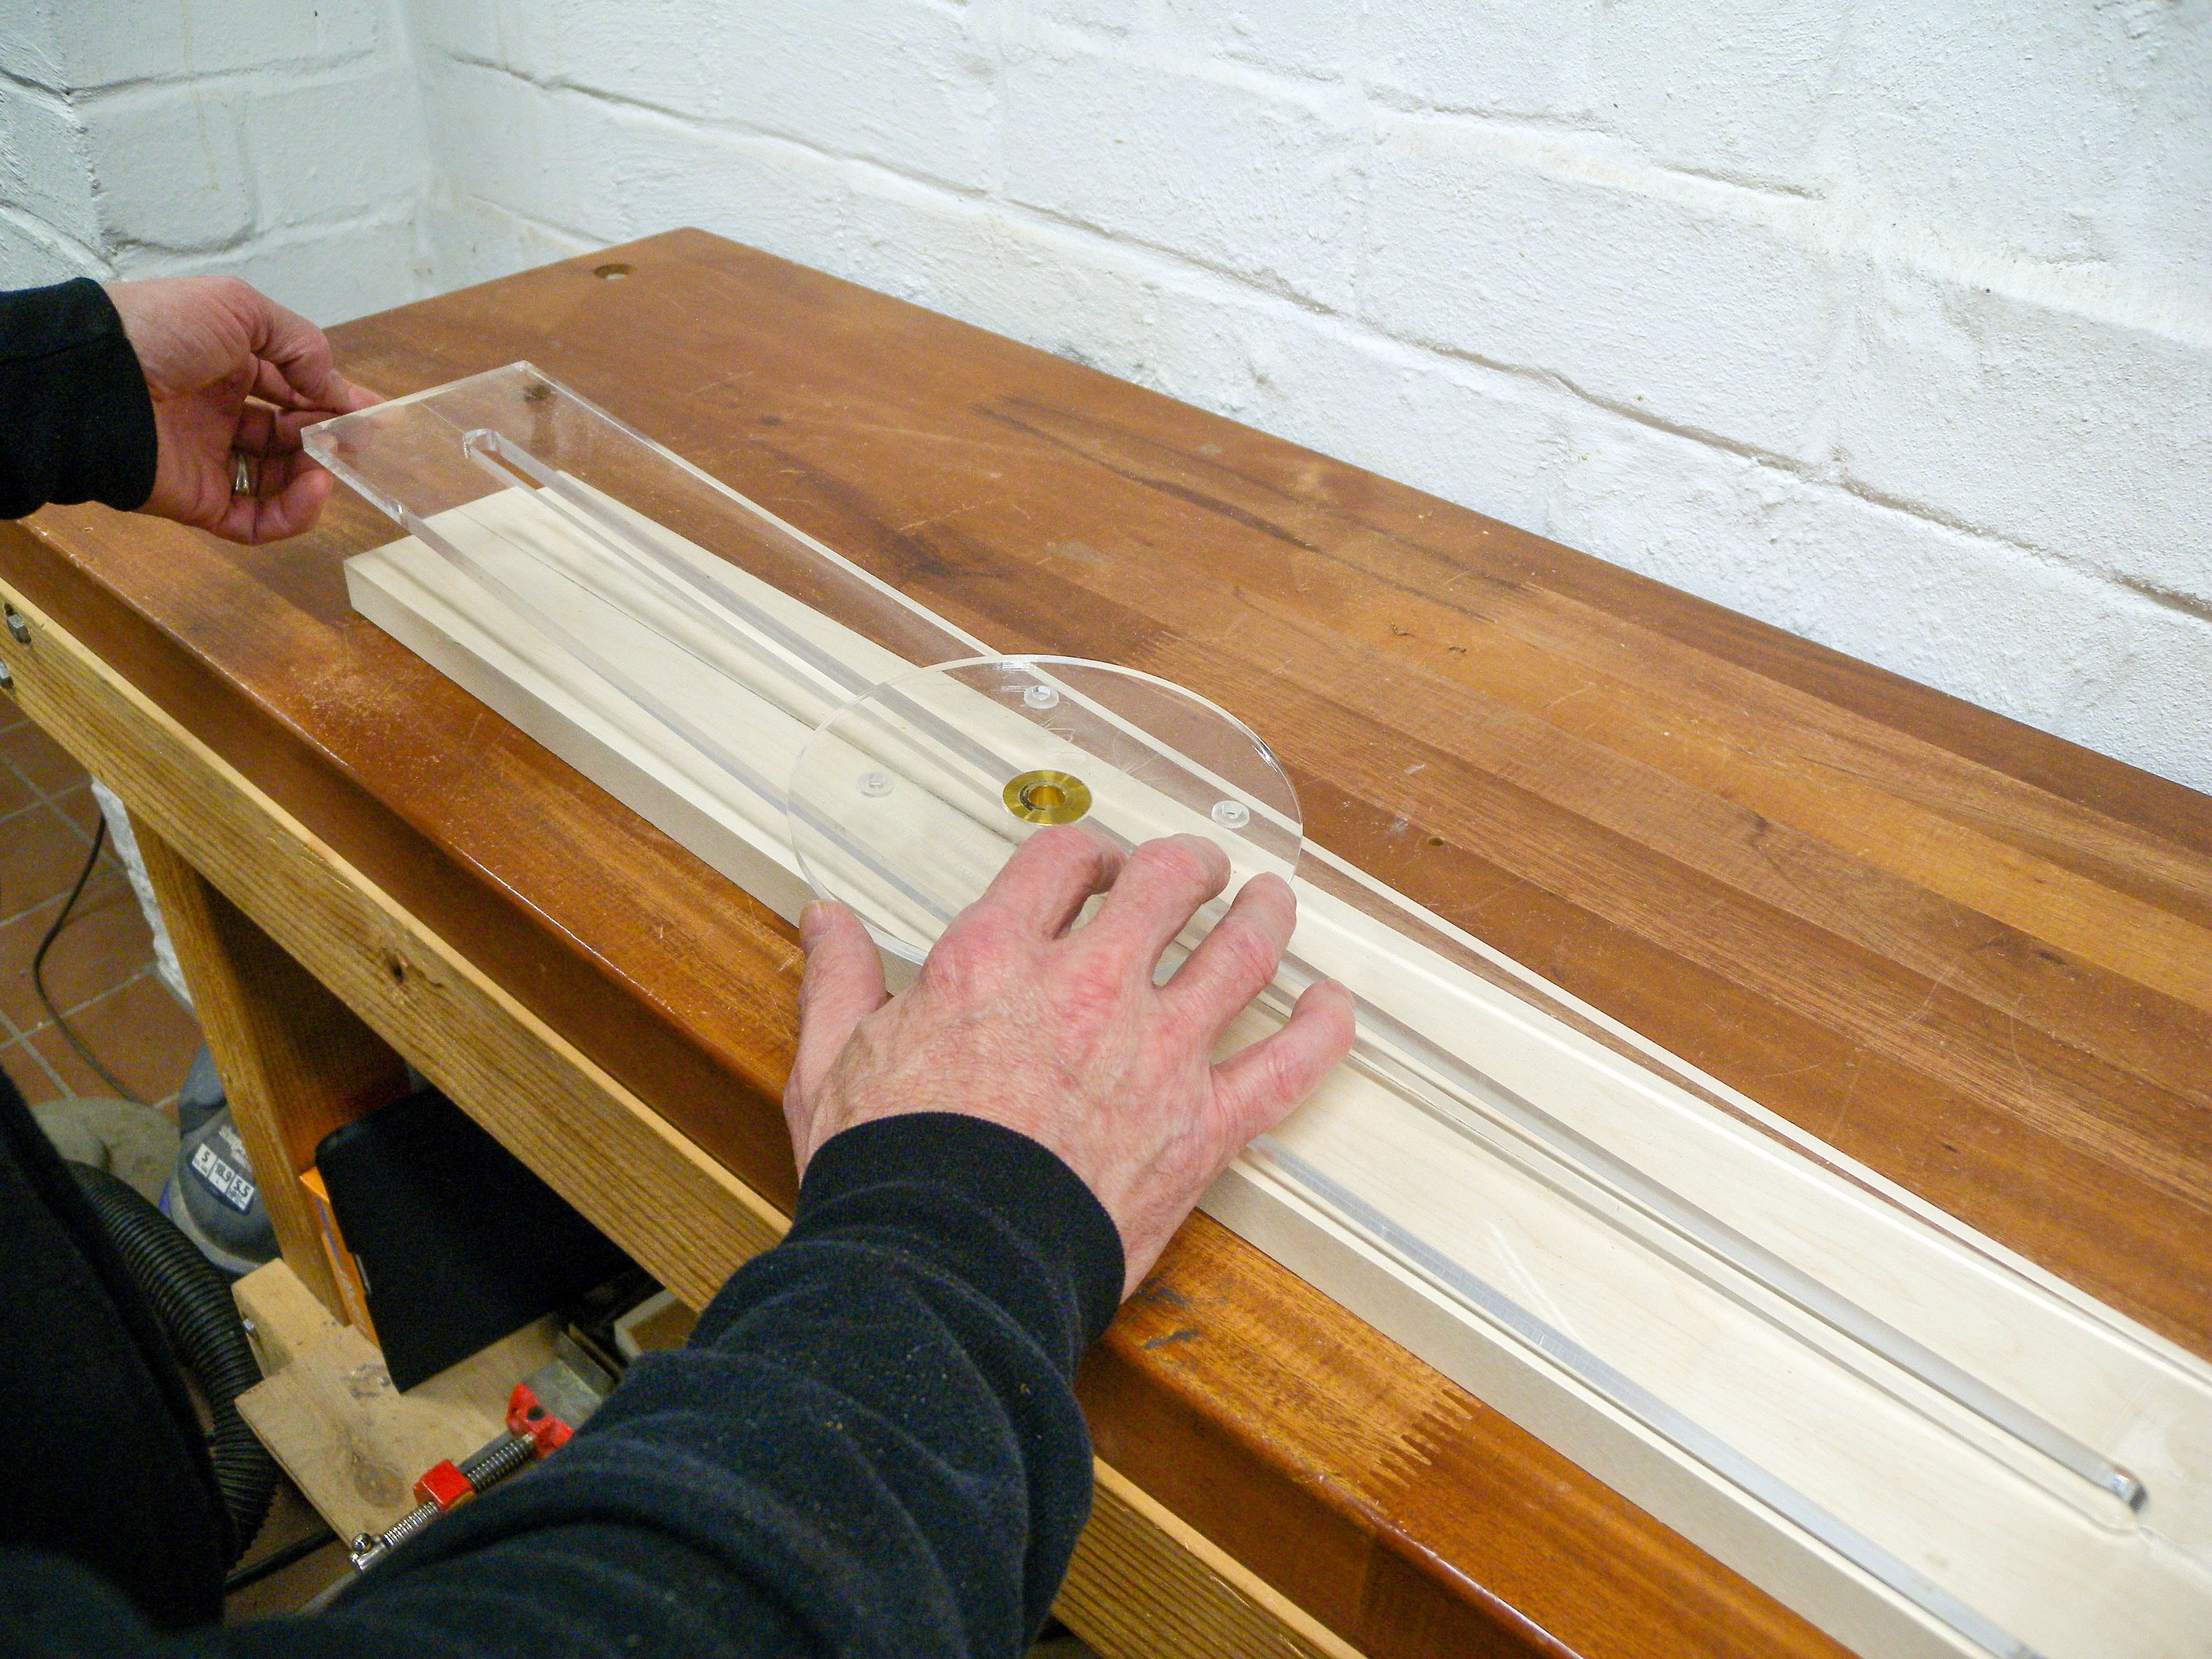
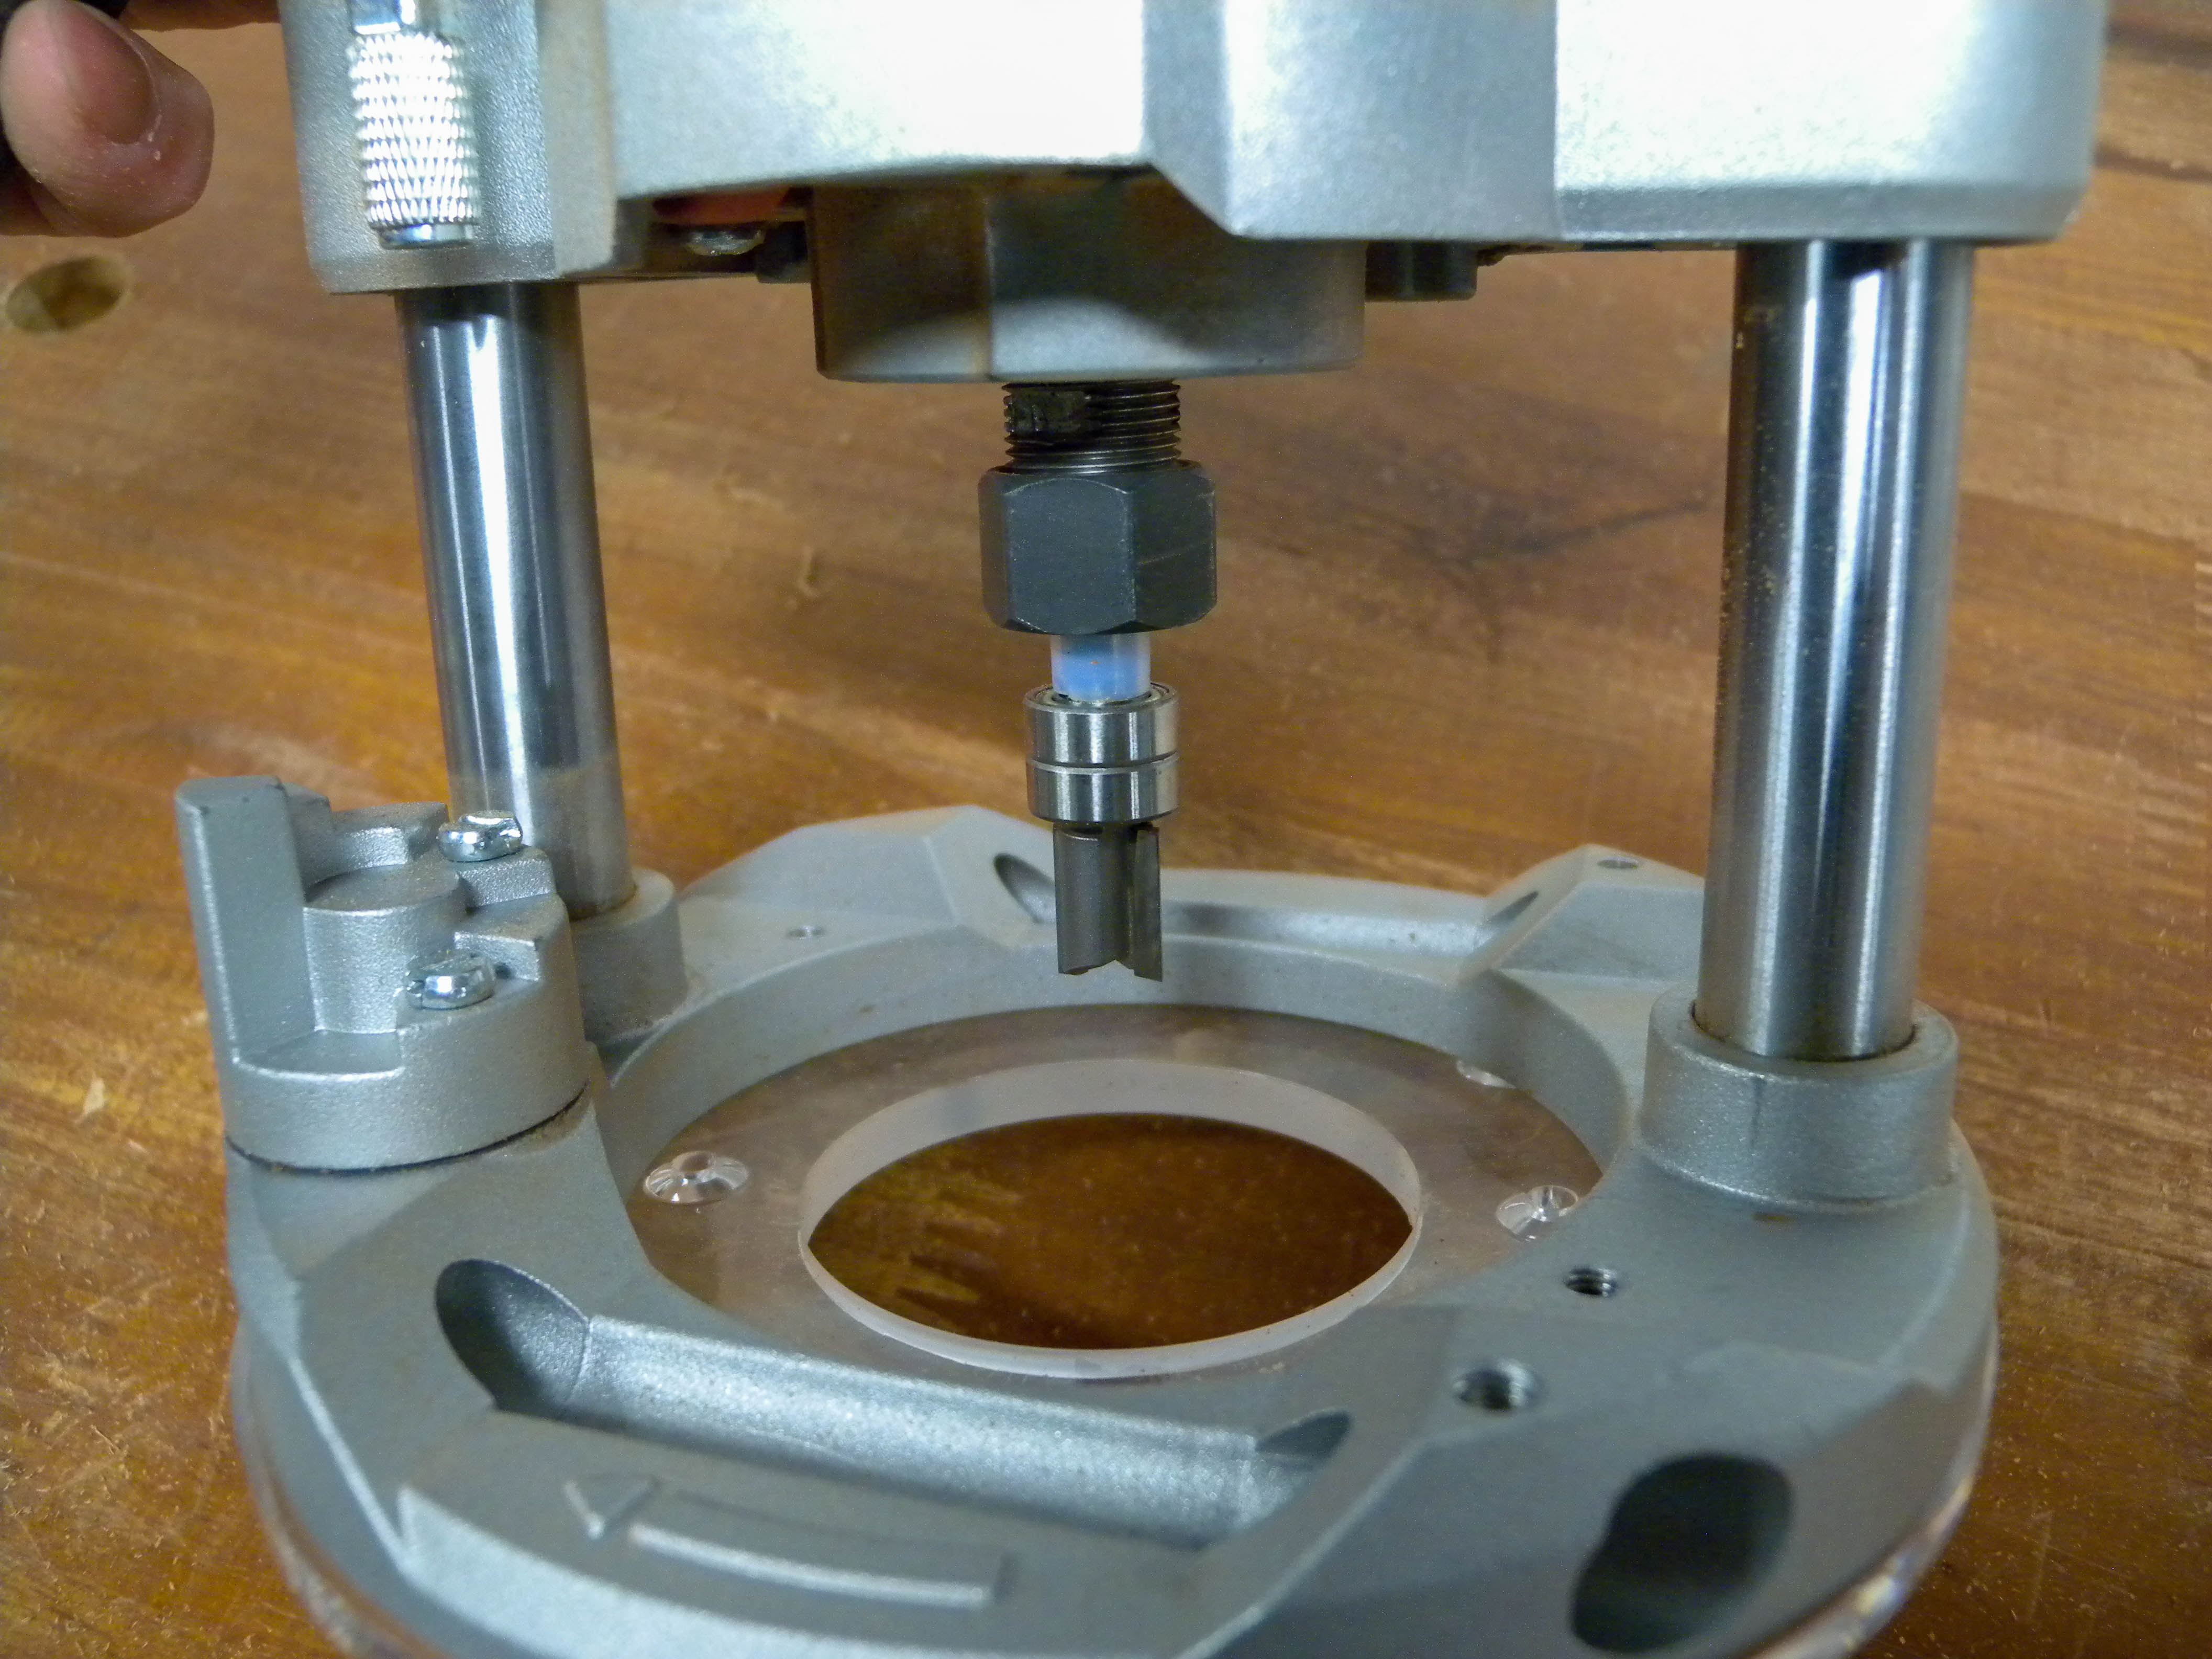
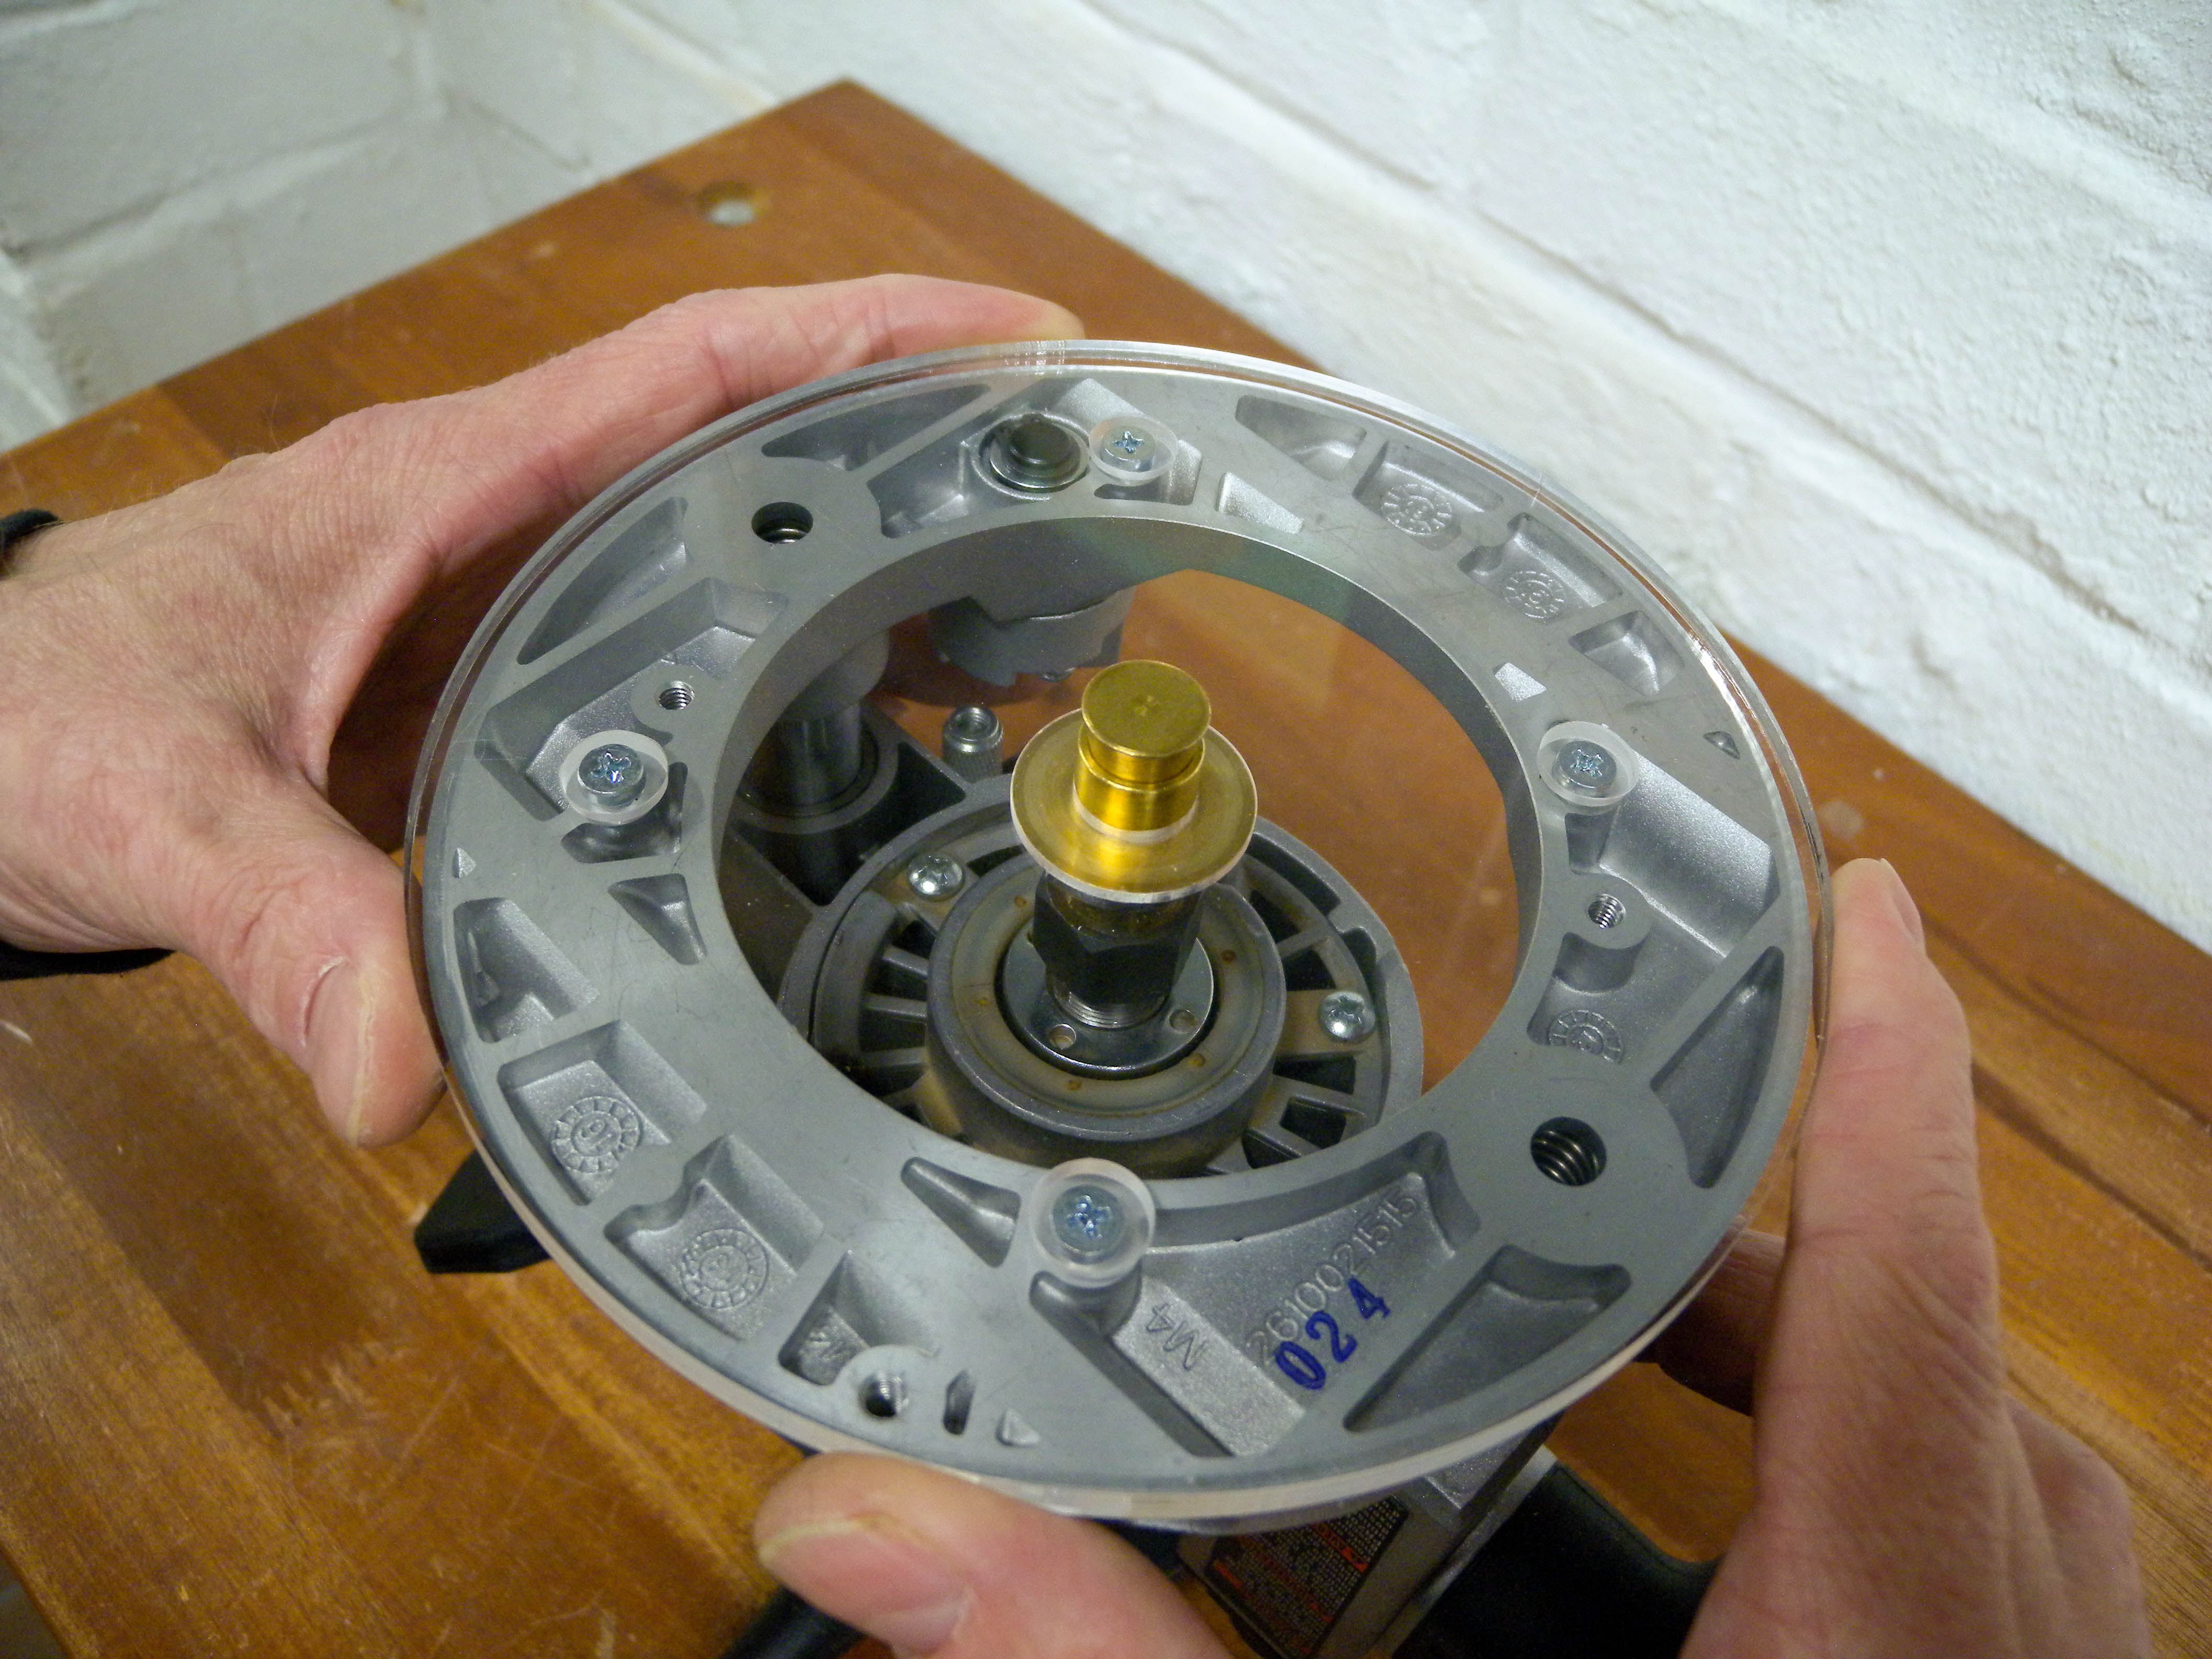
Mark a centerline on your neck blank. You must rout the truss rod channel before profiling and shaping. This is when the neck blank is the most stable, and you can realign your neck template if your centerline doesn't match the template's centerline. Line up the neck template for your desired neck with the centerline you marked on your neck blank and trace the outline. If your neck blank is shorter than the scribed centerlines on the truss rod routing template, or if the channel runs off the end of the blank for a neck that adjusts at the heel, you will need to mark the neck blank with new lines to center the template. To do that, mark a line 1/4" off of both sides of the centerline of the template to sketch out the width of the channel, and center the template on your blank making sure the lines that you marked match the walls of the channel cut into the template. Using the truss rod for reference, mark out the stopping points for your rout. Mark out the depth of your rout on the end of the blank as a guide. Secure your blank to your bench to prevent it from moving while routing. Double sided tape, bench dogs, clamps, or even screwing it down is ideal. Apply double stick tape to mount the truss rod routing template to blank, using strips that run the length of the blank on both sides of the channel. Press the template down firmly on the blank for a strong bond. TIP! Place the Colt Acrylic Router Base Attachment into the template while positioning it to minimize pinching the channel. Use care when mounting so you do not squeeze or twist the channel while pressing the template down on the neck blank. If the channel is pinched even slightly the router and your channel could become misaligned. The type of rod you will be using will determine the set-up of the router and what size bit you will use. This list will help you find the right bit for the truss rod or reinforcement rods you are installing: For use with Colt Acrylic Router Base Attachment: For use with 1/2" Bearing: 1/4" Adapter Collet required: For smaller router bits up to 1/4" in diameter use the Colt Acrylic Router Base Attachment and bushing. Do not use a bit with a bearing to rout the channel. For router bits with a shank larger than 1/4", such as 3/8" up to 1/2" in diameter, use 1/2" bearings on the shank instead of the Colt Acrylic Router Base Attachment. You can more than likely use the attachment that came with your router base. If using a 1/8" shank bit you will need to use the Adapter Collet for use with the Bosch Colt router. If you are using the Colt Acrylic Router Base Attachment, this is how you will install it. Remove stock router base attachment and screws from the router base and set them aside. Attach the Colt Acrylic Router Base Attachment with the bushing facing down towards the neck blank. Rotate the plate until the holes in the router base attachment line up with the corresponding holes on the router. Install the 4 low-profile mounting screws included with the Colt Acrylic Router Base Attachment. Do not tighten the screws completely, you will be installing the centering cone next and will be tightening them after. Reminder! If you are using bits 1/4" up to 1/2" you will be using the 1/2" ball bearings instead of the Colt Acrylic Router Base Attachment. Adjust the plunge base down until the centering cone properly positions the Acrylic Router Base Attachment. Use the centering cone to ensure that the router base attachment is centered. Push the centering cone through the bushing and into the 1/4" adapter collet and snug up by hand. Tighten down the screws until they are tight and secure. Remove the centering cone after the screws are completely snug. We recommend using the Bosch Colt Plunge Base for easier depth adjustment and execution. Set the final depth of the bit to the line you marked on the end of the blank in an earlier step. We recommend routing the channel in multiple passes until you reach your target depth, (rout passes even more shallow when using 1/8" shank bits). The general rule is to not rout any deeper in one pass than the size of the bit (don't rout deeper than 1/8" with 1/8" bit). TIP! When routing shorter channels or through the ends of the channel (as used for a heel adjustable truss rod), make sure the entire template is supported as seen in the photo above. You can use scrap wood to make sure the template always has firm contact with your blank, and does not tip Test fit your truss rod to make sure it is a snug fit. When you're happy with the fit, you are now ready to finish routing and shaping the neck.
What You'll Need
Truss Rod Routing Template
Bosch Colt Router
Bosch Plunge Base
Colt Acrylic Router Base Attachment
Neck Routing Template
Centering Cone
Neck Blank
Truss Rod
Straightedge
Double Sided Tape
Clamps
Router Bits (See "Choosing the Right Bit" section)
1/4" Adapter Collet
Ruler
Screwdriver
Pencil
Prepare Your Neck Blank
Router Set-up
Choosing The Right Bit
Router Bit for Stewmac Hot Rod Truss Rod
Router Bit for Stewmac Low-profile Truss Rod
Router Bit for Stewmac Traditional Truss Rod Kit
Router Bit for .200" Carbon Fiber neck Rods
Ball Bearing Router Bit for Stewmac Square Steel Truss Rods
Upcut Router Bit for 0.125" Carbon Fiber Neck Rods
Upcut Router Bit for 0.117" Titanium Reinforcement Rods

Router Base Set-up
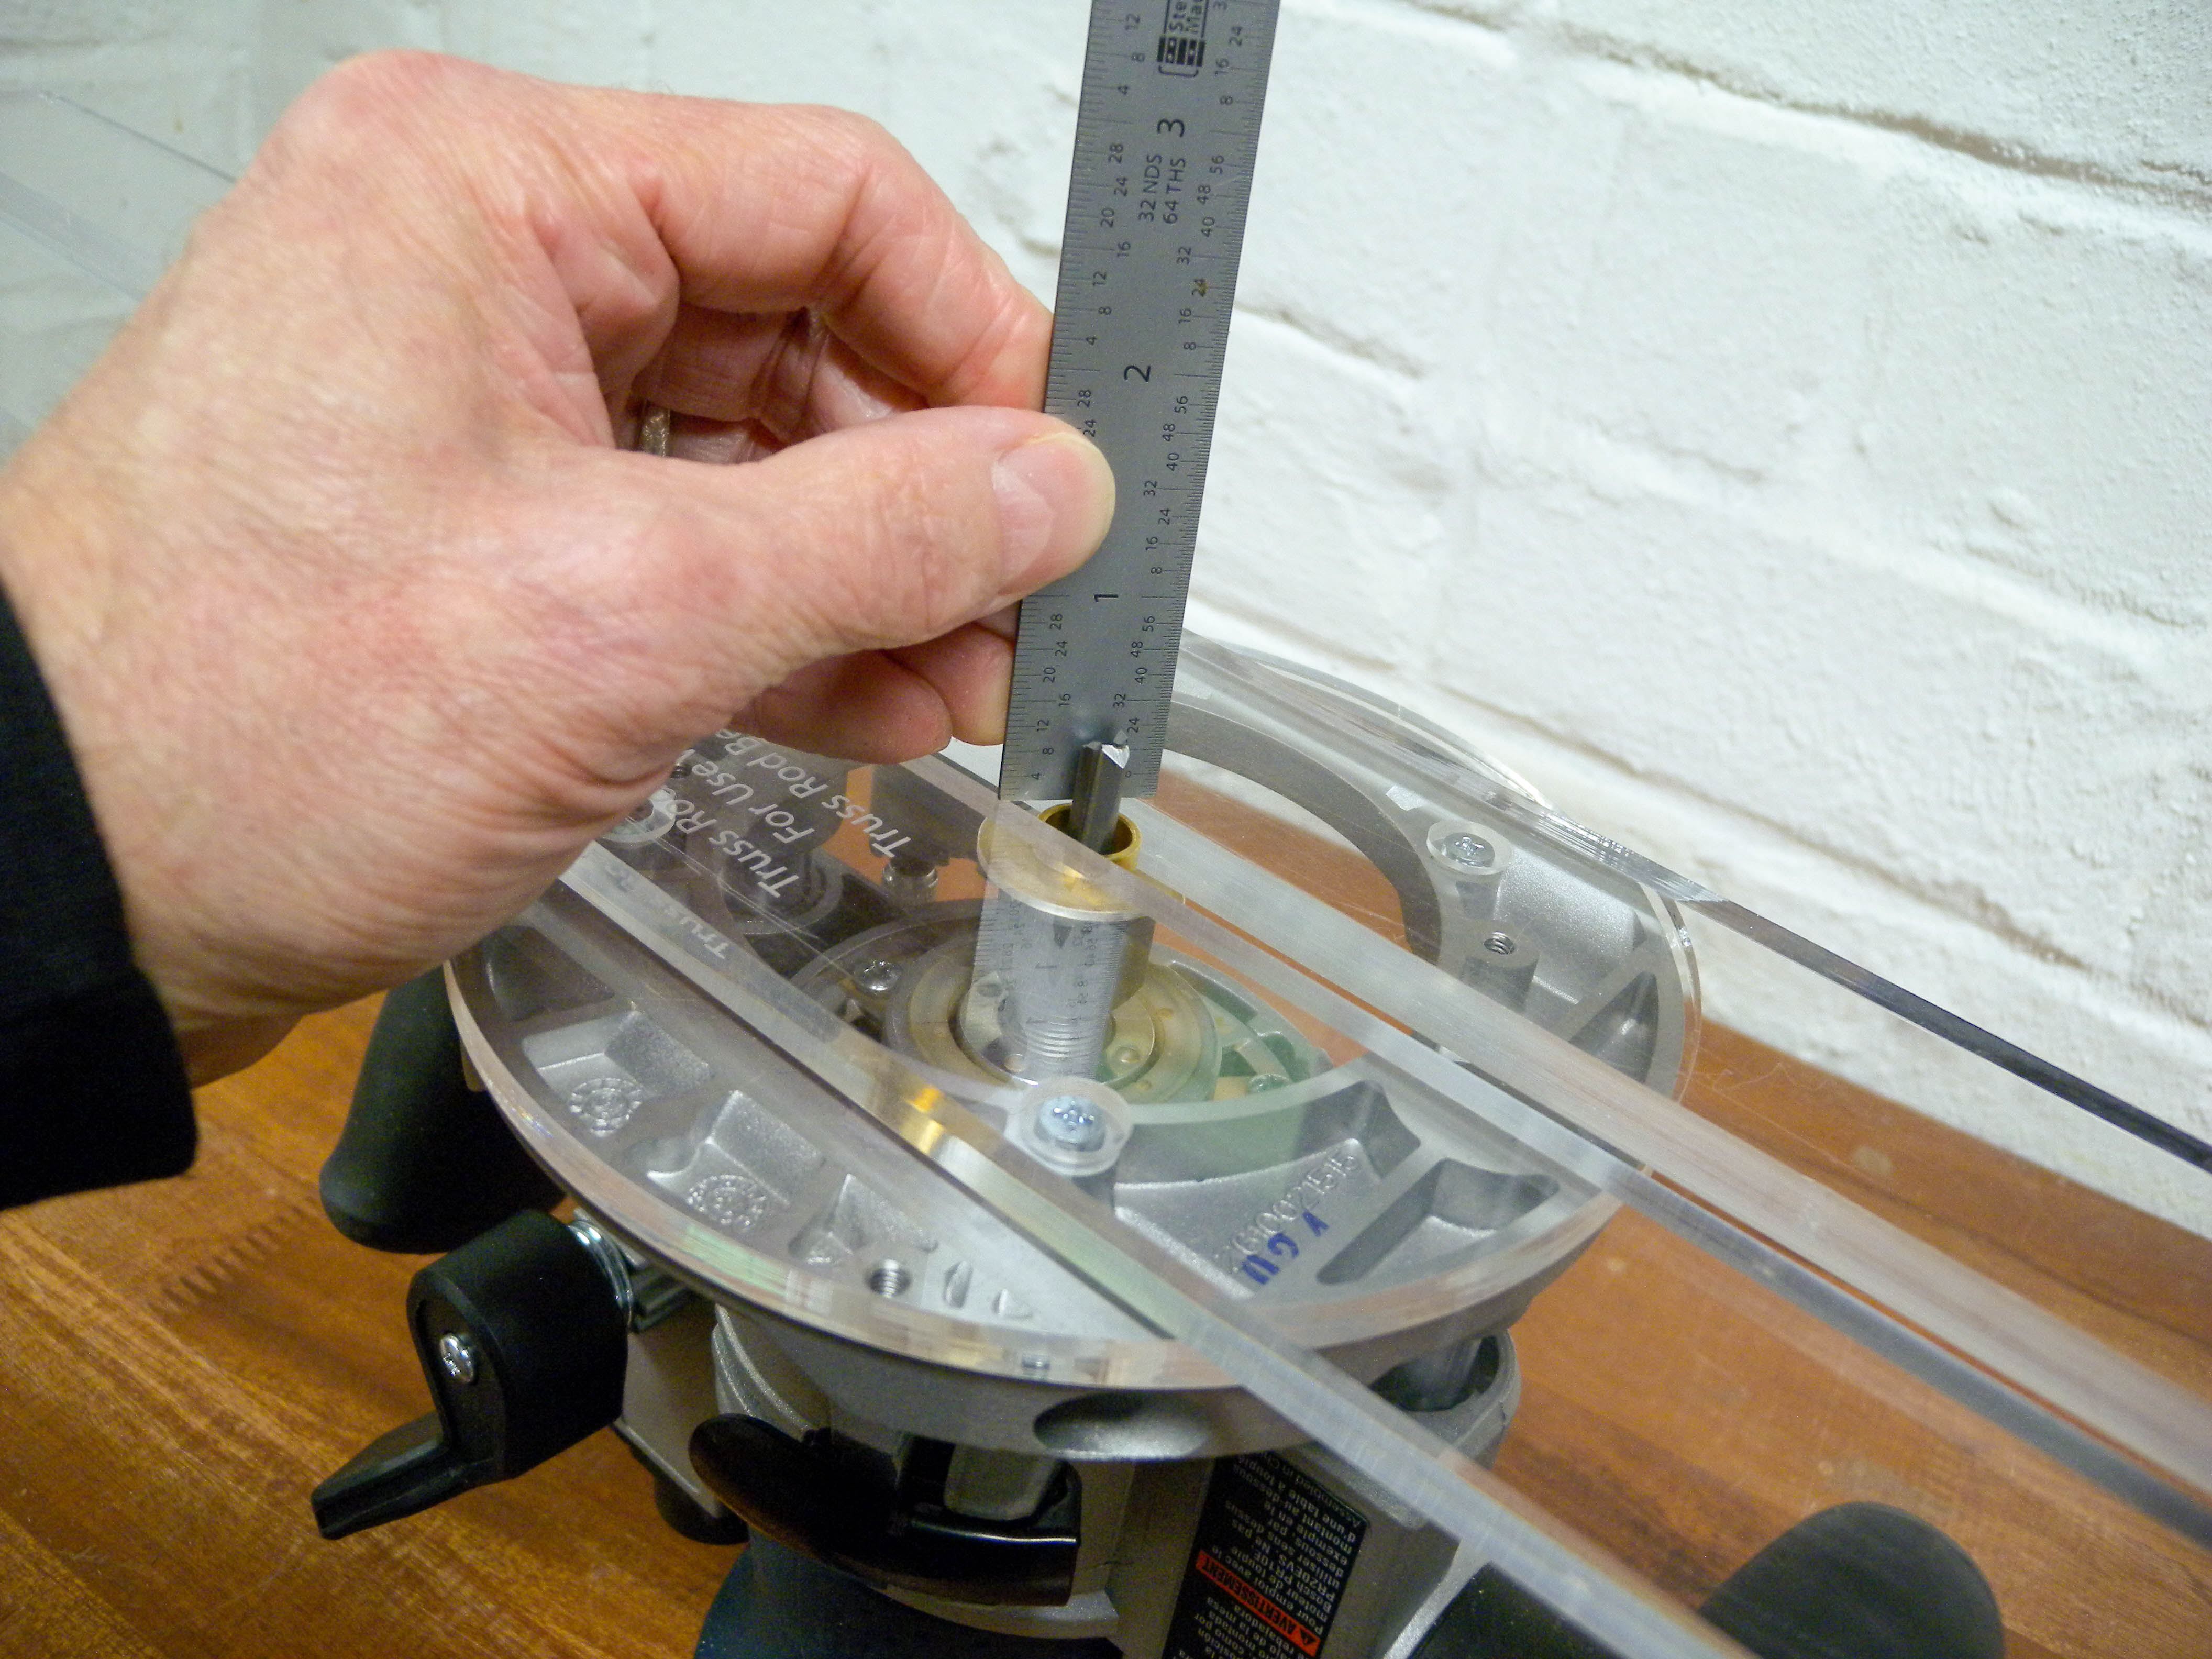
Set The Depth
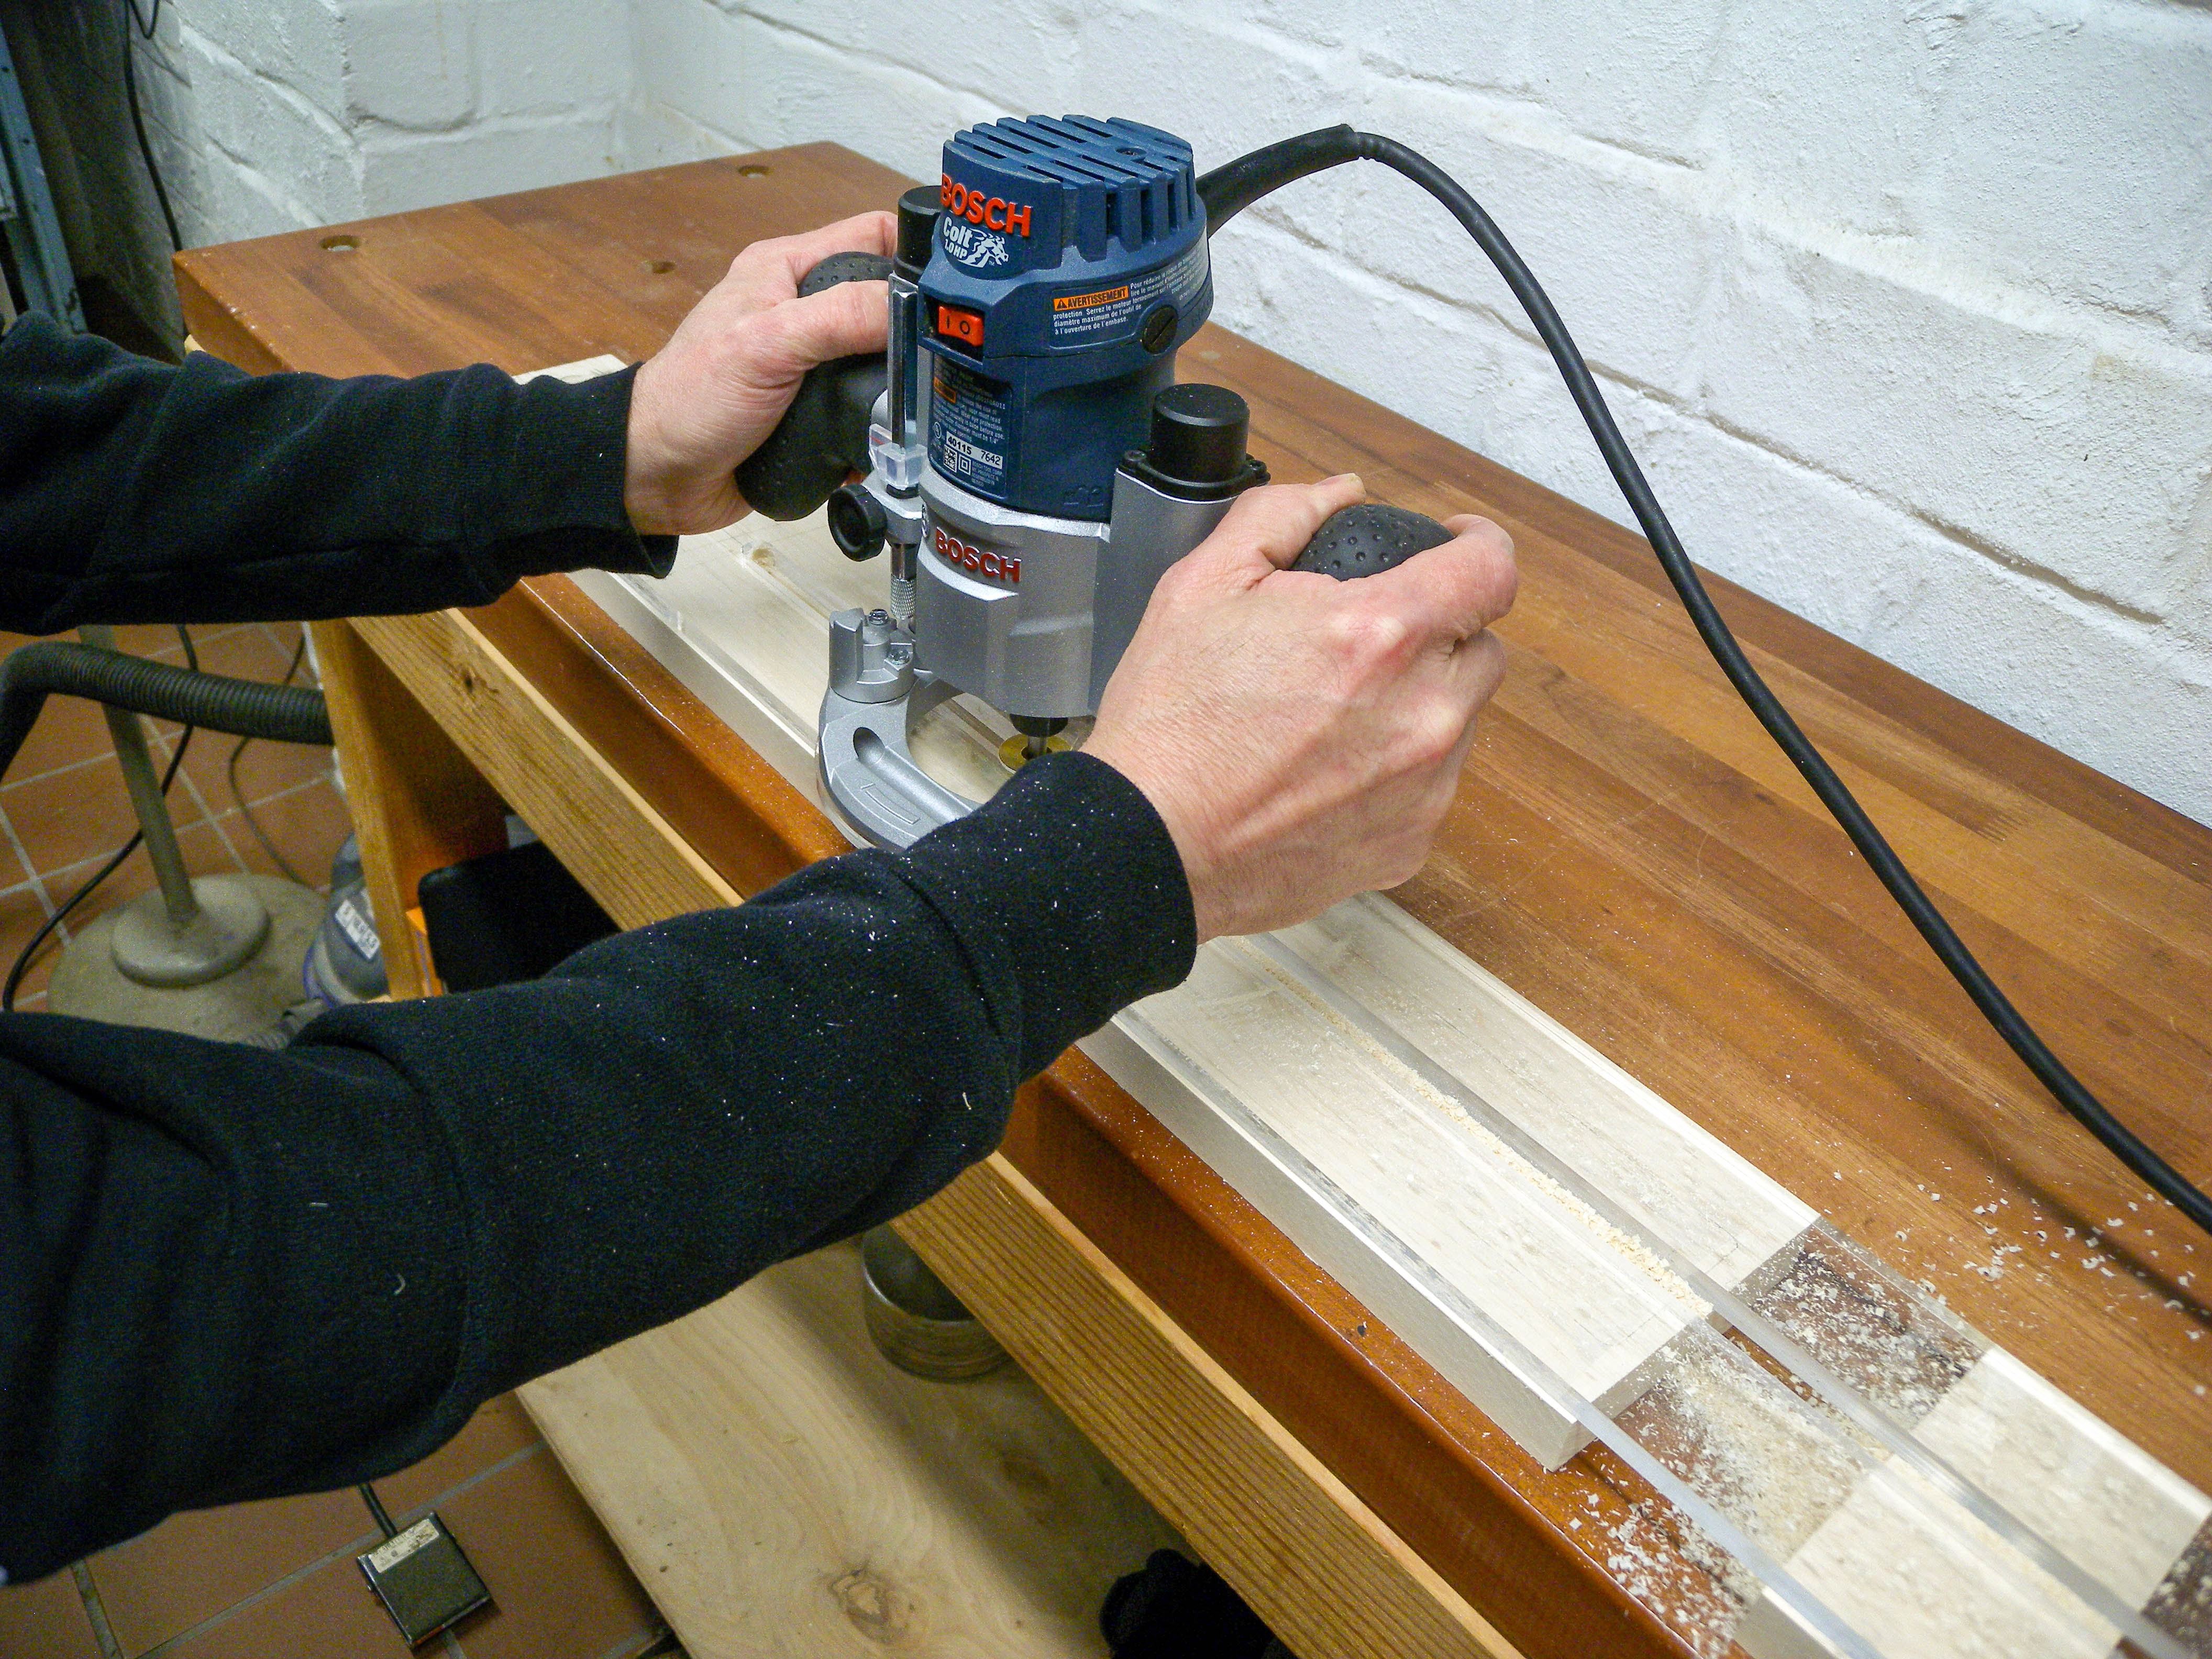
Routing The Channel