StewMac Guitar Side Bender and How to Use It Step-By-Step
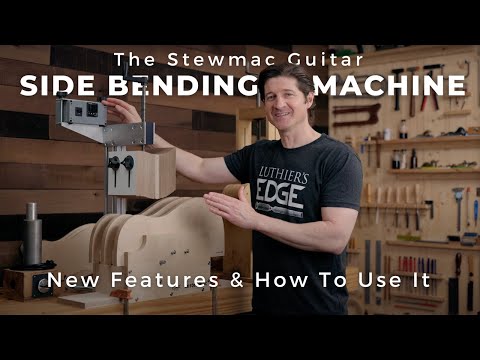
Explore the new StewMac guitar side bending machine, how it compares to an older bender, and learn how to use it step-by-step.
Video Transcription
[on-screen text reads: The Art of Lutherie - theartoflutherie.com]
Tom Bills: Today we're going to take a tour and a test drive of the brand new Stewmac Guitar Side Bending Machine. My name's Tom Bills and welcome to The Art Of Lutherie. I am so glad you decided to check out this video today. I think it's going to be a lot of fun and I hope it's going to be really helpful for you whether you're looking for your first side bender or maybe you're looking to upgrade from a previous Side Bending Machine to this brand new beautiful StewMac version that we're going to be taking a deep dive on today. We'll look at all the features and I was thinking it might be more helpful if we do sort of a compare and contrast just to give you a little bit of frame of reference about why this machine is so much better, maybe why I'm so excited about it and how much it's changed from this previous version.
And then after that, we'll take it for a test drive, we'll get a side ready, we'll bend it and we'll just kind of walk through the whole process so you can see it in action. So hopefully that'll be really helpful and should be a lot of fun too.
StewMac Guitar Side Bending Machine Features
So I think the first step here is to just jump right in and begin looking at some of these great features.
Large and open waist clamping caul
The first feature when you look at this, at least for me the first time I saw it, is this big waist clamping caul right here. This thing is huge, it's completely exposed out here. There's nothing blocking it like there is on this one and there's so many reasons why I love that. I think to be honest, this one feature right here would be worth the upgrade to me and let me explain why. So the first thing is just the size of it, like how wide they decided to make it.
They didn't have to do that, they could have kept it narrow for just the waist similar to this one. So you can see how narrow this one is hopefully, and this works fine, it does a good job of bringing that side down into the waist right there, but the areas on either side of the waist are usually a little closer to being flat. They do have some radius, but they're way closer to being flat than pretty much any other part on the guitar, maybe other than where the neck attaches are on the tail block. But those parts are reinforced by the neck block and tail block. These areas here on either side of the waist are really susceptible to warping and things like that because there's less of a radius. When there's a tight bend, it usually kind of supports itself almost and there's less chance of it warping.
So having this a lot wider during the bending process is going to be number one, it's just going to ensure that that shape there is more accurate. But I like the idea of it pushing down on those somewhat vulnerable areas and making sure that they don't develop any kind of warps or anything. So that's huge right there. The second thing is that the fact that this is so open, it's just much easier to set the shape than it was on this previous version. So on this version, the top is actually covered here with a block of wood so you really can't put your fingers over it and push down on any of the individual pieces. On this one, let me just show you how easy this is. They got the great little knobs here and I can basically just take this and drop this down and you can see how smoothly that just drops right into place.
And then the nice thing is, it's open on the top so I can just take my fingers and I can make sure that everything is seated properly. When I have it the way I like it, I can tighten the knobs and it doesn't take much and now I'm ready. Now I've got a beautifully fit contoured curve right here that's going to protect these areas. It takes seconds to do. I didn't have to use a wrench or anything in my old one here. I always have a dedicated wrench that goes with this to make these adjustments on here and this is just so much better. Then I guess the second thing to mention here, the fact that this is open, it's infinitely easier and we'll talk about this more when we're actually bending a side in here. But it's infinitely easier to put the side and the bending slats and the whole stack of what we're going to bend so much easier to put it in, so much safer when taking it out.
A lot of times I would run into trouble with this one. It's not really trouble, but you have to be really careful after the side is bent. Now the bending slats when you remove this waist caul, they want to go spring back to being straight. The side is bent and especially if you're doing a cutaway, it can be very fragile and you have to figure out how to sort of carefully pull that out of here without putting any stress on there that could potentially crack it or something. That was always an awkward thing. But with this one it's so much nicer because you can just pull it straight out the side like that and I think it's a lot safer. It's just a much more elegant solution there. So another great feature and just what we just described so far is an incredible improvement and if there was nothing else different about this other than that, then I would be all over this and I'd be super excited.
Low maintenance and smooth anchored press screw
But there's a few more other things that I really like as well, so I'll just keep going here. The next thing is this screw, the press screw and a couple of different points I want to talk about about the press screw here. So one of the things that used to really be annoying to me on this old bending machine is the way the press screw attaches right here. Because it would always fall off and if you've messed with these before, they can't be too tight, because then it doesn't turn very well, they can't be too loose, because they don't want to fall off. And so I would always have a dedicated Allen wrench here where every time I would use it I would readjust it and try to get it right and then I have to push up on it when I pull this up. This one has a far, far superior anchoring situation.
The design of how this is anchored in here is way, way better. It's just very smooth and just holds it in place perfectly. So that's a huge improvement there. That's just one more, it's not really a pain point, but those little things that cause friction, it's emotional friction time-wasting kind of friction. When you remove those and you remove a bunch of them, then it really kind of adds up to something that's really helpful. The second thing is, this block right here, which I'm guessing is probably something like Delrin or a material like that, but it's just so smooth. And I haven't used this for years or anything I have the other one, but it seems to me that this isn't going to really need a bunch of oil and things like that to keep it working well, and I love that because when you're oiling this all the time, this I used to have to oil almost every time I used it to get it to go, to get it to move smoothly.
And the oil, the three-in-one oil or whatever you use it wants to collect all of the little fine dust out of the air and make a messy goo on there which goes down into the threads and clogs things up even further. And it's an endless cycle. This one is not going to need that, it's just nice and smooth and I just really appreciate that. Because bending this and you'll see when we get into this part, but there's almost an art to bending this and as you feel it because when you bring it down you kind of feel the resistance of the wood and you're using the sensibilities that you probably developed bending on a regular Bending Iron, like just a hot electric bending iron about understanding when the wood's ready for you to give it more pressure. And so we're feeling that as we're slowly cranking this down and we'll talk more about that later, but having this be such a good smooth stable design.
Just another thing that's my attention can be focused on the right thing and I'm not worrying about if the press screw is going to fall off or something, you know what I mean in the middle of it. And then this is just nice to have, but this little handle actually spins on the top so you can just hold it tight and let the handle spin as opposed to this one where it's just a standard handle. We're talking about little things here. This is just a luxury, a luxury item, is having this handle spin. But I appreciate it and I enjoy it. I like it.
Solid base with more clamping options
The base is redesigned as you can obviously see. This is a great design. It's just so much more solid, gives you a lot more clamping options. The system for the body mold is really interesting.
I never thought about doing one like this where it's just individual pieces they index on this pin. You can't see it on the camera from there, but they drop in when you put this in and they just drop into that spot. Which is really great because you can have a library of these, you can buy the different ones, StewMac makes or you can make your own that way when you're building them you only have to make one and then you can use your router table or whatever to duplicate a few more and then you've got a side bending mold there. Really great design with that too.
Advanced temperature controller
And then of course the beautiful temperature controller. This is new to me completely. The way that I've been doing this for the last 20 whatever years, I use two bending blankets is what I've been doing and they basically have a plug that plugs into the wall. So the game is, you load it in here, you plug those things in the wall and you go as fast as you can without breaking the side obviously, and you have to get done within a certain amount of time or it will literally destroy the side and totally burn it. So that's where I've been all these years. So being able to set a temperature and have it controlled is going to be another game changer for me personally to just have that peace of mind that it's not going to completely torch that piece of wood or at least not as quickly, right?
You're still going to have to move at a decent speed and get it done and turn that off, but it's just going to be really nice having that luxury too. So we're going to talk more about all these things as we get into the bending process. I don't want to take too much time upfront, but I wanted to point out these great new features.
Completely redesigned cutaway attachment
I guess the last thing to mention is they completely redesigned the cutaway attachment too, which is fantastic. Again, the same beautiful press screw set up here and what's really nice too, that I appreciate about this is the way that this connects with just a little hook and it just hooks onto this pin right here, so it makes it really easy to attach, to put that on, to put this on and to take it off and obviously there are cutaway bending forms that you can get as well that work the same way. That's a really great improvement. I can show you my old one here that I've been using all these years.
It's not too bad. I guess the biggest drawback of it, of course it's got the same old press screw stuff, but this one requires me to get out my socket set and install or remove these screws right here depending on whether I'm going to do a cutaway or a regular side, which it's not the end of the world, no tool's perfect. Sometimes you just work around things, but when you can have the luxury and the streamlined, elegant well-thought-out process and features like this has, it's really cool and it just makes it more fun and lets you focus on the things that are really important and not be distracted by other little tiny things, taking your attention away, little parts of your attention and diffusing it sort of.
Setup and alignment
Now we're ready to start preparing the sides and the bending slats for the bending process. And before we get started, I didn't show you yet these really nice bending slats that are included with the machine. This is a beautiful material and I don't know if you can see it, but they've taken a lot of care to round these edges and grind them over to reduce some of the danger because this material can be sharp so you do have to be careful still, but they've really done a nice job to clean this up. Just for comparison, this is what I've been using for the last 20 something years on my old bending machine and this is just spring steel six inch wide, 0.012" of an inch spring steel that I got back in 1999 I guess when I got that original machine. And you can see it's rusted but it's made over a hundred guitars so I can't complain too much, but this is much nicer material and a little safer and it's not so sharp on the edges, it's just going to be really nice.
So the purpose of the preparation here is really all about alignment. While we're preparing the side, we have to make sure that the side isn't shifted maybe to the front or to the back too much. If it's shifted to the front too much after you do your bend, you could end up with your guitar side ending up here and have a big gap between where the wood ends and where it should end at the center of that butt joint down there. And so we want to prevent that. So the way I typically approach it, is I start by taking the bending slat and I just take one of them, the one that's going to be on top that I'm going to be able to see and I put this into the bender. And first I just hold it with my hand and I check each side. And what I'm looking for really is when I bring it down on this bender, I like to have about just enough room to get my tips underneath it between the base of the bender and the end of the metal. That's pretty good right there.
And so once I determine that and get it sort of just kind of close, then I can start bringing the center waist caul [Tom starts lowering the waist caul] , which I already adjusted to be the right shape for this and I can just sort of roughly hold this in place and I can bring this down and double check each side [Tom presses the bending slat down around the guitar body mold] so I slid to the front just a hair. There we go. So that's nice. So when we were talking about how amazing it is that this is open so that you can see it, this is one of the reasons because I can look right here and you can put a mark here, but even just eyeballing the center of this part here, we can use that as our reference point. And so typically what I'll do when I have that aligned is I can slide it forward a little bit and hopefully you can see it, but I just took a sharpie and made a little mark on the bending slat right there.
And that little mark is going to be my visual cue when I put the stack of the bending blanket, which we'll look at next and the slats and the wood in here to begin to bend it, I can align it to that mark. And then in the next step we're going to align when we put this stack together, we're going to mark the side and make sure the side is aligned with this mark because when the side is in that sandwich of these bending slats and the bending blanket, you can't see it really well anymore. And so it's nice to have it lined up with the outside and have a visual reference here that with this new design you can easily see where that center point is and it's just a really nice way to line that up. Once that's lined up correctly, then as I begin my bending process, I know that I'm going to have plenty of room on either side and then I also know that the wooden side itself is going to be properly positioned so that it will complete the whole side of the guitar.
Marking the sides
So what we have here are the two sides for this guitar and right now they are thickness to 0.085" of an inch. You could go 0.09" of an inch or you can vary that for different species or applications and things. But we can't mention all that here today in this video. It's already long enough. But if you do want to know more about the art of side bending because it truly is an art, I have a brand new super detailed course that'll be released soon and it's included in the subscription to the Luthier's Edge. If you want to know more about that, stick around to the end of this video or check the links below. But for now, the important thing to know is that the sides are thicknessed and they are prepared, the surfaces are ready to be bent. I've went ahead and marked the book matched surfaces that I want to be facing on the outside of the guitar and I've marked which sides are the inside of the guitar and I typically just write in on the inside so that I know where that is.
That's the part that'll be facing down in the side bender when we put it in. I always put a little arrow pointing to the neck block just to kind of give me an orientation there. And then a very important point that I want to make sure I mention is that in the last step we put a mark on the side bending slat that we're going to use to index with the side bender to make sure the slat is aligned properly. So what I did is I also marked where the center of the cutaway is on the side as well. And to do that, I just took the bending mold that we're using and I transferred that mark down onto the bending mold. And then what I did is I just measured the length using a little flexible ruler to measure this whole entire length from tip to tip and then I take that length, measure it on my side, then I look at the amount of material left over and divide that by two.
You might have to rewind this if that doesn't make sense. Then what I did is measured the distance from here to here [Tom points to the top of the bending form and then to the waist on the bending form] and then added that little extra measurement. So hopefully this makes sense and I don't want to go over it too much, because I want to keep moving forward. So rewind it if you need to, but essentially what we're trying to do, and you can do this in a different way as well, but that's just what I do is what I'm trying to do is make it so that when I align this with that mark when I'm bending that I'm going to have an equal amount of overhang on both sides or both ends of the side hanging down below this.
And it's important because no matter how careful we are to align this, sometimes it'll accidentally shift a little bit forward or backward and it's nice to have that little wiggle room there and just in case something happens, it just so happens that this particular side has about an inch of extra space on both sides, which is plenty of room to make sure that we get it right, but I just wanted to mention that really quickly.
So that's done and everything's marked and everything's ready to go. I've got the side bending slats, I've got the bending blanket, and we are about ready to get started on this. Now we're going to wrap it. We're going to wet the wood and we're going to wrap it to protect it and to hold the moisture in during the bending process. When you wet it, always use distilled water. If you use tap water, there's minerals in there, especially if you're using maple or light colored woods, it can stain that wood and totally ruin it. I learned that the hard way very early on, but if you use distilled water, you're going to be just fine. So that's a really important thing.
Now to wrap it, some people use parchment paper, some people use aluminum foil. I've always used aluminum foil, but as I mentioned before, my old bender didn't have temperature control and I needed the aluminum foil to hold that moisture in without, so it didn't just totally burn it and dry it out too fast.
I'm going to go ahead and use aluminum foil on this one, but with the temperature control parchment paper might be a good option too. Maybe I'll experiment with that in the future. But this is what I've been using for 25 years, so I'm going to go with that for today's video.
Wrapping the sides
[Tom pulls out and cuts a nice long piece of aluminum foil and lays it flat on his workbench]
So what I want is a nice piece of aluminum foil that's just a bit longer than my piece of wood. I want to roll up those ends and seal that water in there, get this laid out. I've got my side which is clearly marked, which we've talked about. What I like to do when I get started here is just get an idea of how this is going to fold up and how this is all going to work before I add water and everything else. [Tom folds the end of the foil over the top of the wood so it just covers it up] So that looks pretty good. And so I just work this out and get this ready now [Tom continues folding the wood end over end in the foil and creases the edges] and make sure the fold's right. I want it to be nice and even like that, I don't know how important it is, but I don't want a couple layers, like a big thick seam or something that could potentially warp the side. I want it really flat and nice. And it's easier to do that when it's dry.
[Tom unfolds the wood and the foil]
And it also helps to do this because we want to make a nice little backsplash for when we get this wet. Now we have our marks on here and we're going to need to transfer this waste mark out to the sides. You can do that in a few ways. You can sort of remember, you can almost even hold your finger here. It doesn't have to be that accurate. We do have some play as we mentioned and fold it up or you can measure it. Measuring it is the way I like to do it. So I calculated as I explained before that it was 12.5"inches from the side. So that's what we're going to use for this. But let's go ahead and put some water on this and I'm going to explain some other stuff as we go.
[Tom sprays the distilled water all over the top and bottom of the wood using a spray bottle]
So I've got my distilled water and I'm just going to begin soaking this and I like to use a pretty good amount of water. And yes, my spray bottle, it's broken, it's been broken for 10 years and I never get a new one for some reason. It just drips all over everything. And it doesn't really come out very well either, does it? It's one of those things that you only think about when you're using it and then you forget until next time. So I'm putting quite a bit, as you can see, quite a bit of water. And then the water that's falling off is staying here in this little aluminum foil section here. Okay, now this next part is very important. I've marked, you might remember I wrote the word in right here. The in marking is telling me this is the part that needs to be facing down in the side bender when I put it in there. Because I want this to be the outside of the guitar.
So I'm going to put this back in where I had it before kind of lined up and I'm going to mentally or sometimes I'll even say it out loud. So now I know that down is down, so I'm going to be thinking about that as I do this. This has to be right, okay, now down is up and now down is down. So now I know that the part facing down is the inside of the guitar and I'm just going to put up here because then I know that this, when I put it in the bender, this has to be up. And I usually put a little arrow this way as well. Just to remind me, this is the neck block side over here. Now the next thing I usually do is kind of get to where I can see that side on both ends. And then I'm going to measure my 12.5 inches here.
[Tom measures the wood from the end and marks the top of the foil]
So this is my 12.5 inch mark, and that's going to tell me where my centerline is of the waist. And I really like to put it on this edge here [Tom marks the center waistline on the edge of the foil] because the reflective nature of this aluminum foil makes it so that when you sort of look in the stack of all these slats and stuff, you can kind of see that mark from the side if you mark it on the side. Then I roll this up. This part's optional, some people leave it open on the end. You can roll it up or leave it open. It's up to you. I'm going to go ahead and roll it up for this one and see how this works. Put that one there. Okay, good. So now we're ready to start building our stack of slats and the bending blanket. And so we're going to start with the bottom piece here.
[Tom sets the bottom slat on the workbench, then sets the wood piece that is covered in foil on top]
Now I went ahead and I put the mark that we showed before where I put on the top, I put it on the bottom bending slat too and I just find that that's helpful. It makes it a little easier for this alignment. I want to get everything looking good here right at this early stage. And so now this is going to be a reference point to align this way, but we also want to make sure that this isn't messed up or out of whack the other way. So once I get it positioned kind of by eye, what I like to do is I take a ruler and add a little piece of tape. The tape is mainly to help me not have to put my reading glasses on when I'm doing this, which I try to avoid at all costs. And so I'm just measuring from the edge of the slat to the edge of the wood.
I happen to pick 0.75 of an inch, but which isn't perfectly centered, but it's close enough and then I make sure that's lined up. So this is where I want it, right exactly here. Now to complete the rest of this stack here, I've got a couple other things. So this is a little different. So Stewmac recommends that you put a slat on the bottom of the blanket and on the top of the blanket, which I think is a cool idea. I think that'll probably help to even out pressure and temperature a little. So I've always just done one metal slat on top, one on bottom, but I also typically have always put one blanket on top and one heating blanket on bottom. So two blankets is what I always did. So this is a little different, but it works pretty well. I've already bent some sides like this and it works really well.
But I kind of like this, so we're going with sort of the StewMac recommendations here and we're going to go ahead and just lay this carefully on here because we don't want to move or we don't want to move the side that's inside there [Tom lays the top slat and heating blanket on top of the wood and bottom slat stack]. All right, so that's looking pretty good. One other thing to mention is that this blanket has a little bump here where the power cord connects. And so what I find works well for this is to take the end of the blanket and line it up with the end of the piece of wood, so the wood for the side. And so that just kind of slides it forward a little and pushes this past the end of the mold so it's not in the way. So that's kind of nice there. So I've got everything lined up this way.
Double check my, yeah, so this is looking good. Now I'm going to double check my alignment here one more time, make sure I didn't mess anything up. That's still looking good there. And then we'll check this one here. That looks good too. Now that I've got it, I'm going to sort of lock things in place so we can make this transfer over to the bender. If I can do this without blocking your view, which I'm doing a bad job of. Okay, so just getting these little bending. [Tom clamps 4 binder clamps onto the side bending stack, 2 on the top corners and 2 on the bottom corners] These are just binder clips. They work great for this. One more check, just I'm like that. It's good. So now we can lock this in and our stack here is ready. So this is all set to go. And so all I got to do now is get the bender set up and we're ready to get started.
Bending the sides
Okay, we're ready to get this side bent. I've got the bending machine mounted back to the bench. I've got my stack of slats and blanket and wood in position roughly. We'll refine that as we start the process. But just to give you an overview of all the other setup things, the white cord here is plugged into the back of the controller. That is the heating blanket. The black cord, if you can see maybe back here is the power cord going to the controller. And then this one right here is really important, this is the thermocouple. And the thermocouple is what's sending temperature feedback to the controller so it understands how much power it's going to add to the blanket. Without this, I would assume it's probably just going to run full blast and light it on fire essentially because this thing's a really powerful heating blanket as you'll see how fast it heats up, which is great.
So just to make sure this is clear, I want to mention where this is. So essentially and how it's inserted. So it's about an inch and a half or so, maybe an inch and a half out into the stack here. And if you remember when we were setting that up, there's a piece of metal, there's the bending blanket, there's another piece of metal, then the thermocouple is right in between that bottom piece of metal and the wood. And then under that wood is the bottom piece of metal here. So hopefully that makes sense, but you want to make sure that's in there and it's making good contact. I've got a little clamp on here to sort of just make sure that stays in place while we're getting all these things adjusted and heated and everything. And that's pretty much it.
So I think we're about ready to get started in case you're new to this whole thing, the way it works is we're going to bring the waist down first. Of course, we're going to let it preheat a little bit beforehand. But when the time's right, we're going to bring that waist down and then we're going to use these blocks to attach and pull down the lower bout and the upper bout. And it really only takes a few minutes and with all that, oh, and if you don't want to flood your workbench, it's nice to put a little paper towel or something here to catch this because while I'm talking, the water's literally running out the end of this so, it should be fine still though.
So I think we are ready to start the process. There's a power switch on the back of this, which you turn on first and then we'll put on the front power switch. Looks like I already had it on. There we go. Okay, so there we go. Now the red temperature reading is the temperature of the actual heating blanket, or actually it's the temperature of where this is right here. The thermocouple, 300 is the temperature that we are targeting. We're targeting 300 degrees [on-screen text reads: Note: After more testing, 290 degrees Fahrenheit is my new preference]. So I forgot to get my water. I like to have my water bottle handy. Because I spray a little bit on here. I mean you're going to hear it anyway, but this is just a habit of how I used to gauge a temperature before, is just put a little water. When this starts to sizzle I know that I'm getting close to my temperature where I want to start working. Now while this is heating, I'm going to, it's getting hot now.
But I'm going to start the process here of adding just a little bit of pressure. I'm starting to bring this down [Tom starts to lower the waist clamping caul] before it's even hot and I'm paying attention to the alignment here, the marks that we made. So that's looking pretty good. And I also want to make sure that this is aligned. I want about an even amount of overhang or maybe make it flush with the edges on each side if you can so that you know this isn't in here skewed or something. Okay, so it's getting hot now. Now there's a concept I like to think of. It's called riding the wave where there's a moment when the wood relaxes and it's going to let you bend it, I'm looking for that. Now I can look at the temperature, but I'm going to let my senses sort of override what the temperature's telling me. And when I feel like it's ready, then I'm going to move and I'm going to try to stay in sync with the feedback that I'm getting from the actual wood.
So there's intuitive skill that comes over time from doing this. And I'm new to this machine, my old machine, everything's my old bending machine that I got in 1999 made over a hundred guitars on that one and that one's pretty automatic, but this one I'm still gaining my sense, my intuitive, getting in sync with it I guess and adjusting. [slight sizzling noise starts coming from the machine] So did you hear that? Did, maybe you heard how that the sizzle just kind of reached another level and I am feeling like it's about ready. Let's check this. So we've got a good amount of heat there. All right, so I'm going to start. There we go. I don't know if you could hear that, but just kind of hit a different level. And I'm going to very slowly start bringing this down.
[Tom slowly lowers the waist clamping caul on top of the machine]
And if you see these start to swell, you might want to pull these off here. Maybe I'll keep it on the top there. If you don't pull the clips off, sometimes it'll just pop out and shoot at you, which is okay if it does. All right, yeah, this is looking great. And see this doesn't even say that I'm up to 300 yet, but I can just tell from the way this is bending or the way this is sounding and feeling as I'm bringing this down. Sometimes it helps when I push on this a little, what I'm doing is I'm trying to make sure that I'm not feeling resistance from this getting caught in this track over here and just make sure that the resistance I'm feeling really is the resistance of the wood, which it is. So it's really smooth and nice. Okay, so the waste is down. Temperature still says it's low, but I think I'm going to go with it anyway because I think that's where it's going to be here.
So now I'm just going to get this in position. I'm going to start bringing this down [Tom adds the first clamp to the body bending form]. So make sure those are in right and oh, that's what it was. See that temperature jumping, that thermocouple just needed that. As it gets more to be a steep bend here, I got to slow down a little more [Tom works the clamp down the side of the body form]. That's good, so off comes these clamps [Tom removes the small folder clamps] and here we go. The squeakiness will go away after you use this a few times. So now we're going to switch to the front.
[Tom adds a clamp to the front of the body form]
There we go. I find it easiest to come here and pull rather than to try to push that. And these little rings are such a great addition too. Nice and easy. And I can also tell right now by the amount of water that I hear bubbling that I'm not overheating it. [Tom keeps working the clamp down the front of the body form] That was nice. That was a really nice bend right there. Really smooth. The temperature seemed good, everything held strong. I'm going to switch that off. And now we can let this cool and then we get to unwrap it and see how it worked.
The final result
So this has had some time to cool down now and it's just about ready for us to unclamp and take a look at it and see how it turned out. But I wanted to mention one quick thing. I almost refilmed that last part of the video that you just saw of me bending the side because obviously, and ironically I tried to make a point of how important a thermocouple was and obviously I put it in the wrong or I didn't have it in there right so it wasn't giving the right temperature feedback to the controller. I was going to delete it and do it again until I realized that it actually couldn't be more perfect because it illustrates a couple of things. Number one, the importance of the thermocouple. And you really do need to have that right. And I'm pretty sure what happened is I just inserted it a little too far and some of the outer covering was in between the wood and the slat instead of just the little metal part of the wire.
And all the other times I've done this, all the other sides I've bent, it was perfect every single time I tried to do an extra good job this time to make sure it was right. And of course I messed it up, but that's just how it goes. And the purpose of the video is to help people not to try to make it look like I'm perfect, because I'm not. So I'm keeping it for that reason. But the other interesting thing is that it sort of underscored the importance of developing your skills, your sensitivity, your intuitive kind of just trust in your gut. I knew that even though the temperature was wrong, I could tell by the sound of what was going on, I could tell by how it felt when I was cranking it down that the heat was there and it needed to be bent.
And if I didn't trust that and go with it, then I probably could have burnt the side, because I think there was more temperature here than was showing up there, if you know what I mean. And so it saved it. And so I think that's really important, an important point, and it's a big reason why one of our main focuses in the Luthier's Edge is in each different topic of guitar or each different area of guitar making, there's that element of learning to trust your intuition and developing and deepening your understanding of things so that if something goes wrong, a lot of times your senses will kind of kick in and help you navigate through it or might help you avoid something or might just help you build a better guitar. So anyway, I just thought that was interesting that illustrated that. And in side bending, it's really important and we talk about that a lot in the new side bending course, which is going to be released in the Luthier's Edge soon.
But anyway, so we're keeping the other one, even though I got that a little bit wrong, we're keeping that other video clip because you already saw it, so obviously I did. But yeah, so I don't know, it was interesting how that turned out. Anyway, let's go ahead and unclamp this and see how the side turned out too. And I think it's going to be good. So I'm going to go ahead and pull this out and yeah, I'm pretty sure I just had the outer casing of that wire in there, which was kind of keeping the metal from making contact. So just keep that in mind when you're setting this up. And by the way, I highly recommend for this reason and just to get a feel for everything, do some test bending before you... On scrap wood, do some bend a bunch of scrap wood and just kind of get dialed in before you get going on your actual wood so you can get a feel for everything.
So anyway, all right, so let's go ahead and start removing this [Tom starts to remove the clamp from the bottom of the body form]. I'm going to carefully, this is a really big guitar. This is the jumbo model that they have. So it's a 17-inch guitar and these springs are pretty tight here, so I'm being very careful. And you can see I'm keeping my left hand pushed down because what you don't want to do is start to push this up and let the bending iron or the slat could sort of buckle up like that, which could put a crease in it and ruin the slat, but potentially it could take the side with it a little bit and come up and crack or something. So I'm pretty careful to keep this down and bring this up like this.
And then the other thing I noticed is it really wants to, if I let this go, it would take my fingers and smash them into this. So when I'm getting close up here, I'm sort of shifting to keeping my fingers more on the outside and then slowly and carefully letting that rest into place there. So I think that's a nice technique for that. I'm going to do the same thing over here on the other side. I'm just going to keep my hand pressed on here [Tom slowly removes the clamp from the other side of the body form]. And again, I don't want to smash my fingers. Same technique there. Got off. Okay, that's good. And I'm going to unplug. All right. And then here we go [Tom starts to raise the waist caul by turning the handle on top of the machine]. So smooth, all right. With this nice open front here. It makes it really easy to pull this out [Tom pulls the side bending stack out of the machine through the front]. I love that. Man, we got a nice alignment there on that waist [Tom removes the foil from the wood]. Moment of truth. Every time it's like Christmas morning.
Yeah, looks great. So there we have it. Our beautiful side. Looks really nice and you can see pretty good bend right there. So the mahogany, this is mahogany and the different woods will do different things. So Mahogany springs back a little, so we've got a little spring back here, but very, very minor. You could just touch that on a hot bending iron like that and we'll just settle right in. But look at how perfect and beautiful these upper and lower bout are absolutely gorgeous. So to me this is a really good job bending. Everything looks really nice and flat and nothing's burnt. And the lines you see on here are just watermarks, which will sand out. Yeah, beautiful. Okay, I'd call that a successful bend.
Wrapping up
Well, that pretty much wraps it up for this video. I really hope you enjoyed it and found it helpful. I'll put a link to the Side Bender in the description below in case you want to go check it out. And if you're interested in learning more about guitar side bending, maybe developing those intuitive skills that we talked about earlier in this video, then stay tuned because I have a brand new course on guitar side bending coming out pretty soon. So if you want to be notified, make sure you're subscribed to this channel. I'll also put a link to the Art Of Lutherie newsletter down below in case you want to join that. It's totally free. And you'll just get weekly emails from me where I share tips, tricks and tools and techniques and things like that to help you build better guitars. All right, thanks again for watching and I look forward to seeing you in the next video.


