How to measure your guitar's action
Issue 331 May 16, 2019
Looking to dial in your setup? Blake demonstrates the four key measurements necessary to get your guitar's action perfect.
- What does "setup" mean to a guitar player?
- Which rulers don't work for setup measurments, and which do?
- When to use fractions of an inch and when to use thousandths.
- Setting your bridge saddle to play well with your fretboard.
Here's what's covered in the video:
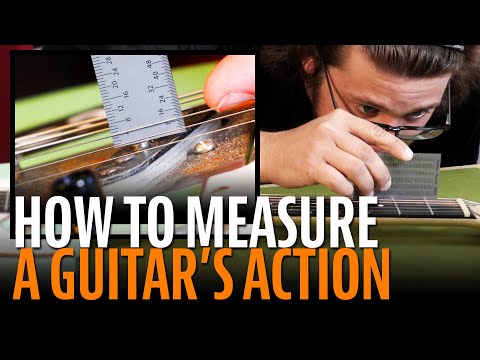
How to measure your guitar’s action using StewMac measurement tools
Today we're only talking about how to measure your guitar setup. With setup, we're talking about action or how high the strings are over the frets, the straightness of the neck, and whether your saddles follow the radius of your fingerboard. Another great thing is to check your pickup heights, too. The measurements we're going to be doing are within 1/8 of an inch so we're going to need a really accurate ruler.
Choosing the right tools
We’ve got a couple rulers here that just aren't going to cut it. These are the kind of rulers you would use in school. The measurement increments don't start flush at the end. There's a little bit of a gap right here before you start measuring. So, you can't get flush to the object to measure height or length and have accurate measurements. Also, you don't want to use a regular tape measure. The measurements are way too coarse for what we're trying to do and your hook is going to get in the way. What we like to use is the 6” StewMac Shop Ruler. This ruler’s measurement increments start flush with the edge and the measurement increments are really small and really accurate. On this side, we measure in 16ths of an inch. This side, we measure 32nds and 64ths. For example, we're going to measure our pull pieces on our treble pickup. Right here, we're getting about 9/64ths and that's pretty accurate. So, that's why we want to use this 6” Shop Ruler, or something similar. Down here at the first fret, we measure within thousands of an inch. So, the way we like to measure these is with the StewMac String Action Gauge. We have a whole bunch of these hanging around the shop because of all the many different ways you can measure and how accurate they are. Right here, on this bottom line, we have 10 to 140 thousands. We're going to use this to measure our string height at the first fret. On our low E string, from the top of the fret to the bottom of the strings, we're getting just about ten thousandths of an inch and just about the same thing on our high E string. Like I said earlier, setup measurements get really small.
Taking four key measurements
Now that we know what tools we're going to be using, we're going to get into this guitar and start measuring its setup. We’re going to be taking four measurements from this guitar: straightness of the neck, your action at the 12th fret, the bridge saddle radius, and your action at the first fret. We're going to start out with the next straightness.
Measuring straightness of the neck
There are three different ways your neck can be set. It can be set in backbow, which you don't want because you'll have a lot of fret buzz. You can have a slight upbow, and that's called relief, or you can have just a perfectly straight neck. Light touch players like me really like dead straight necks but, if you have a heavier hit, you might like a little upbow so your guitar is a little bit stiffer and there's a lot more room for your strings to vibrate. How we're going to measure this guitar’s next straightness without a straight edge is to put one finger right here on the first fret, and one finger right here on the 15th fret (or whatever fret meets the body). You're going to be looking right around the seventh to ninth fret for a gap in between your fret and the bottom of your string. If there's a gap there, that's the amount of relief in your neck. Now this guitar has a slight gap. I'm going for a dead straight neck because that's the way I like to play. Let’s turn the truss rod clockwise, just slightly, in order to take the gap out of there. That should be enough. One thing I'd like to mention is, whenever you're making a neck adjustment with your truss rod, you won't hold the guitar and play position, especially when you're checking it because, if it's lying flat on its back, gravity is pulling the strings toward the fret and it's going to give you an off measurement.
Measuring action at the 12th fret
The second measurement we’re taking off this guitar is right here at the 12th fret. We're going to set our outside E strings before we start messing with the radius for our saddles. This is very important. So, we take our String Action Gauge - - I'm going to get down, level with the guitar, and look at our low E string. From the top of the fret to the bottom the string is measuring about 40 thousandths and just about the same thing on our high E string. Now, the cool thing about the String Action Gauge is that, if I want to know what that is in fractions, I can flip over here on the back because we have a chart that converts it. 40 thousandths from my low E string would be 3/64ths, just a little bit more than 1/32nd. If you want to change the height of your two outside strings, you can come to your saddles with the correct Alan key and you can raise or lower them to wherever you want. This is up to the player. I'm going to leave mine because this is really where I like it. It's very low and this is as low as I would ever take it on anybody else's guitar.
Measuring bridge saddle radius
Now that you have your two outside strings set, you lower your bridge saddles to match the height of your two outside strings. Understring Radius Gauges look a little something like this and we use these every time we set up a guitar in the shop. This is not something most players would have but, if I was doing all my own guitar work, this is something that I would have. We're going to start by measuring our guitar fingerboard radius. We're going to be doing that with these cool radius gauges that StewMac sells that have notches cut out for the strings. That way you don't have to take your strings off. Put it right here on our 12th fret. You're looking to see if you can see light underneath. And if you see any light gaps, that means it's not the right radius. With the right radius, there should be no light coming through. This is looking to be about a 14-inch radius. So, then I'm going to take the #14 on these understring radius gauges and put them underneath the strings. You’re going to bump it right up against your saddles - maybe come off just a little bit. You're going to pull up with just a little bit of tension - just enough to touch your two outside E strings. Then, pluck your two outside E’s and you can hear, they’re buzzing. That's what you want. Now you're going to hit your other ones. My B string doesn't touch - doesn't buzz. That means it needs to come down in height. My G string needs to come down in height. My A string is buzzing up against it so it's OK. So, I need to adjust my D string, my G and my B string. They all need to come down. There you go.
Measuring the action at the first fret
So, the last measurement we're going to be taking is the height of the string above the first fret. You don't have a whole lot of control over this unless you get into filing nut slots. That can be some risky business. The way that I learned to determine the right height is, I would take my first finger and I would press down on the third fret of whichever string I’m looking at. Then, I would press down just behind the first fret. You can see the travel in the string down onto the fret. That small gap is your string height over top or, how much space you have to play with inside your nut slot. All these are really good. I'm going to leave them right there. I’m not going to do any filing. All it takes is one swipe. You've ruined a nut and it’s a long time and a headache to fix it. Good clearances from your low base E string to the high treble E string measure approximately 25 thousandths, 22 thousandths, 20 thousandths, 16 thousandths, 14 thousandths and 11 thousandths. That's a good general measurement for what we like to do on customer guitars.
Making your own string height feeler gauges
Another trick that Dan taught me, if you don't want to trust your eyes and want to be a little bit more accurate, take these old strings and use them as feeler gauges. If you still have your string packages, they have the diameter on them that should let you know the size. Then, take some heat shrink wrap and put it on them to color code them. Now, we know which gauges are which. Then, run your new feeler gauge up underneath your string into that gap. That way you know how much clearance you're playing with and you can file right down to it. Just a really easy $5 do-it-yourself way to make feeler gauges. If you don't like the measurements you're seeing at your first fret, it might be time to take your guitar to your local repair person like me. But, if you think you're ready to get deeper into your own guitar work, StewMac has all the tools and information you need to get started. If you like what you saw today, you should really think about subscribing to our YouTube channel. We have a ton of other videos on how to do lots of different things with guitars. I challenge you to start trying some stuff on your own guitars because, only you can make your guitars play the way that you really want them to. And, it's a lifelong skill to have.


