Fret Buzz can be caused by the bridge!

Issue 341 January 09, 2020
Sometimes fret buzz is caused by the bridge, not the frets. When a bridge collapses, the middle strings get lower so they start buzzing on the frets. Dan Erlewine and Blake repair a guitar that had a tailpiece cranked down to the body, and the center of the original Tune-O-Matic bridge was sunken. Learn how to replace a Tune-O-Matic bridge, properly slot the saddles, set the radius at the saddles, then tune and intonate.
- Most players aren’t aware of this problem, but it’s not uncommon.
- Check to see if your Tune-O-Matic is still straight.
- Lowering the tailpiece can add to this problem.
- Filing the saddle slots might help, but only short-term.
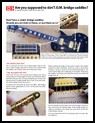
Are you supposed to slot T.O.M. bridge saddles?
Download this PDF to support StewMac Trade Secrets Video #341.
Video Transcription
[on-screen text reads: SteMac tools + ideas for guitarmaking. Fret Buzz can Be Caused by the Bridge]
[Dan is playing an electric guitar to find where the buzz is at]
Dan Erlewine: This guitar is buzzing. That's why it's in the shop. But the buzz isn't with the frets, the problem is with the bridge. This is something that happens a lot, but you don't hear a lot about it, I don't think. This is the ABR-1 Tune-O-Matic Bridge, the original bridge since 1955. A lot of times players will crank that tail piece down to the body, that'll compress the center of the bridge and it gets sunken.
Blake: I'm sure heavier strings probably won't help either, right?
Dan Erlewine: Yeah. If somebody had heavy strings, that would happen faster. On a Tune-O-Matic bridge, the top of the bridge itself should be flat. The strings don't sit in a flat plane though. They're on a radius to match the radius of the fret board. The bridge saddles create the string radius because the two middle saddles are the highest and the others get progressively lower as they go to the outside. When the bridge collapses, the middle strings get lower than the other ones. So they start buzzing on the frets. That's really fairly simple to fix. Blake's going to take you through it.
Check to see if your Tune-O-Matic bridge is straight
Blake: This bridge is kind of collapsed. It's sunken down in the middle. The top of the bridge should be as straight as the Straightedge, but you can see where it dips down at the center. One way you could fix this is to put new, higher saddles onto the bridge to bring the strings back up. You would then notch these new saddles, your D and G string being the shallowest, your A and B string being a little bit deeper. And youre two outside Es being the deepest.
It's simpler just to replace the whole bridge. When you put new saddles on it, the bridge can keep collapsing and eventually it won't work. Or if the bridge is already really collapsed, putting new saddles on it may not even fix the problem. If it's a vintage bridge that you want to keep for resale, just keep it stored in your case. There are a lot of collectors who are really picky about having the original hardware, so it's not a bad idea to hold onto those. There's a lot of variations of the Tune-O-Matic bridge and StewMac sells almost all of them. The easiest one to use for this fix would be the pre-slotted one that StewMac sells. All the slots are already cut, everything's already done for you. But I like to decide my own string spacing, so we're going to use the different one. So the one that we're going to be using is the original ABR-1 Tune-0-Matic style Bridge.
Dan Erlewine: If you want to know more about your Tune-O-Matic bridge, Eric Coleman wrote a good guide that answers questions about string spacing and how it relates to your pickup pole pieces. It's called, "Are you supposed to slot your Tune-o-matic bridge saddles?" And it speaks about the relationship between the saddles, the strings and the spacing of the pole piece. You can download this for free, it's a PDF. Click on the link in this video's description. And remember when you subscribe to our YouTube channel, that helps keep these Tune-O-Matic videos coming to you.
Slot the saddles and set the radius at the saddles
Blake: The catch with using this bridge is that the saddles are not pre-slotted. So what we have to do is properly slot these guys. So let's go ahead and get started. We'll get the bridge on there. Notice how it's not slotted.
We'll put the old strings back on. We don't need to get them all the way to full tension, just under some to make it easier to notch them. I got all these strings where I want them. I'm going to go ahead and notch each individual one. I'm using a StewMac fret hammer [on-screen text reads: Deadblow Fretting Hammer - stewmac.com]. This makes a mark on top of the saddles to show where the slot needs to be. This of course will wreck your strings, that's why I'm using the old strings. All right, I think that's enough. I can see where it is. Cool. And then we'll come through with some StewMac files [on-screen text reads: Gauged Nut Slotting Files - stewmac.com], make these guys a little bit deeper. So the files I'm going to be using today, they're regular StewMac nut slotting files. They come in a lot of different sizes to match the strings, but to cut these saddle slots, you don't need six different files.
I'm just using three. The guitar strings I'm using are set of the GHS Boomer Lights, sizes 10 to 46. I can cover all six sizes using these three files, the 13 for my high E and A string [on-screen text reads: .013"], the 24 for my G and D string [on-screen text reads: .024"], and the 35 for my low E and B string [on-screen text reads: .035"]. If we're notching these things at a radius, the radius of this fingerboard is a 10. I've already checked it with my Notched Radius Gauge. Throughout this process, I'm going to keep checking the depth of my notches with this 10 inch Understring Radius Gauge to make sure I'm matching the fingerboard radius. This is a 10 inch radius. It matches the 10 inch radius of the fingerboard. I'm going to start with my 35 on the low E and make sure you don't hit the tailpiece. Holding the file straight creates an exact slot size, but rolling it slightly from side to side, makes the slot a bit bigger.
All right, I'm going to go ahead and undo the high E. Do my outside Es first. That way they're the lowest and I know what to take the radius down to for the rest of them. I'm going to be using the 13. It's a little bit bigger than the gauge of the string so it should fit in quite nicely. I'm back filing all of these slots, just slightly kind of like I'm making a nut. The back filing moves the point in which the string breaks forward, and that will reduce the chance that your string will start buzzing.
All right, let's test these out. I'm going to go ahead and tune the pitch. Take our understring radius gauge and see what we're looking at. To test the depth of these notches, I'm plucking the outside Es to see if they're buzzing against the radius gauge. Cool. We're hitting our two outside E strings. Now, if they didn't buzz that'd mean we'd have to go back and notch the saddles a little bit deeper, but we're good here. I'm hearing the buzz so we can move on. We'll do the A and B string next then of course, the D and G. Just a little bit more, so those strings don't have any chance of slipping. All right, let's test these out. Once again, we're listening for the buzz.
Install new strings, tune and intonate
And we're hitting on all of them. I'm calling that good. So now that we have the radius set at the saddles, we need to go ahead and change those strings. We're going to go ahead and tune this guitar up to pitch, and then we're going to intonate. Intonating the guitar, make sure it's perfect, it's not sharp or flat. And we do that by moving the saddles on the new bridge, we're going to be using StewMac's little screwdriver kit here [on-screen text reads: Guitar Tech Screwdriver Set - stewmac.com]. We have a great little attachment, it's got a flat head inside of a circular cylinder. It fits perfectly around these Tune-O-Matic style screws to easily help you find your perfect intonation.
Dan Erlewine: You happy?
Blake: I'm happy with it. It's all notched up.
Dan Erlewine: Play something that's not chords. Play down in here, that's where I was buzzing. Cool. It's fixed.
Blake: Yep. No more buzz.


