Are you supposed to slot Tune-o-matic bridge saddles?
Are you supposed to put slots in these, or use them as-is? This is a question we hear a lot.
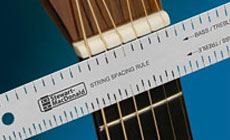
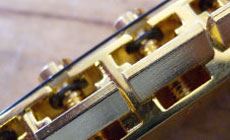
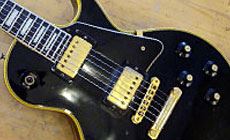
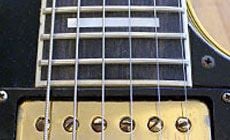
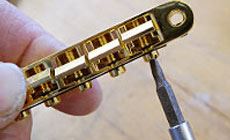
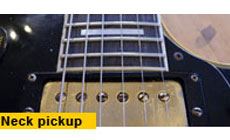
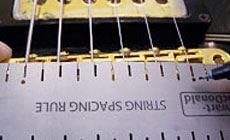
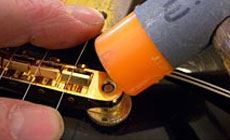
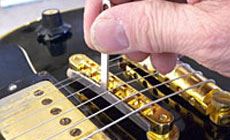
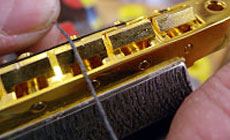
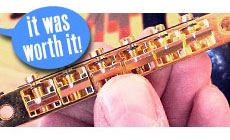
A guitar player (not a repairman) orders a new tune-o-matic bridge, and when it arrives he’s surprised that the saddles aren’t slotted. That’s when the phone rings... Q: “Why do I need saddle slots?” A: Those slots do you a lot of good: they maintain your string spacing, they set string height to match your fretboard radius, and they help you stay in tune by keeping your strings from sliding around. Q: “How do I do it?” A: It’s easy, if you pay attention to the details. Here’s how to do it... Here’s a beauty of a 1971 Gibson Les Paul Custom. It’s in the shop for a new bridge. Its original ABR-1 was replaced years ago with a Nashville model, but that replacement bridge was slotted incorrectly: The misplaced saddle slots meant the strings were falling off the fretboard on the treble side. Not good! I’m going to set this guitar up with a new ABR-1 style bridge, which is more appropriate to a 1971 Les Paul than the Nashville style bridge. Before putting the bridge on the guitar, I rough-in the saddle positions so their intonation points are close to where they belong. To do this, just look at any intonated bridge for reference (the bridge you’re replacing, for example). Positioning the saddles now leaves just a little fine-tuning to do after the bridge goes on. Put the bridge on and position the low and high E strings so they travel over the outside edges of the bridge pickup polepieces, and they're also where you want them on the fretboard (photos, below). Once you determine the E-to-E spacing, mark it on your ruler for reference. Tapping the string itself onto the saddle is a quick way to mark the locations of the two unwound strings (not the wound strings). Hold the string in place while you lightly tap it with a fretting hammer, leaving a tiny groove in the saddle. Using that groove as a guide, gently file a slot with an appropriately-sized nut file — just deep enough to hold the string in place. Choose your file size as you would when slotting a nut: use the same gauge as the string, or a few thousandths larger. Double-check your string spacing with the string spacing rule (things might have shifted with the hammer taps), and move on to the B string. Hammering doesn’t work too well on the wound strings, so we use another method for these. Quadruple-check your string spacing to make sure everything’s still in proper alignment, then use an X-Acto knife to lightly scribe marks on each side of the string. File a slot between the scribed lines, constantly checking that you’re keeping proper string placement. Cut slots this way for all the wound strings. With the correct spacing established, now it’s time to dial the strings to the proper radii (the middle strings are slightly higher to follow the radius curve of the fingerboard). Most tune-o-matic bridges have a built in 12” radius but this one has more pronounced 10” radius — that means a bit of extra filing will be necessary. File the slot depths so that half of the wound strings sit above the top of the saddles, and the tops of the unwound strings sit just below the saddle tops. As a last step, I clean up the slots with abrasive cord to remove any burrs or scratches left over from my filing. This new bridge has slotted saddles, with correct string spacing and proper slot depths. It’s ready to go on the guitar. Accurate spacing for just about any stringed instrument, instantly. Compensates for string thickness from treble to bass side, giving you true progressive slot spacing.New tune-o-matic bridge saddles:
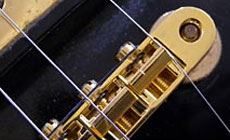
Yep, you gotta slot ’em


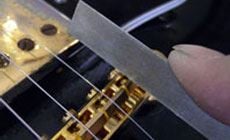
A hammer tap starts the slot for the unwound strings
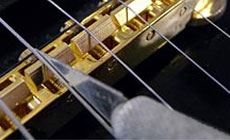
An X-Acto knife scribes the slot locations for the wound strings
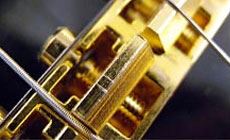
Time to set the slot depths
Done
String Spacing Rule