Build your own custom pickups
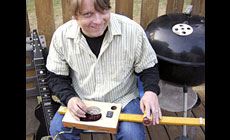
Where are you gonna find a pickup for a 3-string cigar box?!?
Or for a 7-string lap steel, for that matter. Pickups like these don’t grow on eBay! I had to scratch-build ‘em. Here’s how to build yourself a custom pickup...
A P-90 pickup for a 3-string? I guess that’d be a P-45.
At last year’s Cigar Box Guitar Festival, I gave a workshop on pickup winding. Most of those folks play with only three strings, so I hit the drawing board to design a shrimpy pickup with a big sound. A Gibson P-90 would have the tone I wanted, so I started with that design and cut it in half.
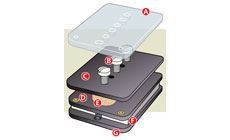
Making the P-45 was easy and fun. I drew all the parts on graph paper, then created the pieces to match my drawing. Pretty soon I had a “P-45 Kit” ready for assembly. Here are the parts:
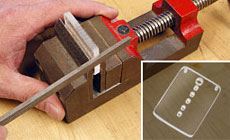
A. A piece of clear acrylic template material, shaped like the flatwork, is the first thing I made. It’s a sturdy reference for shaping and drilling all the flatwork.
B. Three fillister head polepiece screws.
C. A piece of .062" flatwork material matches the template (1-9/16" x 1-1/8").
D. The middle piece of flatwork is .094", and this is where I put the brass eyelets for anchoring the ends of the coil wire.
E. The bobbin at the center of the coil wire is a piece of scrap wood with the ends rounded (1-1/8" x 5/16" x 1/4" thick).
F. The two magnets are an Alnico 5 magnet cut in half.
G. The bottom piece is .094" flatwork material. The hole on the end is for the shielded connecting wire.
I also used: conductive copper tape, AWG 42 coil wire, paper pickup tape, vintage-style shielded wire, brass eyelets and an eyelet setter.
I used a coping saw to cut the template shape, then followed up with our nut and saddle shaping files to get it just right. (All the flatwork will be patterned after this template, so it establishes the shape of the pickup.) I drilled guides for all the holes needed in the various pieces of flatwork.
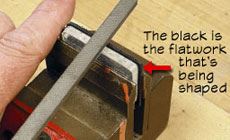
I filed each flatwork piece to match the template. Double-stick tape held the work to the template. I cleaned up the edges with a rectangular scraper blade, then drilled the necessary holes.
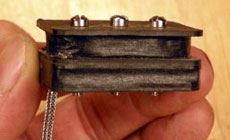
You’ll need to cut the Alnico bar magnet in half. Use a Dremel cut-off wheel or a hacksaw for this. Cutting might weaken the magnet slightly, but that could be a good thing: a weaker magnet may give a sweeter sound. You can always use our guitar repair magnets to re-charge the cut magnets to full strength if necessary.

It's assembly time
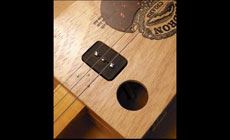
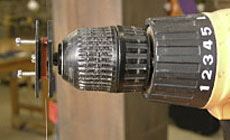
I put the screws through the top .062" flatwork and the wooden bobbin, then through one of the thicker .094" flatwork pieces. Together these parts completed the bobbin, making it ready for coil winding (shown upside down here).
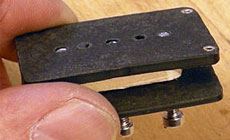
The 3/32” holes I drilled for the polepiece screws self-tapped as I tightened the screws into the flatwork. I tightened them only until they were flush with the bottom.
To make sure the hair-thin coil wire doesn't get into a crack between the flatwork and the wooden bobbin, I ran a bead of #20 super glue all around where the wood meets flatwork. This has the added benefit of keeping the flatwork from warping.
Winding the coil
I used a Schatten pickup winder, loading on as much wire as would fit (between 8,000 and 10,000 winds).
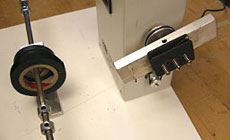
The Schatten winder makes winding easy, accurate, and repeatable, but if you only plan on winding a couple of pickups, you can get by with a makeshift winder like a hand drill. With homemade winders it’s easy to break that ultra-thin wire, so be patient!
7-string lap steel pickup
For this lap steel, I built a 7-string variation of a Fender Jazzmaster pickup. I used the same approach, drawing out my dimensions and shaping all the flatwork before assembling. I used information from our free info sheet #5967 (instructions for our single coil pickup kits).
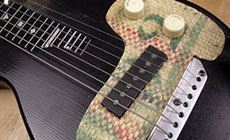
Both of these pickups sound great, like the famous pickups that inspired them. Building them didn’t take long, so in no time at all these two instruments were ready to make some real noise!