Radius Block Basics
An explanation of the different uses of a radiused sanding block.
IN THIS ARTICLE
| • Getting started • Radius a fretboard • Leveling a fretboard | • Fret installation • Leveling frets • Clean = Professional |
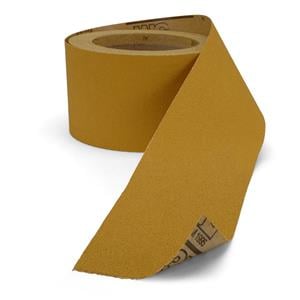
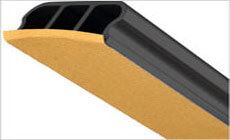
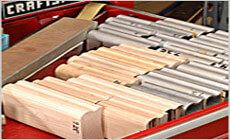
Radius blocks can be made of wood or metal and come in a variety of lengths and radii. We asked StewMac guitar tech and Trade Secrets contributor, Erick Coleman, for some some basic guidelines and tips when using the radius blocks. Here's what Erick had to say: In our shops, we prefer to use self-adhesive 3M Stikit sandpapers with the radius-sanding blocks. They're the most convenient because, aside from being self-stick, they are already sized to fit our blocks. You can also cut regular sandpaper to fit, securing it to the blocks using double-stick tape. Cut your sandpaper just a little longer than the block, allowing it to overhang the ends. Crease the edges of the paper upward to cover the edge of the block. This keeps the paper from curling under while sanding. When using the Aluminum Radius-sanding Beam, this simple step keeps the metal edge from gouging a fret. Use straight, uniform strokes lengthwise on the fretboard. It's imperative that you do not twist the blocks as you sand. Check your progress often with a straightedge. Start with a roughed in neck with an installed fretboard that has been slotted and inlayed. Use the longest radius block you can. The 8" long wooden blocks work great, but I prefer the 18" long aluminum beam for my work. The extra length makes creating a constant radius a breeze. Clamp the sanding beam face up in your repair vise then apply 80-120 grit Stikit paper to the surface. With the fretboard side facing down, grip the neck by the peghead and heel
and begin sanding the radius into the fretboard. Be sure to use even back
and forth strokes until the fretboard is consistent down its entire length. Once the radius is true you can switch to finer-grit papers until you achieve the desired appearance. For uneven fretboards, highlight any problem areas on the surface with a pencil. Start with 80 to 120-grit paper. If there are high spots or large areas of pearl inlay to be leveled, focus primarily on those areas that need attention. Switch to finer grit papers when the problem areas are leveled, then sand the whole board lengthwise to smooth things out. The 4" blocks are perfect for spot leveling problem areas. The 8" and 18" blocks work well for going over the entire length of the fretboard. For heavily pearl-inlaid fretboards such as Les Paul Customs with pearl blocks: Trim the sandpaper narrow. Run it down the center of the pearl blocks, so that it sands to the edges of the pearl, but not on the fretboard-this eliminates any possibility of prematurely sanding the wood around the pearl. Then follow up with the appropraite radius block over the whole board. If heavy sanding isn't needed, start with a higher grit, like 220. No sense adding hard-to-remove 80-grit scratches if it isn't necessary! After gluing in new frets, use the sanding blocks as clamping cauls to hold the frets in place while the glue dries. Radiused aluminum beams and wooden blocks are easy to cut to custom lengths for perfectly sized cauls. To avoid imprinting the fret into the bottom of the wooden blocks, stick a flexible piece of .030" pickguard plastic to the surface for protection. To level the frets after a refret job, or during a normal fret dressing, use the 8" or 18" blocks. Use the 4" length for spot leveling high frets. Start with 220-320 grit depending on how much material needs to be removed. Finish with standard 400-grit sandpaper, using double-stick tape to hold it to the block. Compound-radiusing, or "tapering" a fretboard, is a common refretting task. It's a gradual flattening of the radius up the neck, making string bending easier. A typical compound radius starts at 10" and tapers to 16" or 20" at the highest fret. Form the compound radius in sections by switching block radii as you work up the neck. Blend radii together using the last block in the series, rolling it side to side as you sand, or use the smaller radii block in a similar manner. Many blocks will be used to get a gradual transition, done in sections, from nut to bridge. Radius-sanding blocks have a number of uses in a luthier's shop:

Getting started
Sanding a radius into a blank fretboard

Leveling fretboards
Tech tip
Fret installation
Leveling frets
Compound radius
For a clean, professional job