Finishing a Blue Guitar, Sealer and scuff-sand
Part 4: Dan Erlewine shows how to build sealer coats and drop-fill any imperfections that may occur for this PRS-style finish using aerosol lacquer.
Part 4: Sealer and Scuff-sand
I sprayed 4 coats of sanding sealer outdoors (it was winter). Spray two coats one day and two the next (with 4 hours drying in between). I needed only one can of sanding sealer for the four coats.
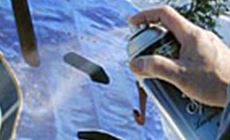
Spraying the cutaways and upper shoulder is tricky — move smoothly and don't stop on one area because it's easy to get runs and "sags" in these areas.
After each coat I used a sanding block and 320-grit sandpaper to barely kiss any fuzz or lint that might have appeared. I did NOT "sand" however, until after the final coat of sealer.
Along the way I got several "spits" from the spray can because my index finger was hanging too far over the spray tip while I sprayed — this can cause the spray pattern to fluctuate and spit. Just leave these spits alone to dry and spray another coat right over them as if they weren't there.

StewMac Tip!
Before spraying, we recommend placing your spray cans in a container of hot tap water. The increase in temperature helps the lacquer flow better and reduces unwanted spitting. When an aerosol can starts to feel cold during use, we recommend switching to a warmed can as chilled cans are more likely to spit. Place the chilled can back in the hot water so it can be warmed back up and used again! Especially when you are spraying in winter, Dan!
I also got a run or two — leave these alone too and sand them out when you level sand the final sealer coat.

If you soak the spray tip in lacquer thinner between coats it will keep it from clogging and it is less likely to spit.
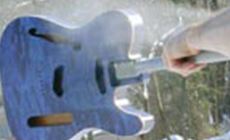
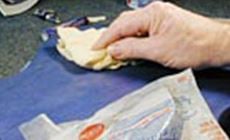
I dinged the edge on my lamp and dented it.
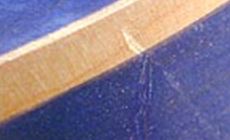
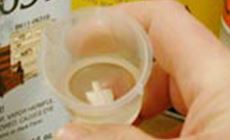
With a brush I "drop-filled" the ding with some clear lacquer which I sprayed into a plastic cup. I use clear lacquer instead of sanding sealer for the drop fills because sanding sealer has a cloudiness if used heavily (as in a drop-fill).
The drop-fill gave the dent some "build," and caught it up to the surrounding finish.
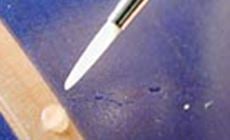
I drop-filled a small fissure that appeared on the back too — this is common with alder, and not serious. This took several applications.

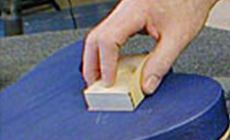
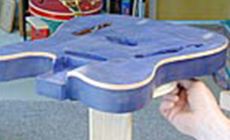
When the last coat of sealer had dried overnight, I block-sanded it level with 400-grit Fre-Cut paper. I would use 320-grit if I had sprayed a rougher coat. I never sanded in between the 4 coats of sealer because they soak in too much and I might remove blue by mistake. After the 4th coat, I block-sanded ("scuff-sanding") with 400-grit gold Fre-Cut paper until the sealer coat was level and chalky-looking. Check often to be SURE that the sandpaper has no blue on it. If it does, stop and spray another coat of sealer before continuing. DO NOT sand on any edges—let the finish build up extra on all edges and you won't sand-through them later.
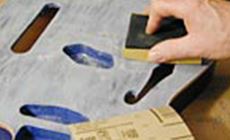
I sanded out any runs at this stage too — they tend to self-level as you spray successive coats and are quite easy to block-sand if you wait until the end

Beware of the sandpaper "loading" — building up hard clumps that will scratch the finish. Use a brush to keep the paper clean as you sand (or wipe the sandpaper on a piece of carpet).

For spraying one level surface, and the sides, I made a "lazy Susan" from scrap wood
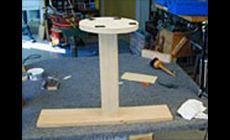
The table rests on a 1" dowel

Adhesive-backed rubber pads give the table some grip
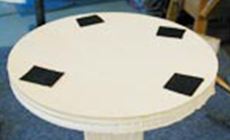
You don't "need" a lazy-Susan to spray, but it's a nice touch.
I used a tack-cloth to wipe off lint in between coats and to remove any dust left after sanding.
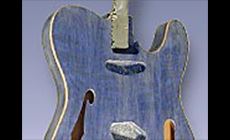
The body is scuff-sanded, powdery looking, and has very few "shiny spots" which indicate low areas in the sealer. Some amount of shiny spots are fine.
In the Part 5, we will spray many coats of clear gloss lacquer.
More In This Series
| Introduction | Finishing a Blue Guitar |
| Part One | Wood preparation |
| Part Two | Staining the guitar |
| Part Three | PRS-style binding |
| Part Four | Sealer & scuff sand |
| Part Five | Topcoats & touchup |
| Part Six | Final sanding & rubbing out |

