
AEROSOL GUITAR FINISHING COURSE | PART 2
The Best Way to Spray: Spraying Color Coats and Clear Coats


See Previous Episode | See Next Episode
Choosing Your Color
“This is the reward for all the prep work that we did earlier.”
We're well on our way to getting an incredible finish on this strat style guitar. In the last episode, we went over the critically important steps of properly preparing your guitar for finish. Including sanding, pore filling, and vinyl sealing.
If you haven’t watched or read through those steps yet, there’s lots of important information and techniques that we’re going to be utilizing today, click here to view Part 1.
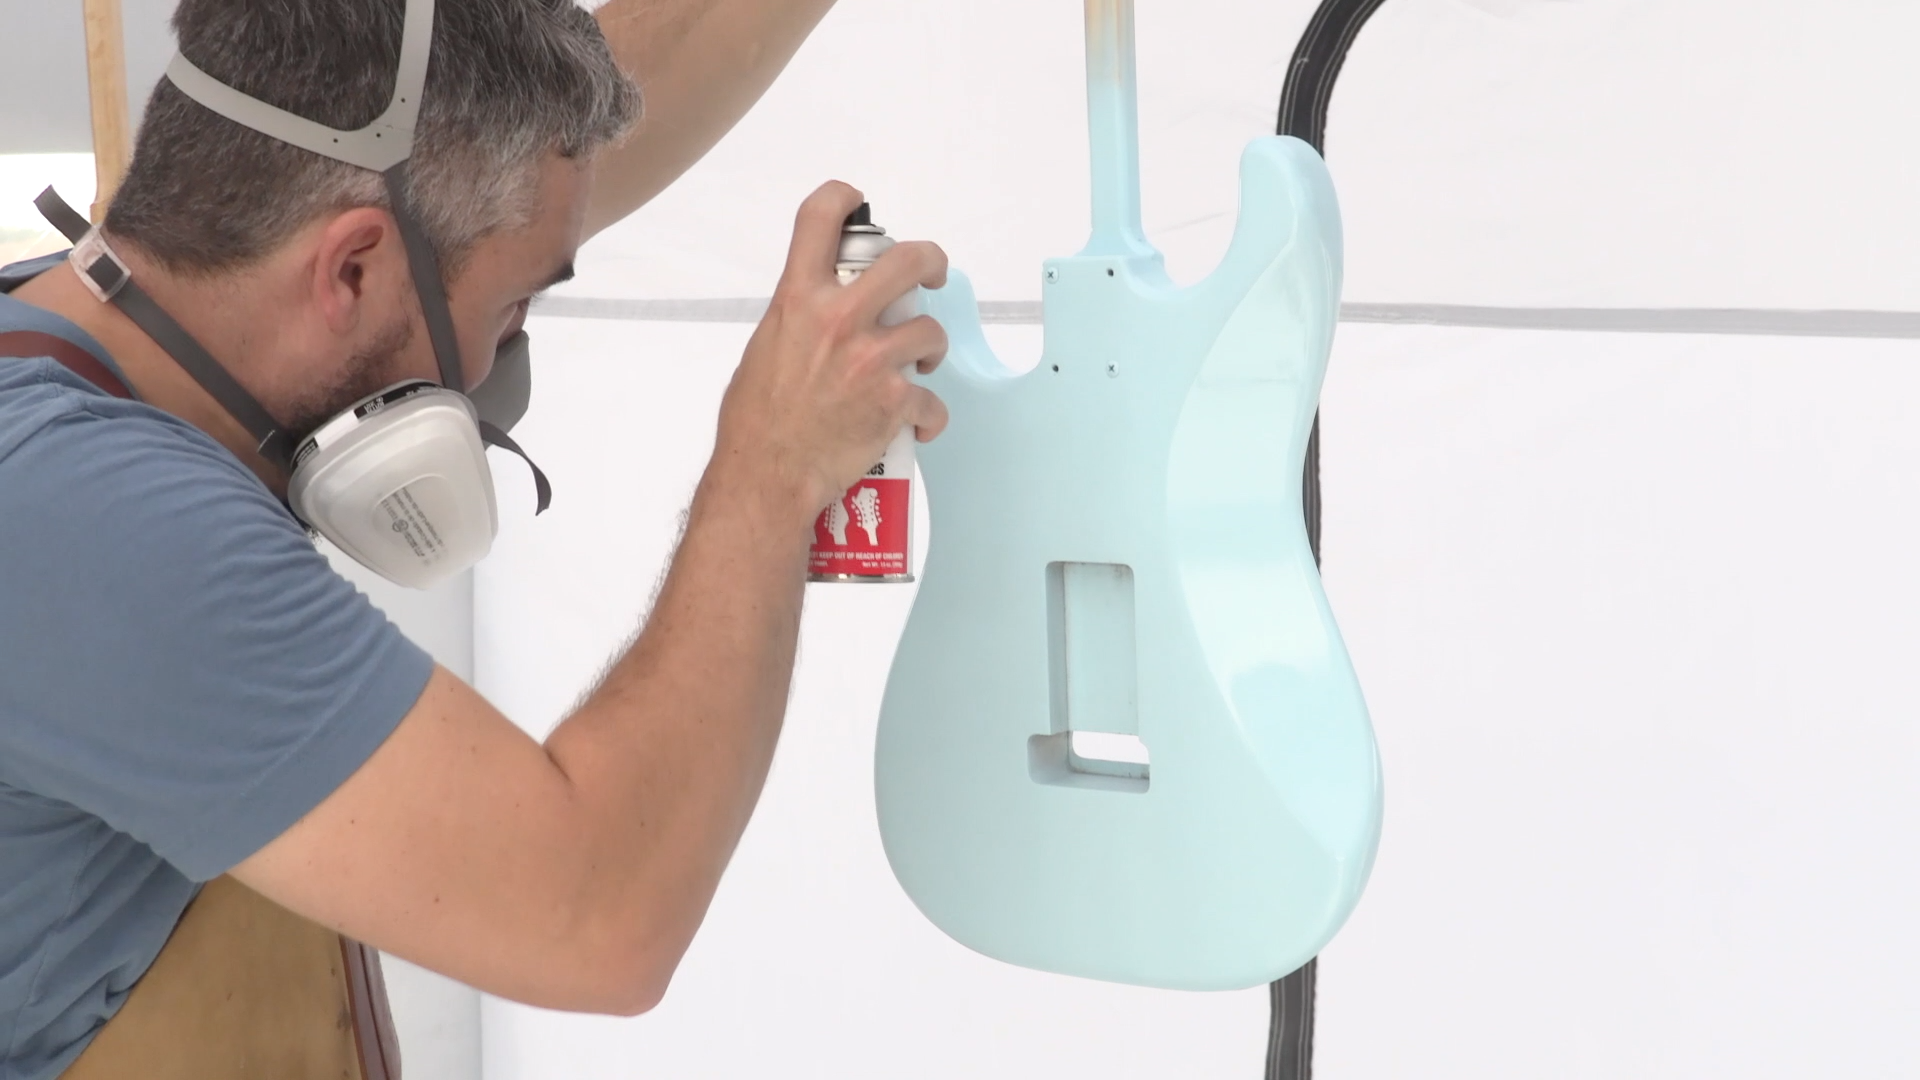
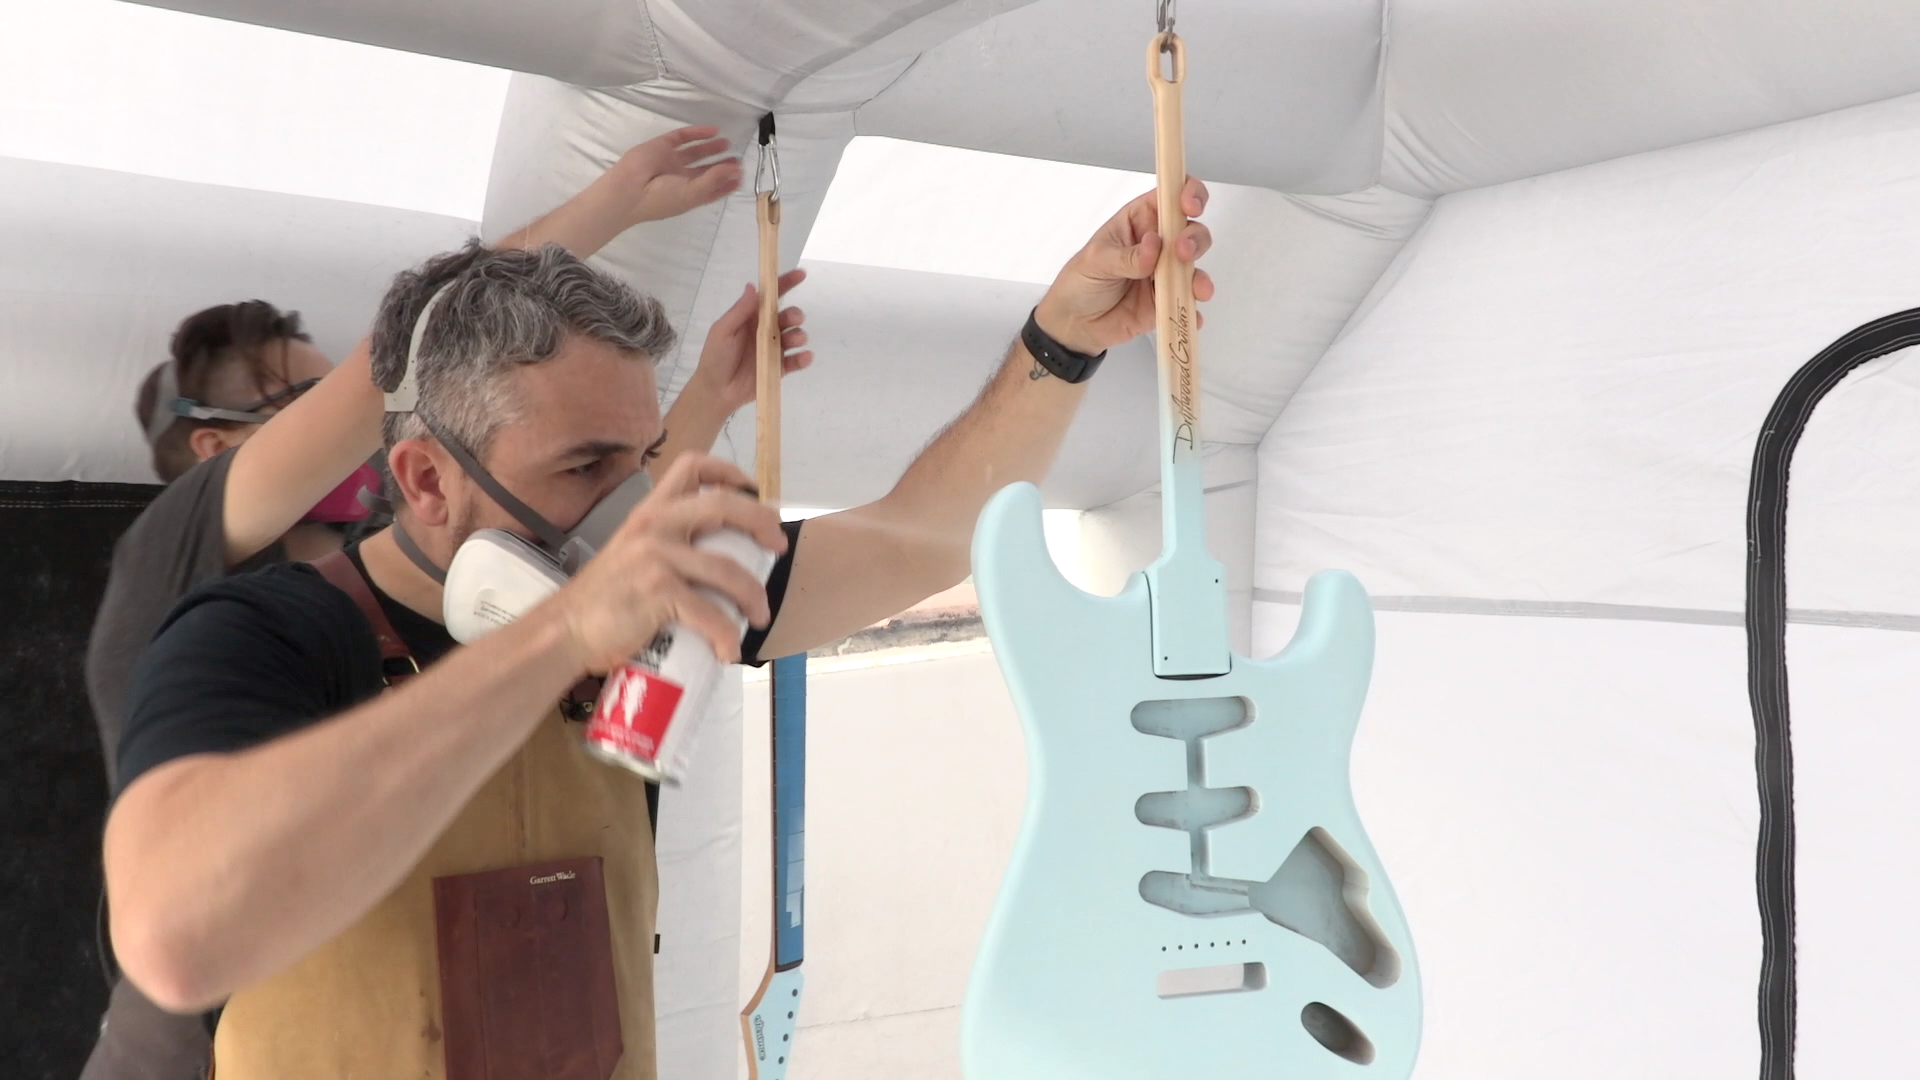
Today, we're focusing on the fun part, spraying your color coats, and building your clear coats. So grab your respirators and let’s choose our color.
As a reminder, you want to stay inside one brand's ecosystem when you're doing this. If you're using one brand to do the vinyl coats, you want to use that same brand to do the color coats, and the clear. It's important because we need to make sure that there's chemical compatibility between each one. We’re using ColorTone sealer, color, and clear coat.
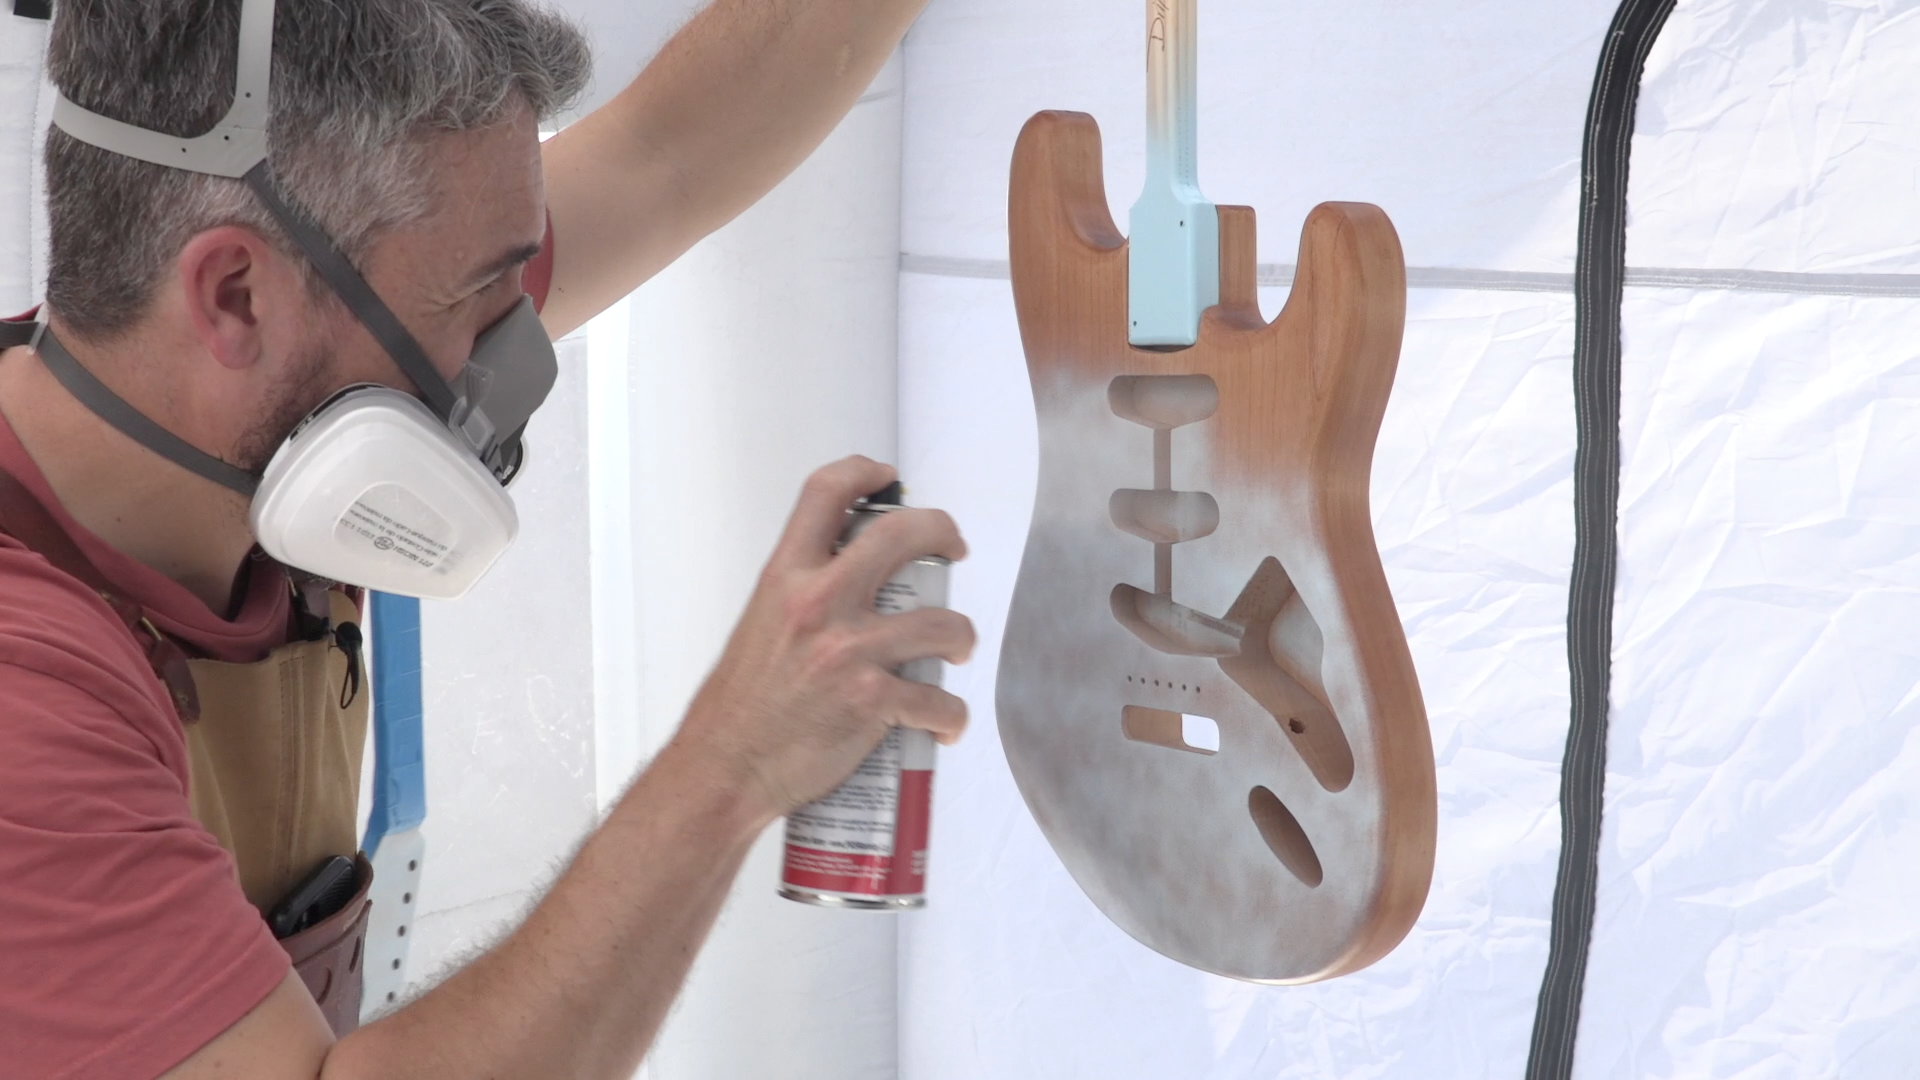
We looked at ColorTone's entire lineup and chose Sonic Blue, because it sits right between their lightest and darkest colors.
PRO TIP: Darker colors show defects a lot easier. If you were to put black on this guitar, the tiniest little issues, whether it's unevenness in the wood or in the finish, will show through. The easiest to apply would be a white finish, because you can get away with all kinds of issues and you won't be able to see them.
Sonic Blue sits right between those two and that's why we're going to use it.
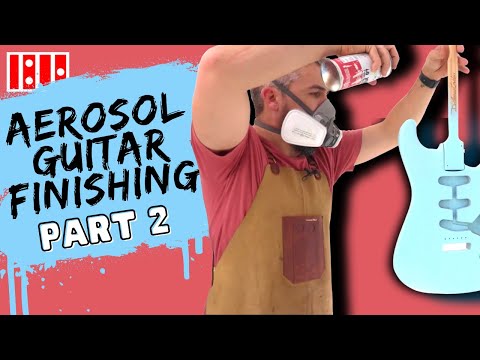
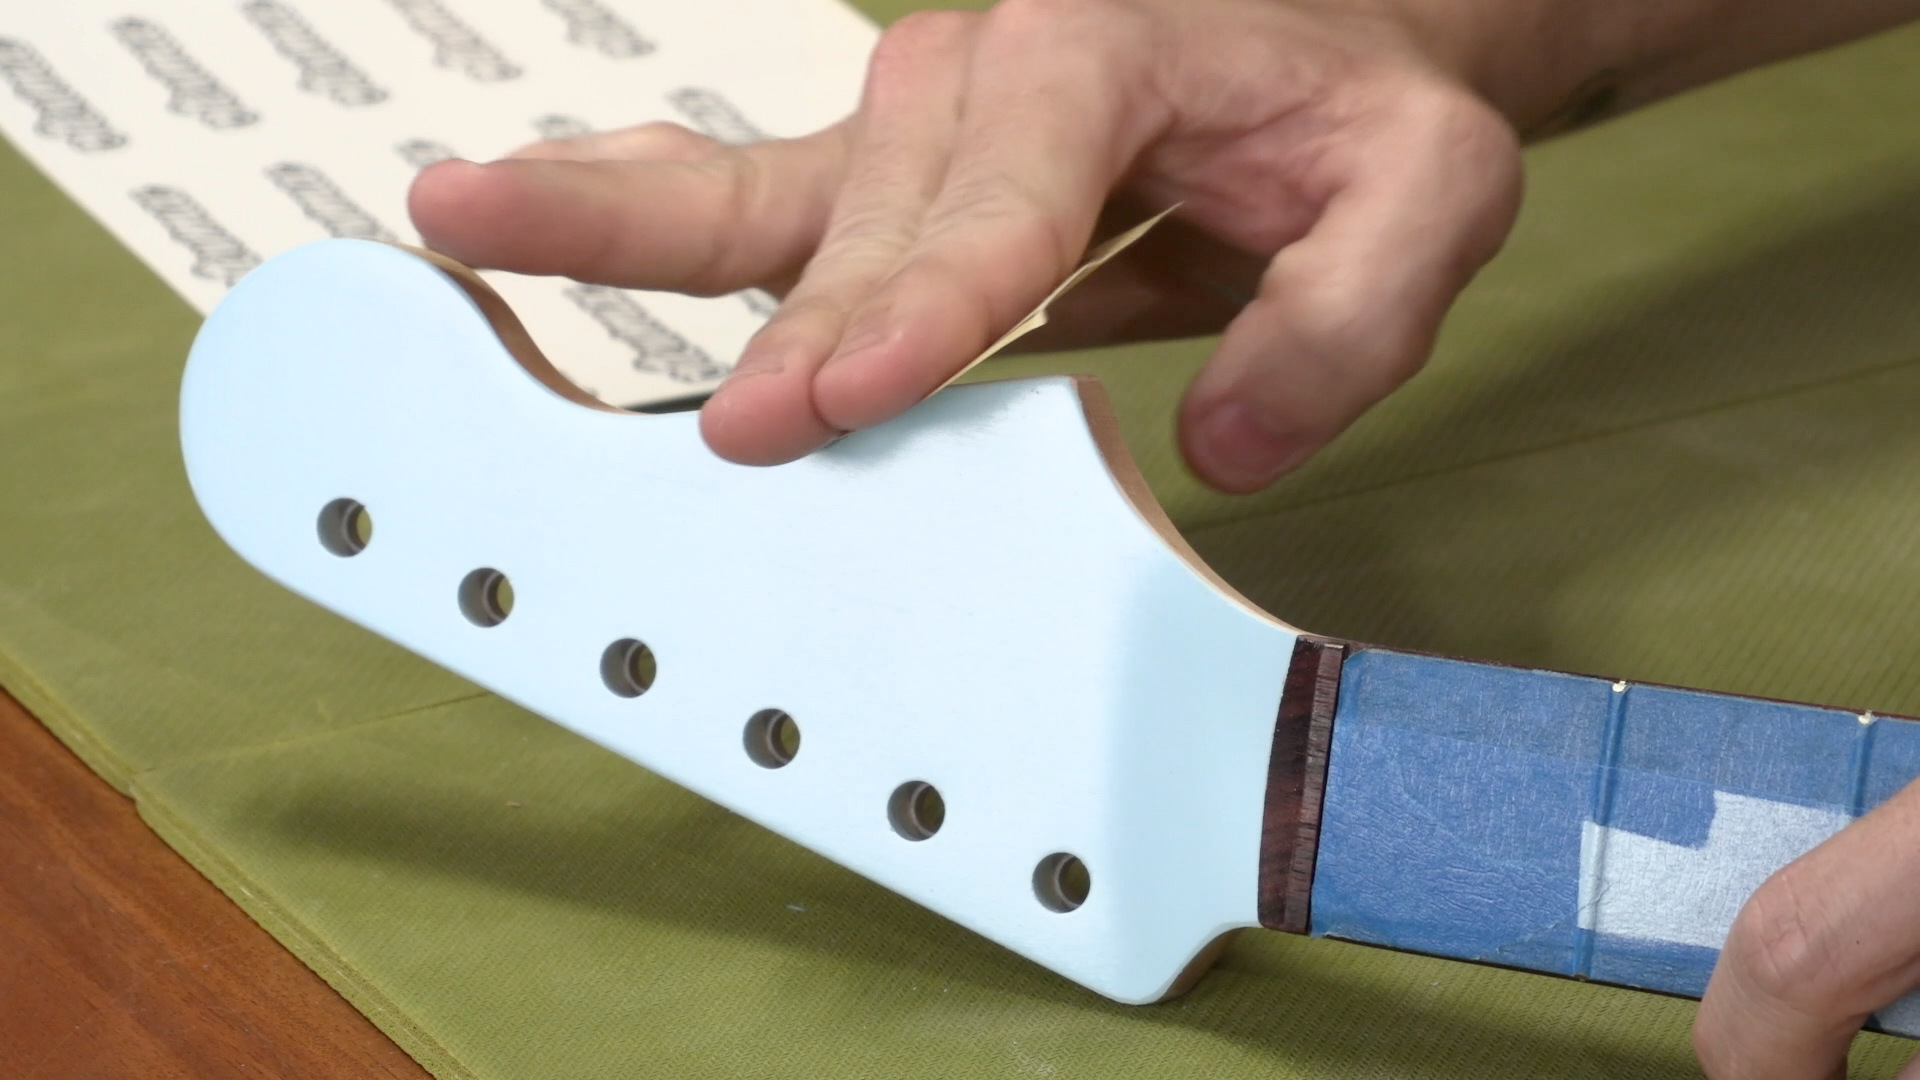
Masking The Headstock
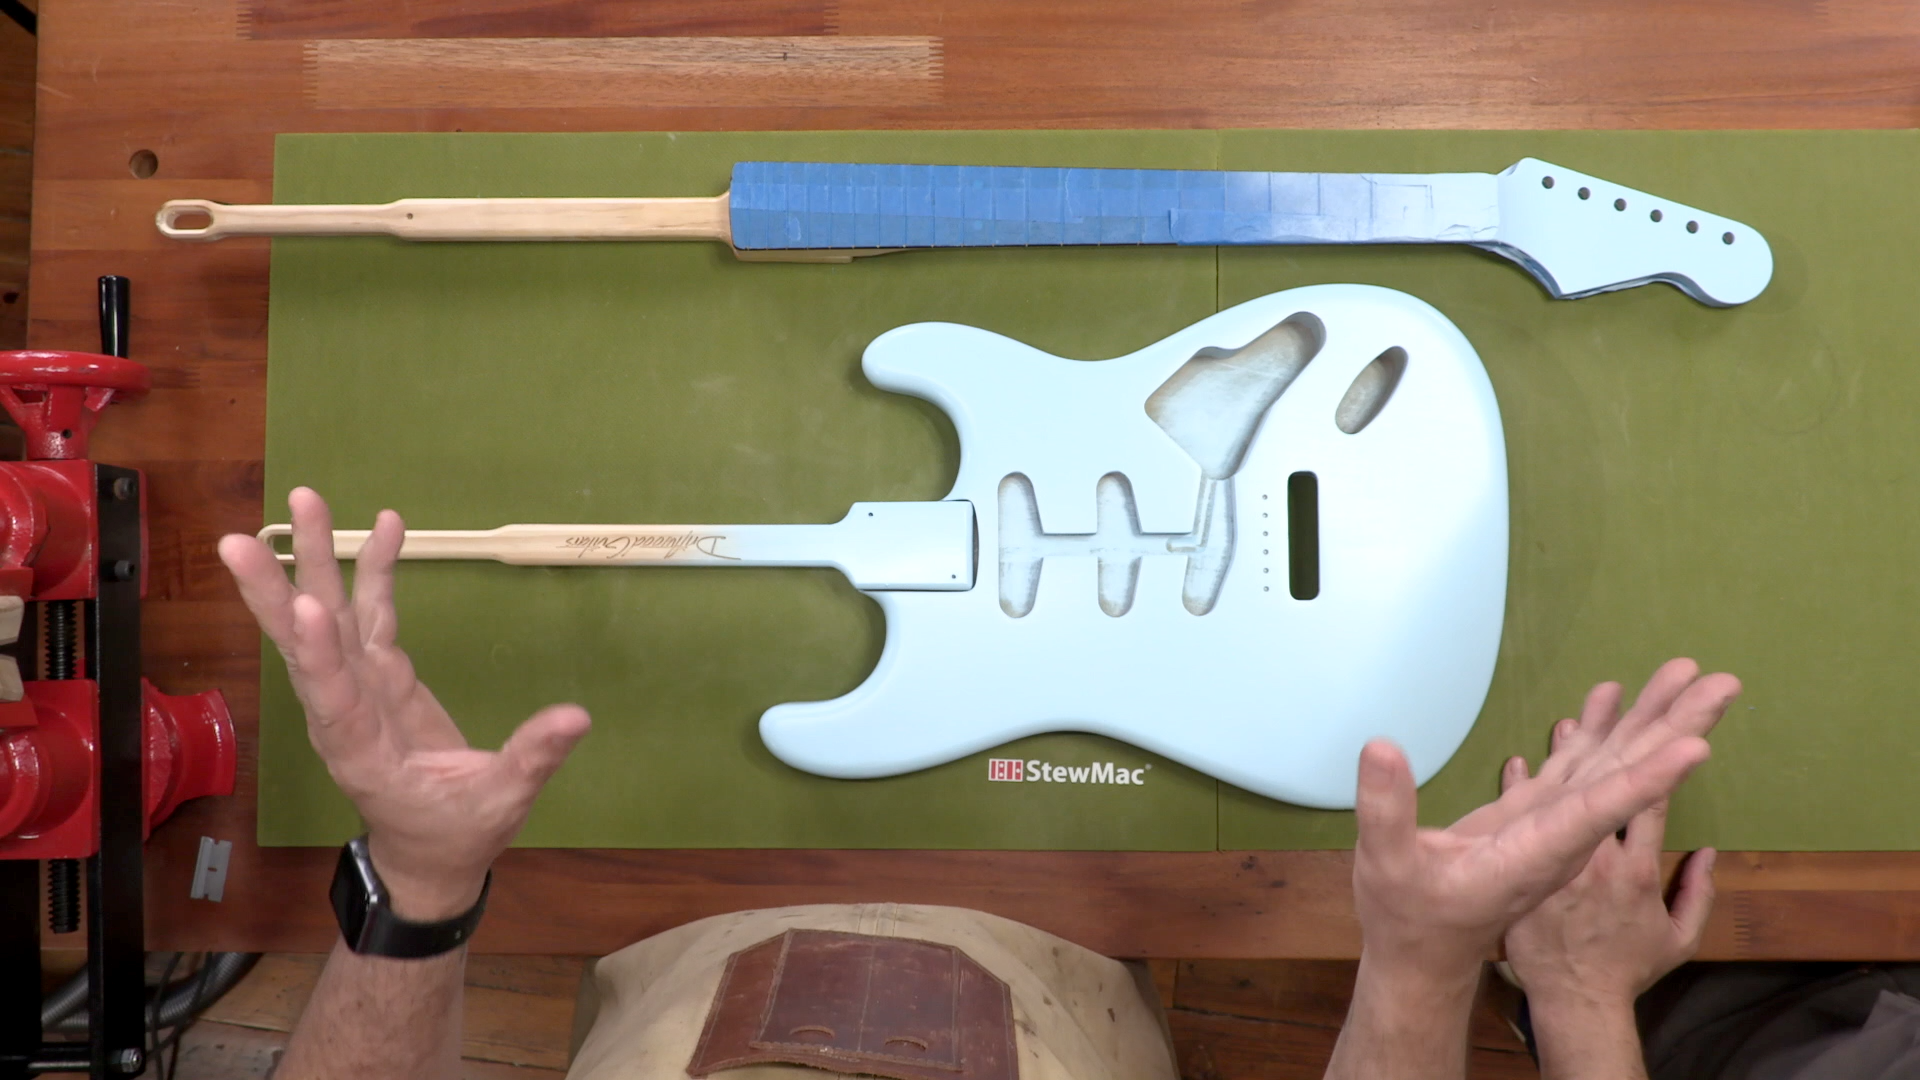
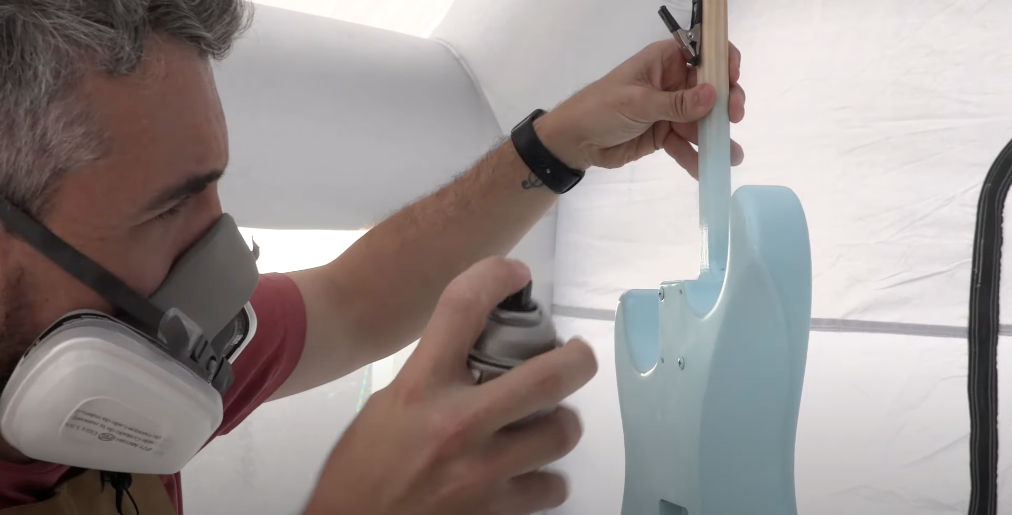
What I like to do when I'm doing a solid color on a guitar is actually spray the face of the headstock, and leave the back a nice maple color. So we’ll need to mask off the neck, so that when we spray the blue on the face of the headstock, we won’t end up with a bunch of over spray on the neck of the guitar. Apply painter’s tape to the sides and back just like we did to the fretboard in the first part. We end up with just the face of the headstock visible.
Tips For Spraying Lacquer
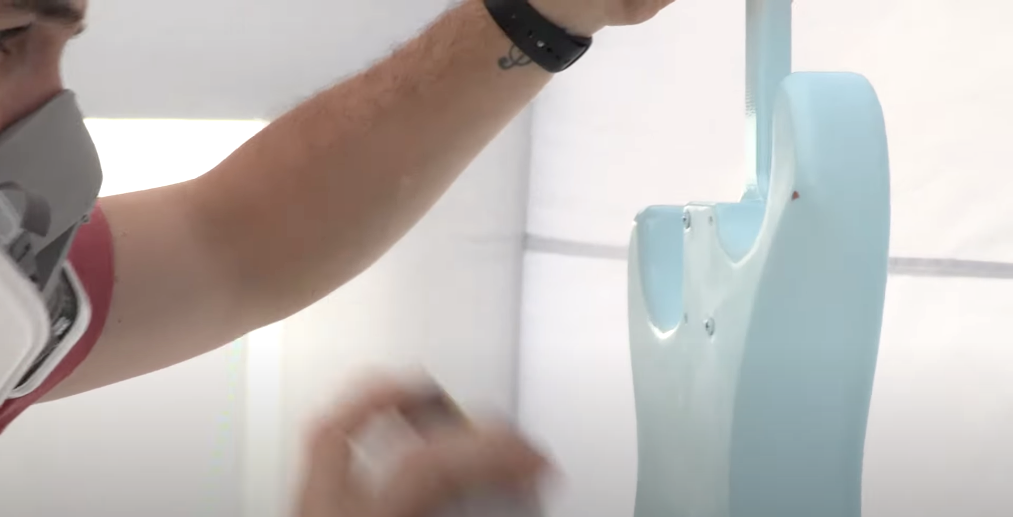
A common rookie mistake is that people think they can just spray it all on in one coat. It's easy with these color coats to be too heavy handed. What to do instead of doing that, is apply two, three, and maybe even four very light coats and slowly build up that color to achieve a uniform finish.
Remember the proper spraying techniques we went over in the first video: keeping an even distance between the instrument and your hand, and doing full sprays across the guitar, without stopping and starting on the wood.
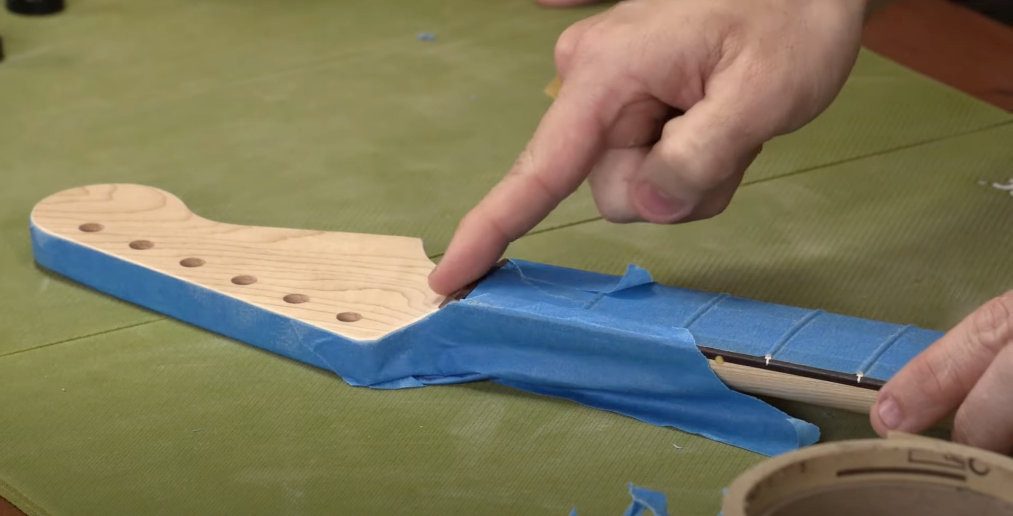
Spraying Color Coats
What You'll Need
ColorTone 50s Classic Colors Aerosol Guitar Lacquer
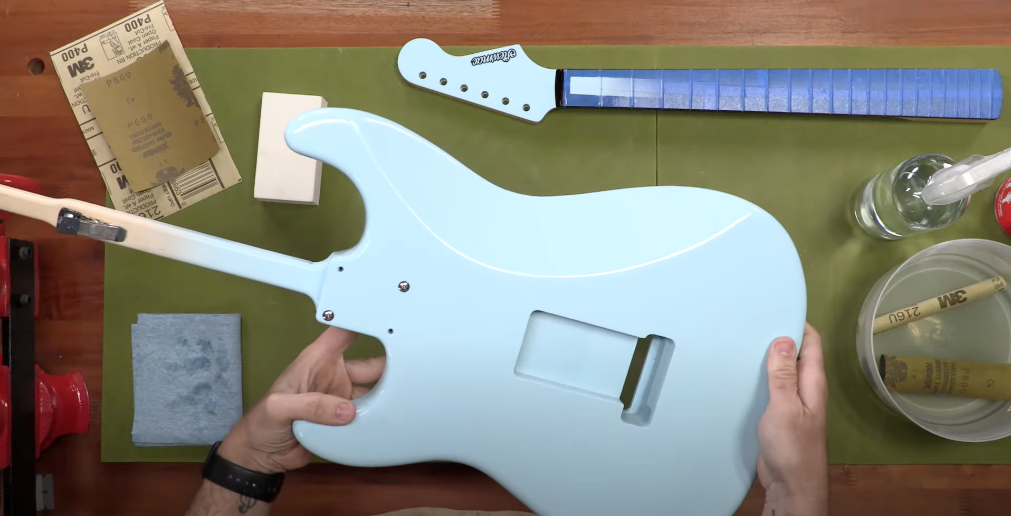
Our first coat is going to look a little blotchy.
When you apply the second coat, after waiting an hour, it’ll be less so.
By the time you get to the third coat, you should have full coverage on the guitar, while also guaranteeing that we're not going to have any runs on it.
All right, after applying all three coats to this guitar, it came out great. We don't have any sags, runs, or defects in it. No blotchiness.
Discuss Common Finishing Problems
We ended up with a really good finish. This is the reward for all the work that we did earlier. Your guitars at home should look very similar to this.
However, if this is your first build, or if you do a lot of builds, you're going to run into some finishing issues. Let’s talk about what those could be.
Let’s discuss five very common issues that might be happening with your finish. While we don’t have time to go into detail about each of these, we can give you the right terminology so that you know what to query on the internet to find solutions, and fix those issues.
1. Orange Peel
This is what we call it when your finish is not smooth, but instead has all these little bumps and dimples all over the surface.
2. Fisheye
Or “fisheye-ing” occurs when your finish is repelling itself from one little spot, and not sticking to the instrument. It can be in just one spot, or in a worst case scenario, covering the entire instrument.
3. Blushing
This will occur within a few minutes or even a few seconds after spraying the guitar. The finish gets a hazy or milky look to it. This happens when moisture gets trapped underneath the finish and is particularly common when working in a humid climate.
4. Runs and Sags
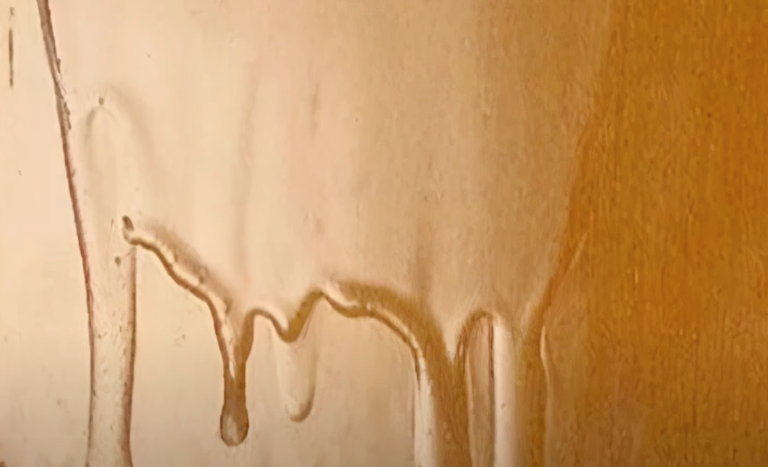
This is very common, and occurs when you go too heavy on the spray and it starts to drip, creating those messy looking runs and sags on your finish.
5. Incompatibility or Adhesion Issues
If you’ve gone from one type of coat to another, either between the vinyl seal and the color coat, or the color coat and the clear coat, and you start to see blistering and cracking on the instrument, this could point to some serious adhesion or incompatibility problems. Unfortunately in this case you might have to start sanding some finish off and try again.
I wish we had the time to go into each of these issues and talk about fixes, but that’s another whole series. For now we can at least provide you with this little bit of knowledge so you know how to identify the issues and research a fix that works for you. Our hope is that if you followed along with part one of this series and were meticulous about your prep work, you can avoid these issues.
Removing Tape and Inspecting The Neck
It's now time to prep our beautiful Sonic blue guitar for clear coats. The first thing that we need to do is safely remove the masking tape that we applied to the neck, making sure that we're not taking off any of the masking tape on the fretboard. Take your time, and be a little bit more deliberate with it. Make sure that the sticky part of the tape doesn't accidentally land on that fresh paint that you just put down.
Inevitably, no matter how good of tape you're using, you're going to get a little bit of bleeding there.
You can get a more deliberate edge by just taking a little bit of 320 or 400 grit sandpaper. And with your hand, slowly do some light downs strokes, sanding very lightly around the edges. This will give you really crisp, clean lines.
Now do a careful inspection of the neck before we begin applying clear coats. We have some color that has actually bled onto the side of this neck. Don't panic. We're going to remove that now using a 400 grit or 600 grit sandpaper. Just lightly hit the spot where you have over-spray, don't put too much pressure on it.
Remember, over-spray is just sitting on the surface of that vinyl sealer that we've put down. So we want to remove the over-sprayed color, and not get into the vinyl sealer at all.

Apply The Headstock Decal
What You'll Need
Waterslide Decal Paper
ColorTone Aerosol Guitar Lacquer Clear Gloss
Exacto Blade
Tweezer
Plate or Bowl Filled with Water
Optional: Optivisor
That is the name of the game for this step. The exact process may vary depending on the instructions for your particular waterslide decal paper, but they're all similar to one another.
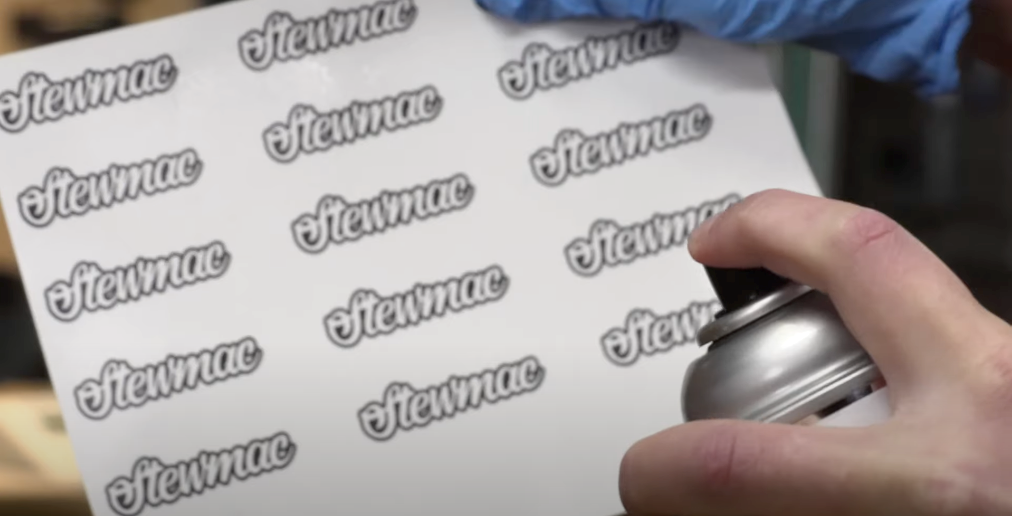
Step one is to design and print your logo or decal. Waterslide decal paper is available at local craft supply stores, and on the internet. It comes with either white or transparent backgrounds. Make sure the paper is compatible with your printer type. If you're using an inkjet printer, get inkjet printer waterslide decal paper. And if you have a laser jet printer, get one for that.
Once your logo or decal is designed and ready to go, print out several, it will save you time and paper if you need to redo it.
After you print, the second step is to spray the paper with a light coat of gloss lacquer, and you're going to use the same finish that we put on the guitar. This helps seal in some of that ink, and prevents it from bleeding onto the guitar once we apply it.
Step three, cut it out. With an Exacto blade and an OptiVisor, carefully cut out your logo all the way through the paper. It doesn’t have to be perfect, just keep it close. I don't want to have a whole bunch of extra material on the outside, because remember the waterslide decal is going to stick up just ever so slightly from the surface of the wood.
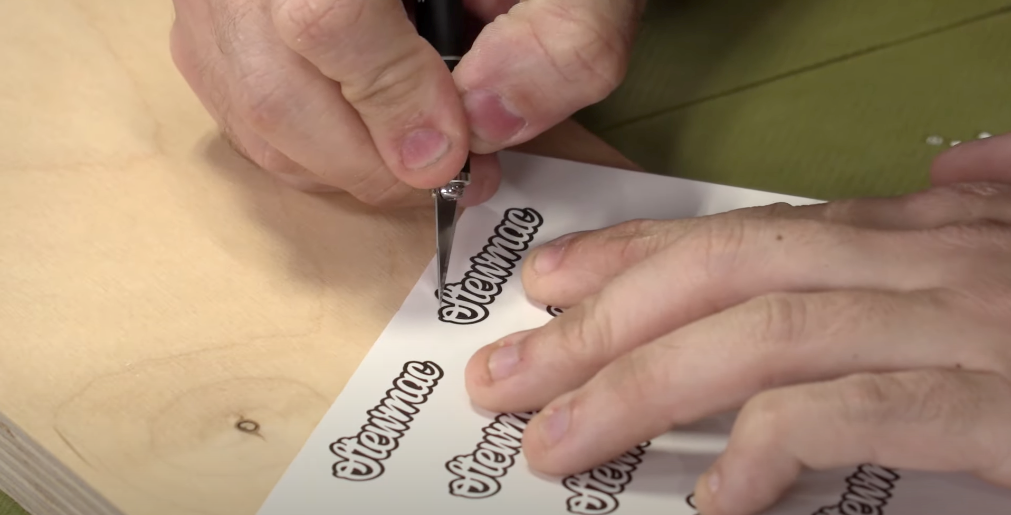
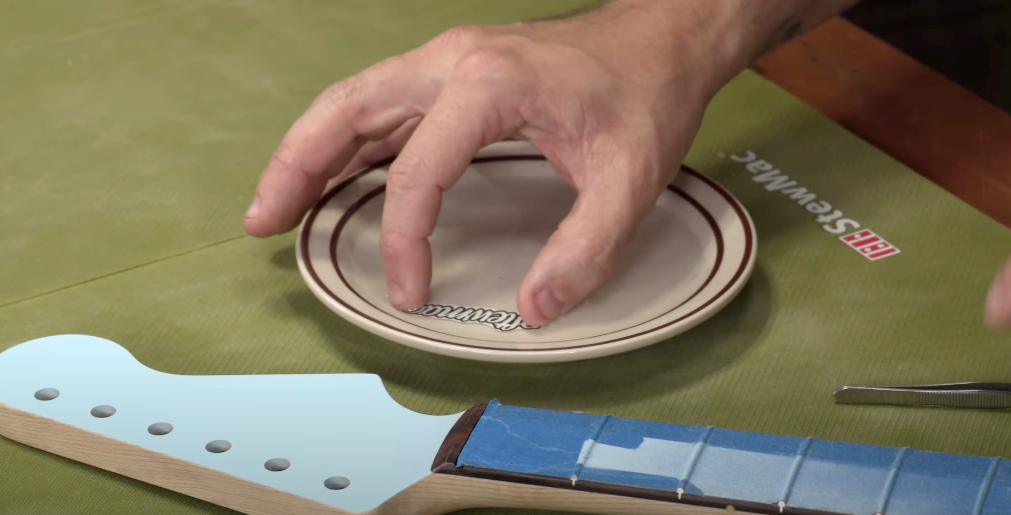
Here we have our Stewmac logo nice and cut out, and we’re almost ready to apply it to the headstock. Before you release the decal from its backing paper, experiment with different positions and decide exactly where you want it to go. Once this is released from its backing paper, it needs to go on very quickly. You get one shot at it. Have your tweezers on hand and ready to go.
So we've just got some distilled water on a plate, or you can use a wide bowl as well. It's only going to take just a few seconds for it to release. Once it releases from the backing paper, it becomes really, really fragile. Handle it with care.
Next, put the decal in the water. it's going to curl up, it's what it always does. You can use your fingers to make sure that it's fully submerged. Also, take just a little bit of water and apply it to the area that you're going to be applying the waterslide decal to. This will help the decal not stick so hard, and gives you some time to be able to wiggle it around. It just takes a few seconds for this to become ready, and you can push on it and then slide your finger, and you’ll feel the moment when it starts to release from the backing paper.
Now this is called a waterslide decal for a reason, emphasis on the word slide. You're not going to want to pull this whole thing off and then try to apply it because of how incredibly thin it is. Instead we're going to actually remove that backing paper and slide it out from underneath it. And then very gently, we have an opportunity to get it into place.
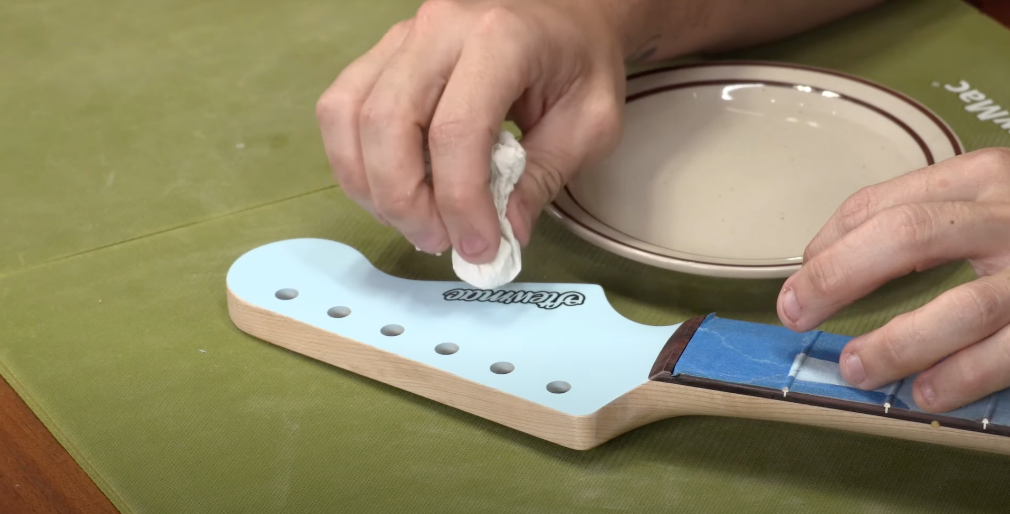
Set it exactly where you want it to go with the backing paper still on it. And then use your tweezers to grab the backing paper. Hold the sticker in place with one hand, while you gently pull the backing paper out from underneath it. If it's not exactly where you want it, you can actually move it around very lightly while it’s still wet. Ever so lightly take a paper towel and slightly pat it, and that's going to remove the water.
The important thing here is to make sure that you don't have any air bubbles or anything stuck underneath it. At first, it might stick up a little higher than you want, but as this dries, it's going to really start to become almost one with the headstock. If you don’t get it right on the first try, don't be frustrated. You can peel it off and try again with a fresh decal.
How Clear Coats Work
What You'll Need
ColorTone Aerosol Guitar Lacquer Clear Gloss
Spray Nozzles
Glancing Light
”Why 14 coats? Because it’s cold out there!”
Now onto the very important clear coat stage. We are going to be applying about 14 COATS of clear to this particular guitar.
Remember nitrocellulose lacquer, like we talked about in episode one, is mostly VOCs, volatile organic compounds. The lacquer is suspended within those VOCs, so only a small portion of what we spray is actually going to remain on the guitar after all those VOCs have evaporated. The other thing about nitrocellulose that's different from a lot of other finishing systems, is that each coat actually melts into the coat that's above it. So you could do 50 coats if you wanted to, but you're still going to end up with one really thick coat.
On top of that, throughout the process of applying each coat, we're going to be doing some steps where we sand and remove some of those materials. So 14 coats, yes, combining into one final, thick coat. Now with nitrocellulose lacquer, because of that gas-off phase, we can ONLY DO THREE COATS PER DAY.
PRO TIP: Do NOT do four or five coats in one day because you're in a hurry. Make sure you plan out your schedule, and understand that it’s going to take some time. Do three coats a day with an absolute minimum of an hour between each coat. And the reason we do that is because we need the lacquer to gas-off. We can't trap all those VOCs between each coat. This is where it is important to keep notes so you know exactly how many coats are on there.
Again we’ll be using this ColorTone line of products, because they’re compatible with what we've already put down, like we mentioned, and they are specifically formulated to be used on instruments. Also, they offer a satin finish as well, which gives you more options for your final look.
If you are going to be doing a satin finish, you're still going to follow the steps that we're doing here. And believe it or not, you are going to apply gloss coats with us until the very end. You don't actually put that satin coat on until the very last couple of steps. So, we're going to use gloss for the majority of the process, and then you can switch to satin for the last few coats.
A quick reminder of the tips we gave you in the first video to ensure success when spraying. Heat your cans up ahead of time by soaking them in 130 degree water, and upgrade your spray nozzles to achieve more control.
Spraying Clear Coats 1-9
The number one thing to remember here is patience. If you go about this patiently, and stick to your planned schedule, it will pay off. So make yourself a schedule: 14 coats total, no more than three a day, with at least an hour in between coats. Now let’s spray.
You’re going to want a bright glancing light going across the guitar. As you spray what you're looking for is a wet look as that clear goes onto the guitar. It doesn't need to look like it's been dipped in lacquer, just enough that you've got the surface uniformly wet.
You’re going to get an orange peel effect as you spray the clear coat. Don't panic when you see that, because it looks a little rough. Those VOCs are going to evaporate pretty quickly in these first few minutes. The finish is going to relax and slowly become much more glassy-like and much more flat. Be patient, continue spraying, don’t change your technique. And when you come back to spray that second coat, in about an hour or two, it's going to look a lot more flat.
 Okay, we’re three days in and our guitar has nine coats of clear coat on it.
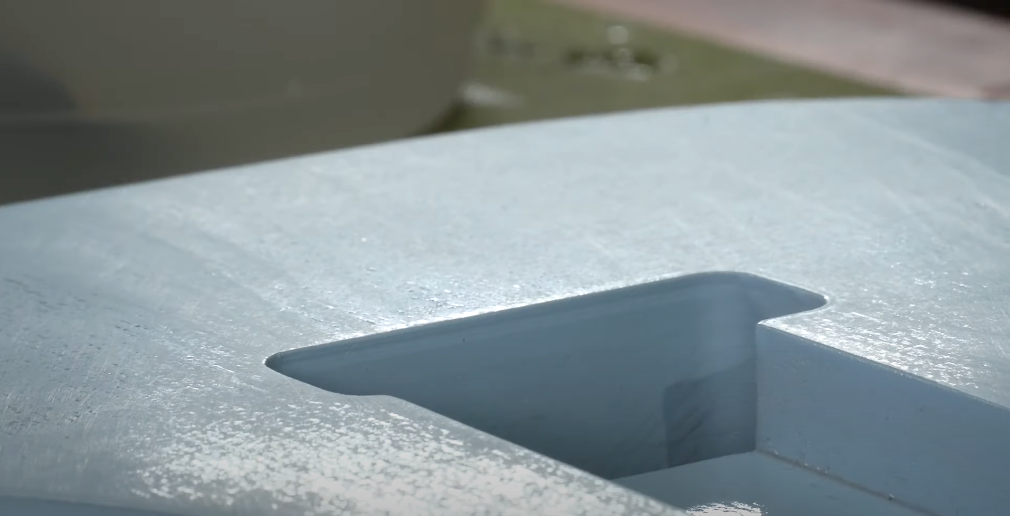
It's got the orange peel that we expect, some specs of dust stuck inside of it. You're not going to have a guitar at this point that looks finished, because we still have to do the wet sanding process.
First Wet / Level Sanding
What You'll Need
400 and 600-Grit 3M Gold Sandpaper
Sanding Block for Self-adhesive Sandpaper
Bowl Filled with Water
Dish Soap
Spray Bottle
Clean Shop Cloth
Glancing Light
ColorTone Naphtha
“Always be cautious when using water on your guitar.”
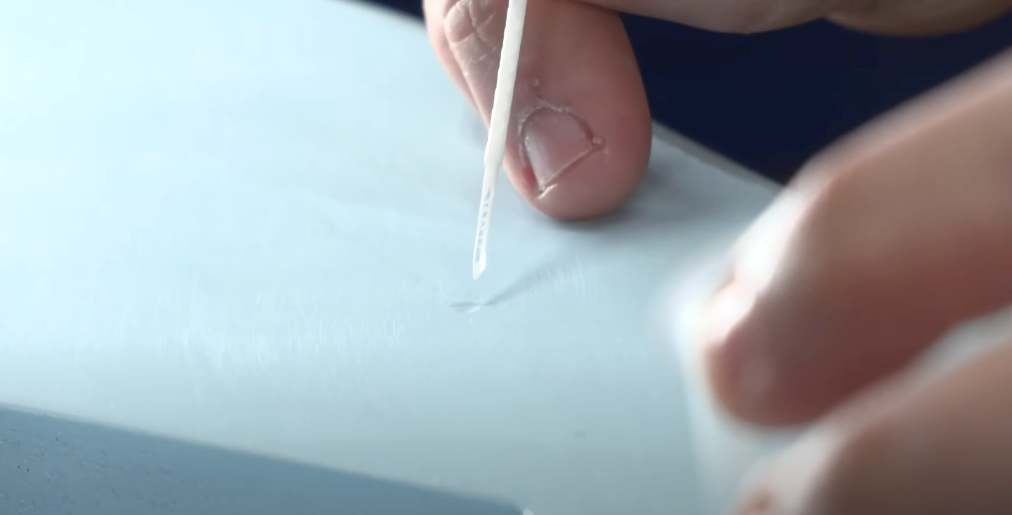
For those of you that have never wet sanded before you might wonder, why are we going to start introducing water into this equation? Well, the water's really important because it's going to keep the surface from being so scratchy. We don't want to add a bunch of scratches to this finish that we're then going to have to cover up with more clear coats, we're just looking to level it out.
Wet sanding washes away all the particles. As we rub that sandpaper on here, those particles are going to get picked up by the water and washed away. We're going to do it with 400 grit sandpaper if it's got a lot of issues that you need to work with. You can go finer and use a 600 grit, if you'd rather be a little bit more cautious.
As you're sanding, err on the side of caution. If you think that you're getting close to the color, stop.
PRO TIP: Always be cautious when using water on your guitar. You need to be aware of water intrusion and how that can cause damage. So look over your guitar body and your guitar neck, and make sure there's no spots that have bare wood, that have no finish on them whatsoever. Be certain to mask those off, or at least be very cautious of that spot, and not get any water in that area. The last thing you want is water getting into there and swelling up the wood.
Make sure you have sandpaper that is compatible for wet sanding. This 3M gold sandpaper is always a nice, safe bet. It has a little bit of a waxy feel, almost like it is waterproof. Take that sandpaper and put it in a bowl of water just to pre-soak. We're actually going to add a little bit of dish soap to it to act as a lubricant. Adding just a little bit of soap to it is really going to help make this job a lot easier. We also recommend that you have a spray bottle and some paper towels at your workstation. Lastly, make sure your station is clean and free of clutter.
First, lightly spray down the guitar with your soapy water. Then take a sanding block with 600 grit paper that's been pre soaking. Make sure you keep it rinsed off, you don't want to be smearing stuff that can scratch up the finish on there. We don’t have to worry about the grain during the finishing process, so I usually sand in a circular motion, rinsing my sandpaper often, and not applying too much pressure.
Be cautious and methodical, because the moment you start to get comfortable and just start mindlessly sanding, is the moment you find yourself in trouble.
If you're starting to get a whole bunch of lacquer stuck to your sandpaper, switch it out, get yourself a fresh piece because you don't want to be grinding lacquer against lacquer. If the surface starts to feel thick and dry, spray more water onto it.
You're kind of blind while there's still water on the guitar. You can't see how much work you still have left to do. So once you feel like you've gotten the whole surface area, take a shop cloth and wipe it down, keeping it nice and clean. This will reveal whether or not you have more work to do, based on whether a spot is shiny or if it has a nice matte look to it.
The moment you break through the gloss and you start getting into just more of a matte, the feel of it starts to change, it starts to push back against the sandpaper.
Always inspect it with a glancing light. And you can see that there are spots that are shiny and there are spots that are a matte finish, and those shiny spots are the low spots.
So we're going to continue to sand until we have a nice flat look on this.
Fixing Sanding Through The Color Coat
Uh oh, here we have a very common mistake.
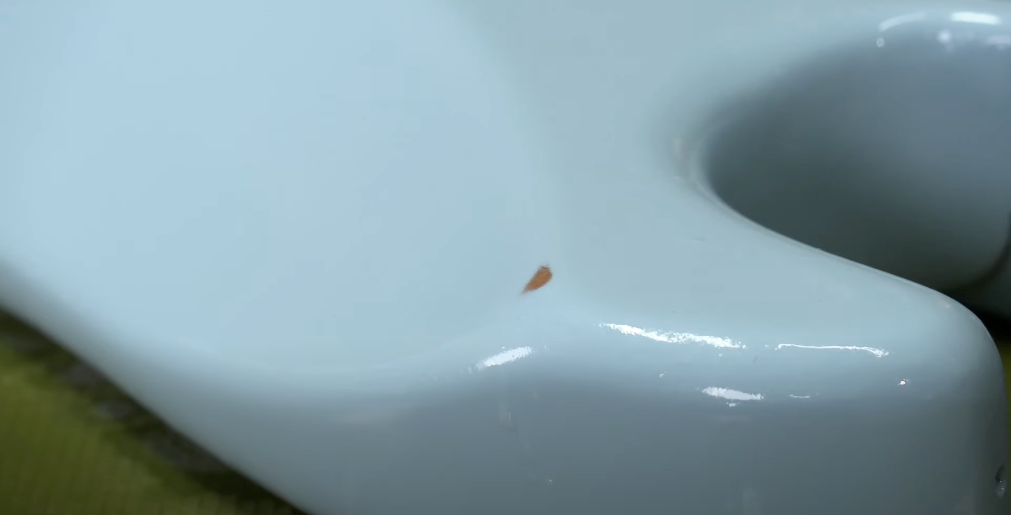
In just a few seconds, because it can happen quickly, we sanded through the clear coat and the color coat.
When this happens, be aware of it, but keep your focus and go ahead and finish off the rest of the guitar. Because we are actually going to be able to feather some new color onto it, and then build up some more clear coats on top of that.
That is a good illustrator of how quickly you can over-sand, especially on the edges and round areas. You want to be light, and quick, never spending too much time on one area.
Before we move back to the paint booth to resume our clear coats, you want to dry the guitar really well. Remember that water and lacquer are not compatible. So if you have access to compressed air, we highly recommend that you blow it out. Make sure that your guitar and work area are dry and clean, and that you don't have any water trapped down inside the pickup cavities and the tremolo cavity.
Next we need to take some naphtha and wipe this guitar down. The naphtha will help to remove any oils from our hands and the soap that we used.
All right, back to the paint booth.
Before we start putting any more clear on this guitar, we need to address the situation that we had here, where we’ve sanded through the color. So what we've done is gone back and gotten some more of our Sonic Blue, and we've heated it up really good. The heating up is more important for this process than it ever has been because we really need this to be a fine mist. More so than ever, we don't want to try to cover this all in one pass. Just slightly add color each time.
So what we're going to do now is, we're going to let that sit for about five to 10 minutes just to tack up, and then we'll hit it again with a little bit more. We ended up doing that four times to get a solid coat, letting it tack up for about 10 minutes after each coat.
You can't even tell that it was there. Remember now we have color on top of our clear, and that's fine. Just keep a mental note of an area where you will maybe need to do a touch up.
Now we can jump back into our clear coat schedule as usual. As you can see it wasn't the end of the world, we were able to recover from it, and nobody will be any wiser.
Now let’s talk about another fix you may need to apply to the body.
Demoing A Drop Fill
What You'll Need
ColorTone Aerosol Guitar Lacquer Clear Gloss
Drop-fill Toothpicks
Optional: Plastic Pipettes
”A great fix for when you have a dent or a low spot in the wood that’s so low you don’t think you can sand it out.”
Drop fills are a great way to cover any dips or dents that might show up at this stage. These low spots often happen in areas where you have some wood joints, some binding, or where your fretboard meets the neck of the guitar. Those are common places where you might need to do drop fills.
Take some of the same finish that you're using for your clear coat, and shake it up vigorously, and spray a little bit into a cup. Just a tiny amount.
There are two products you can use for this process. Stewmac sells these really good little drop fill sticks. And they're basically just little plastic toothpicks that have a section on them that uses the capillary effect and sucks up whatever liquid you're working with. They also sell pipettes. Pipettes are useful if you're needing to do a whole bunch of drop fills.
Today we’re just doing one drop fill so we’re going to use the drop fill sticks.
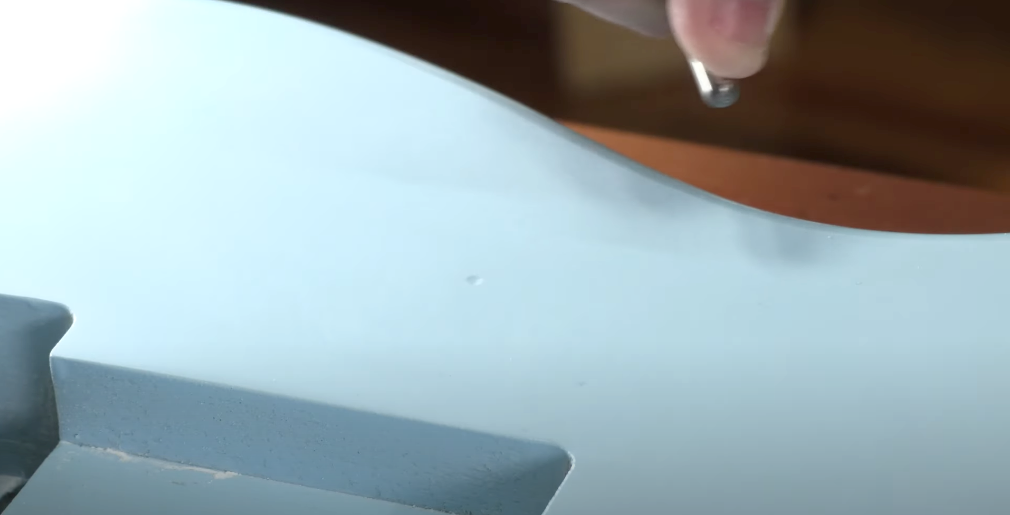
Dip the end of the stick ever so slightly into the lacquer, just enough so that it's going to wick the clear coat up onto it. Then very lightly touch it to the middle of where that little dent is. The moment that you touch it, it's going to wick right into it and pull right inside of there.
This enables you to put lacquer in that space without having to spray it over the whole area. What you're going to end up with is a little bulging spot in the lacquer, that's going to be higher than the rest of it. But we're going to let that sit, we don't want to touch that at all.
Spraying Clear Coats 10-12
After we've done this, we're going to keep moving forward with the process and applying more clear coats. Don't worry about that raised spot just yet. We're going to level that spot before we do our final buff out. We want that drop fill spot to cure the same amount of time as the rest of it.
You can do drop fills at any step in the clear coat process, as long as you make sure you do them all before you hang the guitar up to do its full, final drying time. Give the drop fills enough time to harden up, just 15 to 20 minutes, enough that you can hang it up and it's not going to create a sag.
Then we can get back into the paint booth.
Second Wet / Level Sand
We’ve got three more coats of clear on, and we are ready to move onto the next step, which is another wet sand. We did this with 600 grit sandpaper after nine coats, and this time, after twelve coats, we’re going to use 800 grit sandpaper. You want to use the same technique as before, but you’re going to need even less elbow grease this time because you’ve already worked out those major issues. Remember to be very delicate and gentle when sanding.
Final Clear Coats 13-14
Once your guitar is wiped down, completely dry, and cleaned with naphtha, you’re ready to head back to the paint booth for the final two coats.
14 coats down, and we are done applying the clear coat to this guitar. It has been a long journey to get us at this point, but it's totally worth it. The next step is absolutely crucial.
Discuss Cure Time
“If you feel the need to skip that drying time, you're going to regret it.”
Remember that those VOCs from that nitrocellulose lacquer are still in there, and we need to give them lots of time to finish gassing off. That lacquer is going to continue to shrink back and shrink back and give you an even nicer shine over time.
So how long do we need to wait? An absolute bare minimum of 10 days. But really we recommend at least two weeks. And if you can afford to, go up to a month. After that you start to get a diminishing return.
PRO TIP: A classic rule of thumb is to use your nose. Smell the instrument, and if you smell any little bit of lacquer, then it's still gassing off and needs more time. Over time the smell will become fainter, but wait until it’s totally undetectable.
Somewhere in your workshop, write down today's date. Whatever the day is now that you've applied this last coat, write that down so that you can use it as a reference for how long it's been drying.
Next, find a nice, safe place to hang it up. In my house, I have a drying closet in one of the spare rooms in our house that I hang these things up in. Let it be a little bit out of sight, out of mind. If it is a closet, leave the door open at least halfway, so there’s some air circulating in there. If despite all of our advice about patience, you are in a bit of a hurry, you can get away with putting a small fan inside that closet as well, just to keep the air circulation going.
In the third and final part of our series, we're going to show you how to buff out the finish. Then we’ll attach the neck and it’s going to look amazing. It is going to look like anything that you could buy in the store, and you're just going to be blown away at what you’re able to achieve with aerosol sprays. So join us there, and let's see this thing through to the finish line.
With that, we’re ready to move on to the next step of the process. Click here for part three of this video and article.