Does this bone nut fit my guitar?
Everybody's Asking:

"Does this bone nut fit my guitar?"
Usually my Trade Secrets stories are about the guitar I’m working on. This one’s different: it answers a customer question that’s come up a lot lately.
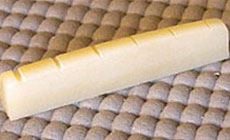
Lots of folks are upgrading their guitars with our preslotted bone nuts. Installing these nuts takes only a little handwork and minimal tools, and many players are doing this mod for themselves. After they realize, “Hey, I can do this!” they give us a call to ask which nut fits their guitar. But guitar models change too much to answer that question without measuring.

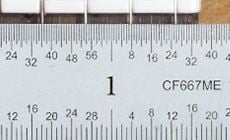
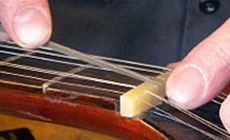
What’s the string spread?
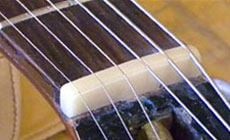
The first measurement to take is the string spread — the distance between the two outer E strings. For this ’67 Gibson, this is the only info I need. I simply compare my numbers to the Gibson string spread measurements on this slotted nuts page, and determine which is the closest.
Many late-’60s Gibsons had a narrow string spread. I got an exact match with the 6012-VS nut. The 6013-VS fits most Gibsons up to around 1966, and also from the early/mid ’70s on.

I’m using a 6" ruler that reads 64ths of an inch. If you don’t have a ruler like that, or if 64ths make your eyes cross, we’ve got a solution for you:
New way to measure.
We’ve put together a sizing guide page you can print from your computer.

It shows actual-size shapes of our slotted unbleached nuts, with string spread lines for each one. To use it, just hold the printout up to your guitar:
Next to each nut shape are two red lines showing the string spread between the outer E strings. The closest fit is the nut for your guitar.
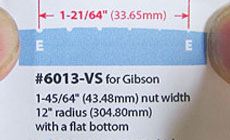
Click here to get this sizing page..
The rest of the specs tell more about the size and shape of the nut. That becomes critical with a Martin nut, for example...
For Martin guitars, we offer four slotted bone nuts to cover different string spreads and bottom shapes.
Traditionally, Martin nuts have had an angled bottom like the nut we include in StewMac guitar kits.
In the early ’90s, Martin started using a flat bottomed nut for select models, and they’ve been using those more in recent years.
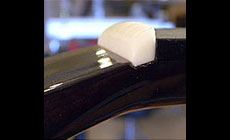
To find the nut for your Martin style guitar, measure your string spread and match it as we did with the Gibson nut. Then look at the the end of the nut to see whether it has a flat bottom, or the bottom is angled like the one shown here. This dreadnought needed a 6024-VS nut, with its narrower string spread and angled bottom. Usually the 6024-VS and 6025-VS fit dreadnoughts, and the wider spread 6022-VS and 6023-VS fit most Martin fingerstyle guitars (our Triple-0 kit, for example).
Fender’s a little trickier.
Fender offers a few different radii and bottom shapes. In most cases, Fenders made in the US and Mexico have nut slots with curved bottoms. They match the radius of the fretboard, varying from 7.25" to 12". Vintage and reissue models are typically 7.25", while the American Standards are 9.5".
Many Fenders made overseas have flat-bottom nuts, as do many of the Fender clones out there.
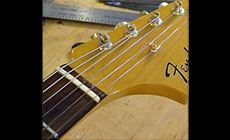
On this reissue Jaguar, I know what the nut slot shape is. Our 6001-VS nut is the one that fits it. If you’re unsure of your fretboard radius, it would be a good idea to take your guitar to a local repair shop find out. (You should expect to pay a bench fee for this service.) You could also buy your own set of understring radius gauges for this; they’d be useful any time you’re setting up an instrument.
Know your limits!
I like it when players learn to work on their own guitars, but know your limits! Unless it's vintage, you can't positively tell the bottom shape of a Fender slot without removing the nut. This is tricky business that can even result in breaking off the end of the fretboard. If the nut’s stubborn and doesn't come out easily, take it to a repair shop.

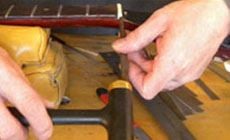
OK, let’s install a nut on this ’67 Gibson
Step 1
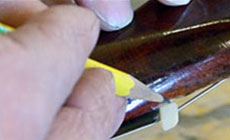
If lacquer holds the old nut in, lightly score around it with an X-Acto knife to avoid chipping. Carefully try to tap the nut out. To help prevent unwanted chips, I'm using a center punch to contact the nut while giving it an upward tap with a fretting hammer.
Step 2
I’m lucky — this one came out easily. Some nuts are glued in so tight that they have to be sawed out!
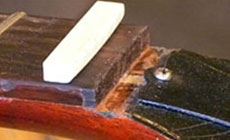
Step 3
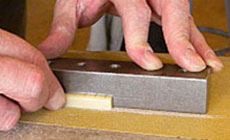
I'm cleaning the bottom of the nut slot with a nut seating file.
Step 4
Here’s the roughed-in nut. So far so good!To lower the slots for proper playing action, I like to use files. They don't cut as fast as saws, so there's less chance of error.
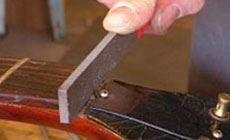
Step 5
Since the slots are already cut to the proper diameter you don't need to invest in a whole set of slotting files to bring them down. Needle files and a sharp eye for detail are all you need. (For details on how to lower string action at the nut check out Trade Secrets #63.)
Step 6
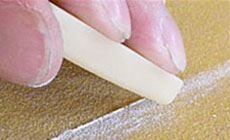
My preferred method of lowering the action is filing the string slots, but if you have a steady hand you could evenly remove material from the bottom of the nut to lower the strings. Be sure to keep the face of the nut square! That’s essential to getting a proper fit. In this photo, I’m sanding against a fence to keep everything on the square.
Step 7
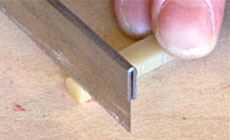
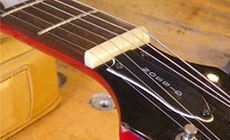
Now that we have the proper playing action, it's time to mark the ends for trimming, using a sharp pencil.
Step 8
Once marked, remove the nut and trim the ends with a saw.
Step 9
With the ends trimmed we can start putting the final shape on the nut. I typically use shaping files, but if you're doing just one nut you can get by fine with 320-grit sandpaper. It’ll take a bit longer, but the results will still be great.
Step 10
This nut has been sanded to 320 grit, and it looks good enough for this job. I could go crazy polishing it like a piece of jewelry, but this is going on a worn old guitar and I'll just give it a light shine with green and black polishing papers and call it good.
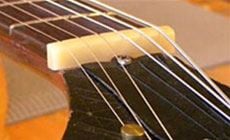
Step 11
Strung up and ready to go.


Just because you don’t see your guitar specified doesn't mean we don’t have a slotted bone nut to fit it
Download and print the nut sizing page to see what fits. For instance, a flat-bottom Martin nut fits a lot of acoustics. And I've used that same nut for Epiphones by taking off a little thickness. The angled Martin nuts fit lots of acoustics, such as Alvarez Yairi, Collings and many others.
Installing bone nuts has never been easier. If you're a repairman or builder, give these a shot. I've found they save me considerable time in the process making it more profitable.