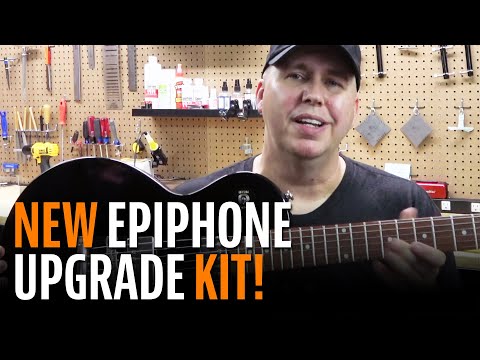
Phil McKnight Shows Off Our New Epiphone Hardware and Electronics Upgrade Kit
V-2700
Phil McKnight, from the popular YouTube Channel Know Your Gear, shows you how easy it is to upgrade your Epiphone. While the kit Phil mentions is no longer available, all of the items are still available separately. Many of these Epi's are really great guitars and can play like their much more expensive brothers and sisters with some new hardware and a little work you can do yourself.
Video Transcription
Phil McKnight: Today I have something pretty exciting for you. We're going to be installing one of StewMac's new complete upgrade kits. This one's for an imported LP style guitar. Let's get into the kit and see what improvements we can make. They really put a lot of thought into the parts that go into this kit. The first thing in the kit is a set of Grover vintage style tuning keys that have that original 14 to one ratio. Next up is the Gotoh Tune-O-Matic bridge. The saddles on the bridge are seated better than the stock unit, which improves the transfer of vibration. It also has a broader range for intonation. That really comes in handy when the bridge isn't installed correctly by the factory. Then you have the Gotoh lightweight aluminum tailpiece. Unlike the standard zinc one that comes with the guitar, this one will actually reduce the weight and improve the sustain.
Next up, we have a set of Parson Street Humbuckers. These are speced out like a vintage set of PAFs. It's a great way to give that guitar that really vintage tone. You don't want to just upgrade your pickups when you're doing a project like this. You really want to upgrade everything else that's going to compliment those pickups. In this kit, there's a set of Emerson Pro Potentiometers and a pair of Emerson 0.22 micro farad paper in oil capacitors. The kit will also include a three-way switch, some wire, and some knobs, so that way you're all set to go.
Remove all of the components from your guitar
Whenever I do a project like this, I like to start from scratch and just remove all the components off the guitar. But that leads me to a great tip. Always use your best tool, which is your cell phone. You can take pictures or videos of anything before you remove it. It's a great way to have a reference if anything comes up later.
Another thing I recommend you do is get some sandwich bags and a sharpie to write the names, the parts, on the bags. Take all of the old parts and put them in the bags, that way you know where they are. Always keep your old parts in case you ever want to return the guitar back to factory stock. Now it's time to start removing the parts off the guitar. One of my favorite tools is the ESP Multi-Spanner. I can use it to remove things like the three-way switch and pry up these knobs without breaking them. If you look at knobs like this, they're easy to crack, and this tool can ensure that you don't break them. Now the guitar's been fully disassembled. We need to address a couple things before we can start soldering.
Reem out the volume pot holes
The first issue is these holes for the volume pots. The ones that came with the guitar are a lot smaller than these Emersons, so we're going to need to remount the holes. The great thing is we can use the washer off the Emerson pots to set the depth on the reamer. This is a very easy process. You just go until you hit the washer and then you'll have the correct diameter for your new potentiometers. Now you'll notice once you're finished, you have exposed wood in those holes. I like to use paint pens that you can get from any hobby shop and pretty much any color to match the guitar and just fill that in. It dries in minutes. It's quick and easy and very inexpensive.
Using painters tape to make a template for wire up
For the next part, I want to show you how I use some painters tape to go ahead and figure out how the best way to do the wire up on this guitar. Now you can do this with a piece of paper or cardboard and you can even buy templates. However, I like painter's tape because it's quick and easy. And notice how I'm using a crisscross pattern to make the painter's tape thick and durable. And what I'm going to do is make a template. Once you made a few layers, I come through the backside of the cavity with a punch and punch the holes for the potentiometers.
Start soldering
Now it's time to start our soldering. And now that we've made this template, we can go ahead and add the potentiometers to it and not worry about being confined to working inside the guitar's cavity. Another great thing about this mod kit is it comes with some really good instructions from StewMac. So you can set it right next to the instructions and just one for one start soldering exactly where it says. Don't forget, you should wear a mask or be in a well ventilated area if you're going to solder. If you've never soldered before or you're new to soldering, always keep in mind when you're working up stuff like this to leave a little extra wire so that you can move around. You never know when you may have to redo a part or reexamine something you've done incorrectly. Once you've finished wiring everything up, you can remove it from its template and install it in the cavity.
Installing the pots and switch
Now, lightly tighten the potentiometers to hold them in place, but don't make anything permanent yet. We can start running the wire through the guitar body and start wiring up our three-way switch. Make sure you put something over the guitar body to protect the finish from any hot solder. When installing the pickups, remember to install the neck pickup first, because you have to run the wire underneath the bridge pickup.
Installing the bridge and tuning keys
Now let's move over to the bridge. One of the things I love about the bridges that StewMac picked out is that they retrofit easily. I was able to insert the new posts and bridges in minutes using the original inserts. As long as your inserts aren't damaged, you can do this in minutes as well. Replacing the tuning and keys starts with just fitting them on there loosely and not locking them down all way.
Once we have all the tuning keys on, we're going to use a straight edge and center up the D and the G tuning key. Once they're perfectly straight, we can use them as a reference point for the other four. But the best part of this guitar is the holes from the old tuning keys line up with the bottom holes on the new tuning keys. So we can use those as a reference. For the bottom holes, we can just insert the screws, but for the top holes we're going to have to drill. So I'm going to use the StewMac Depth-Stop Drill Bits so we can make new holes and not worry about drilling through the headstock.
So now let's re-string the guitar and do a comparison of how it sounded before and now with all the new equipment.
Before and after sound comparison
[on-screen text reads: Original Pickups and hardware]
[Phil plays the guitar with the original pickups and hardware]
[on-screen text reads: Upgraded Hardware and Pickups]
[Phil plays the guitar with the upgraded pickups and hardware]
So there you have it. And she's a beautiful guitar now. One thing I noticed right away was the clarity that the pickups added. Originally, the original pickups, I couldn't even use the tone controls. I didn't demo them because they were so muddy that the tone controls were just adding to the problem. The new tuning keys are a big, big difference. If you notice in the clips of the guitar with the original equipment that it sounded a little out of tune, it's because no matter what I did, the guitar kept slipping out of tune doing the recording.
This is a great way to get into guitar modifications and repair, and you can find even more videos if you go on StewMac's YouTube channel or find all of these parts at www.stewmac.com.


