Sharpen your chisels so they cut like razors
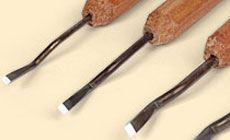
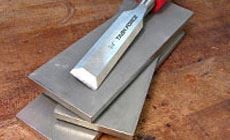
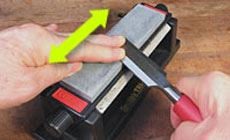
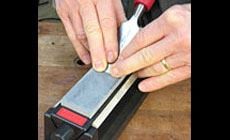
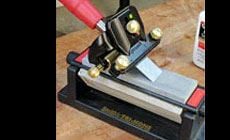
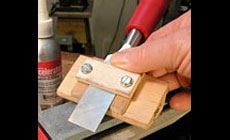
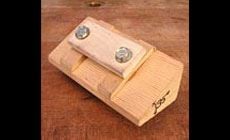
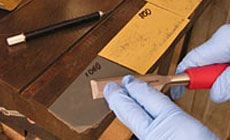
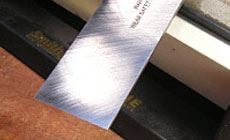
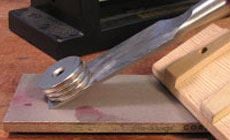
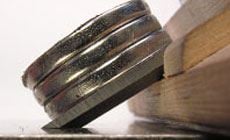
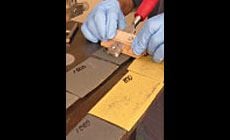
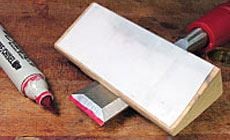
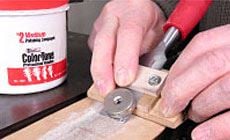
You can’t do good work with dull blades. Here’s how to make your chisels cut the way they’re supposed to. At the factory, chisels are ground to a bevel of from 25° to 35°, but it’s left up to you to put the final edge on it. Your new chisel is merely roughed in and ready for you to make truly sharp. For stringed instrument work, you need the keenest of edges. This chisel is an inexpensive one from a Lowe’s home improvement store. You can see the grinder marks on the bevel; when I’m done sharpening it, these marks will be almost gone. The front and back surfaces will become flat and mirror-smooth, while still keeping this factory-ground angle. I use my diamond fret levelers to sharpen chisels. They’re the best tool I’ve ever found for this job. If you’re not ready to invest in those, I recommend an inexpensive 3-surface sharpening stone like the one shown below. I picked this one up at the same store to try it out, and it did a good job. Flatten the bottom of the chisel by holding it flat to your sharpening stone and working it back and forth lengthwise on coarse, then medium, then fine grits. Sharpen the bevel (below) with the chisel face down on its bevel. Draw it back and forth on the coarse/medium/fine stones without tipping it. Holding the bevel to the stone without tipping isn’t easy, and a fancy sharpening jig like this one helps a lot. You can save yourself that expense by making your own. Here’s how: I sawed this wooden wedge to a 35° angle, and fastened two strips of wood to it using #20 super glue. These two rails fit snugly on each side of a 1" chisel, holding it square to the sharpening stone. Another piece of wood is screwed down across them to hold the chisel tight against the wedge. To sharpen a smaller chisel, I just slip a wooden spacer in there beside the chisel to fill the gap. After sharpening, honing brings the edge to a finer point. Hone on fine sandpaper double-stick-taped to a flat surface. My bandsaw table works great, and so does a thick piece of plate glass. Use 600- and 800-grit 3M Gold Fre-Cut, followed by 1000-grit micro finishing sandpapers for honing. After honing, I can see a slight recess in the bottom of the chisel. When it’s more exaggerated than this, it’s called a hollow grind. Japanese chisels are hollow-ground, making honing easier because you’re only removing metal from the edges. I don’t think this hollow-grind was intentional, but I was glad to have it. A stack of three repair magnets holds the bevel flat against the steel surface of my fret leveler while I slide my wooden angle jig into position underneath the chisel. They also helped to hold the chisel flat against the steel bandsaw table while I honed the bevel. I found that three magnets held too tight, but two magnets were just right. I honed the bevel with six grits: Fre-Cut in 600 and 800, then micro paper from 1000 to 2000 grit. After 2,000-grit, this bevel’s really sharp! I put red magic marker on the chisel, so I could see where the metal was coming off as I worked. Also notice the piece of white Teflon on the bottom of my wooden guide to make it slide smoothly: that’s a piece of our Teflon fret dam material.
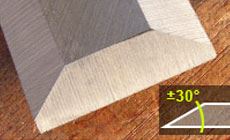
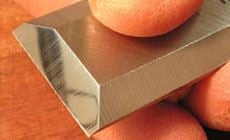
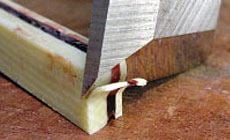
Raise the chisel in the wooden guide by 1 or 2 degrees to create a secondary “micro-bevel,” which you can see in this closeup. It’s a tiny extra bevel right at the tip, and it’s super sharp. Finally, strop the micro-bevel and the back by rubbing them on the rough side of a piece of leather taped to your flat surface and smeared with medium polishing compound. This polishes the steel and finishes the sharpening job. You’ll love the end result: a wicked-sharp chisel that slices plastic binding like cutting a stick of butter! Our micro chisels are perfect for trimming nut and saddle slots or for removing dried glue around braces and frets. (And they’re easy to sharpen!)You gotta stay sharp!
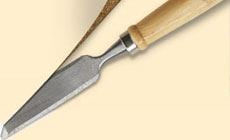
A new chisel isn’t ready to use
Step 1: Sharpening
Step 2: Honing
If you want it even sharper, add a micro-bevel:

Step 3: Stropping
Micro Chisels