Making a perfect bridge with the Sanding Station
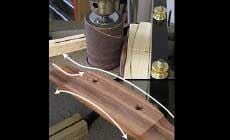
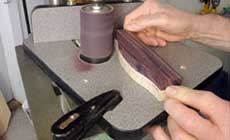
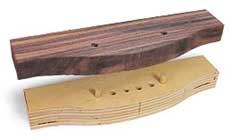
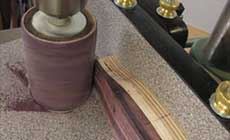
I liked the Luthier’s Friend Sanding Station the first time I saw it, and I use it a lot for thickness sanding. But messing around last Saturday, I got into a whole new ballgame with it... I planned to show you just two simple tips with the Sanding Station, but after I shot those photos I couldn’t stop using it! I was having fun, and I spent last Saturday making this radius jig for bridges. Let’s take a quick look at those two tips so I can get to the part about the radius-sanding: To keep from loading one small area of the Robo-Sander, move the binding up and down against the fence as you pull the strip through. Don’t treat plastics the same as wood as they will quickly clog a sanding drum and render it useless -- it's always better to scrape plastic bindings. Also, plastics, especially celluloid-nitrates, can catch fire from the friction of sanding, so save this technique for wood bindings. After sanding a rosewood bridge blank to uniform thickness, I rough-cut it into shape on a band saw. I made a simple plywood pattern with two 3/16" wood dowels for indexing pins. These dowels fit the two E-string holes, holding the bridge blank on the pattern. The pattern is carefully cut to my final bridge shape, and it stays with the bridge through most of the building. It’s reusable for making more bridges exactly like this one. I “pattern-sand” the bridge to shape as the guide wheel of the Robo-Sander follows the plywood, and the sanding drum removes the wood. The same pattern holds the bridge on its side while I shape the narrow ends — producing a factory-precise uniform curve that’s very difficult to get by hand. In all these photos, I’ve removed the dust collector from the Luthier’s Friend to give you a better view. Take a moment to see what’s going on in this picture:
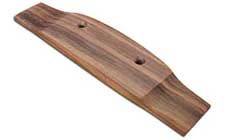
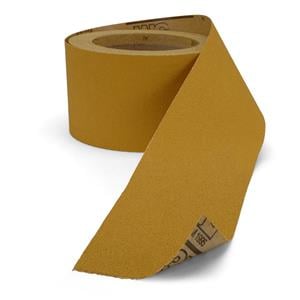
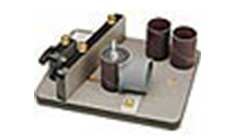
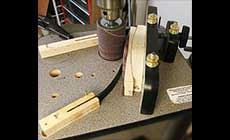
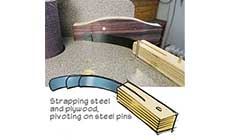
I’ve switched the bridge to a different pattern jig; this one has a curved back which mates with another curved piece against the Sanding Station’s fence. The two slide against each other like a ball-and-socket joint. This moves the top of the bridge across the sanding drum in a perfect curve (this jig’s set to a 16" Martin-style radius.) Some paste wax on the surfaces keeps them sliding smoothly. To make this radius jig, I first cut the curved block you see against the fence, then I put 80-grit Stikit Gold sandpaper on it to sand the convex piece to match. Two spring-steel hold-downs apply pressure to keep the work tightly against the fence. These are made from three overlapped pieces of black steel straps from a large shipping crate. Anchored in a piece of plywood, they’re like the leaf springs in an automobile suspension. Each of the three pieces is about 3/4" longer than the next, and together they give a good feathering affect. The plywood pattern stays with the bridge throughout the whole process, giving me a better grip than just hanging onto the rosewood alone. The next step was to finish it up with a saddle slot and the remaining four bridge pin holes. That might turn up some good Trade Secrets, too!With this shop-made jig, I’m making better acoustic bridges than ever befor
TIP #1: Keep things moving while you sand binding strips

TIP #2: Use the Robo-Sander’s guide wheel with a plywood pattern
Now for the best part: check out this radius jig!
Here's the result: a sharp-looking custom-fit bridge!