Fixing fretboard chips on the Mike Bloomfield Tele
Issue 259 April 07, 2016
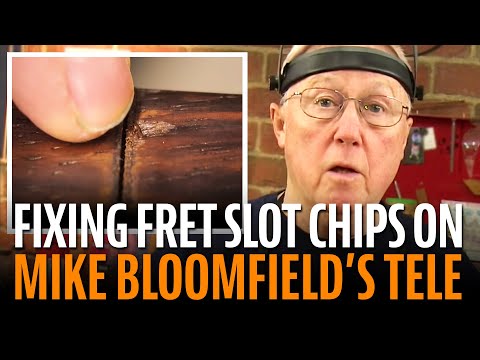
The rosewood fretboard on this 1963 Telecaster has some nasty chips from old fret jobs. Dan Erlewine uses three methods to fix fretboard chips, including some serious surgery for the worst cases: grafting in new rosewood!
About the guitar in this video: This is the 1963 Tele that Mike Bloomfield used to record iconic guitar solos with Bob Dylan and the Paul Butterfield Blues Band in 1965.
- Simple method: a drop of glue
- Common method: sawdust and super glue
- Complex method: inlaying replacement wood
- Remember Dan’s homemade drill press miter blade? Now it’s a real tool!
Video Transcription
[on-screen text reads: Stewart-MacDonald - Trade Secrets! Fixing Chipped Fret Slots]
Dan Erlewine: I'm refretting this '63 Rosewood Board Telecaster and I've already taken out the frets and cleaned the slots. Before I fret it, I want to fix a few chips that I found that were created when someone refretted this maybe 20 or 30 years ago. Some are big, some are little. There's a lot of ways you can fix chips and depending on how much work you want into it will tell you what you're going to do.
Simple method: A drop of super glue
One thing you'll always get is these little flakes. There's a flake right here that's just lifted up. If you don't fix it right away, it'll blow off on your desk and you won't find it. So I'm going to fix that one first.
Be sure to use a little piece of Teflon Fret Dam in the fret slot so the glue doesn't run down in there. And you use Super Glue because it's instantaneous.
Common method: Sawdust and super glue
Probably the simplest and quickest fix is to fill small chips with sawdust that matches the fretboard and super glue like one right here [on-screen text reads: sawdust and super glue].
Of course you want to level that sawdust fill down once it's hard, which it is. To do that, I'll start out with a razor saw to get close to the wood because it cuts in a way that I like. I put a little piece of very thin cellophane tape around that fill just to protect me a little bit. If I hit that, I know I'm getting too close.
I'm happy with this. That little flake that popped up glued down clean and the sawdust fill looks super good and if you put a fret over it, you can see how it hides [on-screen text reads: no more chips].
Complex method: Inlaying replacement wood
So now I want to move on with the big lesson of today, which is how to inlay a piece of wood into a fretboard to hide a big chip [on-screen text reads: For tougher chips: wood inlay]. And this guitar belonged to Mike Bloomfield and he played Like A Rolling Stone on it back in 1963 or 65 [on-screen text reads: 1965: Like A Rolling Stone on Highway 61 Revisited]. And I'm going to treat it the best way I know how.
Making a template with a feeler gauge
And the first thing you do is sharpen your chisel. Even the best chisels don't stay sharp forever. I'll be cutting a V-shaped wedge in the fretboard so that my inlay follows the grain of the wood. And to do that I'm going to grind a V-shape in this Feeler Gauge. That'll be a template that I'll use to cut with the razor knife and the chisel and get a clean line and then I'll use it again on my inlay patch.
I'll use the dremel tool [on-screen text reads: Dremel 4000 Rotary Tool - stewmac.com] on a medium speed to grind that V and I use the foot switch so that I don't have to turn the tool on and off all the time. To hold my template in place, I'm using Don MacRostie's Safe Slot Nut Guard. It's going to hold the feeler gauge here while I do my work.
Cutting out the damaged wood
Now these two little grinds here were my first ones. It took me three grinds to get a good clean edge to it. I slide that right over the chip, making sure that it's clean on both sides. So I'll be cutting into new wood, line that up. And I think I'll bring in a little Scissor Jack to give that support because I'll be pressing pretty tight on that. And I'm in the neck jig. I don't want to... Yeah, that's good right there.
All I'm going to do is come in real close with a brand new blade in my razor knife. I'm cutting very lightly. I'm just wanting to break the wood at the top so the knife doesn't follow the grain. Then I'll follow these marks with the chisel and excavate this wood and following that little thin razor line just enough to really get down in there. Now I can hear it chopping.
So now I've got a secondary cut with the chisel on top of that razor cut, pushing down pretty firm so it's really lined out. And I'm going to get rid of the feeler gauge for now and use that Scissor Jack. Here is a little Micro Chisel just to start picking out some of that wood. It's cut on the sides. I can chip wood off the walls with my chisel.
It makes you a little nervous cutting into something that belonged to your hero. First time I saw Mike Bloomfield play, it was on this guitar. Well on this neck, this isn't the body, that's just holding the neck.
And you don't have to dig it out perfectly flush on the bottom, just enough that it's a true inlay and has a glue joint on the bottom. Now in a demonstration like this on a video tape, I might use some body language that I wouldn't otherwise. For example, there's a camera here, so I would probably come around here and be working free of that camera. That camera is right in my face because it's in close so I can get a real good close up, and you see what this is really like. As opposed to the camera standing back there on a tripod and you can't tell.
Cutting the new inlay patch
Breaking a wall away from the side wall. That's clean enough. I can start making a film and kind of work them together. This fingerboard is Brazilian rosewood, so that's what I'm going to use to patch it with. This color matches pretty good, it's got some of that sort of orangey color in it. And the grain, if I turn it this direction a little bit, it's going to be more natural to the grain of the fingerboard. Then I use that same little template to mark that out.
My first cut is just enough. I'll see them later. Now I'm going to saw this little chunk out so I can work on it. I've cut it to a slight V on the bandsaw. Rough cut. Now I'm going to get a straight clean cut with the chisel on my drill press. I'm going to chop it with this tool [on-screen text reads: StewMac Miter Blade]. It's a sharp blade and a holder that chucks into your drill press. You can line it up to cut any miter or line that you want. I came up with this tool to cut binding miters, but it's great for all kinds of stuff.
Gluing in the new inlay
All that work for that little piece. I trimmed the little off the bottom with that chopper to make it a little shorter. It's a good fit. I'm going to put a piece of Teflon Fret Dam in there. I'm going to drop some number 20 super glue on it [on-screen text reads: StewMac #20 Super Glue - stewmac.com]. That's the thicker stuff so it won't just harden in one second. I think I'll pull the dam out for a second and slide this piece in like that. I'm going to push forward on that and press it down in and kind of drive the wedge up into that. I'm not going to need a lot of pressure to clamp that in with, just clamp a capo on it [on-screen text reads: Grover Ultra Capo - stewmac.com].
Shaving the inlay down
Okay, that's about 15 minutes. Now I got to shave it down to the board. That's a fun part too. And that's why I sharpened a chisel. I'm not sure which way the grain's cutting on this yet, so I'll just do little bits at a time and go from a lot of different directions [on-screen text reads: Two Cherries Wood Chisel - stewmac.com].
You don't try too much because it could run out on the grain and dig down deeper than you intended to. Watch that black stripe in the center. It may change and it may not. It has been changing. As it runs through the grain, it runs at angles and switches directions. I'd like to leave a little of this color in there.
A good thing to do as you go through your guitar repair life, save pieces of wood. If you have a broken guitar that's no good, save the wood because you'll patch something with it. Like this Brazilian rosewood. I bought about 30 of these things from a guy. That's Brazilian. Perfect grain. Not big enough for a bridge or a fingerboard, but I could make Gibson Tune-O-Matic base bridges for an archtop guitar from this. And I'm using some of this stuff on this.
It's going to take me a while of careful scraping [on-screen text reads: StewMac Ultimate Scraper - stewmac.com] to get the glue off because it's sunken down in the grain. That's what the curve's good for. I want to get rid of the super glue on the edges that kind of squeezed out because it sort of looks like a scab. It's really just a thin piece of glue laying on grease. I want to get it off without messing with my inlay too much. It feels pretty good.
Buff the repaired fretboard area
I think I would go on to a real fine sand stick [on-screen text reads: Micro Mesh Touch Up Stick - stewmac.com] and buff this a bit. Makes it shine like the rest of the board. And I'll tell you, when you put a fret on that, and imagine if this was seated down and looked that direction, that's a good looking fill. The little color that I was trying to save and that black line just blend right in.
So there you have it. That's three different ways to fill chips. One was very complicated but worth it because it's Mike Bloomfield's guitar.


