Lesson 6: SANDING THE BODY+NECK
Lesson 6: Sanding the neck+body
Dan teaches you how to sand the body and neck before finishing, locating the bridge, and fitting the neck.
In this video you'll learn:
- Final sanding a body and neck before finishing
- How and why to damp sand
- Rounding the corners for a softer feel
- Positioning the bridge
- Positioning the neck
- Fitting the neck to the body for a perfect fit
What you'll need:
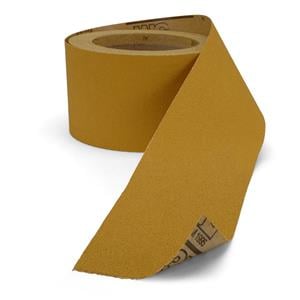
- 80, 180-grit sandpaper
- Low Tack Protective Tape
- Large dowel
NEXT UP
Video Transcription
[on-screen text reads: How to Build a Ukulele. Lesson 6: Sanding the Neck + Body]
Dan Erlewine: Now it's time to sand the body and neck. Finally, this little guy's going to go together.
Steve: Yeah, it's looking good.
Dan Erlewine: It's fitting good too. Yeah. Before we can put a finish in this, we're going to do some sanding. Little elbow grease. And Steve, you do the body and I'll do the neck.
Steve: All right, let's get to it.
Sanding the body
Start with 180-grit sandpaper. Sand with the grain, not across it. I'm taking out any scratches that go deeper than the grain itself. Don't sand too long on the back inside veneer, you don't want to sand down close to the glue between layers. Sand the top and back edges flush with the sides. Use a dowel to sand the curves at the waist. Round off all the sharp edges so they'll hold finish better. Sharp corners will sand through when you sand between finished coats.
Raise the grain with a damp rag
I'm getting ready to damp sand, and I'm doing that because although the grain looks flat, it's sitting a lot like this. So when I come across with my damp rag, it's going to raise up and then I'm able to come and cut it off with the sandpaper and it becomes a nice flat surface. Don't sand it while it's wet. That would just be pushing the fibers back down. Wait for it to dry.
Dan Erlewine: You want to sand in the curves and at the end of the peg head, and you got to flush the sides of the fingerboard into the mahogany.
Locate the bridge
Steve and I have the body and the neck sanded really nicely and ready for finishing. The next step before that is to figure out where the bridge goes and get the neck lined up to it also.
the way I did that was I put a pencil mark on the center line down here, not on the wood. I got one underneath the fretboard there. Then I connected that together and put a center line right here, and I have a little pencil mark on the front of my bridge. Real light right between those two holes so I know where the center is there. It's at right angles to center and it's the exact position of the front edge of the bridge. This will make it easy to do.
Find the scale length
Traditionally, to figure that where the bridge goes, you go from the nut where it meets the fretboard down to the 12th fret and get that measurement. Then you lay the straight edge on the 12th fret center and look for the same measurement at the bridge, but you add a little bit to it. It's called compensation. It's to make it play in tune. So I've already done that. And then to make it easy for you, I'm using a tape measure and telling you that from the end of the fretboard at the nut to the front edge of the bridge, it measures 14 and 3/4" inches. That saves you a lot of hassle figuring it out.
That's for the concert uke. If you're making a soprano, the measurement is 13 and 3/8". For the tenor, it's 16 and 11/16".
Align the neck
Now I'm going to line up the neck to the center line, run a straight edge against the fretboard. Make a little mark on each side, and then measure this mark and that mark are the same distance from the center. And you'll notice there's a little gap to take care of on that side. It's less on this side, and I'm going to do that in a second. But first, I want to tape off the edges of the board so I know where this fingerboard has to lay when it gets glued on. Right up next to it.
Now I can take the neck off and see what to do about this little bit of gap.
Fitting the neck
When I glued this up, the sides are a little bit out of square. That could happen to you too. So I got to take some wood off the bottom to bring it back into square. And when I do that, then this fingerboard, which has a little gap on it right there at the top, it'll sit flat too. I'm going to fit the heel to the sides with sandpaper.
This is 80-grit paper. This one I cut a little notch in it so when it goes up there it can slide around that dowel pin. I have one dowel pin in there, and this strip is just for doing one side at a time. I just kind of open it up a little bit and pull on it. Even that pull made it easier to stick that strip in it right there. That's helping a lot. Now I'm going to put the double strip in.
I should be wearing a glove. I did go put on some gloves because I don't want to get a paper cut. Man, you can cut yourself right through here because it takes some strength. You're holding the heel against the body. You just wanted to tuck in there so it can glue, and it's coming in. That's more like it. I've taken it off out a taper and now the fretboard will sit flat on the top. I'm going to go ahead and mask around the neck so when I glue it on, there won't be any glue getting on the body. And because it's such a hard crisp joint right here, I'm just knocking off a little bit of the hard edge here to help that joint pull together.
That's taped off so no finish will get on there, and once this is on we'll be ready to finish. Are you going to do a clear finish like this one or are you going to use a colored finish with some stain?
[on-screen text reads: Next: Staining the Body + Neck]