Episode 2: INSTALLING DIODES+RESISTORS
V-PEDALEP2
If you've ever wanted to build your own pedal kit but didn't know where to start, this replay of our live build-along series has all the tips you need.
In this 4-part series we show you step-by-step how to build our Interval Fuzz Pedal. Even if you're a complete beginner don't worry! We go over everything from unboxing, to choosing the right soldering iron, to making every connection. We also give tips on painting your pedal.
Video Transcription
[on-screen text reads: Live Build-Along Interval Fuzz Pedal Kit - Part 2: 8pm Eastern, Wed. August 26th, 2020]
Pete: Hi folks. Welcome. My name's Pete. We're live here at StewMac. If you joined us last episode, welcome back. If this is your first episode, welcome. Tonight we're going to be continuing our live build. Joining me again this week are Tommy and Rachel. We are continuing our live pedal build of the StewMac Interval Fuzz Kit. We're going to take it from this box to this pedal. Tommy, about ready over there?
Tommy: Yeah, I am. Thanks, Pete.
Pete: All right. Yeah, take it away, Tommy.
Tommy: Thanks, man. Like Pete said, I'm Tommy. I'm going to be building this kit with you. We're going to do a quick demo again for people who didn't see it last week. Last week was humbuckers. That video's still up, if you want to see that. This week I have a P90 pickup for demo purposes, so you can hear a little bit of the difference. Here's my clean tone. I'm playing into one of our Princeton kits with just a touch of reverb on it. And then here's with the pedal.
And again, my favorite use of this pedal is stacked with an overdrive distortion or fuzz pedal in front of those other pedals so that this pedal will still track your notes properly and give you that good analog octave-up effect. Here's just a pretty standard everyday yellow overdrive. And then here's with the analog-up and the overdrive.
Pete: Hey, Tommy, we got a pretty good comment on the previous episode from Duncan Hill. He was wondering if you could try turning the pedal on and off while playing it, while demoing the pedal, as opposed to playing a bit then disengaging, playing it.
Tommy: Sure. I'll start with the pedal of, with just our overdrive, and I'll kick it on in the middle of a chord here. I don't know if, Rachel, you've got a good shot so you can see when I kicked that on, probably.
Pete: Oh yah.
Tommy: Now I'll kick it off again in the middle of a chord, so you can see. It is a pronounced difference, especially with chords. If it was a single note, we can do that too. You can hear it kind of chokes out if you kick it in the middle of a single note. It really depends on a pretty good attack to form the proper octave signal. And we can talk about Green Ringers and ring modulation more later, but essentially that's just the basics of the pedal. It's a great circuit to experiment with, and it really does lend itself to messing around with different pickups, different pick attack and stacking it with different pedals.
Pete: Right. Tonight we're going to be starting with a clear empty PC board, and then you're going to be taking it all the way up through and populating it with the diodes and the resistors, so it'll end up looking like that.
Tommy: Right.
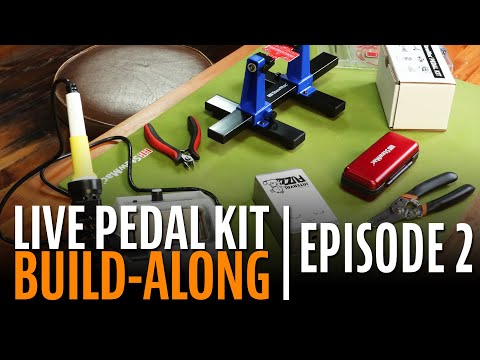
Pete: All right. We did a nice little recap demo of the pedal. Can you just show us real fast one more time what all comes in the pedal kit?
Tommy: Yeah, so again, it's a kit. It comes with everything you'll need aside from tools. It comes with a custom graphic. It comes with all the resistors, diodes, capacitors, transistors, LED for the indicator, jacks and switches. And what I've done over the weekend is sorted everything into this tray. I used the instructions, full color instructions available at StewMac.com, with all the values and the color bands listed. And I, at home, just used an optimizer and the color charts. There's not a whole lot to this kit component wise, so it was pretty easy to sort. But I also, just for simplicity's sake, sorted them with a little tag in each compartment so I know quickly without having to check which color code is which, where all my components are.
Pete: Nice.
Tommy: If you're concerned about maybe not reading the color codes, you can always check them with a Multimeter. I really recommend that if you're new to reading those color codes as they can look a little close. Red and brown can look pretty close to one another.
Pete: Is there-
Susan: Hey, guys, sorry, real quick. I'm going to make sure that your audio's good. Tommy, I just got a little bit of crackling.
Tommy: Oh, sorry.
Pete: Everyone say hi to Susan, our director.
Tommy: Susan, our fantastic video director, making sure everything runs smooth.
Susan: Let's see if that's good. I think it was just that.
Tommy: All right, cool.
Susan: Okay.
Pete: All right. So yeah, you were talking about some tips or shortcuts for sorting.
Tommy: Right. So in a kit like this, which you can see in the parts list, brown is always your last color. Sometimes it might be your first color as well, but it's a real good trick to just keep that in mind if you're having trouble figuring out which way to read those color codes. Again, a sure-fire way is to use a decent multimeter. This is a cheap one that we sell that is just fantastic. I use it almost every day. That's a big one. And again, have some way to just keep yourself organized.
This is something that I really like, but you can even get just a piece of cardboard, a clean piece of cardboard, and just draw little boxes and write the values in the boxes and put the components right on there. Anything you can do to just keep yourself tidy and keep yourself from double-guessing yourself, second guessing yourself, will help you just have fun while you're building the pedal because it's supposed to be fun.
Pete: Great. Before we get into actually soldering and putting this thing together, what did you do over the weekend with the enclosure?
Step 1: Painting your pedal enclosure
Tommy: Yeah. Step one, which we talked about last week, is finishing your pedal. Over the weekend, in about I'd say an hour to an hour and a half, I got my pedal almost all the way finished. I went from the bare enclosure, which is the one I prefer to paint, to this blue one. I took sandpaper, 220 grit. I used our Gold Fre-Cut 220 Grit Sandpaper just to take any irregularities off the case. You might want to wear gloves because you get some metal dust on you. And then wipe that off and you're ready to spray. I sprayed mine with this nice blue spray paint. I tried something a little experimental to get some texture on the top. I just kind of patted it with a nice coarse shop rag that I have, that pulled some of the paint off but not all of it, to create this pebbeling effect. Which I don't know if you can see that, Rachel, but it's pretty cool, huh?
Rachael: Oh yeah.
Tommy: I'm happy with the way it turned out.
Rachael: Oh yeah, there it is. I see it.
Tommy: So again, there's a million ways to do these. Hydrographic film is great. You can use the white enclosure and just draw on it with Sharpie, which we did last week. You can also use acrylic paint with paint brushes on that or paint pens, tons of ways to do it. And so what I'm going to do is put this sticker on now that my base color is all done. And again, sticker comes with every enclosure, bare and white. It's a nice vinyl sticker. I'm just going to put that on there, just about there.
Pete: Oh yeah, looks great.
Tommy: Yeah, so it shows up great over lighter colors. Once you get into dark brown, you're not really going to see this unless you put something else underneath it like a layer of white or something like that. I really recommend if you want to use the sticker that you stay with a lighter color. But again, it'll even show up over green, dark green, things like that.
Pete: What are the other stickers that come with it?
Tommy: This kit comes with labels for the jacks, the power jack and the input and output jack. If you're going to use those, you can mock up where the actual jacks and washers are going to be and then place those stickers so you'll still be able to see them. And then ideally you'd shoot the whole thing with a couple layers of clear paint just to protect anything and keep those stickers from getting damaged at all while it's kicking around in your gig bag or what have you.
Pete: All right, so last episode, we went over the tools that you're going to need. We went over the basics of soldering. We went over sort of the order, how to stay organized, and what you were going to do to finish the kit. That is up through step one, so let's move on to step two and yeah, get into the actual soldering.
Step 2: Install 3 diodes
Tommy: Step two, let's build a pedal. We're going to install three diodes in step two. Some pedal kits have more diodes. This one just has three. It has a power diode and two signal diodes. Again, it's all laid out in the instructions. First we're going to go and put our power diode to 1N5817, clearly marked on our circuit board here, right here. And you can see on the circuit board, it also has a band [on-screen text reads: 1N5817 rectifier diode]. Diodes have polarity, they only pass signal in one direction. Very crucial for diodes that you get them installed in the proper direction. They come in two different sizes in this kit. They come in all different sizes, but if you want to get a shot, Rachel, of what they'd look like up close, what the difference is, the black one is a power diode. The orange one with the black band is a signal diode.
Pete: What's the real difference between those two's function?
Tommy: They both only pass signal in one direction. Some are meant to protect your pedal from any transient voltage, voltage going in the wrong direction. And some are meant to affect the sine wave, the actual signal from your guitar. I'm going to install my first diode. Again, with this kit, you're going to want to bend these leads pretty close to the body. I don't know if you've got a good shot of that, Rachel.
Rachael: Oh yeah.
Tommy: Sweet. So again, doesn't take too much force. You shouldn't have to force it or anything like that. Again, just make sure your band is on the right side and matches up with your circuit board. Sometimes the bigger power diodes can be a little bit big as far as the leg, but these are going to fit right in this kit, no problem. I'm just going to pull that from the backside. Shouldn't take too much force to get that thing in there. You want it to sit as flat against the surface of the circuit board as you can. We install the lower profile components first because it's easier to get them in place and they're not going to interfere with some of the larger components that go on the board after.
Pete: Tommy, what would happen if you did happen to install that diode backwards?
Tommy: Your pedal wouldn't work. Depending on what the diode is actually doing, it may just stop your signal, it may cut the power to your pedal. It's just really important to pay attention to that. Generally, all the folks who send emails about these pedal kits don't have so much issues with getting them in the wrong direction as they do with either soldering or just misreading the instructions.
Pete: Right.
Tommy: So again, I've got that one in there. We'll move on to our other two signal diodes. These are both the same. And again, it lists all the different parts in the instructions, but the diodes in this one, just three and there's only two different kinds. So again, I'm just bending that little lead as close to the body as I can get it [on-screen text reads: 1N4148 rectifier diode]. I'm feeding it in through those eyelets. The little metal rings, if you remember from last week, are called eyelets.
All right, I've got that nice and flat against the board. And again, I'm bending these leads back to hold the components in place. It also kind of helps it make a good contact with that eyelet. Solder isn't glue. You want to have as good of an electronical mechanical connection as you can before you add solder. That's another little tip and trick that you may not know off the top of your head already.
And again, we'll just add that last diode. I've already got my soldering iron station heated up. And again, like I said in the last episode, I like to set mine for around 700 degrees Fahrenheit, or about 370 Celsius [on-screen text reads: 1N4148 rectifier diode]. Some irons, like this Solomon Station, use Celsius, some do Fahrenheit, like a Weller station I have at home. Again, you can see all of my polarity is correct. I've got my bands in the right locations on which side. We're ready to solder. I'm going to flip this guy over. Is that a good shot, Rachel?
Rachael: It is.
Tommy: Far out. I'm going to use our Stay Hot Tip Cleaner. It's good to tin and clean your tip often. Tin it whenever necessary, definitely after you turn your iron on. And then clean it just anytime it needs it, every couple joints is my general guideline. Tinning, as you may have just seen, we talked about it in the last episode, just add a small amount of solder to your tip. Make sure it stays nice and shiny and it's conducting heat properly.
Rachael: Tommy, real quick before you begin. Can you tip it this way just a little bit? Perfect.
Tommy: Yeah, yeah. Cool.
Rachael: Nice.
Tommy: I'm going to get my Magnifier on. We really recommend you have some kind of magnification, just to make sure you're inspecting your joints as you go. Visual inspection can often help you determine if your joints are good or not. It's just another thing to have in your toolbox. So again, I'm applying heat for about four seconds, leaving it on there for just another second, and then removing the iron. You remove the solder from the joint before the iron. That's a big one to pay attention to. I'm just going to go through this circuit board here and hit each of these in a line. With a smaller board like this, it's pretty easy to make sure you don't miss any connections. With some of the other kits that are a little more complicated, I do often see somebody just missed one and that's why their pedal isn't working, why their LED isn't turning on, or what have you.
So again, I'm cleaning my tip. No need to tin it again because it's still nice and shiny. I'm heating the eyelet and the component leg at the same time. Very important that there's even heat applied across both so that the solder can flow evenly, you have a nice shiny joint. And again, just a reminder, a good solder joint is shiny. It goes all the way around the component and the eyelet with no gaps. You should never blow on them or move the joint while you're creating it. You should let it cool on its own. It's a big one that I sometimes see evidence that people either had a fan going or the solder just wasn't allowed to cool properly.
Pete: What's that going to cause? What's some issues?
Tommy: Yeah, so we call it a cold joint. They're characteristically gray, sometimes cracked, dull. They're not nice and shiny like all these joints that I just made. These all look pretty much A-okay to me. Now I'm going to clip these leads. Clipping the leads is important. You don't want any untidyness on your board. I just get as close as I can with little snips or flush cutters. Make sure you keep track of these little leads as they can create an accidental short if you accidentally get them stuck in your pedal kit.
Pete: All right, we've got a quick question from Guitar Zombie, looks like he just joined the stream. We are working on the Interval Fuzz Pedal Kit.
Tommy: Yeah, so the interval fuzz pedal, for those of you who didn't catch that last week, it's essentially a design from Dan Armstrong called the Green Ringer, which is an analog octave-up pedal that gets into ring modulation if you play more than one note at a time. Sounds an awful lot like a fuzz pedal interval, meaning octave-up. That's where we got the name.
Pete: You know, Tommy, you mentioned something earlier when we started tonight, when you were demoing the pedal again, about how it tracks. Can you elaborate on that a little bit?
Tommy: Sure. Maybe I'll talk about that when I'm doing this next step because we are done with step three. We have installed all of our diodes. Now we're going to move on to resistors.
Step 3: Install 8 resistors
Pete: Sorry, now we're moving on to step three, right?
Tommy: Right. We are now on step three, everybody.
Pete: All right, moving right along.
Tommy: Resistors, just a quick note, resistors are not polarized, meaning they don't have to go in any certain direction. If you are a little more anal attentive, like myself, you like to have them all read in the same direction so if you're checking your color codes, you know that left is the beginning and right is the end. You can see there's a couple different sizes of resistor in this kit. That's their wattage rating. Not super important to know that. Just know that just because it's a different size doesn't mean it's necessarily a certain value, as far as the resistance.
Pete: Sorry. What does the size indicate?
Tommy: The size indicates the wattage, the power rating. And again, in a kit like this, you don't have to worry too much about wattage. If you were sourcing all the components yourself, you might take that into account. But for this, it's really not that big of a deal. And now I mixed up... There we go. Playing tricks on myself.
Rachael: They're hard to see.
6.2K resistors
Tommy: They are. So again, I have a lot of experience with kits like this, but you can see it can be tough to read those bands on the fly. It's really good to stay organized. So again, we're going to start loading our resistors. First, I've got a 6.2K resistor, color code blue, red, black, brown, brown. And just from the instructions I can see where exactly it needs to go. It also lists all of the values for the intended position on the circuit board. Rachel, if you can see that, all these little numbers correspond to the resistor values. I've got my 6.2K resistor, same deal. I'm going to bend those leads over as close as I can and then just drop it in through those eyelets, like so.
Pete: You mentioned that they're not polarized and you like to have them in a certain order. How do you recommend finding the proper order to read them in?
Tommy: In a kit like this, all of them are going to have brown as the final band. That's their tolerance. It's a nice easy way to make sure that you're reading them in the right order. And then when I'm installing them, I just pay attention to that first code. If my lettering on the circuit board is left to right, if I can read it, I want to put my first code that way. That's just how I do it. You don't have to do it like that with the resistors. You can put them in literally... If you can get them in there, that's fine. It doesn't matter how they're oriented, I just like to do it that way.
I'm going to get a 10K resistor. And can you say what that question was again, Pete? I'm sorry, I missed that, but I just wanted to make sure we go over resistors pretty well before I started.
Pete: Oh, well you just mentioned that they're not polarized so you don't need to worry about which lead goes into which eyelet. But I was wondering just how you determine which way... You kind of answered it already with the brown being on one side. It seems like if you keep that on the same side, you'll be able to stay organized.
Tommy: Got it. And then what the comment that someone asked the question in the comments?
Pete: The question in the comments... I think the question you may be thinking of is I was asking you about tracking.
Tommy: Yeah, that's it. Tracking the note you play is the note that the pedal is going to try to generate another note an octave-up, a full eight steps up. If you're familiar with music theory at all an Octave will be familiar to you.
Rachael: Which one are you on right now, hun?
10K resistors
Tommy: Sorry about that. I'm on our 10K resistors. There's three of them. They are brown, black, black, red, brown.
Rachael: Awesome.
Tommy: You can tell both ends have brown, but the red is second to last. You can pretty quickly deduce which value it is and which direction to read it. Also, generally if it's brown as the first color, that brown stripe is going to be a bit thinner than the final brown stripe, which is for tolerance. Again, different manufacturers may vary, but that's another little tip I like to just keep in the back of my mind.
Pete: Nice.
Tommy: I'm going to get my last 10K resistor here. Again, if you guys have any comments, questions about anything, please leave those for us. If we don't get to them tonight, we will read through all of those in the meantime and get to any really good ones next week.
Pete: We had the suggestion from Duncan Hill from last episode that we kind of covered at the beginning of tonight.
Tommy: Yeah, thanks for that, Duncan.
Pete: All right, you've got these great tips for making sure you're using the right resistor. But what do you do if you find you have the right resistor but it's not the right value or maybe out of tolerance?
Tommy: Right, so if you check your resistors with a multimeter, you can make sure they're all in spec or that none of them have faulted open. Sometimes if a resistor dies, it won't pass any signal and it'll kill your pedal. Anytime you have any problems like that, reach out to service@stewmac.com or through our website and we'll get you the right parts, or some working parts, just as soon as we can.
18K resistors
I'm moving on to our 18K resistor, only one of those. The colors are brown, gray, black, red, brown. And it goes right in between those two 10K resistors we just added. You may have seen I flipped the board over just to make sure all those leads were pulled out the way I want them. It helps hold everything in place, it just helps keep tidy. I don't solder anything until I'm at the end of a step just so I can double check all my work before it's really fully in place.
Pete: Hey, Tommy, we've got an audience question here from Colleen Berry. They ask, "What does it mean to fault open?"
Tommy: It means the resistor has some type of internal problem and instead of making a circuit, there's a break. A lot of these are a little center wrapped in wire or film that has coils cut into it. And if there's a problem with anywhere along that wire or that film, it can be an open circuit, meaning it's not going to pass any signal. The same way between my two fingers wouldn't pass signal. That's a good question.
Pete: Yeah. Thanks, Colleen.
47K resistors
Tommy: Now I've got a 47K resistor, just one of those as well. That's yellow, violet, black, red, brown. That's here on our bottom row. Here we go. And again, you can reference these locations on the circuit board and via the instructions. I like to use a hybrid of both just to make sure everything is right. That's our only 47K.
22K resistors
Moving on to our 22K resistor. That is red, red, black, red, brown.
Pete: Oh yeah, you mentioned earlier that the red and the brown can be pretty close in color, if you want to see that.
Tommy: Yeah, if you want to see a closeup of that. I'm not sure if it'll show up well in the closeup.
Rachael: It might do. Yeah, they'll see it.
Tommy: But this one is again, if you're not used to reading these color bands, depending on the color of the component, red and brown might look really similar, violet might look really close to red. Really, if you're having a hard time trusting your eyes, double check with a multimeter is my absolute best advice.
I've got a 22K. Let me just grab this back here. Great. And a 22K again. That is all our resistors for step three.
Solder the 8 resistors
Now the fun part, soldering. I'm going to flip this over. You can see that this board is already getting a little bit busy. Really important to remember those tips and tricks, and also just to take your time and be diligent about making sure all those joints look good.
Honestly, the slower and more methodical you are at this point in the build, the less frustration you're going to have later in the build. When I'm kind of getting busy like this, the thing I like to do is go top to bottom and clip some of those leads just to keep it from getting in my way or just getting confusing which one goes where. You need to avoid what's called a solder bridge, which is when solder connects two of these eyelets. Really important to just keep tidy. Again, I just clean my tip. I'm going to go ahead and tin it because it's starting to look a little bit dark.
Again, just a little bit of solder on there does the trick. For tinning, I really do prefer a wet sponge. The Stay Hot Tip Cleaner is great for cleaning but I really like a nice, damp sponge for tinning because you want to get that excess solder off your tip. Here we go. Again, just a couple of seconds til everything's heated properly. You can see, I had to turn my iron. That's a good sign that it's not tinned properly or that it's not quite properly cleaned. If you're ever not getting the joint you should be getting in the right amount of time, clean your tip and tin your tip again.
I've got a good blob of solder on there, and I'm just going to roll that around on there until I get a nice, shiny iron again. Once you get moving, you may move a little quicker than I'm going. Again, for demonstration purposes, trying to go as slowly as I can, especially for those folks who don't have everything quite sorted out yet.
Pete: We've got a couple other questions here while you're soldering.
Tommy: Great, yeah.
Pete: Again, Colleen asks, "Are there specific soldering tips," referring to the soldering iron tips, "that you recommend using?" We did cover this a little bit in the first episode. I think that for these small eyelets, we recommend using the very fine point tip. There are finer point tips out there than the one Tommy is using, but you don't need to get crazy down to like a needle point or anything like that. We also have chisel tips available for the irons that we sell, and that's pretty common for any soldering iron.
Tommy: But we don't recommend those for a pedal kit.
Pete: But we don't recommend that for the pedal build.
Tommy: Yeah, a chisel tip, you're going to melt your board because you're going to get too much heat too quickly. They're really not designed for this small type of soldering. Don't use a chisel tip for a pedal kit. I'm going to go through and clip those leads just to make it a little bit cleaner here. Hopefully you can still see, Rachel.
Rachael: Oh yeah.
Tommy: Again, I'm getting as close as I can to that joint without touching the joint with the clippers. You don't want to snap that joint. You can easily break those joints. Just because it's melted metal doesn't mean it's impenetrable. You really need to just take care that you're just cleaning the extra lead from the component and not damaging the beautiful joint you just made. And you should be making beautiful solder joints, it's important.
Is that still a good angle, Rachel?
Rachael: Looking good to me.
Tommy: Far out. I'm going to go through and hit the rest of these. I may need to stop again and clean up. Hopefully not. You can see that I missed and I just got my tip, so I need to clean that extra solder off before I try again. And again, it can be tricky to get in there. Again, you want to feed the solder to the joint, not to your iron. That's another thing I see people... looks like they've probably globbed on too much because they're feeding all the solder onto the actual soldering tip.
Pete: Here's a good question, Tommy, from Addy Agus. I'm sorry if I've just butchered your name. "Where would you use a heat sink when soldering components?"
Tommy: Heat sinks are great if you have delicate components. You really probably aren't going to need them in this kit. Some capacitors are easily damaged by heat. These resistors stand up pretty well. A heat sink is great if you know you're going to need to apply heat for an extended amount of time. In a kit like this with a good hot iron and a properly tin tip, you shouldn't need to be on any of these joints for more than three or four seconds. If you needed to apply a heat sink, like a little copper alligator clip, you would apply it on this side of the board between the component and the eyelet. That would essentially protect this component, if you put a clip right here, to pull the heat away once it's past the solder joint. You don't want it to affect the heat flowing to your solder joint. And again, in a kit like this, those heat sinks are not really necessary. They shouldn't be.
Rachael: If you could tilt that circuit board just a little bit forward. Perfect.
Tommy: Right on. Just a couple more joints. Again, anytime you see excess solder on your tip, go ahead and clean it. Right on. We're done soldering with this step. Just going to clip those excess leads, keep our board nice and tidy, and then we'll move on to... I believe step four is next.
Pete: Yep. Coming up on step four pretty quick here.
Tommy: Cool. We have any more questions, Pete, from comments or from over the past week?
Pete: No, I don't see any really fresh questions here in the feed, but I had a question for you.
Tommy: Yeah, go ahead.
Pete: You mentioned briefly in passing that this pedal is modeled off of a ringer pedal.
Tommy: Oh yeah. So the Dan Armstrong Green Ringer, it's a really cool pedal. There's still a few of them floating around. It plugged straight into your guitar and had a button so the guitar player could initiate the effect while he was playing, same as changing his volume or his tone knob. A ring mod pedal or effect is when two notes are played, a third harmonic is generated. In this pedal, if you're playing a single note, the pedal is going to track that note pretty well. And especially above the seventh fret or so, it's going to really be able to find that pedal, even with bends. It's going to find that note, even with bends.
If you play two notes at the same time, it's not going to know which note to choose to create an interval octave above. It's going to be confused and it's going to make a different note, and that's where you get some of that fuzz and some of that clipping sound that you get. Not quite the same kind of fuzz that you're going to get from a silicon fuzz, like a Big Muff or something where there's a lot of sustain and kind of like violin tones. But definitely a great fun effect to put into in your signal chain.
Pete: And do you have any tips? Or, how do you like to apply the pedal?
Tommy: Yeah. Again, it can work with any guitar, with any amp and with any other pedals. You really just need to experiment. Personally, I love it on a keyboard because there's so much harmonic content that it's really easy to send it into other worldly territory. It's really also great to kick in during a middle eight or a solo for that extra push, because especially if you already have some type of clipping in your signal chain, it really pushes it into a new sonic territory that's almost always pretty effective.
Pete: All right.
Step 4: Install 6 more resistors
Tommy: Now we're on step four. We're going to install six more resistors. And again, I have all these laid out, but we'll go a little bit slow in case you haven't.
160K resistor
We're going to start with a 160K resistor. That is red, blue, black, orange, brown. And we're just going to drop it in just like we have been. Again, it gets easier and easier as you go to see where the next component goes because there's only so many more places it can go. That's our 160K.
68K resistor
Our next resistor is a 68K. There's two of these. Blue, gray black and I believe it's orange, brown. Sorry, red, brown. So again, red and orange look really close on these, good to reference your instructions and use a Multimeter to guarantee that you have the right component if needed. Again, there's two of those 68K resistors. Sorry if my big head's in the way, Rachel.
Rachael: No, you're good.
Tommy: Okay.
Pete: Definitely populating that board.
68K resistor
Tommy: Yeah, we're getting there for sure. I've got my other 68K right next door. Drop him in. 68K is always a boy. Just kidding. All right. You can see, I'm getting these as close to the boards as I can. They're all just about the same height. No extraneous leads coming off of these that can wind up creating a short circuit. It looks pretty good at this point. I'm pretty happy with how we're doing.
560K resistor
Tommy: My next resistor is a 560K. That is green, blue, black, orange, brown. I've got my orientation the way I want it, just being picky for my own reasons in case anyone ever looks at my work. I want them to think, "Wow, this guy's insane." 560K up here.
Rachael: There's a bunch of people looking at it.
[Tommy laughs]
Pete: You talked about how you like to use the pedal. Are there any artists or recognizable songs out there that feature this pedal? Something that people might recognize?
Tommy: I'm not 100% sure about this exact circuit, but this effect, an analog octave-up effect was used on almost every psychedelic Jimi Hendrix song, incorporated as part of his favored Roger Mayer Octavia pedal, which is essentially this effect paired with a beautiful fuzz pedal. And again, you can simulate that, that kind of Purple Haze solo sound, with this and another fuzz pedal of your choice. And again, there's myriad different people who use this out there. There's a similar effect built into an EarthQuaker Devices pedal that you can hear on Black Keys records. It really is a really musical pedal if you can just figure out how to get it into your signal chain. And again, it just takes a little bit of experimentation.
Susan: I know we're close to the end, but I just want to try one more time.
Tommy: Yeah. Am I still gravelly?
Susan: Yeah, I'm sorry, guys. We're just having a little bit of audio issues.
Tommy: It's okay.
Susan: I'm going to take your mic down a little bit more.
Tommy: Yeah, yeah.
Pete: Everyone say hi to Susan again.
Susan: Hey, folks. I'm so sorry about the crackly sound. Not sure what's going on. Trying to troubleshoot.
Tommy: Thank you, Susan.
Susan: Absolutely.
Pete: That's live broadcasting.
Susan: That's right.
Rachael: On the fly.
4.7K resistor
Tommy: And this is why you sort your parts ahead of time. So our next resistors a 4.7K. Are you falling along at home? That's yellow, violet, black, brown, brown.
Rachael: 4.7K, right?
Tommy: 4.7K, you got it. All right. The guy dropped in there pretty nice.
2.2M resistor
And our last resistor, the end of step four, is our 2.2M resistor, megohms. Red, red, black, yellow, brown. There we go. Drop him in there.'
Rachael: Tommy, [inaudible 00:44:41] and scooch that board just a little bit more towards me?
Tommy: Sure. How's that?
Rachael: Perfect. You can bring it back towards you. Just a little tilt, just so I can get the little ones going in on the left side.
Tommy: Yeah. What I might do is adjust how this board is in there since I'm done soldering on the ends. I'm just going to turn the whole thing.
Rachael: Oh yeah, go for it.
Tommy: Again, this board holder's great. You will need to just adjust some things every once in a while, and that's why it's nice to have something like this that'll keep it nice and sturdy. There we go. And this also has these other teeth that can hold it if it's really getting busy and you can't get to everything you want to get to.
Rachael: Cool. And you can bring it back on wherever you had it before too, so you can get the solder in.
Tommy: Cool. Again, I'm going to do my top row and then I'll probably clip those and I'll just work around where I can reach things, just to make it easier on myself. It doesn't matter what order you solder them in, just as long as you get them all. Here we go.
Pete: All right, down to the nitty gritty on step four.
Tommy: Yep.
Pete: So, Tommy, while you're finishing up those last solder joints, do you have any good repair or solder stories for us?
Tommy: Yeah. Let's see. The most exciting ones are the ones where you made a mistake you really should know better about, and that is installing caps in the wrong direction. Electrolytic caps, if you install them in the wrong direction or if you wire them wrong, they fail magnificently. Spectacularly.
Pete: How so?
Tommy: Flames, smoke, a really unpleasant and all to familiar smell for some of us. I had an amp kit... Let's see. Not an amp kit, an amp repair I was doing. Vintage amp, very few specs on it. It was a little Kay amplifier I believe. And it had what are essentially radio tubes in it, small nine pin tubes that all kind of looked the same. What I thought were the original tubes were in it. The client had tried to change his tubes and put them in the wrong locations, so these tubes kept exploding.
The first one really kind of surprised me and I went and got my safety glasses and put a new tube in. And again, there's no information on the chassis, there's no information on the internet. I can't find a schematic, so I just put it back in the same location after I checked all the internal wiring and it blew up again. And it turned out they had swapped the power tube and the preamp tube, so no big deal. Pretty easy to fix. But man, I blew up some tubes that day. I was cleaning up glass for like 15 minutes in my workshop.
Rachael: I was going to ask if there were explosions.
Tommy: Yeah. I'm not trying to scare anybody. You're not going to have explosions making a pedal kit.
Rachael: This is rare, right?
Tommy: Yeah. Pedal kits operate on nine volts in input voltage. You're not going to blow anything up. The large electrolytic cap is maybe the only one you could actually get a real fireworks display from, and we're not going to let that happen. It's really clearly labeled. It's labeled on the board. It's labeled on the instructions. It's labeled on the component. Again, shouldn't have to worry about anything like that. Sorry for you thrill seekers out there. You're going to have to get enough excitement just out of your new pedal that you're building.
Again, we're going to clip these leads, but we're all done as far as soldering. Again, this is a live build-along, so we're going slowly and step-by-step. Next week we will get into caps and transistors. And again, I just want to thank you guys. Thanks for being with me. I'm sorry the audio's crackly tonight.
Rachael: We'll have it fixed by next week.
Tommy: Yeah, we'll have it fixed. And then please do leave us a comment. Subscribe to our channel for more cool videos like this. And again, we just want to thank you for joining us.
Pete: Yeah, let's see a good shot of that board.
Tommy: Yeah. At this point, this is what your board should look like if you're following along.
Rachael: Nice.
Tommy: Is that a good shot, Rachel?
Rachael: Oh yeah.
Tommy: Good deal.
Rachael: Looking busy.
Tommy: Yeah. We're just going to keep adding things. Next week, we'll get almost everything in the board finished up, and then the two weeks from now... And again, this is every Wednesday at 8:00. It'll be archived in case you're in England and it's 1:00 AM over there, or if you were just getting off work or something. These will stay up on our YouTube channel to watch in the future.
Pete: And that's 8:00 PM Eastern time.
Tommy: 8:00 PM Eastern. Yep, we're here in beautiful Athens, Ohio. Did I miss anything, Pete?
Pete: I think we've really covered everything we were going to tonight.
Tommy: Yeah. Big thanks to Rachel.
Rachael: You're welcome.
Tommy: Big thanks to, Susan, our director, and big thanks to my co-host, Pete, here for helping me keep on track.
Pete: Anytime.
Rachael: All right. Signing off. Say bye, Tommy.
Tommy: Bye, Tommy.
Rachael: Okay.
Tommy: All right, we'll see you guys next week.


