How to fix this guitar if my elbow's stuck in the soundhole?
Issue 142 June 23, 2011
 |
if my elbow’s stuck in the soundhole?! |
 |
||||||
 Hey, it actually happened to me! Years ago I got my elbow through a soundhole, then couldn’t get it back out. No kidding. I had to soap my arm to get it out of there. Hey, it actually happened to me! Years ago I got my elbow through a soundhole, then couldn’t get it back out. No kidding. I had to soap my arm to get it out of there.Try doing that one-handed, while your other hand has somebody's guitar stuck on it! I felt pretty silly as you might imagine, and this isn't something I’ve talked about very often. ;-) This classical guitar came to the shop because its top was buzzing. Looking inside with a light and mirrors, I found the problem. At the tail of the guitar, there was a gap between the top and the tailblock. |
|||||
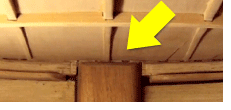 |
Pressing on the top outside, I could see a gap open and close inside. It’s almost too small to see in this photo, but it’s there: the lining between the top and the side had come unglued. |  Flexible Lighted Inspection Mirror Flexible Lighted Inspection Mirror |
|||
 |
|||||
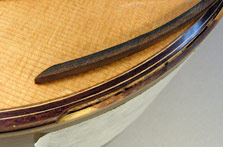
| This guitar must have suffered quite a blow. On the outside, there was a “crunch” fracture along the binding, and a long crack heading toward the bridge. A bit of staining showed where someone had tried to fix the crunch, and a light area along the crack was probably from their sanding. Even with my fancy repair gizmos, I couldn’t maneuver well enough to get glue where it was needed, much less complete the work before the glue started to dry. Even if I could, my glue job would be sloppy as heck and hard to clean up. I decided to “think outside the box” by removing a section of binding to access the loose joint and get at the problem. |
|||||
 |
The wood binding had multiple layers divided by thin strips of maple. I used a ball-bearing binding router bit to remove the outermost layer of rosewood binding. I left the intricate inner laminations untouched. Removing the rosewood was enough to give me access to the joint. |
 Binding Router Bit Set Binding Router Bit Set |
|||
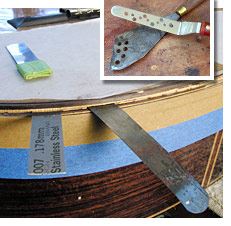 |
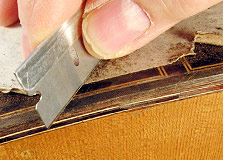
Now I could slide feeler gauges into the loose joint along its entire length. |
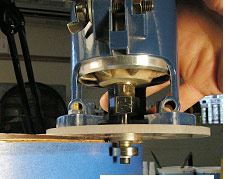
 Offset Disassembly Knife Offset Disassembly Knife |
|||
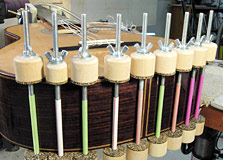 |
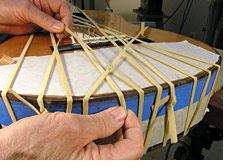
With the glue in there, I clamped the joint shut with spool clamps: cork-padded dowels sliding on all-thread rods. The plastic straws protect the guitar's finish from the threads. |
 Spool Clamps Spool Clamps |
|||
 |
I cut a strip of rosewood to size, soaked it in water for 30 minutes and bent it to shape on a bending iron. |
 Bending Iron Bending Iron |
|||
 |
Day 2: covering my tracks The next morning I shaped the ends of the rosewood strip to match the curves left by the router bit on each end of the routed ledge. |
 Franklin Titebond Glue Franklin Titebond Glue |
|||
 |
|||||
 |
I glued the strip in with hot hide glue, using rubber binding bands to clamp it in place. |
 Rubber Binding Bands Rubber Binding Bands |
|||
 |
When the binding was dry I filed, scraped and sanded the new wood flush with the back and sides. |
 Natural Wood Bindings Natural Wood Bindings |
|||
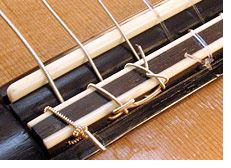 |
Anxious to hear if the buzz was gone, I strung the guitar to pitch before touching up the finish. |
 Classical Guitar Bridge Classical Guitar Bridge |
|||
 |
No buzz! And I never even had to monkey around in the soundhole! |
||||

