Relic finish: faking age cracks on a 1956 Strat
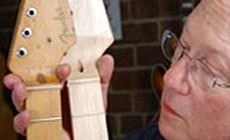
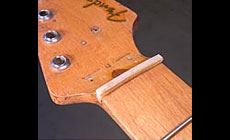
This 1956 Strat neck needed a new finish
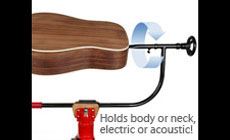
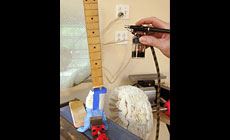
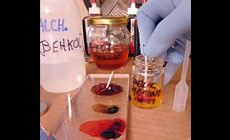
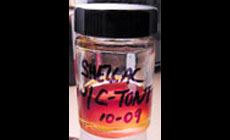
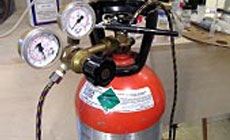
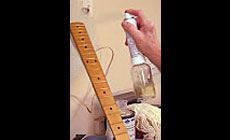
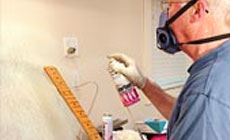
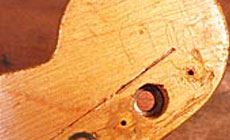
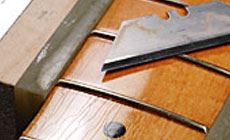
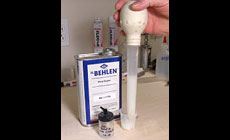
on the fretboard, and it had to match this great old crazed peghead finish. someone had altered the fretboard so it was no longer radiused — it had a broad flat area all down the center. Before fretting it needed to be re-radiused. I did this with a radius sanding beam, a scraper and a leveling file. This meant the beautiful old finish was removed from the fretboard, revealing new wood. What a mismatch! Look at the difference in color between the 1956 neck and a new unfinished one. Refinishing the fretboard involves a lot of steps, but it’s not as hard as you might think. The toughest part is coloring the newly-sanded maple to match the rest of the old neck. And getting the color right is only half the story: the old finish has a lot of checking — a crackled-up spiderweb of hairlines that show its age. Matching that takes extra steps, but it's fun It doesn’t require a lot of experience, and you’ll get great results with very simple tools. After installing the frets, I shaped the fret ends as usual and leveled the tops — but I left the final shaping and polishing until after the finish work is completed. I taped off the peghead so its original finish would be unaffected. Here I'm using an airbrush, spraying shellac thinned with Behkol solvent and lightly shaded with ColorTone stains. I used Vintage Amber, adding a bit of Tobacco Brown and Orange. I only mixed a tiny bit of color into the shellac: brown and orange needed just a drop on the end of a toothpick! Maybe ten toothpick-drops of the amber. A scrap of acrylic makes a good palette: I put a drop of each color on it, then picked up the tiny amounts I need with the tips of my toothpicks. I power my airbrush with a refillable CO2 cylinder from a welding supply shop. It provides clean filtered “air,” takes up hardly any room, and it’s completely silent. I bought the pressure regulator on top, and the cylinders are swapped out for full ones when they’re empty. After spraying the color, I “locked it in” with two very light sealer coats of Behlen lacquer. I thinned the lacquer with Behkol solvent: 1 part lacquer to 2 parts Behkol. I sprayed two coats, using a Preval spray unit (it holds more finish than an airbrush). After three hours of drying, I was ready to spray the topcoats. I used a can of ColorTone clear gloss, which builds a finish faster than the thinned lacquer I sprayed with the Preval. I left the neck to dry overnight. The next day I level-sanded the finish with 320-grit Fre-Cut sandpaper, and I sprayed two final coats of thinned lacquer. I left the neck to dry for two days, then buffed it out. It took years of summer/winter humidity changes to create the finish checking on this neck. After studying the shapes of the cracks through my OptiVISOR, I’m ready to create fake cracks of my own. It’s pretty easy: I’ll use a knife point to put tiny scratches in the new finish. A utility knife blade works well for cutting the checks into the lacquer: it’s sharp, and strong enough that it won’t bend under pressure. Be patient. Put on a CD or a TV show, and relax — pretty soon you’ll start getting speedy! Be careful not to repeat shapes too often: keep referring to the genuine checking for inspiration. They need color rubbed into them to make them show up. Thin some lacquer-base ColorTone Pigment with naphtha and wipe it onto your checking. Don’t let it dry on the surface; you just want it in the cracks. Wipe it off right away using rags wetted with naphtha. After the color’s been in the cracks for ten minutes or so, buff the surface to remove any sharpness in the checked lines — so they don’t feel new. The last step is to de-gloss the shiny new lacquer. I do this by sucking up some of the milky stearate that settles to the bottom of an unshaken can of vinyl sealer. Stearate is the powdery substance that adds sandability and a milky cast to lacquer sanding sealers. Using a turkey baster, I mixed a little of this stearate into an airbrush jar full of lacquer thinner. Two or three light passes on low air pressure (15-20 psi) leaves the surface dull — just like the original finish. This relic finish was fast and fun. It took me less than two hours to create the checking with the knife blade, and over the next few days I only spent another couple of hours mixing and spraying. The result looks good. If the owner doesn’t tell his friends, nobody’s likely to know it’s ever been to my shop! Here’s the best way ever to hold an instrument while spraying. Get a uniform, pro-quality coat on all surfaces!Faking finish cracks
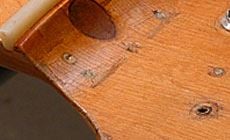
Refretting this ’56 Stratocaster gave me an unhappy surprise:
Here’s how I do a “relic” job on a new finish.
First, add some age-appropriate color
No air compressor needed

Now for the fun part: faking vintage!
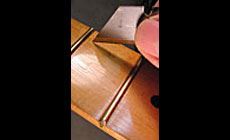
Your checkmarks will be hard to see

De-gloss it to make it look old
Can you tell the old finish from the new?

The new Freehand Holder for better, easier spray finishing!