How to spray a sunburst using aerosol cans
Customers ask me, “Can I really get a good ’burst with spray cans?” The answer is “Yes indeed!” I sprayed these Strat bodies in my shop last week, and took some pictures to show you how....
Here’s how I spray sunbursts without a spray gun
If you've got some finishing experience under your belt, this will be a piece of cake. But if this is your first time finishing, start by practicing on scrap wood like I did. You’ll get the hang of it quick. (Here’s my pile of scrap covered with test-bursts.)
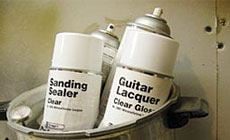
Start with a guitar body that’s been prepped for finishing: grain-filled if necessary, sanded to 320 grit and sprayed with 2-3 coats of clear sanding sealer.
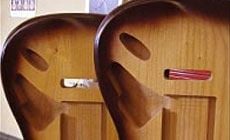
Sunburst Step 1: Black on the outside edge
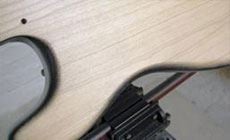
I wanted to blacken the sides without getting overspray on the front or back, so I used a brown paper mask. A few very small pieces of double-stick tape held the kraft paper in place, with the edges loose so they didn’t interfere with a nice feathering to the edge of the black spray.
With the guitar face-up on your workbench or in a homemade stand, begin spraying the outside edge. Point the nozzle at a 45 degree angle down at the top, coming in from the edges with the nozzle of your spray can set for a horizontal pattern. Make light passes all around the top edge, then flip the body over and do the same on the back. You want a nice black band around the outside edge. Avoid spraying directly into the gap between the mask and the body, which would put black where you don’t want it.
Once the black dries, remove the mask and clean up any unwanted overspray with 320 grit paper. Be sure to clean up any sanding dust before proceeding.
Once the black dries, remove the mask and clean up any unwanted overspray with 320 grit paper. Be sure to clean up any sanding dust before proceeding.
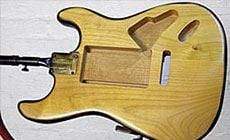
Sunburst Step 2: Vintage amber on the front and back
Now we apply the vintage amber coats, followed by a couple of clear coats. Let the guitar dry.
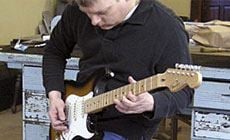
Check it out!

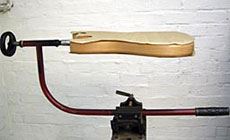
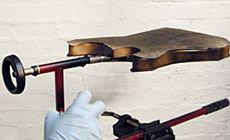
Rig up a simple holder to make spraying easier: see pages 39 - 40 of our Guitar Finishing Step-by-Step book for ways to hold bodies and necks while you spray.
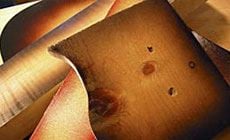
Sunburst Step 3: Tobacco brown blends the black and amber
With the guitar still face-up, it's time to add tobacco brown to the outer edge. Spray from the inside out, with the can at a 45 degree angle. Keep half or more of the spray pattern off the body, gradually bringing the spray inward until you’ve got the blend you’re after. Use multiple passes to get a dark outer edge fading into a nice reddish transition from the brown overspray on the amber. To prevent runs, spray only a couple of coats and let it dry for a few minutes before continuing.
Keep in mind that the further you hold the can from the body, the wider the spray is going to be. Practice on scrap! This step is a good time to run some tests on scrap wood. The secret is patience: don’t lay down too much color too fast! That would cause runs and a badly shaped spray line.

Clean up the overspray
After the color is dry, look for unwanted overspray in the amber area. Since you sealed in the amber with a couple of coats of clear, you can very lightly sand away any brown speckles using 400 grit sandpaper without sanding through to the color. Again, clean away the sanding dust

Tips for using aerosols:
Use warm cans, not cold.
Cold aerosols will spit and spatter, so heat your cans to 75 or 80 degrees F. by setting them in a pan of warm tap water. This does the trick.
Use multiple cans!
Keep one can warming while the other’s spraying. When one can becomes cold to the touch, swap it for the cozy warm one. And if a nozzle becomes obstructed by built-up lacquer, pop it off and drop it in lacquer thinner while the other nozzle takes a turn.

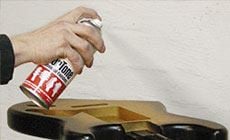
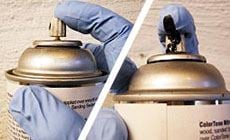
Keep out of the spray!
Make sure your fingertip is on the back of the button, where it won’t get into the finish. Otherwise you'll have a mess on your hands.
With the body ’bursted and cleaned up, apply 4-10 clear coats. Then buff it to finish off the job!


