Coloring new binding to match the old stuff
Issue 212 March 13, 2014
We've watched Dan Erlewine repair this 1930s Kay over the previous 3 Trade Secrets. It's time to finish it up. Elliot John-Conry of EJC Guitars ages Dan's patch of new plastic binding so it blends in with the old binding around it. About the guitar in this video: This 1930s Kay Deluxe is a fixer-upper that Dan Erlewine repaired in order to sell. Now that it's in great shape again, maybe Dan'll keep it!
About the guitar in this video: This 1930s Kay Deluxe is a fixer-upper that Dan Erlewine repaired in order to sell. Now that it's in great shape again, maybe Dan'll keep it!
- Masking with 3M green painter's tape
- Using a touch-up marker to create signs of wear and age
- Homemade shellac strainer that works better than store-bought
- Mixing stains to get amber and brown shellac
Video Transcription
[on-screen text reads: Trade Secrets! stewmmac.com. Elliot John-Conry, EJC Guitars]
Elliot John-Cconry: This old Kay has just had a binding repair [on-screen text reads: Coloring new binding to match the original]. The newly patched binding is very bright, doesn't match the rest of the guitar. I'm going to do a touch up to match it to the rest of the binding. See this old center stripe of maple binding is much darker than the patch.
Using touch-up marker to age the binding
We're going to get our overall color match with the airbrush, but I want to get some kind of age streaks and spotting, and I'm going to use this touch up marker to do that [on-screen text reads: Tobacco Brown Touchup Marker]. I'm going to put a little dab of color, mostly on the black, and drag it into the maple. And we're not looking for a lot here, just some discoloration to break it up a little bit, give it some patina and age.
It's not going to take much, just probably that much. If you drag a little bit out over onto the celluloid, if you get a little on there, don't worry about it. You can just use a razor blade and gently scrape it right off. It comes right off.
Homemade shellac strainer
The finish that I'm touching up is really old, dry, not very glossy. So to do this touch up, I'm going to use shellac. I chose shellac because I can spray it on thin, easily add color to it, and it bonds really well. I have some shellac mix [on-screen text reads: Find shellac at StewMac - ColorTone Shellac] for this touch up and the flakes appear to be well dissolved, but I'm still going to hold it up to a light, give it a swirl, check... It looks good. I'm still going to run it through a filter before loading it into the airbrush. I won't be using the traditional mesh paint filter. If there are any suspended gelatinous globs of shellac flake, they'll seep right through this screen. This is a tip I got from Don McCrostie, it's a paper towel, fold it into a little funnel, just hold it up let it run through. Looks good. And that's enough to work with.
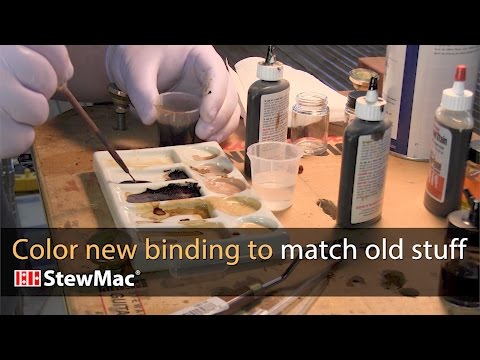
Mixing stains to get amber and brown shellac
Now we can move on to mixing some color. The first color I mixed was an amber for the binding. I added one drop of ColorTone Vintage Amber into to a full airbrush jar [on-screen text reads: 2 ounces shellac] and that's a little bit on the weak side for the color I'm going for, but I'd rather build up to it than go too far too soon. The second color is for the maple binding, and I'm going to need a light brown for that. I'm going to start with a medium brown [on-screen text reads: ColorTone Medium Brown], and then once I'm happy with that base, I'll darken it with a tobacco brown [on-screen text reads: Brilliant concentrated colors! ColorTone Liquid Stains from StewMac]. I've got my shellac here and I like to just suck up a little bit of that medium brown, blow it into the shellac, gives it a little bit of a start to mixing it. Then I'm just going to see what we get here. This is, this'll be way too light. Yeah.
Maybe I'll scoop up a little bit there.
Alright. Now we can add some tobacco brown [on-screen text reads: ColorTone Tobacco Brown] into the mix.
Oh Please.
Yeah, that's about where we want to be. I'll take it and load it into an airbrush jar and I'll go shoot a test.
Spraying on the color
I'm in the paint booth [on-screen text reads: No booth? Dan has you covered - Trade Secrets - Dan's low-tech "spray booth"] as a holder, I've got a three eights eyeball going through the bolt on neck hole. I've got a large rubber washer with paper in between that and the finish, to protect the guitar. And it's a really versatile setup. You can use it from the end pin hole as well, and then you just clamp it in your vice like so. I'm going to be spraying two colors here. I'm going to do a light brown over the maple and an amber on the plastic binding. I think I'll start with my brown on the maple. So I'm going to tape the plastic off with this quarter inch 3M Painters Tape [on-screen text reads: Brown mix darkens the maple inner binding].
[Elliot sprays the maple inner binding with the brown and the outer binding with the vintage amber]
[on-screen text reads: Vintage Amber ages the plastic outer binding
Anytime you're spraying, you want to have gloves, respirator, and eye protection. If you have a beard like I do, tighten the mask as tight as you can to your face and you want to be in a well ventilated space. So let's unmask it and see what we've got. It's looking good so far. Right here between my fingers is where the patch was. There's a little more gloss than I'd like to see, so I think I'm going to de-gloss it with either some micro-mesh [on-screen text reads: 2400-Grit Micro-Mesh] or steel wool. Just see what that gives me. I'm trying to stay off the top. I think that does it. I'm happy with that. I've got the neck back on. It looks really good. I think Dan will be really happy with this. I know he was thinking about selling this guitar, but I bet he ends up keeping it.


