Problem: a WaRpEd guitar top!
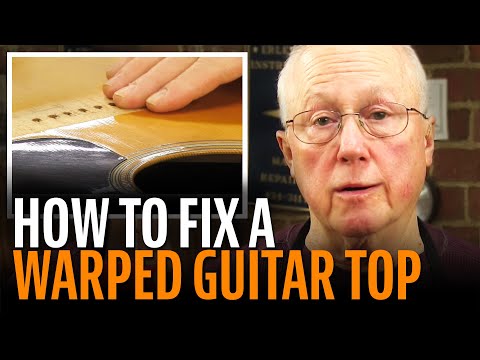
Issue 262 May 19, 2016
High action turned out to be a symptom of trouble for this guitar. The owner felt the strings were a little high. Taking a closer look, Dan Erlewine finds that the bridge is just about to pop off! A hump had formed under the bridge, and Dan comes up with an interesting solution.
Thanks to our friend Dakota Dave Hull for his music in this video.
- Diagnosing out the problem
- For a humped top, a humped sanding block
- Silver pencil shows the effects of sanding
Video Transcription
[Stewart-MacDonald - Trade Secrets!]
Fitting a bridge to a warped top
Dan Erlewine: This 706035 came into the shop, because my customer felt that the action had gotten high more than he was used to. And the reason for that was because the bridge was coming loose, and he wasn't paying attention to it. I could slide a piece of paper all under the backside as it peeled loose from the spruce. And that raised that saddle up enough that he could notice it. It's a good thing that he noticed his action was high and brought it in, because if you leave a bridge that's loose on the rear, sitting on a guitar, eventually it will pop off. Just kidding. But I have seen that happen.
Diagnosing the problem
In the case of this guitar, we've got a hard flat piece of ebony sitting on a slightly domed top, and it rocks a bit. So, it's not a perfect fit. It doesn't make sense to me to glue this flat piece of ebony onto this slight hump of spruce. I could shave this down with a knife or sandpaper, and flatten it, but I don't want to do that. That's a good glue surface, and it's the right thickness. And then, I'll take a silver pencil, because I can see that on ebony, and start marking out where I think the high spots are [on-screen text reads: Acoustic Bridge for Martin - stewmac.com]. It's not a regular shape. It's right in that center of the bridge, and I'll remove wood there and see how it fits.
Sand out the high spots
I moved on over to my drill press table, because it's flat, clean, cast-iron, and I'm going to lay down a little tape just to get a center line [on-screen text reads: Precision Straightedge - stewmac.com]. The center line is going to let me know when I'm sanding this bridge on center to my little Teflon Riser [on-screen text reads: Teflon Fret Dam - stewmac.com]. It's a little oval of Teflon. That's more or less shaped in the area that I want to sand. You could use masking tape, cardboard, whatever suits your fancy. That holds the Teflon down, because I'm going to cover over it now with some 120 grit self-sticking sandpaper [on-screen text reads: 3M Stikit Sandpaper - stewmac.com], and put a center line on that. I'm going to sit the hump right over the Teflon Fret Dam. I'll tell you, it's almost impossible to hold a curved bridge like that. So, I'm going to use this little prop that I use when shaping the bridge. Today, I'm using it upside down, just as a handle.
Now I'm ready to sand, and I know where the humps got to be. It's going to be right in here. That's better already. I'm going to take a little bit more, but it's already sitting much more flush around. We're getting there. Sometimes, I'll interrupt my sanding with a little scraping, go outside of the area and just scrape some of that wood going out towards the edge [on-screen text reads: StewMac Ultimate Scraper - stewmac.com]. It would be even hard to measure this, because it's over a long area. That's a good fit. It's got that nice belly into it.
Make sure the bridge fits tight on the edges
Now I want to make sure that it's really sitting on all the edges, not so much on the guitar top, but on a flat surface. I want to know that to itself, this bridge is flat around the edges, and you'll see a little dish in the center. Then I know when I clamp it on, it's really going to be tight on the edges, and that's where it comes loose. Anyway, you don't want that coarser sandpaper, that's 120. Masking tape makes a good little sawdust picker-upper. I don't want this. I just want a piece of 220. It's the perfect grit to do the kissing.
Glue and clamp the bridge
There, the silver is all gone, and I can still see my concavity. That's ready to clean up and put on. There's a point when it pops right into its own footprint. That's a good fit. It's not rocking. And most important of all, it's sitting down on the edge all the way around, just a little bit. You could get a small feeler gauge under that, but you won't be able to when I clamp it, everything will come out equal. The wings will sit down tight, and this will be a great glue job [on-screen text reads: Behlen Ground Hide Glue - stewmac.com].
[Dan glues and clamps the bridge down onto the guitar]
I'm going to let that dry for 24 hours [on-screen text reads: Ibex Bridge Clamp - stewmac.com]. You could cheat on that a bit, 12 hours overnight probably, but I'll wait till tomorrow. I put this bridge on at 3:30 yesterday, and took the clamps off this morning at 9:30, so that's 18 hours. Then I messed around with the saddle and the bridge pins for maybe an hour. That's 19 hours of drying time. It fits the top perfect. It's dry as a bone, and has a great sound [Dan plays the guitar gently and sings back in the saddle again].