No-fail method for making custom guitar soundhole rosettes
Issue 333 July 11, 2019
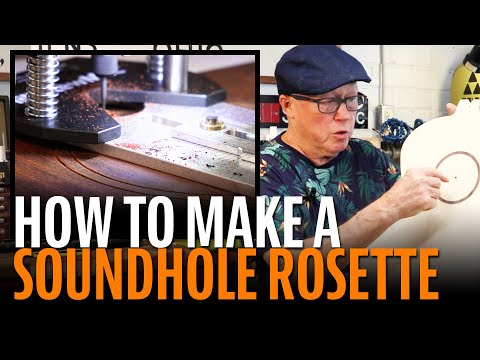
Brock Poling shows Dan Erlewine his method for ensuring that his custom rosewood acoustic guitar rosette inlay fits perfectly in the soundboard channel. Brock makes circular cuts using a Dremel and StewMac’s Soundhole and Rosette Routing Jig on twin workboards to ensure identical cuts and a precision fit.
- A beautiful rosette out of scrap wood!
- Just five router cuts create both the channel and the wooden inlay.
- Finishing touch: black/white/black purfling.
- A unique rosette adds personality to your custom build.
Here's what's covered in the video:
No-fail method for making custom guitar soundhole rosettes
The rosette is the focal point of the guitar.
With the acoustic guitar, its rosette around the sound hole is the focus point for everything. It's the first thing you see. Collectors look there first and so do buyers and players. And, it's a place where you get to have a little fun in designing something and putting it in there. And it's a hard job. This is a guitar top made by my friend at StewMac, a co-worker who's been building guitars a long time made this soundhole ring, the rosette.
Rosette channel routing is a fussy job
No matter if you made the rosette yourself, or bought it off the shelf, that's only half the battle. You still have to get it into the spruce top without any gaps, holes, tear-out, punctures, and the like. We're going to show you how to do that on this video. Brock Poling developed his own method for doing this that I'd never seen before and, it's really great. I'm looking forward to this because I've only built a couple acoustic guitars and I always had trouble putting the rosettes in.
The two-workboard method ensures accuracy
Yeah, it's actually can be a little bit tricky to get everything in there and fit nice and tight because you don't want any gaps. One of the keys to this is starting with two work boards because we're actually going to work on both work boards at the same time. Each work board is made of two thicknesses of ¾” plywood with a sheet of laminate on the top, 2’x2’ square. I measure down eight inches and center a pin which is 3/16 of an inch and matches the index hole on StewMac’s Rosette Cutting Jig which also has the plunge base on the Dremel in it. So, this is going be the tool setup that you use to cut all this with. And, we are going to use this to measure out exactly where we need to be for the outside dimension of our rosette. Then we're going to use the second workboard to cut our rosewood and the first workboard to measure the inside of the ring. Then, back to workboard 1 to cut our rosewood. If we do this exactly right, everything should drop right into the channel and fit nice and tight. This is this the sound hole that'll get cut out and this part will be removed. These two lines will be where we are going to cut for the Cocobolo rosette.
Join together your leftover exotic wood scraps
I don't throw anything away. This had been, at one point, the shape of a guitar but, you know if you flip these around and join them, you've got more than enough material for rosette.
Preparing workboards and tools
But it's always smart to do a test cut. You can see here in my test board that I've made quite a few test cuts to make sure everything is right. Once you get your cut made, you want to test the fit with your purfling. You want it to fit nice and tight. However, you don't want it to be so tight that you have to stuff it in. You want it to be a comfortable fit, but tight. I'm pretty happy with the way that fits.
Set the location and depth of the router
Before we make our first cut in the cocobolo, we need to set the cutter to the outside dimension of our rosette. Once we get it exactly where we want it, we can start by making just a tiny test cut to see if we got it where we want it. It's always a good idea to do your test fittings up here at the top because, ultimately, the fingerboard is going to come down and it's going to cover all this up. If you look right there, you can see my test cut. I've taken most of the line, but not all of the line. So, I'm pretty happy with where that's at. Now that we know what our outside dimension is, we're going to take the trimmer and we're going to move over to the other work board for our first cut.
Go slow so you don’t break your bit
Because the cocobolo is so hard, we want to make sure that we take just a small bite at a time and we don't cut too much because this bit is really, really small and it doesn't take much to break it. There’s quite a bit of dust building up so I'm just going to take the cutter off and vacuum the dust to keep the cutter from overeating. You’ll notice you’re seeing some of the tape coming off or I’m seeing some of the laminate from the board underneath. I don’t want to take too much of a bite. I’m cutting and then giving it some relief and cutting and giving it relief. Ok, that's exactly what I did not want to happen. I just broke a bit. And there it is, right there. You can see it laying right in there. That happens with this method because we're making small cuts and we're going deep in a material. It's tough to not let that happen. But, it’s just part of the trade. We take our lumps and move on. If you look, you can either see the white of the board below or I could see where I've actually cut into the laminate top a little bit which is exactly what we want.
Set the purfling depth and cut the soundboard channel
Before we take the trimmer off and come over and cut our channel in the Spruce, we need to set the depth for our purfling. So, I'm gonna start by cutting off a little piece of the purfling just so I get something smaller to work with. So, just set the purfling at the top of the pin and bring the other one down to meet it. Once I have that in place, let's tighten it from behind. So, right now, if I plunge my cutter to this depth, I'm going to be all the way in on the purfling. But, I don't want to be all the way in. I want to be about two thirds or maybe a little bit more. So, what I'm going to do now is use the fine control to be just a little bit less. Now I've got about ¾ of it in there or maybe a little less. That should be just about where I want to go. Take the cutter and move it over to the Spruce. We shouldn't have to adjust anything. We've got our depth stop in place. Just like we took light, shallow cuts on the cocobolo, we want to take light, shallow cuts on the spruce, too. This is a softer wood and it will cut okay but, the problem is that when we get into the straight parts of the grain, we can sometimes get tear-out. It will change the shape of the hole a little bit so we just want to take light cuts to make sure that everything is as perfect as we can get.
Cut the purfling and fit it in the channel
Okay we’re at final depth. We're going to take some 320 sandpaper and we just want to very gently cut those fuzzies off without changing the top of that channel at all. So, the next thing we're going to do is pre-fit a piece of purfling and cut it approximately to size so when we're installing everything, we've already got this done. We just take our purfling and insert it into the channel all the way around. Back out come the trusty Fretting nippers. It's not critical that these two things are a perfect fit right at the top because, again, the fingerboard is going to come in and cover this up. So, that's our outside. Right now, it's time to cut the inside of our rosette ring. The reason why we cut the outside ring first is because you can see with the pin that all this materials still connected on this cut. When we cut through the ring, it’s going to be loose. The only thing that's going to be holding this ring in place is that tape and this can't move at all. That’s why we spent so much time to tape this down so tightly. So, let's get going. We're going to adjust the trimmer. Loosen the bolt in the center that basically holds everything down. Clockwise is tighter. This seems like it's going to be a good fit. Now we're going to come over and cut the cocobolo just like we did before. Okay, there's our inside ring. Now we'll just do what we did before and adjust the depth of the cutter to about three-quarters of the purfling. So, now we're going to come back over and cut. So, we're going to insert our inside ring and cut that.
Set the depth of the soundboard rosette channel
To set the ring depth, one of the things that's easy to do is just cut off a little piece of the material that the rosettes cut out of and we can use that to set our depth stops on our router. So, I switched the cutter in this case out to an eighty thousandths cutter. It doesn't matter what you use. Anything thicker is fine. Just like how we set the purfling, we want to set the depth just a little bit shallower so, I'll use the fine adjustment so just a little bit of it is poking out. Make a test cut. So, that looks good. We're not touching there outside of the purfling line, it's taking plenty of material. We’re good to go. Okay, now we're just going creep out until we run into the other purfling channel. Okay, that's our Channel and now I have to very carefully remove the rosette ring. I'm gonna start by taking the outside material off first by prying up this cocobolo then very carefully loosening the ring from the work board. They love to break and it's not atypical for this to break in at least in one place, which isn't a problem. It's more challenging is if it breaks in two places. Then you’ve got to hide it and that gets a lot harder. Yeah! Got the ring off without breaking and now we get the tape off and stickiness off using a little naphtha. Just go around the edges a little bit to make sure there's no tape residue stuck to the outside edges.
Fitting the rosette components into the channel
How are we doing, pal? We’re getting there, buddy. We've got the ring cut, channels cut, purflings are cut. So, now I'm just going to make a little incision in this so I can scooch it around while I'm putting the purfling in and we can check and see what our fit looks like. I'm going to cut it right on the vertical grain. It just makes it a little easier to get it into the channel. Be careful. Yeah, don't want to break it, now. Check our purflings to make sure we got the right one on the inside and the right one on the outside. Here comes the “moment of truth”. It’s feeling snug. You got it. Looking good.
What if it's too tight?
If it's going in so tight that you think you're either not going to get it out or you’re going to potentially have to break it to pull it out, seal the rosette channel and maybe a little area around it with shellac. Use use the stuff out of a spray can or you can use like a one-pound cut to keep the superglue from getting into the end grain of the Spruce because it'll discolor it. When the shellac dries, put the pieces back in and then, right on top of the rosewood, apply a little bit of number 10 superglue and the capillary action will just pull it down and firm everything right up so it’s nice and snug and tight.
Gluing the rosette into the soundboard channel
My preferred method is to use Titebond, if I can. But, you can, here. I can definitely here because it's because it went in pretty easy. Make sure we get plenty of glue in the channel. Again, part of the reason why I like this glue is that the water in it makes the woods swell it just gives you a little bit tighter fit. Also, the wetness of it helps ease everything into the channel so it goes in nice and smooth. Start with the outside ring, then outside purfling, and inside purfling. Then, if you just take your finger, just kind of let it seat itself all the way around. I want to make sure it's seated down in the bottom of a channel the best you can get it. It does tend to like the lift out of there. So, you kinda have to keep an eye on it while you're gluing up. Start with a little dry clean up, first. I'll come back and just do a little bit of damp clean up just to get the worst of it off. You know when it’s wet like this, this will be pretty much what the color will be under finish. So, there's that nice red rose woody kind of look like cocobolo likes to show. Now, we're going to take a piece of wax paper and slip it over the peg. You're gonna take a call which is a piece of wood with the hole drilled in it, set it on top. Use something heavy like this granite surface plate. We’re going to let it sit until it dries.
Recap of the process
So, using two work boards, index pins, a setup of a Dremel tool, a plunge router base, and the sound hole and rosette routing jig, Brock inlaid this without a flaw. That rosette as tight as a drum. There are no gaps. Now he'll use the same setup to cut out the sound hole. A perfect job.


