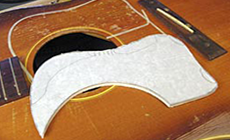
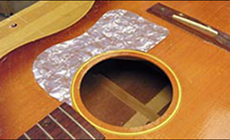
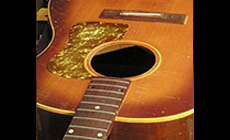
Making a pearloid pickguard with a 1950s vibe
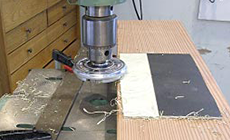
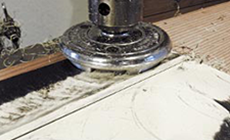
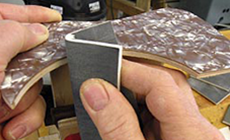
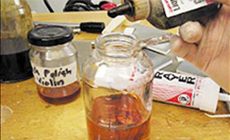
This National flattop from 1951 shows off the new pearly pickguard I just made for it. After fifty-plus years, the original guard was decayed and discolored; removing it was a chore, but making this replacement was fun! I wanted the new pickguard to look like something National might have used in the 1950s, and decided on pearloid — the material that most of us call “mother-of-toilet seat.” For an acoustic I admit it’s a little hokey looking, but in just the right way. I had an odd scrap of pickguard that I'd been saving for years for the right guitar — it has a slightly purple cast. The trouble was that it was way too thick (.120"). I needed to thin it down to .025", removing the black and white laminates, so only the pearly layer remained. In this photo, my old scraps are on the right, and on the left is a piece of new white pearloid. I tried this technique on both with equally good results, finally choosing the old stuff because of its crazy purplish color. With double-stick tape I fastened the material to a flat board, pearl side down. Then I clamped a piece of steel to the drill press table to act as a fence to run the board against while removing material with my Wagner Safe-T-Planer. (In this photo the work board is pulled away so you can see the fence.) Running at the slowest speed on my drill press (460 rpm), I passed the work under the planer in a series of shallow cuts. With each pass I cut a swath a little narrower than the full width of the planer, stopping to move the fence as I progressed across the pearloid. This is important: partial cuts give you the best control of a cutting tool. It took three or four passes to plane the width of the piece, and four or five cuts down until I was almost through the laminate nearest the pearl. Caution: Use slow speeds when you cut plastic, to avoid heat that could ignite it! After planing, I used a hand-held orbital sander to achieve my final thickness. Since the pearl piece will become so thin and delicate, I used double-stick tape to cover the working board with waxed paper. The double-stick on waxed paper held the pearl down, but a gentle tug released it without damage. I fashioned a template from 1/4" plywood and matched it to the imprint of the original pickguard (which I had marked out with 1/8" latex pinstriper's tape). After tracing the template onto the pearl, I cut the pickguard to shape with scissors and double-stuck it to the template. Now I could file, scrape, and sand the edges smooth. I used Micro-Mesh pads, taking it through the grits all the way to 6,000-grit. See how much lighter the pearl is now that I've planed away the layer of black that was beneath it. This pickguard’s going to look great, but it needs some color to tone it down and make it fit the look of the guitar. A couple coats of fresh shellac colored with ColorTone amber stain did the trick. I mixed this shellac fresh by dissolving it in Behkol solvent, and sprayed it with a Pre-Val sprayer. I use Pre-Vals for small stuff or when using colors that I don't want in my larger spray guns I sprayed a sunburst around the edges by adding some ColorTone tobacco brown to my amber mixture. The next day I sprayed four coats of clear aerosol lacquer to protect the color. Now I was satisfied — the pickguard had a little sunburst to match the two-tone ’burst on the body. With enough pickin' and grinnin' the sunburst on my pickguard will eventually wear away and become covered with scratches, but I'm betting that I’ll like seeing that pearl peeking through someday!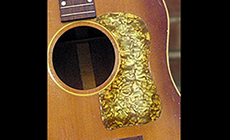
Peter piper picked a piece of pearly plastic...
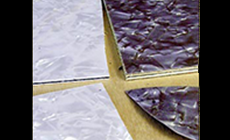
I wanted a final thickness of .025" for the pearl. Here's how I got it.