StewMac Ultimate Scraper
V-0631
Al Carruth shows how to use and sharpen the Ultimate Scraper.
Video Transcription
Al Carruth: Good afternoon. I'm Al Carruth, and I'm the guy that's kind of responsible for this scraper being out there. I learned about scrapers of this sort from Carlene Hutchins when I was learning violin making. And it took me about 10 or 15 years after I first saw her using one, to actually make one for myself. I was using the usual kind of spring steel scraper for a long time; and eventually, as it happens to everybody, your favorite tool wears out and you can't find a replacement that's anywhere near as good. So I made one of these and I said, "My goodness, what took me so long?" Basically what this is is a piece of tool steel, cut to shape, hardened, very slightly tempered just for stress relief. It's still about a Rockwell C 62, I would imagine. You can't turn a burr on this piece of steel.
It's pretty nearly as hard as your burnisher, so you don't sharpen it the way you sharpen a card scraper. And the other thing, of course, is that it is thick enough that you can't spring it. You couldn't if you wanted to. Well, if you can, my hat's off to you. The idea is that you don't have to spring it. You could just use it one handed, if you want to, without having to do that. It has much less of a tendency to chatter. Because it's so hard, you can actually scrape mother of pearl with this; not for very long, but you can do it. When you're leveling an inlay or something like this, this is a good tool to use.
How to use the Ultimate Scraper
Because it's a very hard steel, it's brittle. Hard materials tend to be brittle. You always want to keep it as close to perpendicular to the surface you're scraping as you can. You don't want to lean it over like that, because then you're tending to roll the edge off and chip it and you lose the edge very quickly if you do that. Holding it up like this, backs the edge up better. You make a few strokes with it at one angle, and then you reverse the angle and go the other way. And that way, particularly working figured wood, if it does start to washboard, following the figure, this is going to bridge that over and keep the surface level. Now the surface is only going to be as level as this face. Again, if you're trying to make something flat, with a card scraper, you could spring it and take off the high spots just by hitting them. With this, you could do that on the curved edge, but really on this straight edge, it just naturally wants to make a flat surface.
Sharpening the Ultimate Scraper
So one of the things you want to think about when you're sharpening it, is keep that surface flat. Before I got into using these, when I was teaching people how to sharpen a card scraper, I would tell them it would take about a year for them to learn how to do it. And they'd all say, "No, no, no, I couldn't be that way." And then a year later they'd come in and say, "I'm just getting to where I can sharpen my scraper." This is really simple. I've got this one here, which is dull. People have been using it, and it's just producing dust. So this is dull. And what I have to do to sharpen it, is take the burr off and grind the edge. It's the burr from the grinding that is actually the cutting edge. So I'm going to start with a flat stone like this and just lap this off.
This is an old worn stone, not going to take much off the surface, and it will leave me with a nice smooth edge. As you know, when you're sharpening, the idea is to have two smooth edges that intersect at an edge. Two smooth surfaces that intersect at an edge, and that's the best edge. If the surfaces themselves are rough, then the edge looks like a saw, and it won't last very long. So I'm going to lap that off. And then the other thing I'll do, actually should have done first, is to make sure that this is flat by just putting this on the stone that way and lapping off, making sure that this surface is flat. Then I got to get the burr off from that. So now this is ready to sharpen. It's got the edges just sharp, but there's no burr and it wouldn't cut very well like that. You need to have a burr on it.
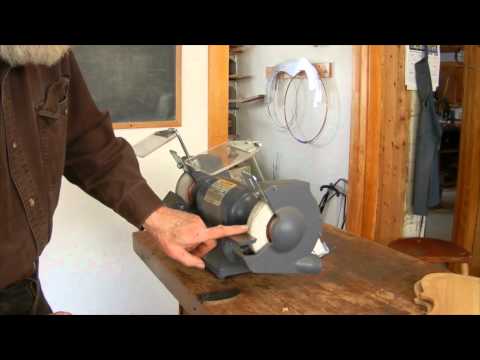
Well, this is a fine grinding wheel, and what I've done is to set the tool rest up so that it's pretty well perpendicular to the grinding wheel. What you actually want is to have a line from the center of the grinding wheel that goes out and follows that central plane of the scraper. So how you set the tool rest is going to depend a little bit on how thick the material your scraper is. When you're first setting up, what you'll do is just take this and touch it and see where it's cutting, and adjust that until it's in the middle of the thing. It can be a little hard to see if you're not used to it.
And I know the camera isn't used to it. So what I'm going to do here, is I'm just going to black a part of that surface with a felt tip marker. Okay? And then I'll turn the grinder on. And I can just touch that on the... And you can see where that cut. Now that's a little up from the center of the surface. And I'm going to flip it over and try the other side. And that's also, from that side, up from the edge of the surface. So that means that this tool rest is just a little bit this way. You want to get it adjusted to where both of those marks show up at the same place on the surface.
Now, if the surface, now there you have two marks that are the same. So now this is adjusted exactly in the center. If it happened that both of those marks were on the same side, one was up and one was down; that means that the surface itself is not perpendicular that you're beginning with. But if they're both in the same place on the surface, then you're perpendicular. So now this is good to go. I can sharpen this up. I'll put some marker on this and just show you. So here's what happens. And again, you can see where the stone has taken off material on the edges, but not in the middle, in the hollow grind. And it's all the way across here, and a little deeper there. So this edge was a little wavy to begin with. Not terribly so, but a little bit.
So now to dress that off, I'm going to just take that part, that high spot, And just touch that a little bit. And then I can go along with a light cut. And when I start taking that flat off the sides that I made with the diamond stone, then I know I'm getting out to where I'll have a burr. Now I can go around the whole thing. You want to try to get even pressure and a nice smooth throughout. So you take about the same amount of material off everywhere. Just take it off lightly. And now this has a bit of a burr all the way around, although it needs a little more right there. We take about two more passes there, and that's sharp.
[Al runs the scraper down a board]
And I can go back over here and take off nice shavings with that. This edge will last a good long time, much longer than it would on a spring steel scraper. Again, because this is hard steel. And as you see, it's very easy to sharpen.
Quick method for sharpening without the grinder
Another thing you can do with this is, if you're scraping along and it starts to get a little dull and you don't want to bother grinding it. You can also just touch up the edge by lapping the face to get off the burr, and then hold it up perpendicular on the stone and take a few strokes on there on your stone. And now what I've done, of course, is to make flats along here the way I showed you before on that other one. This makes a really fine burr, and that's particularly nice when you're scraping spruce. It will do a smoother job. So that's what I would do if I was doing the final scraping on a violin top is just take that, make that last, that real fine burr, and go over the top with that; and then you're ready to varnish.

