Episode 4: INSTALLING JACKS, SWITCH+LED
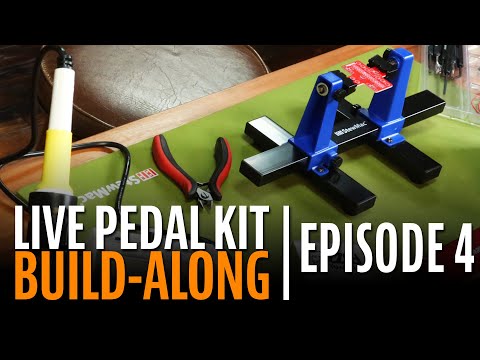
V-PEDALEP4
If you've ever wanted to build your own pedal kit but didn't know where to start, this replay of our live build-along series has all the tips you need.
In this 4-part series we show you step-by-step how to build our Interval Fuzz Pedal Kit. Even if you're a complete beginner, don't worry! We go over everything from unboxing, to choosing the right soldering iron, to making every connection. We also give tips on painting your pedal.
Video Transcription
[on-screen text reads: Live Build-Along Interval Fuzz Pedal Kit Part 4: 8pm Eastern, Wed. September 9, 2020]
Pete: Hi, folks. Thanks for joining us. We're live here at StewMac. My name's Pete. Joining me again this week are Tommy and our videographer Rachel.
Thanks for joining us. We are continuing our pedal build video series. Our livestream series here, turning this box here, building the Interval Fuzz Pedal Kit into a pedal like this. And tonight we're going to be finishing up. So if you joined us the previous episodes, welcome back. If this is your first episode, welcome. Two episodes ago we started with our blank PC board, and then we installed all of the diodes and resistors. Last episode we continued on installing the capacitors and transistors, as well as the lead wires. And tonight we're going to finish the pedal, install the actual board into the enclosure, and all the jacks, close it up and we'll have a good test at the end. All right. So Tommy, he's getting warmed up over there. Tommy, you about ready?
Tommy: I think I'm ready, Pete.
Pete: All right, take it away.
Tommy: All right folks, we're back again for episode four. We're going to finish it up tonight. Tonight I've got a bass, pretty standard J bass set up to show you how this pedal is going to sound with an instrument other than a guitar, because we've done a lot of guitars stacked with overdrive pedals and a modulation pedal. So now we'll hear it with a nice low end signal. So here's my clean tone. It's a nice round, just standard bass tone. Now, with the interval fuzz pedal. So you can hear it adds that nice kind of gritty saturation, as well as that octave up. Same for guitar, it's going to track better at about the seventh fret or up. So you can play something up here. And now with that Interval Fuzz Pedal. And you can hear it is a little bit cleaner up at those higher frets. And you can also hear that that octave is a little bit more precise, but you can still get those good green ringer ring mod effects too, which is just a really weird, interesting thing that you can get if you play more than one note at a time.
So you can hear those modulations happening between those two notes, which is really fun. It's my favorite part of this pedal. Is that enough demo, Pete?
Pete: That's pretty good. I was just curious, you've been showing in the previous episodes how you like to pair it with other effects. Why did you decide to demo it for us tonight just on its own?
Tommy: It sounds great with bass just by itself. It's still pick attack dependent. So if you play with the pick, it sounds a little bit different. I'll turn it off so you can hear with the pick. And now with the pedal on. So you can hear the attack really changes a little bit of the flavor of it, but I just think it's a great pedal just for bass if you want to add a little more color while your lead guitar players off, jumping on a monitor, playing a crazy solo.
Pete: All right. So let's get into the build tonight. We're starting with step eight on page 11 of the instructions. So we're going to start with installing the switch.
Step 8: Install footswitch into breakout board
Tommy: That's right. All right, so we're really getting down to the end here. Not too much complicated stuff to talk about as far as the rest of the components. Our first component is our footswitch and our breakout board. This footswitch will make your pedal true bypass. This is something a lot of people talk about. Some pedals have buffers that can affect your overall tone even when the pedal is off. This type of switch will ensure that your pedal, when it's off is essentially completely out of your pedal chain. So none of this circuitry that's on your board is going to affect your tone in any way with the pedal not being used.
Rachel: I see that switch.
Tommy: Yeah, so that's our switch that comes in all of our pedal kits, they're all true bypass. We do have, I believe five other kits, this is one of six. So the rest of these steps in the instructions are going to be identical, if not identical, very, very similar for all of our pedal kits, and really most pedal kits nowadays. So we're going to install our breakout board onto our switch. I've been breadboarding at home, so it just popped into my head. So you can attach the mounting nut to this switch if you want, but essentially you can just put it through the hole for the switch on the outside just to keep it in place. You can put your mounting nut in there if you like, but it's not really necessary, it should be sturdy enough as is. This breakout board will only go onto the switch in one orientation. So if you have it the wrong way, it's not going to go on.
Pete: Hey, Tommy, why is it called a breakout board?
Tommy: So it breaks out all of these connections instead of having you solder all these leads and jumpers on the switch. Very common for certain electronics to use a breakout board for ease of access to all those things.
Pete: All right.
Tommy: And then the other thing is with this breakout board, there's writing on both sides. It says this side down, meaning down over the lugs of the switch. Switch goes here, switch goes here, meaning the lugs of the switch go through that side. If you can see stewmac.com, and these little labels up at the top, you know it's in the right way. There's circuitry inside of this, which if you can see those lead wires, Rachel, is that a good shot?
Rachel: Oh, yeah.
Tommy: You can see lead wires here that are all internal circuitry in this board. So if you have it upside down, it's not going to work right. So you get that on there. Got my soldering iron heated up. Heating up now. Sorry about that folks. And what I'm going to do is get this oriented even before I solder the breakout board. I'm going to get it in place for when I have my circuit ready to add to the breakout board. So I'm just using our screwdriver set case here to get it up off of my bench. You can improvise however you want with this. This is just what I've found to be a good height for this project.
Pete: All right, so the eyelets on that breakout board are a very different shape than the eyelets we've been soldering on the PC board. What tips do you have for soldering those connections? Is there anything different that people can anticipate?
Tommy: So you're going to need a bit more solder. You really want your joint to be fully flowed all the way around the eyelet in this board. If you have any gaps, you're just asking for trouble. Corrosion can get in there, gunk, other things that aren't good for electronics. These eyelets up here are very similar to all the eyelets for all these lead wires on the main board. But these eyelets for the switch tabs do have a bit bigger surface area. So you do need just a bit more solder. Make sure you have a nice hot tip. Looks like my tip's getting up to temperature here. And again, I like to use 700 degrees Fahrenheit, or about 370 Celsius. Adjustable stations sometimes you can switch back and forth, but some just list one.
So I don't really need my OPTIvisor for this, but I just want to make sure we're getting great-looking joints, especially for the video. So I'm just going to start and work my way through. They're all the same. You don't need to go crazy in any order or anything like that. And you can see that that spun a little bit, but it's not a big deal. And you can see that joint looks great, it's nice and shiny, and there's no gaps all the way around.
Rachel: Looking good.
Tommy: Great. I'm just going to do that eight more times, essentially. It's good to inspect your work as you go. And then again, at the end just give it another quick glance. Really important, if any of these connections aren't good, you're going to have your pedal behave in funky ways. Either you're not going to have a signal when you initiate it, you're not going to get your proper effect going through when it's on, or you're going to have some funky behavior with your LED even. So it's really just very important just as with the rest of this kit that all these joints look good.
Pete: Tommy, you mentioned that you like to have your iron at about 700 degrees Fahrenheit. For someone out there who maybe doesn't have a nice adjustable station, could they build this kit with just a cheap pencil soldering iron?
Tommy: I have built a kit with a single heat iron, but it's got to be, I'd say 40 watts at least to get you the proper heat. If you don't have the proper heat, or consistent heat, it's just going to be frustration, and you may end up with some cold solder joints that you need to troubleshoot. A cold solder joint is one that didn't properly heat, or properly cool. So if you move a component while the solder is still hot, it can cause cracks inside the joint. You may not even be able to notice until you get a lot of experience what a cold solder joint looks like. But essentially you need to make sure they're all nice and shiny like these, and that they're all very smooth. And the best way to ensure that is to have a good hot soldering iron, with a nice fine tip like I'm using. So that is our last lug of the breakout board, and that is the end of that step, I believe.
Pete: Yeah, moving on to step nine.
Step 9: Attach 6 wires to breakout board
Tommy: Far out. So we're going to attach our six wires to our breakout board. That would be the four coming off of the main board, as well as the two that go to our input and output jacks from the switch. So I'm going to start with one of those. I'm just going to feed that wire through, and this switch may still be a little warm. The solder joints have all cooled, but it will hold a little bit of heat. So I'm going to wrap that around the same way just to help it hold itself in place while I solder it. And there we go. Again, not as much solder needed for these jumper wires. And I'm going to feed these other ones all through into that breakout board, if I can. And again, this is why having that not fully mounted into the enclosure can be nice, because it's nice to be able to work with both components, not have one be completely stationary or attached to an enclosure. Can you see that still, Rachel? Sorry, I know I was...
Rachel: [inaudible 00:13:48] little bit of hand, but I can see whats going on.
Tommy: Yeah, but you can see those wires, that nice pre bond wire has enough rigidity to kind of hold itself in place. And you just want to make sure that these are indeed oriented right. You can see I have the leftmost lead up here going to the left most after my big four-inch jumper to the jack. So I've just got one more. And again, you can see those all. We like to feed them up, we find it works best if you feed these up through the bottom. You don't have to, you can solder it from either side, but this just ends up looking like a bit cleaner pedal kit. That is just not behaving. There we go.
Pete: And just a reminder to our audience out there, we are live right now, so if you have any questions, please give us a shout-out in the comments, and we'd be happy to address them.
Tommy: Absolutely. Favorite color? What'd you have for dinner? What'd you have for dinner, Pete?
Pete: I didn't eat before.
Tommy: It's going to savor...
Pete: Bad, bad move.
Tommy: ... the end of the pedal with a nice, big...
Pete: I was worried about eating tacos before being on camera.
Tommy: Ah.
Pete: Could be quite embarrassing, potentially.
Tommy: Did you eat dinner, Rachel?
Rachel: I didn't eat dinner yet.
Tommy: Oh man, you guys...
Rachel: Terrible.
Tommy: I mean, it's not terrible, it takes all kinds. All right, so I'm going to get my last jumper into this breakout board, and that is for my other jack.
Pete: So you were discussing some tips on how to set up and arrange these two different components when you're attaching them, putting everything together before finally installing it in the enclosure. Do you find one thing works best, or how do you kind of approach that?
Tommy: About what? I'm sorry.
Pete: Oh, about finding a way to get these situated next to each other, secure enough to be able to attach the leads and get them all hooked up.
Tommy: Honestly, it's going to be an improvisation thing. There's no perfect way to do it that I've found. I think I do it a little bit differently every time, just depending on what the closest, stable, rectangular thing is that I can put to get these at the right height. You can lay them all on the ground if you want. I'm going to pull this out of our board holder. You can lay these on the ground if you prefer. You can even solder this board to these jumpers before you solder it to the switch. It's really up to you, and it really is just whatever is the most comfortable for you. This is just how I mocked it up today. Eventually, I'll make some kind of pedal holding jig out of acrylic that will be just absolutely perfect.
Rachel: I just realized it looks like a little guy with hair.
Tommy: Yeah. Isn't that nice?
Pete: So that is the end of step nine, right?
Tommy: Right.
Pete: So moving right along step 10.
Tommy: We're very close now.
Pete: All right, we do have a question here from the audience. Josh Turner asks, "What's a good way to practice soldering before I try building my first pedal? I'd hate to mess up the kit right out of the gate."
Tommy: So the best way is practice on cheap things. Electronics components and wire are extremely cheap pennies. So get a bunch of jacks, or microphone connections, XLRs, and some wire. And just start soldering guitar cables, patch cables. XLR cables are great if you're around a recording studio. But really practice makes perfect. And I've been soldering a long time, but if you can follow those tips and tricks, it won't take you too much before you get to be confident and understand some of the little nuances of soldering.
Pete: And if you do go back to episode one of this live series, we do have a lot of tips. We go over the basics of soldering, so those are very helpful.
Step 10: Install LED indicator light
Tommy: Right on. All right, so step 10 is install our LED indicator light. This is also a diode, just like those diodes that we installed into the board. It's function in this kit, is just to show you whether your pedal is on or off. But it really does work in the same way. Some guitar pedals use these for other purposes like clipping, generally.
Pete: And again, we did discuss diodes [on-screen text reads: 5m white LED] in more depth in episode two when we were installing them in the earlier steps.
Tommy: Yes, indeed.
Pete: Some of the quick review diodes will have a longer lead for the anode. It's the positive lead.
Tommy: Great. That's the best indication on this one, what the polarity is, polarity being positive or negative. It also has a flat side, but it's tough to see. I don't even know if you can see that in a camera like this.
Rachel: Let's see if we can.
Tommy: But again, that's harder to tell than the long and short leads, are a great indicator. So for our LED, we need to install the bezel. It's going to hold the LED securely and stop you from crushing it, or breaking it. And then there's a little lock washer that goes in there. And then the actual mounting nut. Just get that finger tight for now. Doesn't need to be crazy. And actually, I am just going to snug it up just because we won't want to go back. So just give it a little bit of pressure on the outside, and just get it finger tight and maybe a quarter turn more. It's not going to go anywhere. It's nice and stable in there. And then, there's also a little plastic sleeve that's essentially just a little stopper that'll keep your LED securely mounted into the bezel. And you want to put that on before you put the LED in, generally.
Rachel: I'm going to get a shot of that while you're doing that.
Tommy: Yeah. So there's two little holes in there, and those legs come right through. Can you see that, Rachel?
Rachel: There it is.
Tommy: Perfect. It's good to get that all the way down onto the LED. And then, I know that on my board it's labeled, but you really want to make sure you get this LED in this bezel properly the first time, if you can. Especially if you're going to add a bead of silicone, or some other kind of adhesive to just keep all that stable in there. I generally don't put a little bit of adhesive on there, but if you can guarantee that it'll stay in place for all the rough gigs and stuff on the road. So it's not a bad idea by any means.
So I've got my LED in there. Again, looking at the back of the enclosure, the longer lead for the anode or positive side, is on the left. All right, and that wraps up step 10.
Pete: Right on moving right along.
Step 11: Install printed circuit board
Tommy: So step 11, we're installing the PC board. This step also installs the diode into the main board, as well as the footswitch into the enclosure. So there's a lot happening all at once right here. We are very close to the end, folks.
I like to get my footswitch in there first. I forgot my lock washer. So on the footswitch, it's just something to note, you want this nut on the bottom. You can have it further up if you like. I like to pull it a few threads up just so you don't have so much of this switch showing outside of the enclosure. Then you want your lock washer, the one with the teeth on it, and get it through the enclosure, and hold it steady. Get your nylon washer on there, that'll stop it, the metal nut from marring your nice painted enclosure. And then get that started. And again, you don't need to go crazy with these, just get it nice and finger tight. And then you're going to want to hold this switch on the inside, because it's going to move. And then just give this another quarter to a half turn. Once it's snug, it's not going anywhere. So we've got our PC board ready, and essentially all you got to do is get those LED leads. Can you see those, Rachel?
Rachel: Yep.
Tommy: You want to get those fed through these last two holes at the top of the PC board. So you can orient it however you like. I'm trying to get a good shot for our viewers out there, and it sometimes takes a little bit of finagling, but those leads will go right through. It is not quite oriented. There we go.
Pete: Definitely can get tight in there when you're finally installing everything.
Tommy: All right. So we finally got it in there. Now, you don't want to bottom this out on the LED necessarily. This board is kind of just floating in space. It's going to be secured by all these lead wires as well as the LED. But you can see there's a fair amount of distance you don't need to go all the way down. Can you see that, Rachel?
Rachel: Oh yeah.
Tommy: You don't need to do that. I'd say about halfway up those legs is good. That way if you need to remove it, you'll still have plenty of lead to unsolder and resolder it if you need to. And those are some of our last solder joints. Is that a good shot, Rachel?
Rachel: Right there, yep.
Tommy: Okay. Cool.
Pete: So if the LED is installed, if it's mounted without adding a bead of silicone, is the weight of the PC board likely to pull that out at any point?
Tommy: No, that PC board doesn't hardly weigh anything, and it really shouldn't be an issue. If you're worried about it, go ahead and grab some silicone adhesive, because again, better safe than sorry, peace of mind is worth a lot. But I have never had that issue without using silicone. So I'm just going to get back in here. I know those joints are kind of buried. Sorry about that, Rachel. And you folks at home.
Rachel: I got a clear shot on it.
Tommy: Great.
Rachel: You can't see the actual joint going down but I can see where you're going.
Tommy: How's that?
Rachel: Perfect. Thank you.
Tommy: And we'll get that last joint done. Whoop, that was not a great job. That tip needs cleaning.
So you can see that big blob of solder was just stuck to my iron. That's because my tip was not clean. There we go. So that is our diode, and that is the last component on the board. I'm going to clip those leads for tidiness.
Can you still see that, Rachel?
Rachel: I sure can.
Pete: Tommy, Light Sound Geometry says that it looks like a green ringer.
Tommy: It is a green ringer. It is based on that same circuit that Dan Armstrong green ringer circuit. Ring modulation is what happens with this pedal when you play more than one note at a time.
Pete: So good eye.
Tommy: Yeah, great eye. So we are done with that step, step 11.
Pete: Yeah. Moving on to step 12.
Step 12: Install the DC power jack
Tommy: On the installing the DC jack.
Pete: On page 13, if you're following along in the instructions.
Tommy: Right. So this DC jack is very simple. One mounting nut, two tabs. It's very important that the polarity of this is proper, is accurate as well. So the longer lead coming out of that jack should be on the left when you're looking at the back of the enclosure, down at your circuit.
Pete: Now, is that longer lug on the DC jack like the longer lead on the LED? Is it the positive connection?
Tommy: Yeah, it is. And that's a pretty common thing across electronics, just to make it a little bit simpler. But it's always good to just check with the manufacturer, because who knows what different companies have done. But in this kit and all of our kits, the longer lead, the longer leg, or lug, or what have you, on these DC jacks [on-screen text reads: DC power connector], caps, diodes, they're all going to be your longer, they're all going to be your positive. So I've got that. Again, not overly tight, it's not going to go anywhere, just get it nice and snug. I'm going to get my two leads for my power, which are these inside two leads, these guys. And you can get them in there however you like. I like to feed them inside out, meaning, I don't know if you can see that, Rachel. Start it on the inside and send it through the outside. It's just going to decrease the chance that you're going to get a short between those two. Solder that guy up.
Can you see any of that?
Rachel: Oh yeah, that's a great shot.
Tommy: Nice. This may take a touch more solder. I kind of singed my jack. It's not going to be an issue. If you do something like that and it is an issue, you can also reach out to StewMac, service@stewmac.com. If any parts get damaged during your build, we're happy to replace them. If you think you have defective components, we're happy to replace those, and we can help you test them to see if there is an issue. But that little bit of plastic isn't going to cause any problems with this build.
So I'm going to just go ahead and feed my other jack, my other lug. And I like to get it, if I can, to lay down against the face of that lug as much as I can. It's not vital, it's just got to be a good electrical connection, but it just keeps it a little bit more low profile. So you don't want to pull on those lugs, or those leads at all, until after it's had a chance to cool. I'd say give it 10 seconds before you touch it, depending on how hot your iron is, maybe more or less. That's all for that step. I'm going to pull these just so they're more obviously on either side. But again, I can see that this lead is going to the right lug of my jack, that they're not touching each other, and that those solder joints look pretty good.
I believe that is the end of that step.
Pete: Yeah. Moving on to step 13.
Step 13: Install the input jack
Tommy: So this is basically the end, folks. We're going to install our input and output jacks. These are standard Switchcraft mono jacks. Some pedal kits use other kinds of jacks, some pedal kits are stereo. But for all of our StewMac pedal kits, they're going to come with these jacks. They're exactly the same, so you don't need to worry about that. And you can see they [on-screen text reads: 1/4" mono jack] just pop right through those holes. Sometimes if you get some finish in there, either your film, or your paint, or what have you, you'll just need to bust it through there. You can clean them up with a file if they're a little bit too small, just a standard cheap file is good enough for those.
Pete: Tommy, before you install the other one, can you give us a look at the different sections, the different connections?
Tommy: Absolutely. Yeah, that's a great idea, Pete. So I'm just going to get this hardware on there just so I don't lose it.
Just finger tight, because at this point you want to be able to rotate these, so you don't want to get this too tight, just to make it easier to solder. So on any jack like this, you have two connections. Your tip and your sleeve, or signal and ground if you'd rather think of it like that. On these, the inside is connected to this lug. You can see this lug is directly connected.
Can you see that, Rachel?
Rachel: I can.
Tommy: So there's a direct mechanical connection between this lug and what's going to be your jack. So I'll show you one here. Sorry, it's tight.
So you can see on a guitar cable, there's two conductors: your sleeve and your tip. Signal, ground. So when you plug it into the jack, your plug, the two conductors are separated by this plastic. Basically, just to stop them from touching. Your sleeve is touching this lug. And this lug is attached to a plate under here that connects to this actual tip connection. And that tab is what holds your guitar plug in place.
All right. So in this kit it has great instructions about how to orient these when you're done. I like to keep them loose while I'm soldering them, just so I can move them around so it's easier, because getting into this pedal kit at this point is a little bit tough. Once it's in the enclosure, gets a little bit tight. So you can see I had to kind of give it a little oomph to get it through. I had some paint in there. I'd sprayed this with clear coat as well. So there was enough finish in there to make it a little bit tough. But metal's going to beat paint pretty much every time.
Pete: And if it was a little too thick just to force that through, do you have any recommendation?
Tommy: Sandpaper, or a file, anything like that would do. All that is going to get covered up by this hardware. So even if you kind of ding up your finish around those holes, it's probably going to be covered.
So now, we're going to solder our jacks. So again, we've got our signal coming to and from the switch from these jacks. So those long jumpers are going to be your tip connections. I'm going to use one of my soldering aids to pull this wire out of there so I can reach it. All right, so again, we've got our tip connection and our sleeve connection. Doesn't matter really which order you do them in. I'm going to do my sleeve first, just because it's already oriented up. Same deal, I like to pull that through like that, so that the actual solder joint is on the outside.
And again, this is a bit bigger joint.
Rachel: [inaudible 00:35:10] you got those two wires that are kind of perfect.
Tommy: Sorry about that. So again, I've got my tip. I'm heating both at the same time. I'm feeding the solder to the joint. I'm going to add a little bit more. There we go.
So that's a nice, solid joint. It's not too big. You don't need to worry about filling that hole like you would with an eyelet. I know that's a strong connection there. And then I'm going to flip this jack around. Sorry for the hand shot there.
Rachel: Oh, you're fine.
Tommy: So I've got my signal lead pointed up. So it's really easy to get to... Just feed that guy through. I'm bending that wire over just a little bit to help me keep it in place. I'm going to tin my tip here. If you missed any of those soldering terminologies or tips, you can always go back and see our first episode. It's going to stay up on our YouTube channel.
So that's another good joint there. And we just have our output jack left.
Pete: All right, so moving on to step 14.
Step 14: Install the output jack
Tommy: You got it. Oh, you know what? I put the wrong lead in the wrong place. So I put the, it doesn't... Well, probably doesn't matter, but I'm going to fix it. This is the lead that's over here. So I just made a mistake there. And again, that's just how easy it is to make that mistake. Not a big deal. I can easily fix it. Just put the right wire back where it should go. But that's just an example of what can happen if you're kind of moving too quick, or not having the proper attention to detail.
Pete: Can you show us a little clear the [inaudible 00:37:31]?
Tommy: So I had this lead over here going to this jack. They're both ground. I don't know that it would've made any difference, because these just go directly to ground, but I still want to have it look right, so I'm going to fix that.
Pete: And so you were able to just desolder that pretty quickly.
Tommy: Right, didn't need to use any type of solder remover. I just melted that joint and pulled that wire out. Now, if you want to really clean it up, you can, but that still looks pretty good to me. I'm not worried about it. If you wanted to, you could use a Solder Wick, which I can just show you how that works. You just put that braid on there and heat it up, and it pulls solder off of that joint. You can see it just cleaned up that top part. So that's a little bonus on how a Solder Wick works.
All right. So now we're onto our output jack. Sorry for that brief departure. So I'm turning this jack just so the leads are on the right side. You don't really need to do it, it just helps everything look a little bit cleaner. And you can clearly see that I've got the right conductors in the right place.
Pete: Tommy, you just answered a question I was about to ask you, without me even asking it. That was perfect.
Tommy: Well, you're welcome.
Pete: I was going to ask you how you keep the leads organized, but that card's gone.
Tommy: Honestly, the leads are pretty easy to keep in place. They're rigid enough since they're pre-tinned wire, that they stay in place a lot better than non pre-tinned wire. And again, this tinned wire is in all six of our pedal kits, and it really does help you get a good result with less fuss.
Pete: So the wire that's included is pre-tinned. What about the components?
Tommy: The components are not, but they're so small. It's less important than if you were working with big 22 gauge wire, or a big fat lead on a component, like a really large diode or something.
Rachel: Tommy, before you finish that... Perfect. Oh my gosh. You just read that. Tommy reading everyone's mind.
Tommy: Uh oh. All right, so our last connection. This is a big one, folks.
Pete: So while you're doing that, are there any issues you commonly see when helping customers regarding this stage of the build?
Tommy: Yeah, actually just today I had an email from a guy who was pretty confident that all of his solder work was good, all his components were in the right locations, he followed the instructions. And essentially he did something really similar to what I just did. He just flipped two of his wires. So he had his signal wired to his sleeve, which essentially just cuts your signal. So again, super easy fix, and I'm sure we both had a little chuckle about it.
Pete: So that's the end of step 14, right?
Step 15: Completed view
Tommy: That is. So essentially we're down to our completed view. Your pedal should look something very similar to this.
Rachel: Looking good.
Tommy: Great. I'm going to tighten these jacks now.
Pete: I was going to ask, are there anything that you would recommend doing before closing it up and testing it?
Tommy: Yeah, so I don't know if I can get you a good shot without my hand being in the way, but you want to tighten these while you still have access, because you want to hold this so it doesn't spin. So I'm just going to do that with both. I'm using a nut driver here, that's a half inch nut driver. You can also just use the end of most wire strippers, have little pliers on them. It's easy to ding up your finish using pliers. So just use care. And again, I already snugged my switch up. It's still jiggling a little bit, so I'm just going to hold it on the inside and give that another good half turn.
Pete: Sorry, would now be the time you would clip those LED leads that are left over?
Tommy: Yeah, so I clipped those earlier, but if you've got any longer leads that you can still see, good time to do that. Just give yourself another quick double check. Make sure all your joints look good. That one has a little burnt plastic on it. I'm happy with how this looks. We haven't tested this, so it's time to plug it in and see if we actually built a pedal kit. So I'm going to get my enclosure, the back of my enclosure on there. I'm going to get my four screws.
Pete: Definitely a little bit nerve-wracking, normally with any kind of video, we'd love to be able to test everything before plugging it in and demoing it. But we are live, so...
Tommy: No net tonight.
Pete: Hopefully everything goes the way it should.
Tommy: Yeah. Well, I took my time. Normally, if I'm building a pedal kit at home, I'd be kind of flying pretty quick through the instructions. We tried to get as much of a good video shoot as we could do for you folks while we were going through all the steps. So I appreciate you more experienced folks bearing with us.
Pete: We do have another question from the audience.
Tommy: Great. I'm going to get this thing plugged in. Go ahead and ask that question.
Pete: I hope I'm not about to butcher your name, but I believe it's DotHackFreak11 asks, can you add a battery?
Tommy: So this kit and all of our other kits do not have a battery option. They do sell jacks that you can hook up for either battery or DC plugs. But the instructions and the included jack are not compatible with a battery.
Pete: And before we go ahead and plug this in and test it, you discussed in an earlier episode how you generally don't install the decal sticker on these for the input and output and DC jacks.
Tommy: Right. So the sticker, if I can grab that real quick and show you, Rachel. Can you see that in that shot?
Rachel: Perfect.
Tommy: So it says input jack, output jack and DC jack.
Rachel: Actually, just tilt it a little bit, just so everything lay perfect. There you go.
Tommy: And I don't need those labels. I've been around pedals long enough that I know that the input is on the right and the output is on the left.
Pete: And the DC jack is the one that's the DC jack.
Tommy: But if you want to use those, you absolutely can. I've seen customers who add their own custom labels, arrows, electrical signals, things like that on the top of these two. All of our pedal kits come with those stickers, as well as labels, if they're relevant for Potentiometers or mini Toggle Switches. So there's a ton of different stickers that come with these depending on the kit. This is our most simple kit, which is why we chose this one for this shoot. But I believe we do plan to do a few more of our Pedal Kits as a build along. So I'm going to show you how to plug it in, and we'll see if it works.
Pete: Let's test this thing out. Yeah.
Tommy: So like I said, your input jack is on the right side when you're looking at it. So I've got that coming from my base. Your output jack is the other one on the left side. That's pretty universal for most pedals. And then your power jack. And I can see right away we've got power. That's a good sign. If you don't see your LED, that is a good sign that you need to troubleshoot either your power, or your switch, or that actual LED itself.
Pete: Yeah. Tommy, I was going to ask you, is there any kind of rubric someone can use to determine how successful their pedal build went? What can they look for as a flag that maybe something's not quite right, or opposite? What should they expect if everything went according to plan?
Tommy: If it went according to plan, it's going to sound like this.
Pete: It works. Everybody cheer.
Tommy: For this kit, there's one switch, it's on or off. If it sounds different from when it's off, it's probably working properly, as long as you don't have any oscillation, or hiss or excessive hum, or anything like that. You can hear this pedal even with a base in a noisy environment with all these lights and everything. It's quieter with the pedal on. So that's a good sign that we have a good build.
Pete: And what is it that makes the pedal quieter when it's engaged?
Tommy: So all those caps and resistors function as filtering. That's part of how the pedal works. It's also a good design, that PC board is designed well so that you're not going to get any kind of weird noise that you might with a breadboard build, or some of the other slap dash circuitry that has been created over the years. That's just inherently noisy.
Pete: All right, let's hear some more of that pedal.
Tommy: I like it. Again, this isn't my favorite out of all of our pedals as far as our pedal kits, but it is a great pedal for bass, especially if you need some slightly raunchier tones.
I think it just adds a nice fuzzy distortion without being over the top, or spitty, or anything like that. And it really helps push your bass into the mix further. Your guitar player might get mad if you're stepping on his toes, but I love it. I love it for this.
Pete: Fantastic. All right. Well, I am so happy that worked, as soon as we plugged it in. Definitely a little bit of a drum roll moment. All right. Well, everybody who has joined us for this series, thank you so much. I want to thank Tommy, and of course, our videographer, Rachel. I want to thank our wonderful director, Susan.
Tommy: Couldn't have done it without you, Susan.
Pete: And I especially want to thank everyone, again, who's tuned in. We definitely would love to continue doing these series. So for any of you who maybe this was your first time joining us tonight, all of these episodes are available on our YouTube channel, so you can subscribe and go back and re-watch them at any point. Again...
Rachel: If anyone needs help.
Pete: Yeah, if anyone maybe didn't have quite a successful build as we did, if there are any issues, if you just need some help troubleshooting something, you can always contact us, send us an email to service@stewmac.com [on-screen text reads: if you get struck we are here to help]. We'd be more than happy to help you out. And I think, like Tommy said, we do want to continue doing these videos, so please leave your comments, or questions. And this is just one of six pedal kits we have right now, and I know there are a few more in the pipeline, so those hopefully will be available soon. I think that's all. Thank you guys so much again for tuning in, and have a wonderful evening.
Tommy: Big thanks to Pete. Big thanks to Susan. Big thanks to Rachel.
Pete: Take care, folks.
Tommy: Have a good night.


