How to Clean a Guitar
People ask us all the time, "what's the best way to clean a guitar without damaging the hardware or finish?" We get asked so frequently, in fact, that we decided to make a video to show you some of our favorite methods.
Cleaning your guitar is just like getting an oil change in your car. It's something that's really easy to do, but it's totally crucial to the wellbeing of your guitar. You just need a couple of simple things, some cleaning supplies, some polish, and some elbow grease. Let's get started.
Step 1: Regular Upkeep
Whether it's an acoustic or electric guitar, you'd be so surprised how quickly it could build up dirt and grime. So it's a good idea to establish regular upkeep habits in between deep cleans. Your fingers are a source of a lot of dirt and grease. Washing your hands before you play guitar is a great habit to establish and also keep a rag in your guitar case.
You can use it to wipe down your guitar after you play, especially, the strings or in between sets when you're playing in smokey barns, sweating when you're rocking out, keeping your strings regularly maintained, not only extends the life of the strings, it makes them easier to play.
Step 2: The Deep Clean
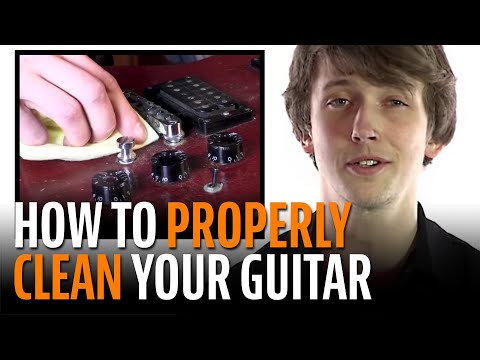
When it comes time for a deep clean, I always take off my strings. It just makes it easier to get to the fretboard and harder to reach areas. Cleaning your guitar is a top down process. You're using the least aggressive cleaner to work your way through the layers of dirt and grime that keep you from the finish. I like to start by rubbing it dry with a clean cotton rag or even an old t-shirt because sometimes that's all you need to get off that first layer of dirt.
And once you've gotten all you can dry, it's time to move down to that next layer of grime with a wet clean. Before you get started, you want to make note of any places on the guitar where there's bare wood. Cracks, openings for electronics, the sound hole, these are all places where water and polish and cleaner can get on the guitar, swell it, and just make it harder to do repairs in the future. Once you know where all the bare wood spots are, now you can use a little bit of hot water or even some saliva to wipe down the dirt off of your guitar. Saliva is an age old cleaning agent, and I've used it when nothing else works on a guitar.
If it still hasn't come clean, Naphtha is your next choice. It's a degreasing spirit that's a little bit more aggressive than the water or saliva, but it's not going to mess with your finish. Although, you're going to want to wear gloves because Naphtha is basically lighter fluid. You just have to remember that less is best and that a little bit goes a long way. In general, you want to stay away from household cleaners, things like PineSol or Windex or furniture polish, these things generally don't do well on a guitar finish.
Step 3: Tips & Tricks
When you come across hard to reach areas like around the tuners or the deal or the bridge, you can use soft brush, or personally, I usually grab Q-tips. Sometimes a fretboard can be really gunky. For those, the trick that I have is using an old credit card to scrape off the dirt. Then I'll use some steel wool to take the rest of it off. You want to make sure that's fine steel wool, not the regular stuff. Then to give it a nice sheen, I like to use lemon oil or the fretboard finishing oil or wipe it down with a Miracle Polishing Cloth. This technique, though, only applies to Ebony or Rosewood fingerboards. If you had a Maple fingerboard, and you'll know them because they're a lot lighter in color, it probably has a finish on it, and so you definitely would not want to use any abrasives.
You just want to wipe it down with some hot water and some Naphtha. If you have electronics that are kind of noisy and crackly, you'll be so surprised about what a little bit of DeoxIT pot and switch cleaner will do. You spray some of it in there and give the pot a good turn to work some in, and then you might not have to take it to a repair person for more work. If you come across some rusty or corroded parts, I like to use a toothbrush and put in some of that elbow grease. If it's really bad, my go-to is a Dremel tool with a brass wire brush. Once your guitars come clean, you can really make it shine with some polish.
Step 4: Give it a Shine
Before you can put on any kind of polish, you have to know what finish your guitar has. Usually, it's a gloss or a satin finish. A gloss finish is really just how it sounds. It has a nice shimmer to it. It reflects off the light. It looks and feels smooth like glass. Whereas a satin finish, it's more of a matte natural looking finish. If your finish is satin, I would definitely stay away from any polish or scratch remover that has an abrasive in it. This is just going to try and shine up your finish into something it's not. It's a matte finish, it's supposed to look natural. Preservation polish is a great option for satin finishes. It's a versatile polish that can be used on any finish because it's gentle. It doesn't leave any stickiness or residue or cloudy film. Just squirt a little bit into a clean cotton cloth and rub it in.
For a gloss finish like this guitar has, you can either use ColorTone Clean + Shine or a scratch remover. The scratch remover is a little bit more aggressive because it has an abrasive in it, and when you put a little bit on a rag and rub it in, you're actually cutting into the finish. When you're done wiping it on, you can take a clean rag and just wipe it off and leave a nice sheen. I can't stress enough to keep your polish off of the bare wood. Also, you need to stay away from any polishes that have silicone or wax. Anything that you think is going to leave a residue. Once you've done your polish, you're ready to put on a new set of strings. Your guitar is looking slick and squeaky clean, and you're ready to rock out.


