Bindings with CA Glue - Luthier Tips du Jour Mailbag
In this episode, Robbie O'Brien answers a viewer's question and demonstrates how to install bindings and purflings using CA glue.
Video Transcription
[on-screen text reads: Luthier Tips du Jour Mailbag]
Mailbag question: I don't work as fast as you, is there a different method and glue I can use for binding installation other than what you use?
Robert O'Brien: Today's Tips du Jour Mailbag question comes from a viewer in England. "Dear Robert, I've watched your online guitar building course videos and your Tips du Jour video on binding installation. In the videos, you use LMI White Glue. I don't think I can work as fast as you do. Is there a different method and glue for doing this step? Steve, in England."
First of all, a sloppy binding job can make an otherwise great build, up to this point, look really bad, so you need to take the time to make sure everything fits properly before you even get out the glue bottle. Now, if you need more open time, fish glue offers a very long open time, a quick tack, so that's an alternative. What I'm going to show you today is a method known as the CA Glue or Super Glue method. This allows you to fit everything perfectly before you even get out the glue bottle. Then, you wick in super glue or thin viscosity CA glue to hold everything in place. So, let me show you how I use that method.
Binding Install Preparation
The first thing to do is to make sure that everything fits properly, and if necessary, pull out a file and clean up the channels to make sure that's the case [Robert files the guitar binding channels on an acoustic guitar]. So, once you get the channels cut and filed so that everything fits properly, then come in with some shellac and make sure that you seal not only the top of the guitar, but also the binding channels, because since we're using the CA glue, or the super glue, we don't want it to wick into the spruce, because it has been known to stain the top. You can also put a quick wash coat of shellac on the top. This will help the fibers from tearing out when you remove the tape.
Binding Assembly
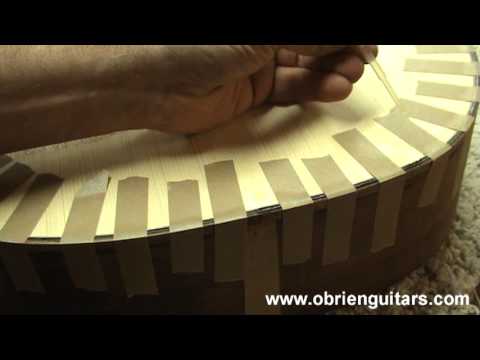
All right, so once all the channels are sealed and everything fits, go ahead and put everything in place, pull it up nice and tight so there's no gaps, and you can see your problem areas before you even have to get out your glue bottle.
[Robert is setting the binding into place then immediately applies Brown Binding Tape around the guitar body edges to pull everything tight and hold it into place]
All right, another advantage to doing this is that you can get all your joinery perfect before the glue bottle comes out. This is especially helpful if you've got complex binding and purfling schemes that perhaps go around the end wedge. So, once the bindings and purflings are all taped into place, you can go around and look and see if you have any small gaps or problem areas. If you do, take care of it now by placing more tape on it and pulling that gap out. And that looks pretty good. I think we're ready for a glue bottle.
Gluing the bindings in
So, the glue of choice for this method is CA Glue. I'm going to be using the thin viscosity, it's like water, and I'm going to be using an accelerator, which helps the glue dry instantly. And to apply them, I'm going to use these small pipettes that I got from LMI. So, I'm going to start by just running a little bit of accelerator in between the tape. And I want to make sure that it gets down inside everything, runs down inside, so that when the glue gets down there, it dries instantly. And right now, I'm just going between the tape. I'm then going to apply just a little bit of pressure with a block, just to make sure everything's pulled up nice and tight, and run a little bit of thin viscosity glue down into the joint.
And it's just like water, so it wicks right down inside there. And the accelerator should help it dry instantly. Now, if you get really carried away with this method, you can look inside your guitar later and you have nice little waterfalls of CA glue. So, don't get happy with the glue. Another advantage to doing it this way is that the pucker factor is a lot lower, no stress as you're working. So, just keep moving around the guitar, applying the accelerator, then coming back with your block, pushing up the binding and the purfling, and then applying the CA glue.
[on-screen text reads: Remove the tape and apply more glue]
So, once you get done scraping the bindings and cleaning them up, this is what you get. Perfectly installed with no gaps. If you use the CA Glue method, you're not under as much stress as if using just tight bond or LMI White Glue or some other glue that has less open time.
So, Steve, there's an alternative method for installing bindings using CA Glue rather than Tightbond or LMI White Glue or any other type of glue. You may find that using this method, the pucker factor goes down just a little bit. Anything you can do to get the stress level down as you build your guitar, can be a good thing. So, happy building.
[on-screen text reads: www.obrienguitars.com - Private and small group guitar building and finishing instruction available]