A pain in the necks: Gibson doubleneck with a broken truss rod
A real pain in the necks

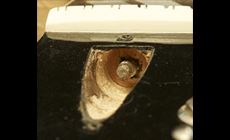
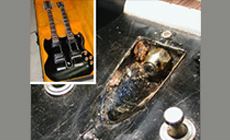
This Gibson doubleneck arrived last week with these photos and a note:
“Dan, I broke the adjusting nut off the 12-string neck! I wasn't tightening it hard, but I guess I went too far.”
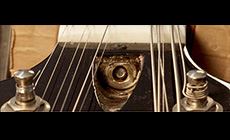
When the adjusting nut snapped off, it took the end of the truss rod with it. That didn't leave enough threaded rod to screw a replacement nut onto.
When the adjusting nut snapped off, it took the end of the truss rod with it. That didn't leave enough threaded rod to screw a replacement nut onto.
This problem used to mean major surgery.
Think about all the steps involved: steaming off the fretboard, removing the truss rod, installing a new truss rod, gluing the neck back together and refinishing it. It’s a huge amount of work, so most guitars with a truss rod break like this are done-for. They wind up in the dumpster or the “repair someday” graveyard.
That’s changed lately.
In recent years, I’ve rescued over forty necks like this without removing any fingerboards. Using the Truss Rod Rescue Kit, I remove wood around the broken truss rod, uncovering whatever threads are left. Then I clean up those threads or cut new ones, so the adjusting nut works again.
I’ll show you how this neck was saved, and how to avoid breaking off truss rod nuts like this in the first place.
This repair presented some special difficulties.
First obstacle: a deeply embedded washer
That you can see in the closeup above. That washer took a lot of coaxing to remove, since it was pretty much glued on with finish that had to be cut and scraped away.
This seems to happening more often on recently made guitars. I finally pried this washer out with a small screwdriver.
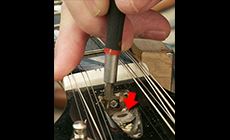
Another problem: limited access.
I had a bit more trouble than usual getting the cutter started over the broken rod. The neck was made from particularly hard maple and the access cavity wasn't machined as deep as most.
This causes tools to approach at a slight angle, making it difficult to get a socket onto the adjusting nut. In cases like this, I’ve sometimes had to grind down of a truss rod wrench just to make adjustments.
With a chisel and file, I removed excess lacquer and a little wood from the bottom of the cavity to get a good angle of approach.

This neck was pretty thin, which isn’t uncommon on Gibsons. I used a light touch with the cutter, removing just a tiny bit of wood around the broken rod.

See our Truss Rod Rescue Kit video at stewmac.com
The cutter cleared wood from around the broken truss rod, leaving this newly-exposed bit of rod ready for the threading die.
The threading die “chases” the threads, cleaning them up to accept the adjusting nut again.
When a broken rod doesn’t have enough thread left, the die cuts additional threads in the bare rod.
In place of the old washer, I inserted this steel spacer from the Rescue Kit. I’d exposed the minimum amount of thread needed to accept this spacer and the adjusting nut.
Usually, the truss rod slightly protrudes from the nut, but in this case I was content to allow the rod to be a little shorter than that.
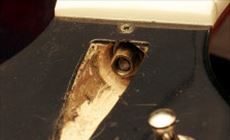
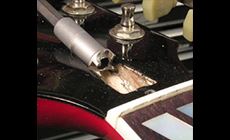
For comparison, here's the truss rod access on the same model, but from 1965. The cavity is wider and deeper, and the nut is completely accessible to a truss rod wrench without any chiseling or scraping of the cavity bottom. The amount of truss rod extending through this acorn nut is more typical, too.
To keep from busting a truss rod in the first place:
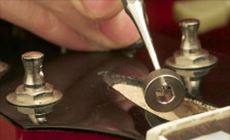
In the photo below, I'm adjusting the 12-string truss rod. See that aluminum carpenter’s level? It’s sitting on two small wood blocks on the fretboard. A clamp in the middle of the neck is gently bending the neck into a slight backbow. (A wooden caul protects the back of the neck from the clamp.) Only after gently bowing the neck this way do I tighten the truss rod.
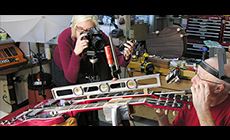
The idea is, why ask that little metal rod to pull the whole neck into position? By helping the neck this way, you often can loosen the rod into its final position, rather than tightening it. It’s a world of difference. A long handled, 5/16" hex truss rod wrench cleared the long peghead nicely, and like usual I’ve got my OptiVISOR on for seeing the details.
StewMac photographer Brooke Shanesy took these photos, so I could work fast without stopping to take my own pics. This whole job took 65 minutes.

Now I get a chance to play this guitar. Here I am, trying to play both parts of "Stairway To Heaven" at once!

