Measuring Basics: Rules and Calipers
If you're new to guitar building and repair, taking accurate measurements is a fundamental skill. Our customer service team gets LOTS of questions about how to measure correctly and we thought a video would be helpful for all of you just starting out.
In this video Gene and Matt demonstrate measuring basics and show you how to read a rule, use a set of calipers, and make imperial and metric conversions.
Video Transcription
[on-screen text reads: StewMac]
Matt: Rulers and calipers. Turns out there are a lot of people out there that don't know how to use these essential measuring tools correctly or to their full potential. Hey, I'm Matt, Manager of the StewMac Customer Support team. And I'm here with Gene, one of our lead Technicians.
Gene: Hey folks. We get questions every day that have to deal with a critical skill for guitar work, measuring. So today, we're going to talk about two tools we use everywhere for really accurate measurements, rule and calipers.
Matt: Like I said, there are a lot of customers out there that never received proper instruction on how to utilize these essential tools, so don't feel alone. We're going to cover the basics. By the end of this video, you'll have everything you need to accurately measure anything on your instruments at home.
Gene: Let's do it. Okay, let's start with something you're going to find in every repair shop, the humble rule.
Matt: So wait a minute, Gene, is it called a rule or a ruler? I hear both terms from our customer base. Can you explain the difference?
Gene: It's a pretty easy difference, Matt. A rule [on-screen text reads: StewMac Shop Rule] , the measurements start right at the end of the tool. On a ruler, you're going to have a little bit of space before you hit your first measurement. A ruler is probably what you remember from school. It's what most people learned on, but now a rule is available in a wider variety of lengths and finer increments. Because it goes right up to the edge, it works better for guitar work. For instance, if I was going to check the action on this guitar, the ruler's not going to work. The action doesn't even register where the increments start. But now this rule, since it starts right at the edge, I can get right in here at the 14th fret, which is where I check. Lots of people check on the 12th fret or at the end of the neck, and I'm getting right about 3/32nd's of an inch. Can you see that?
Matt: Yeah. Okay, cool. Got it. So now back to the rule and how to read it.
How to read a rule
Gene: Okay, so most people are comfortable with what I call tape measure units. They can do feet, they can do inches. It starts to get a little more unclear when we talk finer increments. So let's break that down. A rule is divided into fractional measurements. In our case here, since we are using an imperial rule, the primary increment is an inch, and within each inch it is subdivided. The big mark in the middle is half an inch, and the next larger lines are a quarter inch. There are four of those. The next smaller lines like these are eighth inch marks and there are eight of those. The next smaller lines are 16th inches, and depending on how precise your rule is, it probably goes down to 32ndths and even into 64ths.
Matt: Man, those 64ths are really hard to see.
Gene: Yeah, totally. If you're going to be reading down to 64ths, I really recommend a magnifier like the one Dan loves so much, the OptiVISOR.
Matt: Nice. Oh yeah. The older I get, the more helpful magnifiers and good lights seem to be.
Gene: Okay, so let's measure something else. Let's check the pickup height on this guitar. We hold down at the last fret and we're going to check here 1, 2, 3, 4/32ndths, but we don't talk about fractions that way. Four 32ndths, four divides into four one time, four divides into 32 eight times. So what we really have is an eighth of an inch.
Matt: Man, this is giving me flashbacks of junior high math.
Gene: You always wanted to know how you'd used these things, didn't you?
Matt: Yep, sure did. So Gene, another thing that seems to confuse people are the significance of these numbers and why they're broken down into sixteenths, 32ndths, 64ths, et cetera. The numbers are getting bigger, but the measurements are getting smaller. What's the best way to explain that?
Gene: The easiest way to think about it is to think of a pie. If we take a pie and we cut it in half and we have two equal pieces, that's a half. We take those two pieces and cut those into two equal pieces, we have four pieces, those are quarters. We take those pieces and cut those in half, we have eighths. Each time, the number is doubling, but the size of each piece of pie is getting smaller. So we go from eighths to sixteenths to 32ndths to 64ths.
Matt: So bringing it back to the rule, each one of these lines represents a slice of pie. So if I have 32 slices of pie, I put eight slices on my plate, that's eight 32ndths or a quarter of the pie.
Gene: I bet you can have more than a quarter of a pie, right?
Matt: Oh, absolutely.
Gene: One oneth.
Measuring with a caliper
Matt: Not a doubt. All right, Gene, you've convinced me, a rule is a great tool for guitar work. But let's shift gears a little bit and talk about finer measurements, say the thickness of a guitar string. What if I need a measurement more precise than a rule can provide?
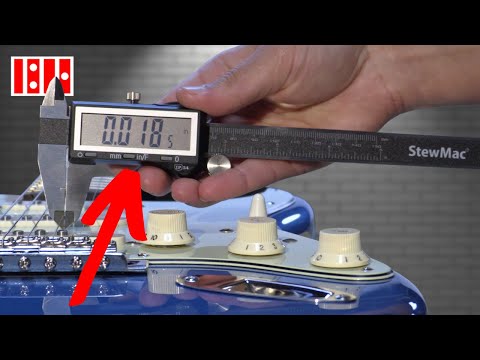
Gene: You're going to need a caliper [on-screen text reads: Luthier's Digital Caliper]. A caliper can measure down to one 1000th of an inch, and some, like ours, even down to half of 1000th of an inch.
Matt: That is small.
Gene: It is very small. To give you an idea, let's measure a sticky note. So a sticky note is exactly 3000th of an inch thick. So a thousandth of an inch is one-third the thickness of a sticky note and one 10,000th of an inch is 30 times thinner than that. Very small.
Matt: Now, that is precise.
Gene: It is. Let me show you what else these can do. It has a depth gauge for checking things like pick up cavity depth. You can also check fret height right on a guitar. We have the specially ground notch, which you won't find on other calipers. We also have this notch for checking fret height off of a guitar. You won't find that on other caliper either. And these smaller jaws on the other side are great for inside measurements on things like the diameter of tuner holes, the width of a nut slot. Everything you measure has a super precise readout in whatever scale you need. Inches, millimeters, fractions, you can easily switch between the three.
When should you use a decimal or a fraction?
Matt: Now, that is super convenient because we've been speaking in fractions this whole time, but I know I've seen a lot of measurements in decimal form too. So when should I use a decimal? When should I use a fraction?
Gene: Any measurement can be expressed in the form of a decimal or as a fraction. If you want to take a fraction to a decimal, it's really easy. You divide the top number by the bottom number. Let's take an eighth of an inch. You divide one by eight, you get 0.125 or 125 thousands.
To convert a decimal to a fraction, it's a few extra steps. So most people just use the chart on the back of our string action gauge. You can find one on our website or on the back of our calipers. It makes it a lot easier. But if you want to know how to do the math, you take the decimal number and divide it by the place value. Place value is determined by a numbers position before and after a decimal point. In this case, we have 0.25. One is in the tenths place, the two is in the hundredths place, and the five is in the thousandths place. So the number is read as 125 thousandths. To convert this to a fraction, you divide 125 by a thousand like this. Then don't forget to reduce the fraction. That gives us 1/8th.
Matt: I think I'm just going to use the charts.
Gene: You and everybody else. Like I said, you can find these charts just about everywhere.
Matt: All right, Gene, another good question for you. When using a caliper, we're sometimes talking about measurements that are too small to see. So I'm assuming that even the slightest jiggle of your hand could affect the readout, right?
Gene: Yeah, totally. That's a good point. How you hold the caliper, how tightly you squeeze, it can all affect what number you get.
Matt: So then how do you know if you have the right measurement?
Tolerance
Gene: Well, that's part of a bigger subject we refer to as tolerance. Tolerance is basically the acceptable amount of error allowed in any measurement, and that can vary depending on what you're doing, what you're measuring. Let me give you a few examples. In our shop here, when we slot fingerboards, we stay within plus or minus five thousandths of the nut. It makes a difference where you're measuring from. If we were measuring five thousandths per fret slot, that tolerance will stack and it will add up to be a big deal by the end. You want your slots to be pretty accurate if you want to play in tune, right?
Matt: Right.
Gene: So that tolerance is pretty tight. We want to stay very accurate when doing something like this.
Matt: Makes sense.
Gene: If we were talking something on the other end of the spectrum, like say roughing out a body out of a blank. Now, it doesn't matter if we're five thousandths away from this line, this is just roughing this out. We could be a quarter inch out, a half inch out, and it really doesn't make a huge difference because we're just roughing this out and we're going to shape this later.
Matt: Totally.
Gene: So tolerance is important to understand not only so we can be accurate, but so we don't drive ourselves crazy trying to be accurate when we don't need to be.
Matt: I'm so glad that you touched on these concepts, Gene, because it's something that we hear all the time from our customers, trying to find the specific tolerance of a particular measurement. And again, just want to take a moment to let you know that if you have any questions at all about tolerance or measurement, feel free to reach out to us here at StewMac [on-screen text reads: StewMac Customer Service].
Finding the measurement between two center hole locations
All right, back to calipers. Let's talk about finding the precise measurement between two center hole locations. And if I'm not mistaken, you just recently had an aha moment regarding this, a new trick you might have picked up.
Gene: Yeah, totally. Let me show you. Okay, so let's say we're trying to find the center to center spacing of these tuners. You don't want to just hold the calipers up and try to eyeball that. It's not accurate enough. So we have to do a better job. The way I used to do it, I would measure the diameter of one of the posts, and then I would write that number down, and then I would measure outside to outside of two posts, and then I would subtract the diameter I got on one of those posts, and that would mathematically give me the center to center spacing. Then one day I was down in the R&D shop talking to Todd Sams about some specs on some Waverly plate tuners, and I watched him take the caliper and check the diameter of one of the posts, and then he just zeroed out the caliper from there, effectively subtracting that before we even start. And then he did like I did and measured from the outside to outside, and then the number you see is the actual spacing of the posts.
Matt: Nice.
Gene: Yeah, it blew me away. It's a pretty simple trick, something I'd never thought of.
Matt: It just goes to show you, doesn't matter how long you've been in this business, you learn new tricks everyday.
Gene: Absolutely.
Matt: Awesome. But what if you want to measure the spacing between two holes instead of two posts?
Gene: That's a good question. It's basically the same thing. We're talking about the difference between outside diameter and inside diameter. A good example would be Tune-o-matic post spacing. So let's check that out. All right, so I'm going to do the same thing here, but I'm going to use the smaller jaws on the other side of the caliper. I'm going to measure the diameter of one of the holes. I'm going to zero that out and then I'm going to measure the outside of both of those holes. 2.909.
Matt: Nice. Yeah, I see you got the 2.909, but I know from our website that the Tune-o-matic bridge spacing is typically two and 29/32ndths of an inch or 2.9062 inches. Is it a problem if that's off?
Gene: That's only what, three thousandths difference. The holes in a Tune-o-matic are a little bit bigger than the posts. That allows a little bit of slop. There's a little bit of slop in the mating of the post and the bushing. And plus, even with a CNC machine, you're not going to be that accurate. Wood moves with moisture, humidity, metal moves with temperature. Back to our discussion about tolerance, three thousandths is nothing on something like this.
Using the metric system
Matt: All right, Gene, one last question for you, and it's a big one. A decent portion of our customer base uses the metric system, not the imperial system that we're accustomed to here in the states. So a lot of those fractions we were speaking about might not make a whole lot of sense to them, and I can literally hear our international customers just yelling at the screen right now, "Use the metric system."
Gene: Yeah, Matt, and they have a good point. Once you learn it, the metric system makes a whole lot of sense. It's easier. But like we said earlier, you and I learned the imperial system like a lot of our customers when we were really young, and the metric system doesn't make a lot of intuitive sense now that I've learned the other way. Fortunately, it's easy to convert back and forth. Like we said, on the back of our string gauge, on the back of our calipers, on our website, you can find conversion charts everywhere, but it's also really easy to do with just a simple bit of math. So this one's pretty easy. There are 25.4 millimeters in an inch, so you simply divide or multiply by that to switch back and forth. For example, an eighth of an inch is 125 thousandths. 125 thousandths times 25.4 equals 3.175 millimeters. Then converting within the metric system is a piece of cake. You just moved the decimal point. 3.175 millimeters is 0.3175 centimeters or 0.003175 meters.
Matt: All right. I guess that wasn't too bad. Well, thanks for this breakdown, Gene. It's been incredibly helpful. Mathematics is truly the language of Luthierie. When it comes to repairing, building or modifying guitars, it's what you need from beginners to pros. And again, if you have any questions about measurements or anything else at all, feel free to contact our customer support team and we'll be glad to help you.


