Lacquer drop fill: hiding a scratch on a customer's Les Paul
Uh-oh! We scratched this customer’s Les Paul!

Accidents happen — I just wish they wouldn't happen to a customer’s guitar! This one occurred last week. I'll tell you about it — but thank goodness the customer will never know!
Name withheld to protect the guilty!
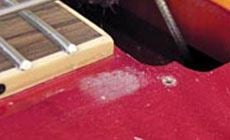
One of the most talented young luthiers in my shop is John D. When John does a fret job, he does it right. But even John can make a mistake! For example, the scratch on this gorgeous Les Paul’s birdseye maple top. Time for an emergency lacquer repair!
While reinstalling this pickup mounting ring, a stubborn screw “made” the screwdriver jump onto the top. This made a nasty scratch/dent combo right where it shows. Instead of freaking out, I calmly said,
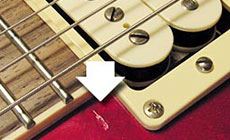
“Don’t worry, John, we can make this disappear. But let's get started — in case the customer shows up early carrying a weapon!”
Here’s the fix:
I poured a nickel-sized drop of lacquer onto the bottom of a plastic dairy carton, and let it sit for an hour to thicken. I put a small amount of acetone into a plastic mixing cup. A repair magnet in the bottom of the cup holds it to the metal lacquer can so it won’t spill.
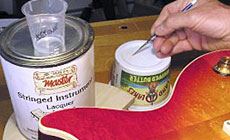
With a small artist's brush, I place a drop of acetone on the dent to soften it and prepare it to accept a drop of lacquer.

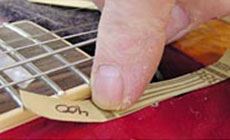
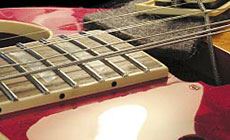
I use the same brush (still damp with acetone) to place a drop of lacquer onto the dent, and spread the lacquer evenly out onto the surrounding finish.
(While we’re looking at this photo, check out the nicely-shaped fret ends. Good work, John!)
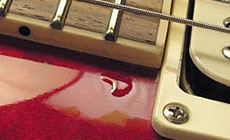
Within an hour the perfect-looking drop of lacquer had shrunk — sinking in the center, so it’s mounding up at the edges. After four or five hours I added a second drop. It too will shrink back, so I repeat this drop-fill several times over two days using a smaller drop of lacquer each time.
Trade Secrets now comes every other week.
Dan Erlewine’s busy in his shop creating the new 3rd Edition of The Guitar Player Repair Guide. (As a Trade Secrets reader, you're the first to hear about this.) He’s also filming new StewMac tool videos that you’ll start to see online! With so much happening, Dan and crew will be sending new Trade Secrets issues every other week instead of weekly.

Now for the “shave” part of this “close shave” story:
Once the drop stops shrinking, the crater looks filled, and the finish has hardened overnight, I go to the next stage: scraping the drop fill flush. I do this with a fresh single-edge razor blade on which I create a burr by drawing the sharp edge against a steel vise jaw. I always draw the burr toward the side of the blade that has letters on it; that way I can remember which way the burr is facing. I want the burr turned in the direction I’m scraping.
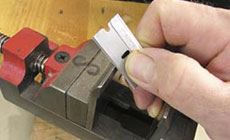
I don't use the razor blade as-is; instead, I use a tip I learned from my pal Frank Ford: wrap cellophane tape over the sharp edge on each side of center — leaving only enough blade exposed to cover the width of the drop fill. The tape is .002" thick — enabling me to scrape the fill level, and within .002" of the surrounding finish.

The “burr” is a slight hook added to the sharp edge.

Strip-sanding 1: dry
I call this “strip-sanding”: pulling narrow strips of sandpaper across the fill under gentle fingertip pressure. I start with 400-grit Fre-Cut gold sandpaper, then work my way through 600, and 800-grit. Then I move up to micro finishing papers: 800, 1000, 1200, 1500, and 2000. Each strip is pulled across the fill once or twice. The razor removed most of the drop, so this whole operation happens fast — all the grits within a minute or so.
Pull the strips through your fingers a few times to curl them up a bit. This way they don't lay flat, so just a precise little bit of the sanding surface touches the lacquer.
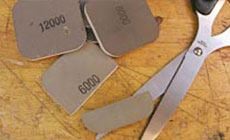
Strip-sanding 2: wet
Now I switch to Micro-Mesh pads used wet — starting with 3600-grit, and followed by, 4000-, 6000-, 8000- and finally 12000-grit. This leaves an impeccably-smooth surface, that just needs a little buffing.
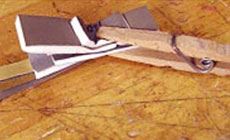
Here’s a little clothespin trick:
Turn the wooden pieces around on a spring clothespin, and you get a useful little clamp with tapered jaws instead of the normal blunt ends of a clothespin. Here’s one holding my bunch of sanding strips ready for the next emergency.
Buff and polish
My first buffing is with #2 medium polishing compound on a pad of soft paper towel. I buff in a circular-pattern, much like French polishing.
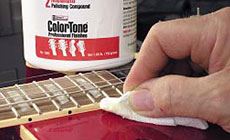
After the polishing compound, I repeat the circular buffing (with a fresh paper towel) using guitar polish for a high gloss.
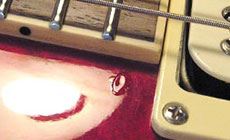
This came out great, so John can finally come out of hiding! Should we tell the customer about this? Or should we lay low?
We’re thinkin’ about it...


