How to French polish for a fast finish without spraying
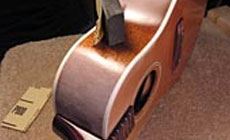
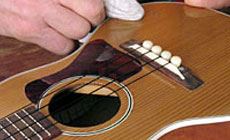
Happy birthday! I made this baby guitar for my granddaughter Kate, and French polishing let me finish it in time to cut the cake! It’s not a product, it’s a technique of applying shellac by hand with a wad of cloth. French polishing is a simple way to get a lovely hand-rubbed finish. It takes considerable elbow grease, but you get a darned good finish in just two days by putting on 4 or 5 coats a day, as I did here. A pint of shellac will easily finish a full size guitar. For this baby guitar, I mixed only four ounces—a quarter-pint. To get the right viscosity for French polishing, use a jelly jar like I did, matching your mix to the photo: I filled a jelly jar to the 2 oz. line with flakes (that’s 1 oz. of dry weight). Then I added alcohol to 3/8" above the jar’s 4 oz. line. Tighten the lid and let it dissolve, shaking and stirring it occasionally. Shellac has a shelf life of 3 to 6 months. Mix only what you’ll use in that time, and store your shellac (dry flakes, too) in a cool, dark place. The wood should be scraped and sanded smooth and clean, down to 320-grit. Wood with open grain (like mahogany) should be grain-filled. The size of the pad depends on the job. Place cotton in the center of your rag, pour on a slug of shellac, and add alcohol (about a third as much alcohol as shellac). Pipettes make good applicators—cut the tip off for the viscous shellac and leave the tip on for the alcohol. Fold and twist the corners tight around the cotton to create the pad. Soak up some shellac, and blot it on paper so the pad isn’t too wet. It should leave a blotchy mark, but a not super-wet one. Lay down the first coats with long, straight strokes. Be generous with the shellac until it stops soaking into the wood and starts to build on itself. Let this first “build coat” dry for an hour. Repeat the process three or four times, with at least an hour drying time between applications. If you’re in a hurry like I was, get up early in the morning so you can get all these coats on in one day. After the fourth coat has dried, scuff-sand lightly with 320-grit Gold Fre-Cut sandpaper and let the shellac cure overnight. The sanding opens up the finish a little, helping the alcohol to evaporate. Note the handle in the neck joint: for finishing a neckless body, you need to make yourself some kind of holder. The next morning, apply several more coats as before. Circular motions work well but are tricky near the edges, where the pad can catch and squeeze out shellac, causing runs. Remove a run by polishing over it immediately, or (worst case) wiping it off with a rag that’s damp with alcohol. Now the pad begins to stick on the built-up finish. When that happens, dip your fingertip lightly in oil (I’m using virgin olive oil) and wipe it on the pad for lubrication. Then squeeze up some shellac and continue polishing. After an hour drying, the oil rises to the surface. Wipe it off with your pad dampened only with alcohol and well tamped-off. At this point, I stopped to glue on the neck and bridge (I’d finished the neck weeks earlier). I used Titebond, and let it dry two hours before unclamping. You should allow more drying time than that, but I was on a last-minute birthday mission, and the show must go on! By mid-afternoon, I was ready to level-sand with 800-grit Gold Fre-Cut sandpaper. One last coat, polishing up to the neck heel and fingerboard (which is more difficult than shellacking the body unfettered). This last coat was smooth, glossy, and ready for final-sanding and rub-out the next day. The next morning I sanded lightly with a sanding block and 1000-grit micro finishing paper, then rubbed the finish to a gloss using fine polishing compound, followed by swirl remover. I was rubbing out ’til the last minute, as it was time to light the birthday candles! It was all worth it! Baby Kate’s got her own little version of grandpa’s Gibson J-45! Questions about finishing? Look here first! Our book solves problems and gives you the confidence to do your own quality finish work. More...French polishing is a fast, high quality finish with no spraying

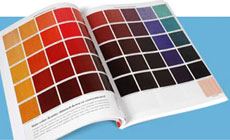
Do you know about French polish?
What you'll need
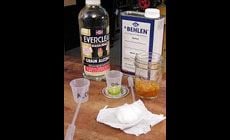
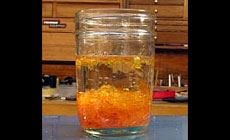
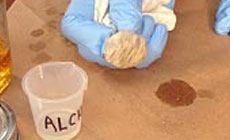
Mixing the shellac
Preparing the wood
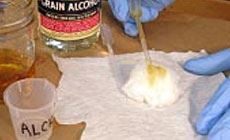
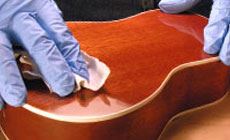
The polishing pad
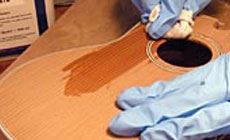
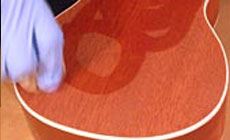
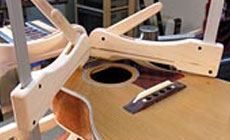
Okay, let's start polishing
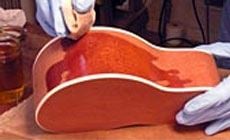
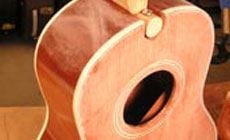
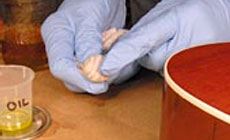
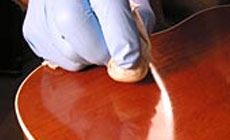
Day 2: We have build-up!

Guitar Finishing. Step-by-Step