How to clean a guitar that REALLY needs it!
Rock’s a dirty business, but somebody’s got to do it.

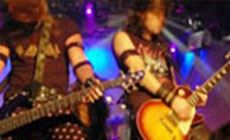
After 650 consecutive gigs, this Les Paul needs more than a bath: it needs the full spa treatment!
Fly By Radio is a hard-working band that tours heavily across the South. Band member Jack Ash sent me his guitar for a pit stop: it needs setup work, but first it needs a bath! After four years on the road, this 2005 Les Paul is getting old before its time.
How to clean a guitar that REALLY needs it!
Ever worked on a guitar so dirty you won’t touch it without gloves? I've cleaned guitars that were victims of Hurricane Katrina, and this one gives them a run for their money.
Jack told me:
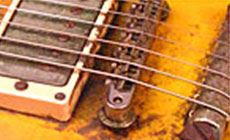
“It’s a workhorse, but it’s filthy. The bridge and tailpiece are caked with dirt and need to be replaced. The retaining wire rusted right off!
“The intonation is way off — I can't play full chords without sounding out of tune. It needs lots of TLC. Do whatever it takes to get it playing great.”
After donning the first of many pairs of nitrile gloves I got started:
Removed the hardware and pickups
Normally this is a simple step, but everything on this guitar was frozen with rust and grunge. It would be simplest to just replace all this hardware, but for this Trade Secret I decided to clean and reuse it, the same as I would for a vintage instrument.
The bridge didn’t want to budge, but a bridge jack levered it up and off the posts neat and clean (well, not clean). While I was prying, the pad on the jack protected the tailpiece and a folded rag provided extra protection for the top.
The tailpiece didn't want to come off, either. A rusty bond had the studs locked up tight, but a tailpiece wrench broke them free.
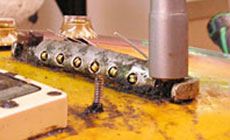
Now for the bridge posts
I held each thumbwheel with a multi spanner while tightening a post tool down firmly against the wheel, locking them face to face; by turning both tools together I managed to back the treble post out. The bass post didn't want to budge. I left it for a naphtha-soaking step coming up later.
The grungy pickup covers cleaned up to a nice vintage look with metal polish. The rusty bridge parts got a 15 minute swim in naval jelly rust remover and a water rinse...

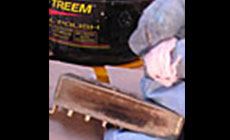
Then they spent the night in a bath of naphtha mixed with a little oil (3 oz. of naphtha and 1/8 ounce of 3-In-One oil).

Parts cleaning
For parts cleaning I use a Dremel tool on slow speed, with a wire wheel — stainless steel wire for heavy corrosion and rust, and brass for gentler cleaning.
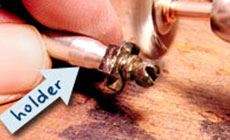
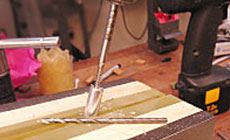
Don't try to hold a tiny part like this saddle screw in your fingertips! You'll tear up your fingers and the the part will go flying. I'm using a holder I made from a scrap of aluminum rod:
To make it, I drilled a small hole through a piece of hardwood with a #43 size bit (the same bit I'll use to drill into end of the aluminum rod). I followed that hole with a 1/4" bit, drilling just halfway through the wood.

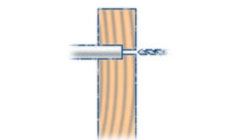
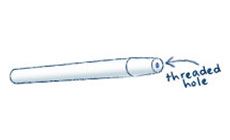
I pressed a 1/4" aluminum rod into the hole, where it was held tightly and centered on the smaller hole. With the #43 bit guided by the hole it made previously, I drilled a hole into the center of the rod.
Holding the rod in the jaws of my Ultimate Vise I tapped the hole with a #4-40 tap, matching the thread of the saddle screw.
I smoothed and tapered the end of this screw holder on my belt sander, and it did a great job of keeping my fingers out of the way as I cleaned each of the six saddle screws.
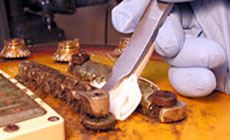
Cleaning the body
Start by using warm water with a little dish soap in it. Constantly mop up the dirty water while you work — you want to avoid over-wetting the finish.
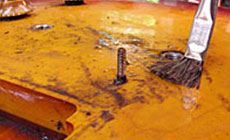
Wet the grease and grime with a brush full of naphtha as I’m doing here. You can see that this bridge post hasn’t been removed; it was rusted tight. The naphtha soaked into the rust and helped loosen the post, which came out without a struggle.
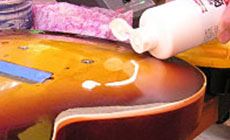
The body’s finally starting to look more clean than not! The next step is to run a couple lines of swirl remover onto the surface, about 3 or 4 inches apart...
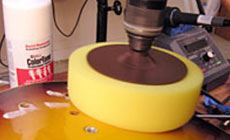
...then pick it up with a slow-moving foam polishing pad. Once the foam pad becomes loaded with swirl remover, go ahead and buff the entire top. You probably won’t need to use any more swirl remover, but you might — play it by ear.
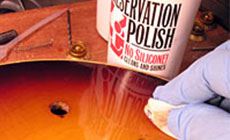
Finally, I used guitar polish on a soft piece of flannel to polish the finish. (Instead of hand-polishing, you could do this with a fresh foam polishing pad on your drill.)
I had fun doing this job, and got a kick out of salvaging the original parts rather than dumping them in the landfill.
Jack: I hope Fly By Radio will play near here, so I’ll get a chance to check you guys out! (But you'd better keep this guitar clean if you don’t want to see me walking on stage with a rag and bucket!)


