Chopping the ends off bridge pins
Issue 218 June 05, 2014
If you're not careful, installing new strings can create a problem that throws you out of tune or damages your bridge pin holes. Elliot John-Conry of EJC Guitars shows us an easy fix.
- Bridge pins can snag the string's ball end
- The result can put you out of tune and chew up the bridge pin hole
- Repair shop customers don't always install pins carefully—this tip helps
- Using a mirror inside the guitar is always a good plan
Video Transcription
[on-screen text reads: Trade Secrets! Stewart-MacDonald. Elliot John-Conry, EJC Guitars]
Common problem with bridge pins
Elliot John-Conry: Here's a really common problem with bridge pins. If you're not careful when you're restringing the guitar, the ball into the string can get hung up at the end of the pin like this. And eventually over time and under string tension, it's going to work its way loose and drag itself up the length of the pin before it locks firmly against the bridge pad. This is particularly so on a deeply slotted pin where there's enough of a groove to actually grab a hold of the ball end. You can see how deep that groove is at the end. That'll really grab a hold of the ball end.
Let's take a look at this inside the guitar. This is exactly what you don't want. And you don't want this for a couple reasons. First, you're going to detune, you're going to go flat, and secondly, dragging the windings through the bridge pad and the bridge is going to eventually enlarge your pinhole a little bit. This is what you'd like to see with the ball end firmly against the pad.
How to avoid this problem
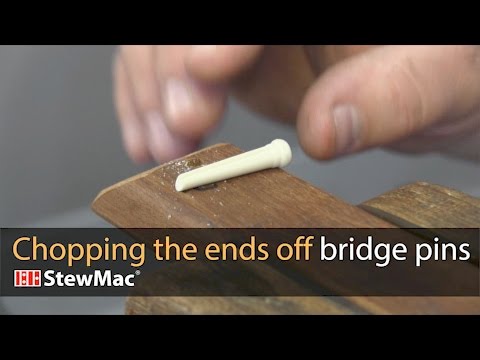
Here's a simple way to help avoid this problem. On a plastic bridge pin, I'll cut a bevel on the end using a utility knife. See how the bevel forces the ball end out and away from the pin? And this helps it guide its way up to the bridge pad. With the bevel, there's nothing for the ball end to get hung up on. Here it is inside the guitar.
For a bridge pin that's a harder material than plastic, I won't be using a utility knife to cut my bevel. For bone, tusk, or ebony, I like to use a file. And I have a block of wood here that I use as my holder. It's got a 3/16 inch hole drilled up here on the flat and another one down here on this bevel. Then I ream those holes with a three or five degree taper [on-screen text reads: Reamers for instrument work - StewMac Peghole Reamers], depending on the pin I'm working on. Lock it firmly in. And then you start putting your bevel on. And sometimes I'll drop it down to this lower hole so I can get around the pin a little better. Maybe get a little steeper bevel. When I have the bevel where I want it, I'm going to come in with a needle file [on-screen text reads: Accurate work in small areas - StewMac Needle Files, Set of 5] and just open up and deburr the edges of the flute or the slot. Once I've gotten that far, let's clean the whole thing up with some 400 Sandpaper.
Inspect bridge pin after installing new strings
That's ready to go on the guitar. Even with a bevel cut on the end of your bridge pin, it's still a great idea to use an Inspection Mirror inside the guitar so you can really see what's going on and be absolutely certain that the ball end is firmly seated against the bridge pad. Plus a mirror's a pretty good thing to have around the shop, so you know you're looking your best. You never know who's going to stop by.


