Bridge collapse! Carving an archtop guitar bridge in a hurry!
My guitar is dead! + I'm recording tmrow -- HELP!
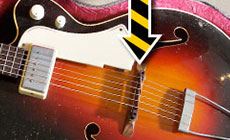
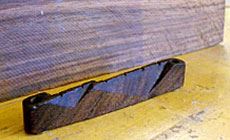
Danger: Bridge out.
Bridge carving in a hurry
I received a late-night text message from my customer: he was getting ready to travel to a recording session in Chicago the next afternoon. That's when he noticed that the bridge on his late-50s National Debonaire archtop had caved in. He was in a real pickle, and asking if there was anything I could do on such short notice?
In our shop, the working musician gets priority. We can do this! The guitar was waiting at my door first thing in the morning, and I started right in.
The Debonaire is a cool guitar indeed. Built by the Valco company, it has those neat tuner knobs and Valco’s famous Vista-Power pickup.
The Z-patterned bridge is the compensated version you find on many Valco-built guitars, like Airlines and Supros. Even if I could find a replacement for the broken top of this bridge, there’s no time to order one. Glue won't hold it (and could change the tone), so I'll have to carve a replacement from scratch.
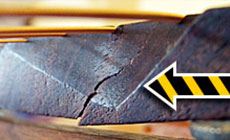
It’s no surprise that this bridge broke. The adjustable top was quarter-sawn widthwise, and string pressure over many years caused it to break along a grain line. I'm guessing this was made out of shop scrap. Still, it was a strong enough piece of wood to last for over 50 years before finally giving in!
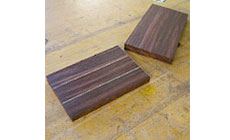
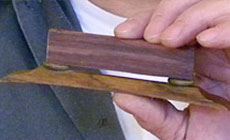
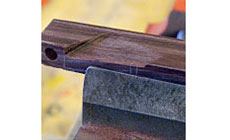
I had a rosewood acoustic bridge blank on hand. You can see here that it's big enough to cut up into about six flat-sawn archtop bridge tops.


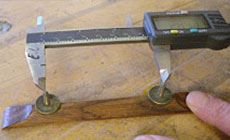
I measured the width of the original bridge and thickness-sanded the blank to match it. I marked it out for trimming into three pieces the size of a bridge top, but didn't cut them apart yet...

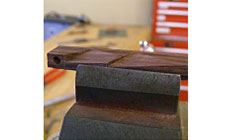
Before cutting apart my three small blanks, I drilled my post holes based on this measurement from the original bridge. This way, I drilled the holes for 3 bridges in one shot, saving a little time if I end up making more than one.
My drilled blank is a perfect fit.
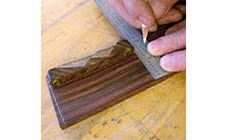
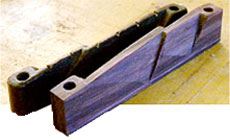
Before shaping it, I shaped the top to match the Debonaire’s 12" radius. I used a radius gauge to mark that curve onto my blank, then roughed-in the radius on my belt sander.
I marked out the zigzag compensation lines with a white pencil, using the original bridge as reference.
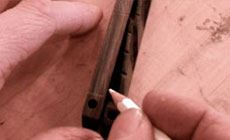
I gently clamped the blank into my nut and saddle vise to start removing wood with my razor files.
With the original bridge as my guide, I started razor-filing the treble side of the blank and worked my way across, following my pencil lines. When I was close I flipped the blank over and roughed-in the opposite side.
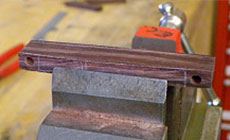
Here’s my roughed-in bridge (above). Now I’m ready to clean things up and dial in the final shape.
Using some of my luthiers files along with micro chisels and mini scrapers, I copied the original until my lines were clean and closely resembled zig-zag compensation shape of the original.
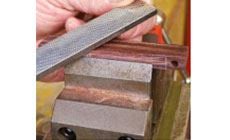
The lower photo shows my finished work. I sanded it to 400 grit, then used some polish to condition the wood. I'll add the string slots next, using the the old bridge as my guide, then this replacement will be good to go.
And here it is on the Debonaire’s bridge base, strung up and ready to roll.

This was done in plenty of time to hit the road for Chicago and its recording session!


