Simple Trick for Repairing Cracks on a Guitar Fretboard
Here is a perfect beginner's guitar repair. In this video, tech Gene Imbody shows a simple method for fixing a fingerboard crack that runs the length of the fretboard.
Video Transcription
[on-screen text reads: StewMac]
Gene Imbody: Lately we've been working on some videos about the most common repairs you find on guitars, and today's a big one. We're going to talk about fingerboard cracks. You see these a lot in dry months, during the wintertime when you have your heat on and the air dries out. You also see it a lot on inexpensive guitars with some questionable woods that maybe weren't dried properly. And today we're going to talk about how to fix that.
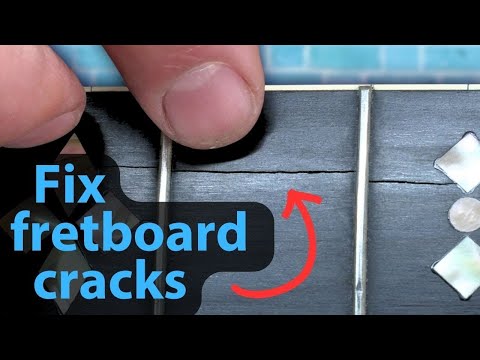
We're going to show you how to do it on this 1989 Ovation. It has a fingerboard crack that starts behind the first fret and it moves all the way up the board all the way past the body joint. It skips around, it's wide open in some spots, tighter in others. This is a perfect guitar to demonstrate how easy a fix like this can be with simple products you might already have at home.
Prep work
Okay, so let's get started. I've already taken the strings off of here, so I have full access to this crack. The first thing we're going to do is clean it with some naptha [Gene thoroughly wipes down the entire fretboard with a clean naptha soaked rag]. I want to get any gunk or oil or grime off of here, anything that I don't want to push into this crack. All right, we'll give that a second to evaporate. So our board is all clean. Our crack is ready to be repaired. Let's talk about what we need, and that is number 10 super glue, the liquid stuff. You may think, "Why not Number 20? Why not Number 30? Something with more gap filling properties?" Well, I like the liquid stuff because it penetrates deep into this crack, but the Number 10 is very runny. It's very messy. We're going to make a little bit of a mess on the board and that's okay, but be careful with this glue. You don't want to spill it anywhere you don't want it. You don't want it on your fingers, you don't want to get it anywhere else on the guitar.
We have some things that will help you be neater with this glue. They come with these whip tips, which are great for precise application. You do have to be careful though. I'm always leery about taking a full bottle of super glue and turning it upside down over my guitar. We also have things like The Glue Looper. You can put this in an X-Acto knife. This will allow you precision application drop by drop. These are great for drop fills on finish, filling cracks. These are really nice.
But my preferred method of application is just the single edge razor blade. These are cheap, they're easy to find. You can apply drop by drop. You can't spill any more super glue than what you put on this razor blade. It's a lot safer than turning the bottle upside down.
Filling and scraping
Okay, let's get started. We're going to do this crack right here to begin with. Normally I would just start at one end of the board and work my way down, but this one shows up really good on camera and you'll get a good visual of what I do to fill this crack. We're going to add a few drops onto our razor blade, and we'll just get the tip of our blade right into this crack [Gene inserts the razer blade directly into the crack]. I'm not trying to fill this entire crack, I just want to get the bottom of it kind of sealed up here. And the glue works itself right where we need it. All right, wipe off a little excess.
Now I'm going to take a fresh razor blade. Keep a good supply of fresh ones around. You don't want to use the same blade that you use to apply the glue for what we're about to do, which is scrape this board. I'm going to scrape back and forth gently between the frets. I'm not pressing too hard here. This is going to level the crack out and it's going to create a small amount of dust that's going to work down into the crack and mix with my glue and create a slurry that fills that gap. I'm just going to keep repeating that until the crack is completely filled and it's leveled to the top of the board.
We're going to start layering this up. I'm going to go back to my super glue. Just a few more drops here. Okay, fresh razor blade. We're going to scrape a little more. I'm being careful that I'm hitting both frets on either side. If you stop in between a fret, you're going to leave a line. Let's see, we're wet there. I pulled a little bit out of the crack. We'll give it a second to kind of dry. I don't like to shoot this with accelerator so early because that accelerator is going to continue to act on any more super glue we put on here. I want that glue to wick down into the crack. If it hits accelerator too soon, it's going to set up. We just want wet glue in there. When you wipe up super glue, be quick about it and just wipe right off of the surface. You don't want to glue the rag to the top of the guitar. We'll just repeat this process until that entire crack fills in and scrapes flush. You can already see this is starting to fill in. We're looking pretty good here.
As I'm scraping this, I'm seeing some of the wet glue come back out of the crack. So we're getting close to being full and I don't want to just keep pulling that glue back out. So I want to hit it with a little bit of accelerator and help it set up. Now we can use the spray accelerator, but the problem with that is it's going to get into the rest of the crack and other places, and I don't want glue setting up before I want it to.
You could take this and spray it onto a Q-tip and apply it. That's a good way to do it. But we also have this in brush on form that's perfect for stuff like this [on-screen text reads: Brush-on Accelerator for Super Glue]. I'm just going to take a small amount and brush that crack and just like that the glue under there is already dried, and my next coat is going to dry a lot faster too. A lot of times when I'm working with super glue we'll take the time to use paste wax on the wood or the surrounding area where we don't want glue, and that makes cleanup a lot easier. I don't do that on this particular job because I don't want that wax working into the crack, so I just try to be as neat as I can. But if I was gluing a loose fret or a loose piece of binding, I most definitely would be coming in here with paste wax anywhere I didn't want this glue, and then it would wipe off very easily.
I know I'm done when I can lay a line of super glue on this thing and it doesn't wick into the crack [Gene pours super glue over the repaired crack]. If you lay a puddle of glue here and the crack of appears back on top of the puddle of glue, you know it's still absorbing. If it just sits there and puddles on the top, we're all sealed, there's nothing else to put in there and we're ready to move on [Gene wipes the super glue off from the fret he was testing]. That looks pretty good. One more trip with the razor blade. I'm just gently scraping this thing. We're not removing more than a thousandth or two of wood here.
Okay, this looks great. In the end, we're going to polish all of this out. It's going to be virtually invisible. So now I need to repeat this process on every crack I find on this fingerboard. So let's get to it.
[fast forward video shows Gene working all the way up the fretboard]
So I am switching up to the whip tip here. You do need to be careful with these because you have a full bottle of super glue over the fretboard, but this is going to allow me to fill this thirsty crack with a lot more glue a lot faster. Most of the time when I encounter these cracks, they're just a few inches or they span a couple of frets. But one like this that goes all the way up the board, if I use the razor blade for all of this it's going to take forever. I also just scrape right over the pearl on these. The little bit of dust that comes off of the top of the pearl doesn't really affect anything and the crack still fills in black like you can see here.
As I get farther up the board and the fret spacing becomes more narrow, I start working several cracks at once. This will also make the job go faster, and since I'm not scraping such a big area, I'm able to span multiple frets at a time. So we are pretty much dry here, but I give it one last spray with accelerator just to be sure everything is cured. I also give one final light scrape across the entire board just to make sure all of my scratches are out and everything looks uniform.
You're going to get some glue and dust buildup on the fretboard, especially once you start using some accelerator. This isn't a problem and you can go ahead and scrape a lot of this off with razor blades, chisels, scrapers, whatever you have.
The blending process
Okay, so my crack is repaired. I've gone through a preliminary cleanup. Now we're going to continue on with the blending process, and how I approach that really depends on the specific guitar, the nature of the crack, and where we're going with all of this. If I was doing maybe an old vintage guitar that had a small crack on it, I would probably spend the time to blend that crack in with the condition of the rest of the board. On a lot of guitars, lesser expensive guitars, or a guitar like this where the crack runs all the way down the board, I'm going to scrape and clean everything as if the crack is everywhere. I want a uniform clean appearance on this whole board.
So to start with, I'm going to get way down here and find these tiny little bits of glue and sludge that I didn't get at first. I like to use these little micro chisels for that. Those along with the razor blades I've been using are great for this microscopic level blending and cleanup we're going to do. It's not super obvious right now, but if I don't spend the time to get what little bit remains here, by the time I polish out this board, this stuff is going to stick out like a sore thumb. I've also noticed, too, that there are a few spots here where I got a little bit careless with my chisel and left a line here and a few lines here. I'm going to come in with some sandpaper and see if I can kind of blend that in and smooth it out a bit. This is just some 220 sandpaper. We'll come back and go over that with some 320.
Now I'm going to take some Scotch-Brite and I'm going to hit all of the frets in the whole board and start polishing all of this out. I'm going to use some successive grits from fine to about medium. You can also use some steel wool from the hardware store. Either one is fine. I'm going to take some tape here, protect the sides of the board, and I'm going to do the same thing on the peghead [Gene applies Blue Painter's Tape to the bottom of the peghead and on the body along the sides of the fretboard]. All right, we'll start with the coarsest grit we have here. Move up in grit a little bit. Finest grit we have [Gene sands the entire fretboard using different grit levels].
Final clean up
Okay, the last thing I'm going to do is come through here and just polish these frets out real nice. You can use fretboard guards for this. I like just using a piece of tape on each side of the fret. So the sanding stick has three grits [Gene starts polishing the frets with the touch up stick]. It goes from the most coarse to a medium and the finest grit. Carefully take our tape off and you can already see how much shinier this one is than the other frets. So we're going to work our way all down the board there.
[fast forward video shows Gene polishing all of the frets on the fretboard with the Micro-Mesh Touch Up Sticks]
Okay, these frets look great. We're going to do one last cleaning with some naptha. Last thing I'm going to do here is put a coat of lemon oil on this board. It's going to hydrate it and help protect it to keep cracks like this from forming in the future.
Okay, this looks great. You can barely see this crack. And even in the areas where you can kind of see it, it really looks just like a grain line. It's totally solid. Everything's clean and polished. This thing's ready to be strung up. So remember, stay on top of your humidity, oil the board when it needs it. You'll probably never have to deal with this. So thanks for joining us today, and we'll see you at the bench next time.


