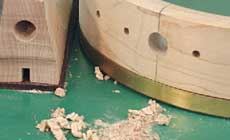
Installing an old-time banjo dowel stick
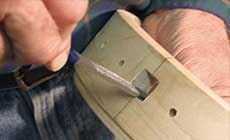
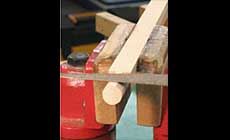
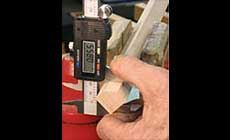
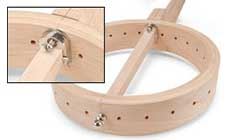
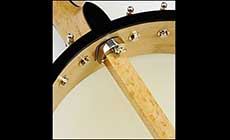
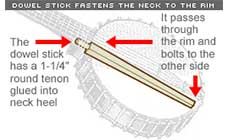
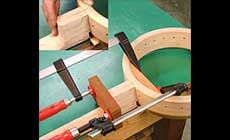
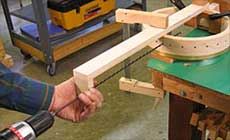
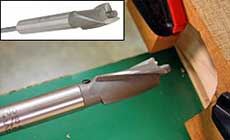
Open-back banjo builders often use a wooden dowel stick to fasten the neck and rim, instead of metal rim rods. It’s got the traditional look, and adds a warm old-time sound. Here's a new and precise way to install a dowel stick. For this demo, I used our old-time banjo neck and our old-time banjo pot, which has an 11"-diameter rim with 3/4" wall thickness. A dowel stick is hard maple, typically tapered from 3/4" to 5/8" square, with grain oriented to match the neck grain. Glued into the neck heel, it extends through the banjo rim to anchor with an endbolt on the opposite side. Installation is tricky: if the stick isn’t aligned properly, the banjo neck will be cockeyed. Mark accurate centerlines on the neck heel and on the rim at the neck and tailpiece locations. With the fingerboard in place, clamp the neck upside-down on your bench. You'll need to make two wooden cauls for clamping the neck and rim together, as shown. The tone ring must be in place; in our case, the rim needed to be shimmed up 1/16" near the neck before clamping (red arrow). Other rim/neck combos will vary. Put a support block snugly under the tailpiece end of the rim. Before you start, the heel of the neck must be cut to the proper neck-set angle, and must be shaped with a curve to fit the rim diameter. The stick will inset 1-1/4" into the neck. It goes through the rim and touches the other side. Rim size determines the length of the stick (this one’s 11-1/2" long including the tenon). To use our dowel stick hardware, the stick must be 3/4" square where it passes through the rim. The trick is to set the dowel stick into the neck at the correct angle. To do that, I'm using an 18" "aircraft" twist bit. A simple L-shaped jig aligns the bit. The edge of the jig lines up on the center marks, and I filed a half-round groove to support the bit (where my fingers are holding it). The groove keeps the bit perpendicular to the rim. Use a centerpunch to mark the drill's entry point on the outside of the rim, and also on the inside opposite surface, at the neck. Drill the pilot hole through the tailpiece side of the rim. Remove the jig, and finish drilling the pilot hole through the opposite side of the rim and into the neck. Use a piece of masking tape on the drill to mark a depth stop, allowing the drill to make the pilot hole 1-1/4" deep in the neck heel. When the tape reaches the outside of the rim, the hole's at the right depth. Our friend, Bart Reiter, the renowned old-time banjo builder, gave us this tip for removing a dowel stick: “Drill a small hole beside the stick tenon and inject steam from a pressure cooker for 10 minutes – just like cooking off a Martin guitar neck through a hole in the 15th fret slot. (On cheap banjos, just saw the stick off, drill a new hole and glue in a new stick.)” Thanks, Bart! To enlarge the pilot hole where the dowel stick will pass through the rim and into the neck, I used a 5/8"-dia. counterbore bit and a 3/16"-dia. x 15-1/2" steel rod. The hollow-center bit slides onto the rod, fastening with an allen screw. Chucked into the drill, the rod uses the previously drilled holes for alignment, and 1/8" is left extending beyond the bit as a pilot for guiding the cut. Unclamp the rim and use a flat rasp to square the rim hole until the stick will fit through (a 3/4"x3/4" square). Back to the stick: 1-1/4" of the end must be filed round to form a 5/8"-diameter tenon for the neck hole. I filed flat parallel surfaces to an octagonal shape, checking progress frequently with a digital caliper, and sanded the final corners round. On the tailpiece end of the stick, find the center and drill a 3/32"-dia. hole for the endbolt. To use a decorative metal ferrule, the stick must be tapered to 5/8" square at the tailpiece end. File enough relief on all four sides to let the ferrule slide on for a snug flush fit. When the neck is finished, glue in the stick. Install the neck using the neck brace which wedges against a steel pin in the dowel stick. Tightening the screw secures the neck tightly to the rim.Stickin’ to tradition:
Installing a dowel stick in an old-time banjo
Old-style stick, new-fangled trick!
Here’s a new way to install a dowel stick nice and straight.
Setting up
The tricky part: alignment
Bright Idea
My Secret Weapon: the counterbore bit!
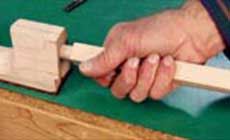
Fitting the stick