Final-shaping a neck with files and scrapers
Issue 198 August 29, 2013
Shaping a neck is all about feel. Chelsea Clark learned from Dan Erlewine, and honed her skills on abandoned "project guitars" found on Craigslist and eBay. Chelsea shares some great tips on shaping the neck and preparing it for a finish.
About the guitar in this video: This is a custom seven string, with a finished body ready for parts. It came into Dan's shop with a roughed-in neck, still in need of final shaping for comfort before finishing.
- Three files take this from rasp-rough to nearly complete
- Three scraper shapes chosen for smoothing
- Solving the problem of super glue lumps
- Final sanding with 320- and 600-grit paper
Video Transcription
[on-screen text reads: Dan Erlewine - Stewart-MacDonald]
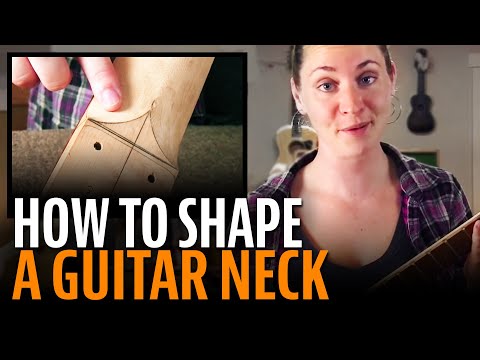
An abondoned "project guitar"
Dan Erlewine: Here's a cool seven string guitar that was almost completed, but never quite made it to the finishing line. The body's all ready for the neck, but we got the neck in sort of a rough carved state. I've asked my friend Chelsea Clark to final shape the neck and here she is to show you how she did it.
[on-screen text reads: Chelsea Clark - Dan Erlewin's Repair Shop]
Chelsea Clark: I have this awesome seven string guitar neck in my hands. Unfortunately was never completed. The last thing to touch this looks like some dirty hands and probably a rasp, which is okay. You'll see these project guitars everywhere on Craigslist and eBay. People get started, they never quite finish it, which is really good when you're young and learning to practice certain techniques on. Today I'll be detailing it. I'll be finishing it up. We'll probably be using scrapers and some files and kissing it at the end with some 600 grit sandpaper right here.
Right here you can see a buildup of dirt because people have been handling this neck, which is good for us because it helps us to see the rasp marks. There was a curved rasp that was taken to really get this nice shape. The only problem is it was never really tapered and blended into the rest of the neck, and it may be taken a little too deep. So we have a ledge right here, and I can feel it perfectly with my fingers, just right through here. That's going to need taken care of.
Shaping the neck with files
The line between the neck and the fretboard, I can really feel a hard ledge. Now I know you can't feel it, so let me bring up a straight edge and show you. It's just a hard angle. Not that I'm going to correct it too much, but I am going to soften it a little bit because it's going to be slightly uncomfortable to play. To get the humps out of the heel of the neck, I use one of my go to files. It's called a Razor File. It's like having 100 little micro chisels at the tips of your finger. It can take off a lot of wood. Here I'm using a Half-Round File. It's great because it gives me two options, a flat side and a round side. This Nut Shaping File has two sides. We have a fine side and a core side. I like the fine side for this job because the course is just a little too aggressive.
Now here's a problem. The ends of these frets were capped with super glue along with a bead in this joint right here to reinforce it, but it's also super glued. When I'm trying to blend maple into rosewood, it's really difficult if I have hard bumps of super glue in my way. So what I'm going to be doing to make my life easier is to just be using a flat file, really flat, and taking the tops off of this super glue. I'm going to be taking it down a little bit. I'm going to stop before I reach the wood. I'm going to take out my scraper and then I'm going to scrape down. The scraper is a little less invasive than the file, so I'm not worried about marking up the rosewood at all.
Cleaning your files
I'm going to stop right now and clean my files. If I was just filing wood, a filing brush is all I would need, but we did file some of the super glue, so I'm going to take a minute and use an exacto knife to clean the teeth. Now depending on how close the teeth are, it's usually a little bit better to be dragging instead of pushing. See when I try and push, it kind of skips. I can usually do it pretty quick. Tap it off, see what you have left. There's just a little bit of dust down in there. I can take this and just dust it back out, and it's clean again. I got the neck so smooth with the files I didn't need to do much scraping.
Scraping and sanding the neck
These were the scrapers I did use [on-sceen text reads: StewMac Scraper Blades], especially this one. I ended up putting a piece of tape so that I remembered which side I sharpened. Razor blades make great scrapers too. This is about as far as I want to go scraping. I don't want to shape the neck anymore. In fact, I really like the shape. I just want to get rid of these little marks that are from the file. There are a few of them that are still from that rasp. I'm going to be using 320 grit, or you could use 400, as well as a 600 grit sandpaper. We'll be starting with the 320, but at first what I want to do is I want to take a barely damp cloth or paper towel, and I'm just going to apply a little bit of water straight to that neck. It's going to plumpen up the grain so that when I go to sand, the finishing result will be a lot smoother.
It looks good, feels good. I think we're done. The next stop is finishing. It's really going to turn out nice. But seven strings in a Floyd Rose? I hope I don't have to set it up [Chelsea is laughing].


