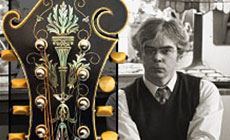
Lesson in pearl engraving from Doug Unger
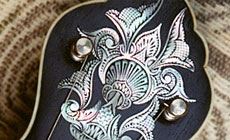
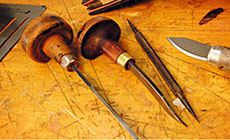
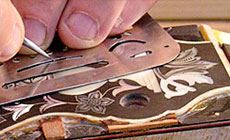
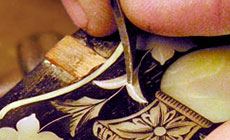
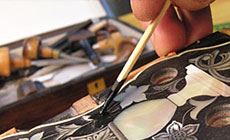
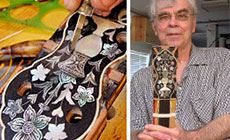
We've long admired the work of Doug Unger, art professor emeritus, friend and customer since the early days of StewMac. Doug restores and reproduces exquisite turn-of-the-century banjos and mandolins. His engraved inlays rival the finest examples of that period. Doug visited here recently and demonstrated his engraving technique for Trade Secrets readers. A hallmark of Doug's craftsmanship is the astonishing delicacy of his engraved lines. For this work, Doug's "right-hand man" is a sharp scribe, which he uses with curved patterns and draftsman's templates. The blank inlay must be polished very smooth. Even the smallest scratches will show when black filler is added. Before engraving, Doug inlays the pearl by routing each inlay cavity with a Dremel tool mounted in our precision router base, using straight router bits (#1187 and #1188). He leaves the pearl surface slightly above the wood, to be sanded flat before engraving. Epoxy and black chalk are mixed as filler for gluing the inlays in place. When dry, the pearl is sanded flush and polished to 600-grit smoothness. Sanding marks will hold ink later and ruin the engraving. He pencils the pattern on the inlays, and uses metal eraser shields and plastic ellipse drafting templates as guides for scribing on the pearl. The scribe is pulled along the template to lay out uniform curves and straight lines. Doug also uses a single-cut graver for much of his work, as well as a 4-line "rake" graver (multi-line gravers can also be pulled along a template). He uses his single-cut graver freehand, starting the cut as a fine line that gradually widens and tapers. This is done by slowly increasing the pressure and angle of attack, or by gradually "rolling" the graver toward its side in the scribed guideline. Rolling the 4-line graver gradually adds the second, third and fourth parallel cuts. Doug pushes the graver with his entire arm, rather than his hand or fingers, as he steadies the graver with his other hand. He explains, "each slow careful stroke requires a combination of delicacy and strength. The longer the stroke the more difficult to master. Practice about one hour before you start on an instrument." He sharpens the graver every 10-15 minutes on a ceramic stone. For accenting the engraved lines Doug uses a toothpick to apply black waterproof artist's ink, whenever he prefers to let the depth of the cut enhance the work. He also uses a filler stick for restoration work. Excess dried ink or filler is scraped off with a #25 X-acto blade, followed by 600-grit paper. Doug brought a banjo neck in progress that features an intricate "flowerpot" inlay pattern. The fingerboard and peghead overlay were already bound and glued to the neck blank; he finds it easier to profile and shape the neck after the pearl work is finished. He uses our slotted fingerboards, bindings, fretwire and banjo hardware, and prefers our Hot Rod truss rod, installed for adjustment at the neck heel. In case you're wondering, Doug estimates he'll have 10-12 hours of engraving work in that beautiful banjo peghead! Our new Essential Engraving Kit is a great way get started on your own masterpiece and save money, too. We include gravers with handles, a stylus, sample patterns, a scribe, and instructions.Learning from Doug Unger, a master of vintage pearl inlay
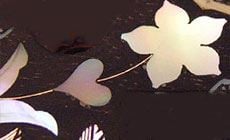
Doug stresses that polishing is critical:
Even a lowly dot becomes special with a few simple cuts!


