Phil McKnight Shows Off Our New Squier Stratocaster Hardware Upgrade Kit
V-2710
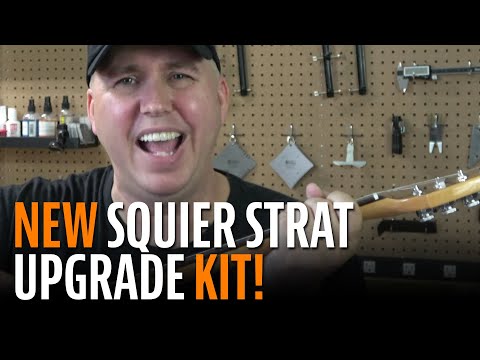
Phil McKnight, from the popular YouTube Channel Know Your Gear, introduces our new Squier Stratocaster Hardware Upgrade Kit. Many of these Squier's are really great guitars and can play like their much more expensive brothers and sisters with some new hardware and a little work you can do yourself.
Video Transcription
Phil McKnight: Today, I'm taking this 1970s reissue Squier and giving it some performance upgrades. With the tools and aftermarket parts from StewMac, I was able to improve the tuning stability and performance to give it more of a high-end instrument feel. This is a great project. I want to show you what tools and parts I used to get it to where it is now.
Upgrading the saddles
The first thing I upgraded on this guitar was the saddles. The original saddles were rough and felt like a cheese grater on my hand so I wanted to go with some high wood saddles. These saddles still keep the look of the vintage saddle, but the tops are smooth and feel great on your hand. Also, because they're notched, they improve the way it feels when you do bends. To install the new saddles, we only need a few tools. I'm going to use the StewMac Screwdriver Kit.
It has all the Allen wrenches and screwdriver sizes and styles I need to install these. Next, we're going to use the StewMac Caliper. I like the StewMac caliper, not only for the options that it has over other calipers, but I love how accurate it is as well. One of the things I like about these replacement saddles is they're generally the same size as the vintage saddles, which means if you already have a guitar that's intonated, you can start by putting these approximately in the same spots and that will really speed up the time it takes when you are setting the intonation when you put the strings back on. What I use is the caliper and I measure between the back plate and the back of the saddle. Now you can go ahead and lock this and do them one at a time or you can write these numbers down.
Once you've done that, go ahead and use your screwdriver and it's okay to go ahead and release the saddle. Don't throw the original parts away because if you ever want to put the guitar back to original, you can. What I do is I just push the saddle up to the point where it sits and then you want to definitely double check it and it's perfect. Now go ahead and repeat that process for the next saddles.
Upgrading the tuning machines
The next upgrade was the tuning machines. I added these Gotoh Magnum Locking Machines because not only do they have a 16-to-1 ratio, they also lock which means you can restring the guitar in half the time. They also are staggered, which creates more downward pressure on the nut. To install these you'll just need a few tools. You'll need a 10-millimeter guitar nut driver, a reamer because you're going to have to expand the eight-millimeter holes that the original tuners had to 10 millimeters, and a tuner bushing press to remove the bushings from the original tuners without damaging the headstock, and we'll still need our StewMac Screwdriver Set because we're going to need a Phillips head screwdriver for the screws. To start just remove the screws from the original tuning keys.
Removing the bushings
Then once you've removed all the tuning keys, it's time to remove the bushings. Not only is the tuner bushing press easy to use, it can save you in costly damages to your headstock when you're removing the bushings. As you can see, it's very easy to use. It catches the bushings in this little cup, and I thought that was a really cool feature.
Reaming the headstock holes
Now it's time to use the reamer. This is a good time to mention that we're reaming the holes from the back of the headstock. There is nothing that has to be done to the front face of the headstock.
There's a bunch of different techniques, but the one I prefer is take the first hole and just go slowly, checking it periodically with the tuning key until you get the right size hole. Now, once you've done that, go ahead and set the reamer back in that hole, and using a piece of painter's tape you can tape off and set the depth. This is going to be really important when you do the next five holes because it'll speed up the process. There are a couple things to note here, though. You could damage the painter's tape so you want to pay attention. This is one of those things with a lot of patience and a little bit of elbow grease will take you a long away.
Installing the tuning keys
Now it's time to install the tuning keys. Using the nut driver, use enough force to hold them in place so we can do the second step. Once you have all six tuning keys on, use a straight edge to make sure that they're perfectly straight and aligned. Then what I like to do is go back with the nut driver and put just a little bit more force on there so that way they won't move when we drill them. Now I'm going to use the StewMac Depth Stop Drill Bit to make new holes so we can finish installing these new tuning keys. Once I've done that, I'll use the nut driver to tighten up the tuning machines the rest of the way.
Now you're all ready to install our screws and move on to the next modification.
Installing the string tree
Joe Glazer's team came up with this great idea to make a string tree that has three so it's just your G, B, and E string, which is perfect. Installing the string tree couldn't be easier. Just remove the original string tree and using the same hole, replace it with this one and what's best of all is it's a non-marring modification, which means we can install it and remove it and no one will know. Now that all the new parts are on the guitar, we're going to go ahead and set it up. We're going to use the StewMac Notched Straight Edge and some Understring Radius Gauges to get it playing its best. First, we're going to restring the guitar, which is going to be easy now with these locking keys. All you do is run the string through the hole in the peg, turn the locking mechanism at the bottom of the tuning key, a couple turns and you're in tune.
Radius the bridge
Next, we're going to radius the bridge. The understring radius gauges come in every major fretboard radius. Using the fretboard we can see it's nine and a half. Now setting it underneath the strings of the bridge we can use it to set the radius of the bridge. Once we do that, we can use the StewMac notch straight edge. One side is set up for short-scale guitars like Gibsons and the other for longer-scale guitars like Fenders. All we have to do is set it against the fretboard and adjust the truss rod so the neck is straight. As you can see, this is a great first project or for anyone who wants to just improve their instrument. The information you learn when modding and repairing guitars will last you a lifetime. If you like this video, you can check out even more by checking out the Stewart MacDonald YouTube channel with amazing videos on how to repair and modify guitars, and don't forget all of the tools you see in this video are available at www.stewmac.com.


