Lesson 3: ASSEMBLING THE BODY
Lesson 3: Assembling the body
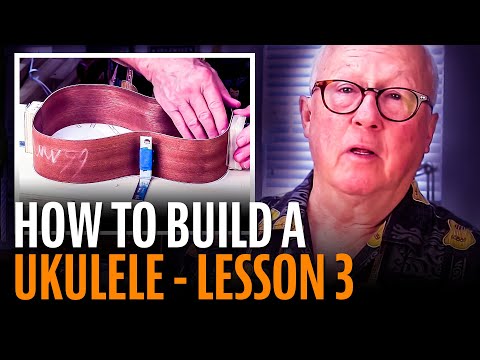
Dan shows you how to build a mold to hold your uke sides, and how to glue the sides, top, and back.
In this video you'll learn:
- Building a mold to hold your uke for assembly
- Gluing the sides, neck and tail block, and linings
- Sanding the sides level and installing the top and back
- Fitting and gluing the top and back to the body
- How to build a simple clamping jig with rubber bands
- Trimming the top and back flush to the sides without grain tearout
What you'll need:
- Tightbond III Glue
- Swivel Handle Clamp
- Glue Brush
- 80-grit sandpaper
- Razor Knife
- Rubber Clamping Bands
- Dremel Tool
- Precision Router Base
- Low Tack Protective Tape
- Mini Clamps or clothespins with rubber bands
- Plywood
- Angle brackets
- Large dowels
- Wax Paper
NEXT UP
Video Transcription
[on-screen text reads: How to Build a Ukulele. Lessson 3: Assembling the Body]
Make the body mold
Dan: The first thing we'll do is make the body mold. That's what you'll put the end block and neck block in with. And a lot of building gets done in this simple thing and it's easy to make. Draw yourself a center line [on-screen text reads: 3/4" plywood, 19" x 11-3/4"] and line up the body plan on that center line. Then tape it down. I'm using a set of four angle brackets from the hardware store. On two of them, I'll attach plywood blocks. Position these angle brackets so their clamping blocks sit right against the solid outline of the uke body and screw them in place.
The other two angle brackets, keep the sides pressed down in the waist. To keep the metal brackets from scarring the sides of the uke, I use a half inch wooden dowel and tape it to the angle bracket so it's sort of a round edge. Now we're going to assemble the body.
Assemble the body
This should just pop right into place. I love it. Make sure your glue seams are right on the dotted center line and don't pay any attention to if your sides don't exactly hit this black line. That's the intended line, but they're going to spring their own way. What you really want to know is that they're square to the board. I'm going to put down some wax paper. I don't want to glue this uke into the mold.
Glue the sides + blocks
That's the neck block and the end block. They go like this. I'm going to glue them up now.
Get some Titebond III. It looks like a lot right here, but really it soaks right into the wood pretty quick. I'm good with this. And a little bit here. Doesn't hurt to put a little glue here [Dan clamps the sides and the end and neck blocks]. You got a little bit of water on that and juice it up a little bit. It'll stick with the other stuff real quick. A little warm water, always have that handy. Now I'm going to let that dry 45 minutes.
Install the linings
Steve: Before we can glue the top and the back onto the sides, we have to install the linings. This is our gluing surface and it's pretty thin, so we use these flexible pieces of plywood to get around these curves. It adds thickness to the sides and it also stiffens them up and makes them stronger and easier to work with.
I'm doing a dry run to make sure I like the way my clamps fit before I glue it up for real. This masking tape will catch any glue that squeezes out. I'm ready for glue. Do the same over here and let these dry for 45 minutes. Then flip the sides over and put the other linings on. The linings are dry and now I'm ready to sand them flush with the sanding stick.
Dan: Sanding stick, it's that two by two I was using. I bent the sandpaper, that 80 grit tied around it and taped it down so it wouldn't slide off. It's all you're going to need.
Steve: It's easy.
Dan: Do a good job of penciling all the way around. Blacken the rims with some pencil lead all the way around and the pencil disappears as you sand. When the pencil's gone, you know the rims are level. If one of the end blocks is higher than the sides, that'll take some extra fitting. You could use some sandpaper on a block or a chisel or a saw to lower it a bit that.
Steve: So now it's time to fit the back to the sides. The braces overhang just a little bit, so we're going to have to cut them back and also make notches into the lining so that the back just snaps right into place on the sides. I'm making small pencil marks to show where the braces cross the sides and that's where I'll notch. I transfer those marks onto the linings and draw the notches that I'll cut out with a knife. Pop the pieces out with a little chisel. Then I cut back the braces so that they fall right into the notches.
It pops right into place so I'm ready to glue the back on.
Glue the back
So instead of clamps, we're using rubber bands. I've put eight eye hooks all around the body board and that's what we're going to use to tie these down to and clamp the back on. I use Titebond around the sides. I could smooth it with a brush, but I'll try my fingers, and I'll have to do a little cleanup. Lots of wraps with the binding bands. Make sure you have even pressure all the way around. And I'll let the back dry for at least 45 minutes.
Dan: The tone's happening already. Good job, Steve. Now we have to trim that overhang we talked about, and I'm going to have Steve do that. He's done a bunch of them with this Dremel outfit. You might not have that. So if you don't, I'm going to teach you how to do it with a knife and a file. Whether you use a knife or a Dremel tool or a router, you've got to pay attention to the grain direction or you'll get tear out. And here's how I would explain that. All these grains are running straight, but if you took a knife or a cutter bit and went into the end grain like that, it could chip it right out. It would chip here. It would chip there. It would chip here. It would chip there. It would chip here and there. So you go with the grain. There's the whitest part of the bout. Right there where the grain meets in the center, I'd cut this way.
From here, you cut that way down to the waist and you stop where the two directions meet. From here on the curve, I'd come down to there and stop. You can see I did a little practice in there. Up here, I'd come around the corner and stop. Here, you start about there and stop this direction. Then you come down to here, cut to here and there, and then you have all the tear out areas taken care of. Then you just go around with a file and clean it up. The Dremel tool that Steve's going to use is pretty simple. You got the Dremel tool, Precision Router Base, the edge guide. That little bearing follows the sides, and this eighth inch down cut bit will do the trimming.
[Steve works the router around the outside ukulele edges all the way around]
Steve: The Dremel's done a good job of bringing in the overhang, but it doesn't take us all the way. So we're going to have to use some sandpaper or a file, whatever you choose, to bring it in the rest of the way because you want it to be flush. Before you bring it all the way to being flushed though, you want to make sure to tape it off with this masking tape because the way that the overhang isn't level with the sides yet, you could get off kilter there.
When you're done, it's all going to be flush with the sides. You'll be ready for final sanding and ready to put the neck on, like Dan's going to show you how to do. The file works fast on the places where the overhang is pretty big. See this little nick? That's what the tape is for, to protect the sides. You might not need to file at all. 120 grit sandpaper might be all you need. Okay, the body's done and we're ready to think about the neck.
[on-screen text reads: Next: Preparing the Neck]


