Tips and tricks for gluing loose braces
Issue 254 December 03, 2015
Two braces popped loose inside this Epiphone acoustic. Dan makes some do-it-yourself glue scrapers and shares a ton of ideas. With his brace gluing wedge and see-thru plastic guitar, Dan turns this fix into a guitar repair class!
About the guitar in this video: This is a 1961 Epiphone Frontier, the first square-shouldered dreadnought built by Gibson. It served as a prototype for the Hummingbird.
- For a Gibson, this guitar has an oddball truss rod and cover
- Dan spells out the four steps of a brace-gluing job
- Free glue scrapers from old saws and a waxed paper box
- Custom cauls from auto body filler
Video Transcription
[on-screen text reads: Stewart-MacDonald Trade Secrets!]
Brace gluing tips and tricks
Dan Erlewine: Here's a cool guitar. It's an Epiphone Frontier FT-110, 1961, and the First Frontier was made in 1958 as the prototype for the Hummingbird. This was Gibson's first square shoulder dreadnought. It's got a pretty sunburst, I love the inlays. And it's got a 25 and a quarter inch scale, which is different. And you got to check out this truss rod cover. Looks like a Buck Rogers spaceship. It's stamped metal. Not only is it a strange looking truss rod cover, the truss rod's different too than a Gibson. I've seen them before, but it's been a while. It's not an acorn nut, it's Allen wrench adjustable barrel nut.
When you think about a Gibson, you expect to see an acorn nut, and I was just surprised to see this one because I haven't seen that many Epiphone's. The reason this guitar's in the shop is it has two loose braces in a pretty important area. Right here, there's a collapse here, this one's loose and that one's loose. Probably about this far back and about to there. There's a mirror in there and I can show you what we're looking at [on-screen text reads: StewMac Guitar Inspection Light]
[Dan places the inspection light into the guitar body via the soundhole]
The braces we're talking about are these two top braces that you can see down here in the mirror [on-screen text reads: 3-Piece Inspection Mirror], and you'll notice they're not tucked into the lining, that would've helped hold them up. And also I think this piece especially was not the right cut and it's strong in the wrong direction and bowed downward. I really want to get a good glue job on this. There's nothing to hold them into the lining. Loose braces like this are pretty common on Gibson's from any era, but especially the older ones. However, since it's so accessible through the sound hole, I think I can glue this up nice and clean if I follow the right steps, which are:
- Clean out all that old high glue that's in there now
- Choose a clamping method that works
- Make several dry runs so when the glue comes along, you're ready for it
- Mask off around the braces the best you can so you don't get glue all over the top.
Cleaning out the glue
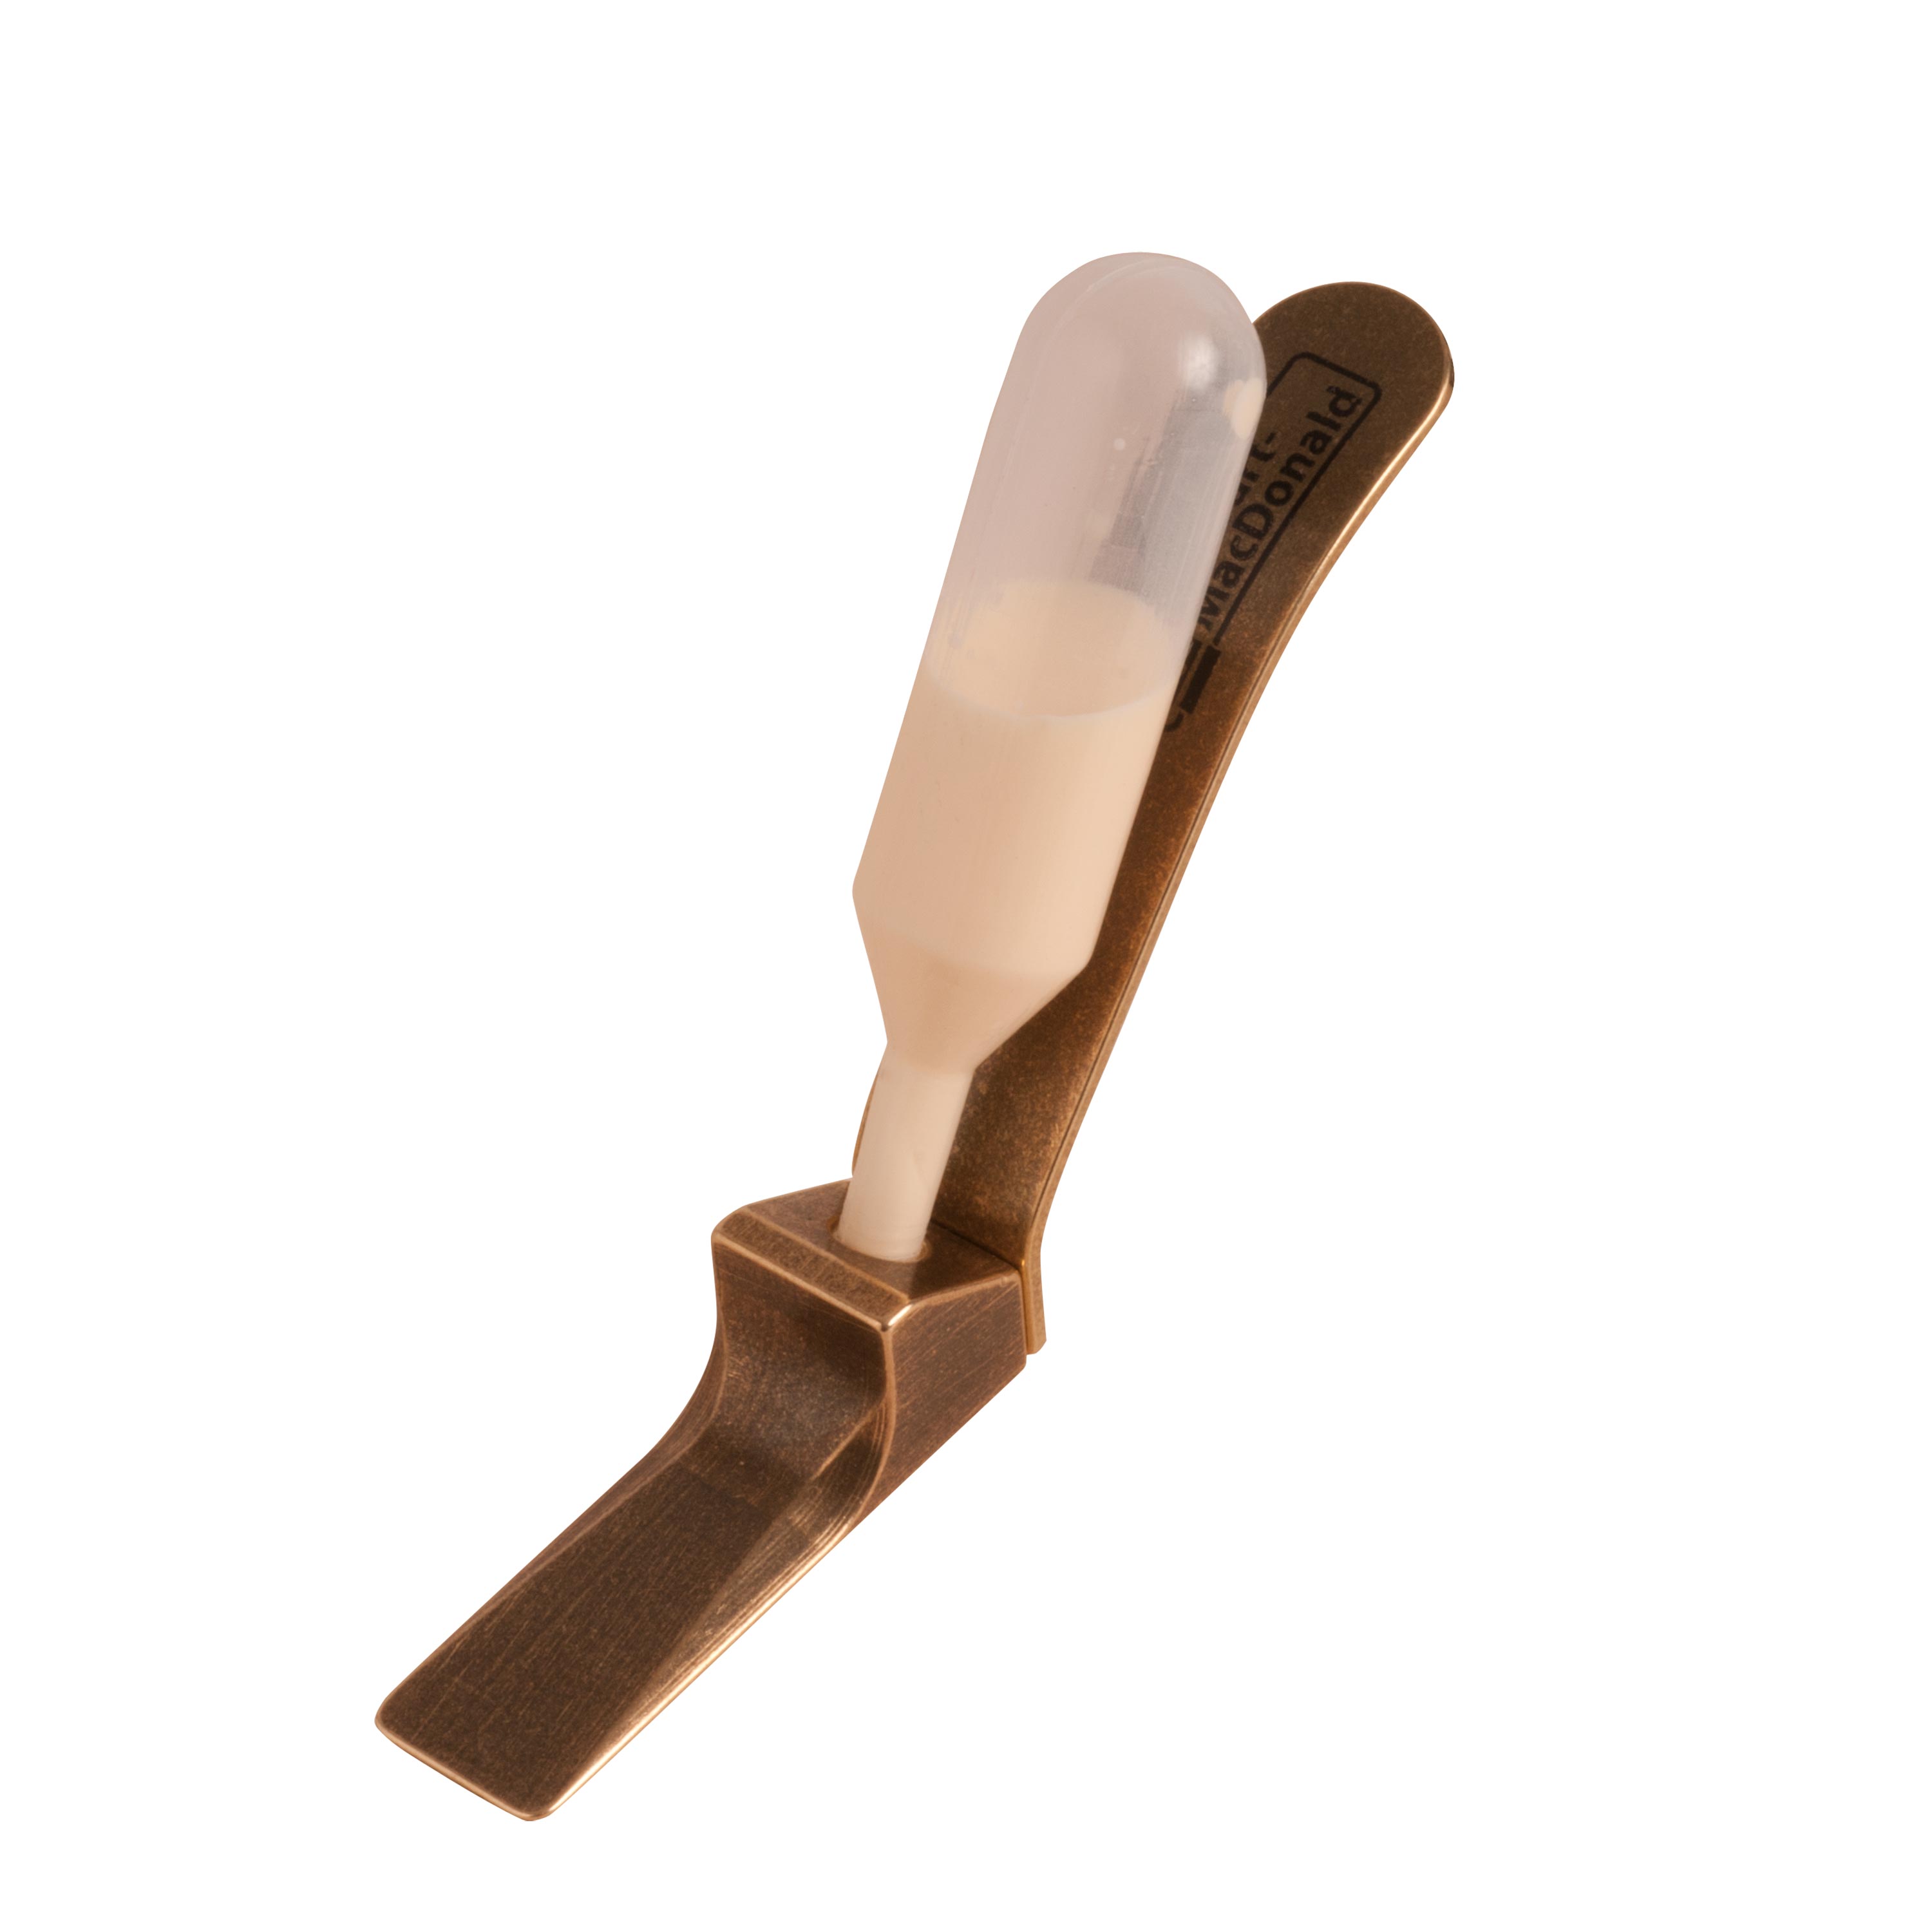
I'm going to put the Frontier away for a while now and show you how I'll fix it on this clear topped Hummingbird body that I got from my friends at Gibson, it was a reject. I've braced it like a Gibson. I've even loosened these two braces so they mimic that guitar. And what I want to do is clean out the glue [on-screen text reads: 1. Clean out old glue] and I'm going to use a brace gluing wedge to pop this end open even more to loosen it up here a bit.
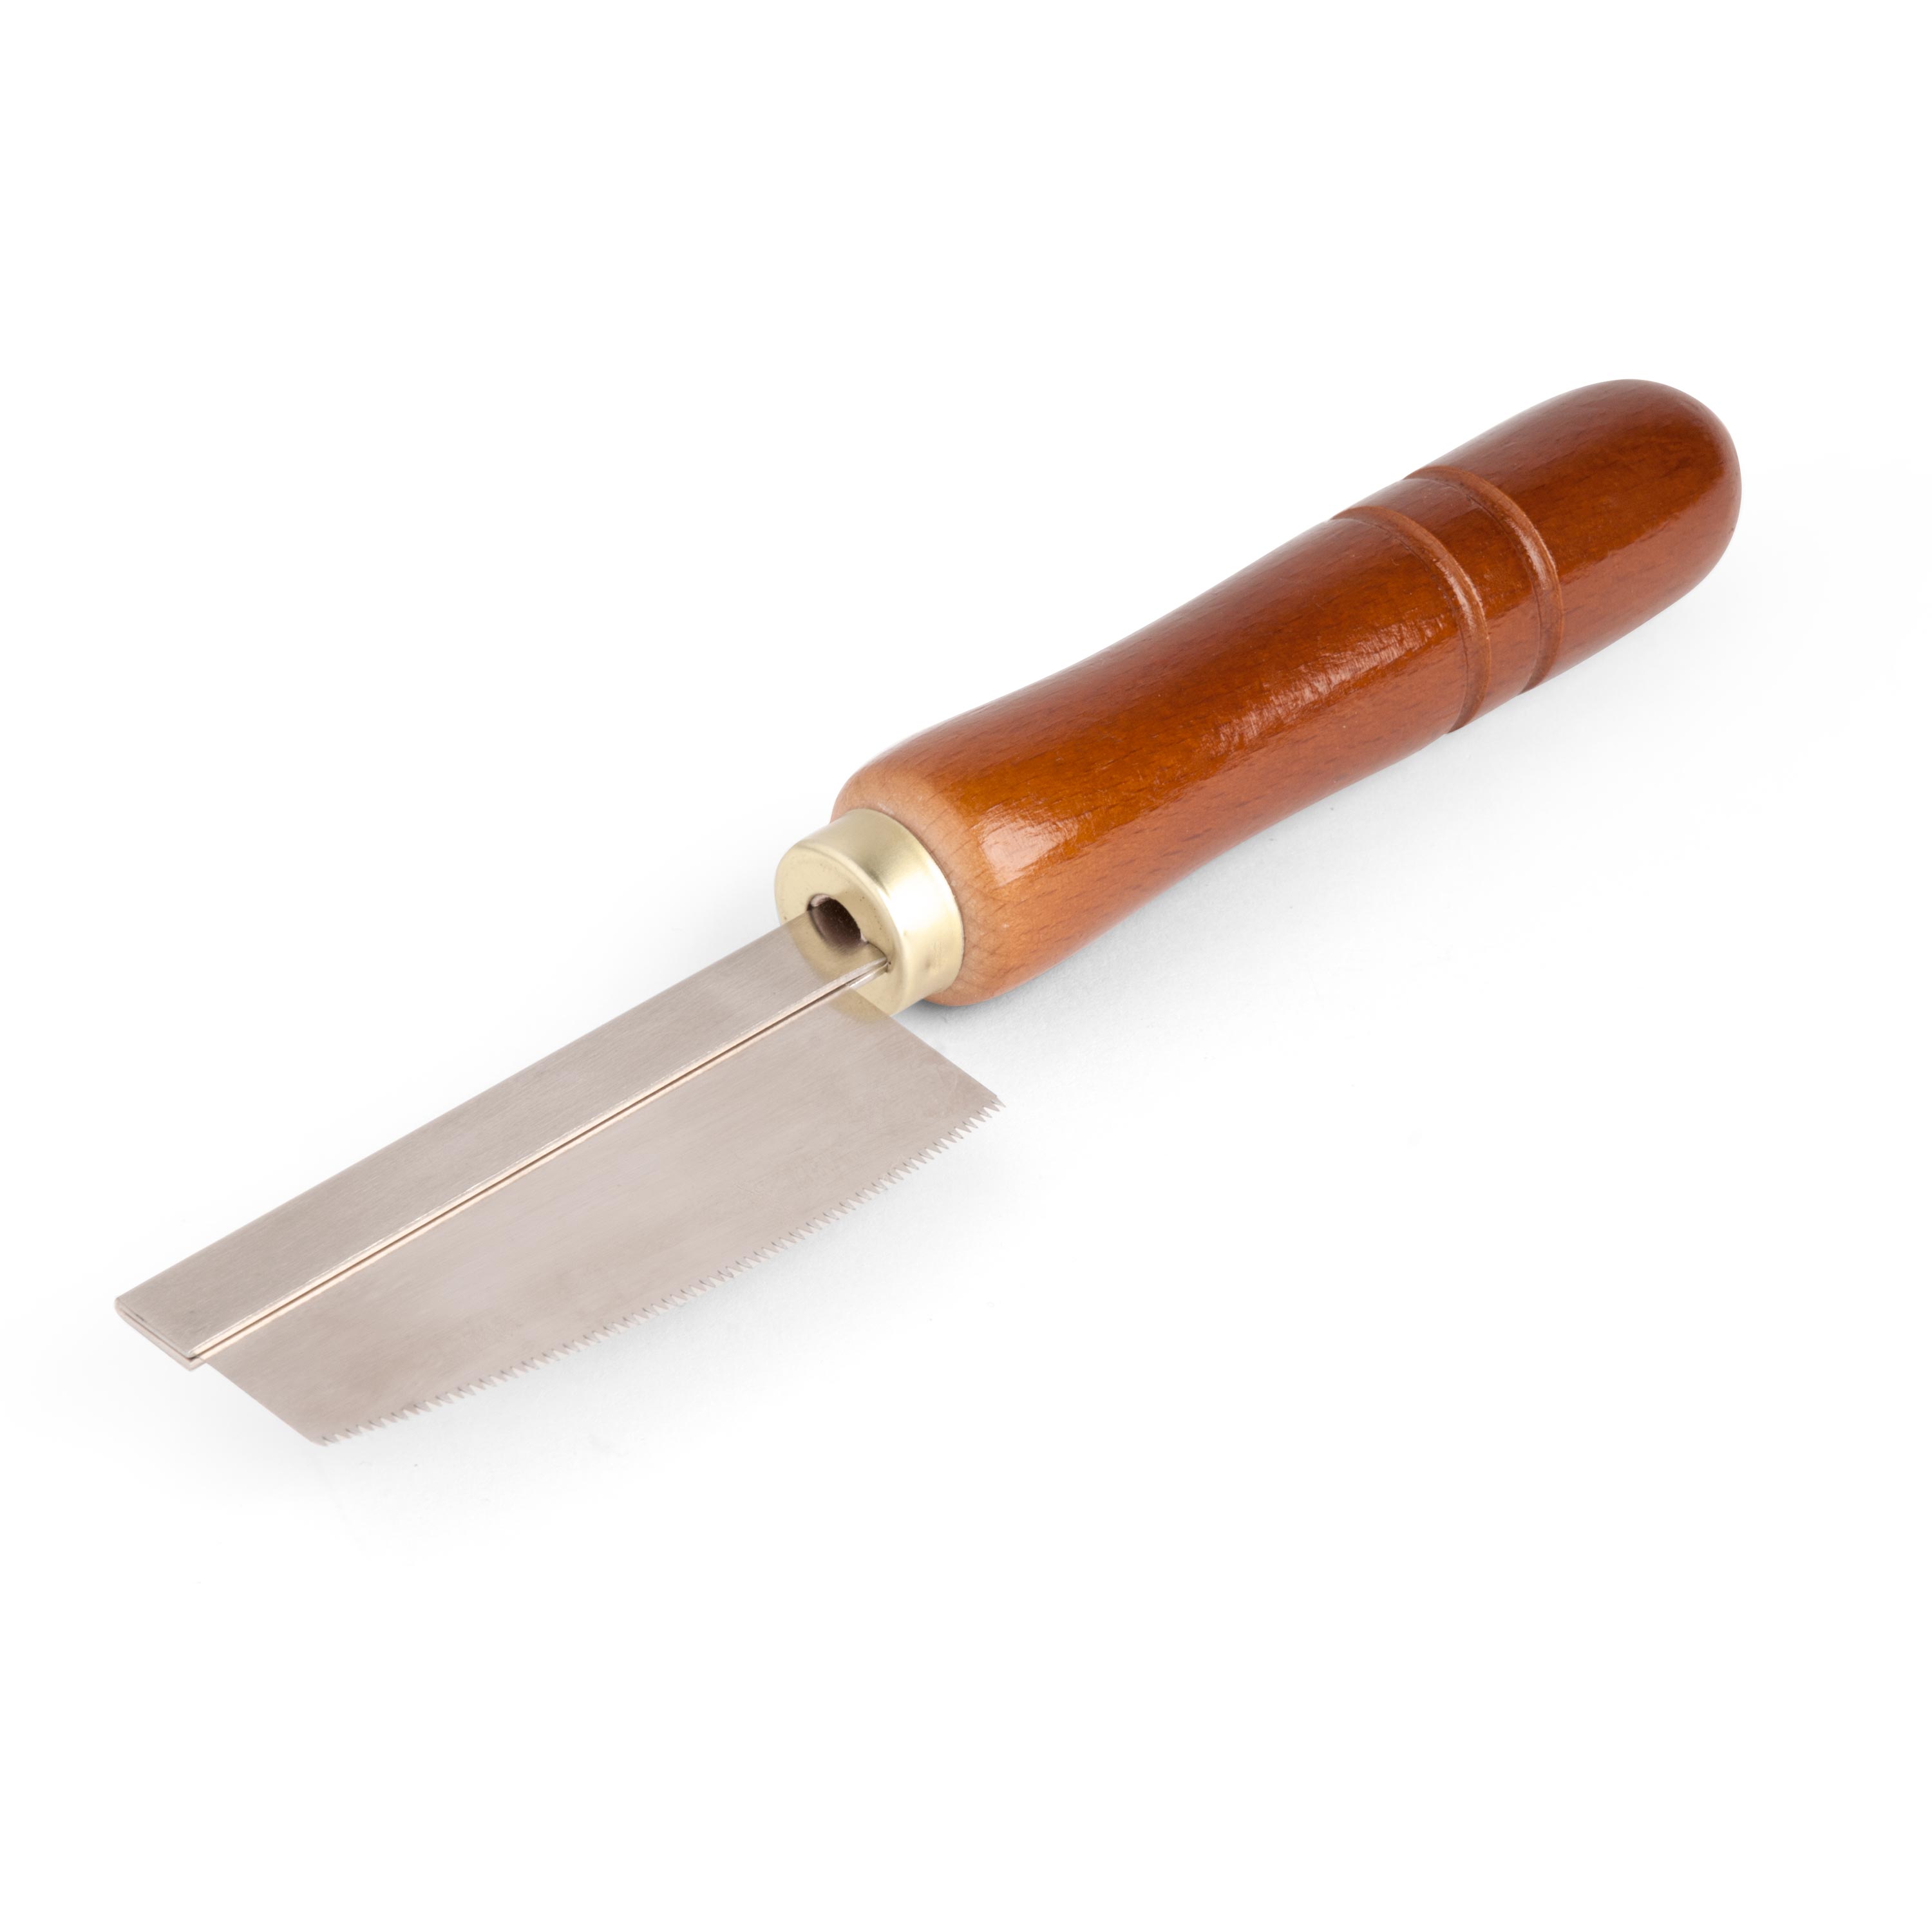
The wedge wedges the brace open more so I can get in here where I know it's loose and I'm going to clean the glue out with these saw blades [on-screen text reads: Old saw blades make good glue scrapers] and some others, I cut them from old razor saws. Actually this one was a brand new saw because I like the teeth and with them I can get in and start my cleaning. This brace is not loose, I don't want to undo that one. Oh, here's another one. This is a strip from a cut right waxed paper box. It's got a certain kind of tooth that really pulls out glue.
To keep off this brace, I made these blocks of wood with the Japanese curved razor saw blade [on-screen text reads: Japanese Curved Edge Mini Saw] super glued to it. Watch this, I can come in, I can feel my way along, and I can saw right past this brace because it can't cut there. It can only cut as deep as the blocks of wood will allow it to cut, and the little guys are good up in the tight corners when you want to clean right out to the end. Now I have to figure out how to clamp this up. That's the next step.
Clamping the brace
Now I want to clamp this brace so that the end is tight [on-screen text reads: 2. Plan for clamping] and I want to see it. It looks like this. Here's an old Gibson brace. It's got that sharp curve on it. I want to be sure that it meets with the top and doesn't come loose again. Here's what I do. Take some scraps of wood and Super Glue a channel, wax off the brace well, slather the channel with auto body filler, and then press the brace in and let it dry. What you'll get is a shape of the brace that's quite accurate [on-screen text reads: Custom-shaped brace gluing caul]. In this case, I took one and cut it down to fit. It's already to go and it snaps right onto the end of the brace and will hold itself there while I come in with my clamp.
Now I could use this clamp, because look, I put a hole in the bottom of that. I took the top piece out, set it aside, and went to the hardware store and got a 10-32 brass thread and cut the head off. That can go here and there's a good setup. You can get close to the edge and it's a good clamper, but I don't even need to do that on this case. It's going to be simpler than that. Get the caul in there, it'll snap into place. Put a caul to protect the top and I can look in the mirror and come in with a sound hole clamp and get just what I want [on-screen text reads: 3. Do a dry run]. That's my dry run.
Gluing the brace
Over the years I've seen a lot of guitars come through my shop that were glued poorly with glue spread all over around a brace [on-screen text reads: 4. Mask before gluing]. I started masking off early by putting tape on a doll and rolling out along the brace to protect it from the glue, that wasn't as easy to do on the inside as it looks there.
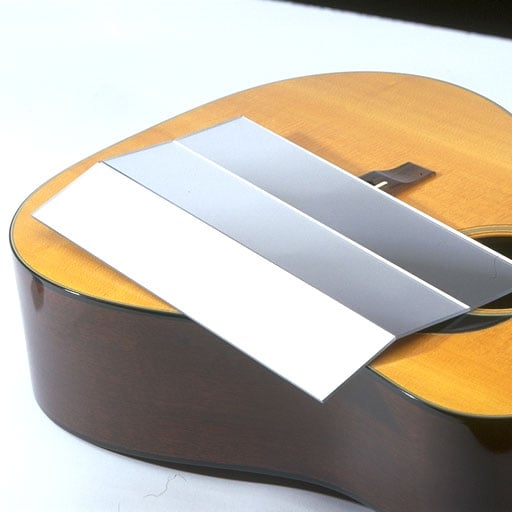
Now I'm using sheet steel [on-screen text reads: Steel masks, cut from shim stock], cut the fit around the brace and held in place with magnets. I think this is a great way to go. Here's how I use the brace gluing wedge. It's got that hole in it. It's tapped 10-32, which just happens to be the perfect size for the shaft of a pipette when you've cut it short like this. You go in and out a couple of times and it's tight and so it won't leak. It's got a handle for placing it and that's also to squeeze and you squeeze the glue out.
That's about how much you want into the brace and you don't want glue running all over the place. What we do is put a piece of cellophane tape on it [on-screen text reads: Tape sets the glue opening to fit the job], trim it away, and then I put about four or five layers of a heavy tape on the bottom [on-screen text reads: Depth stop to match the brace width] and that acts as a stop. It tells me when I've butt into the brace because it'll stop the wedge because I'll be working blind in there.
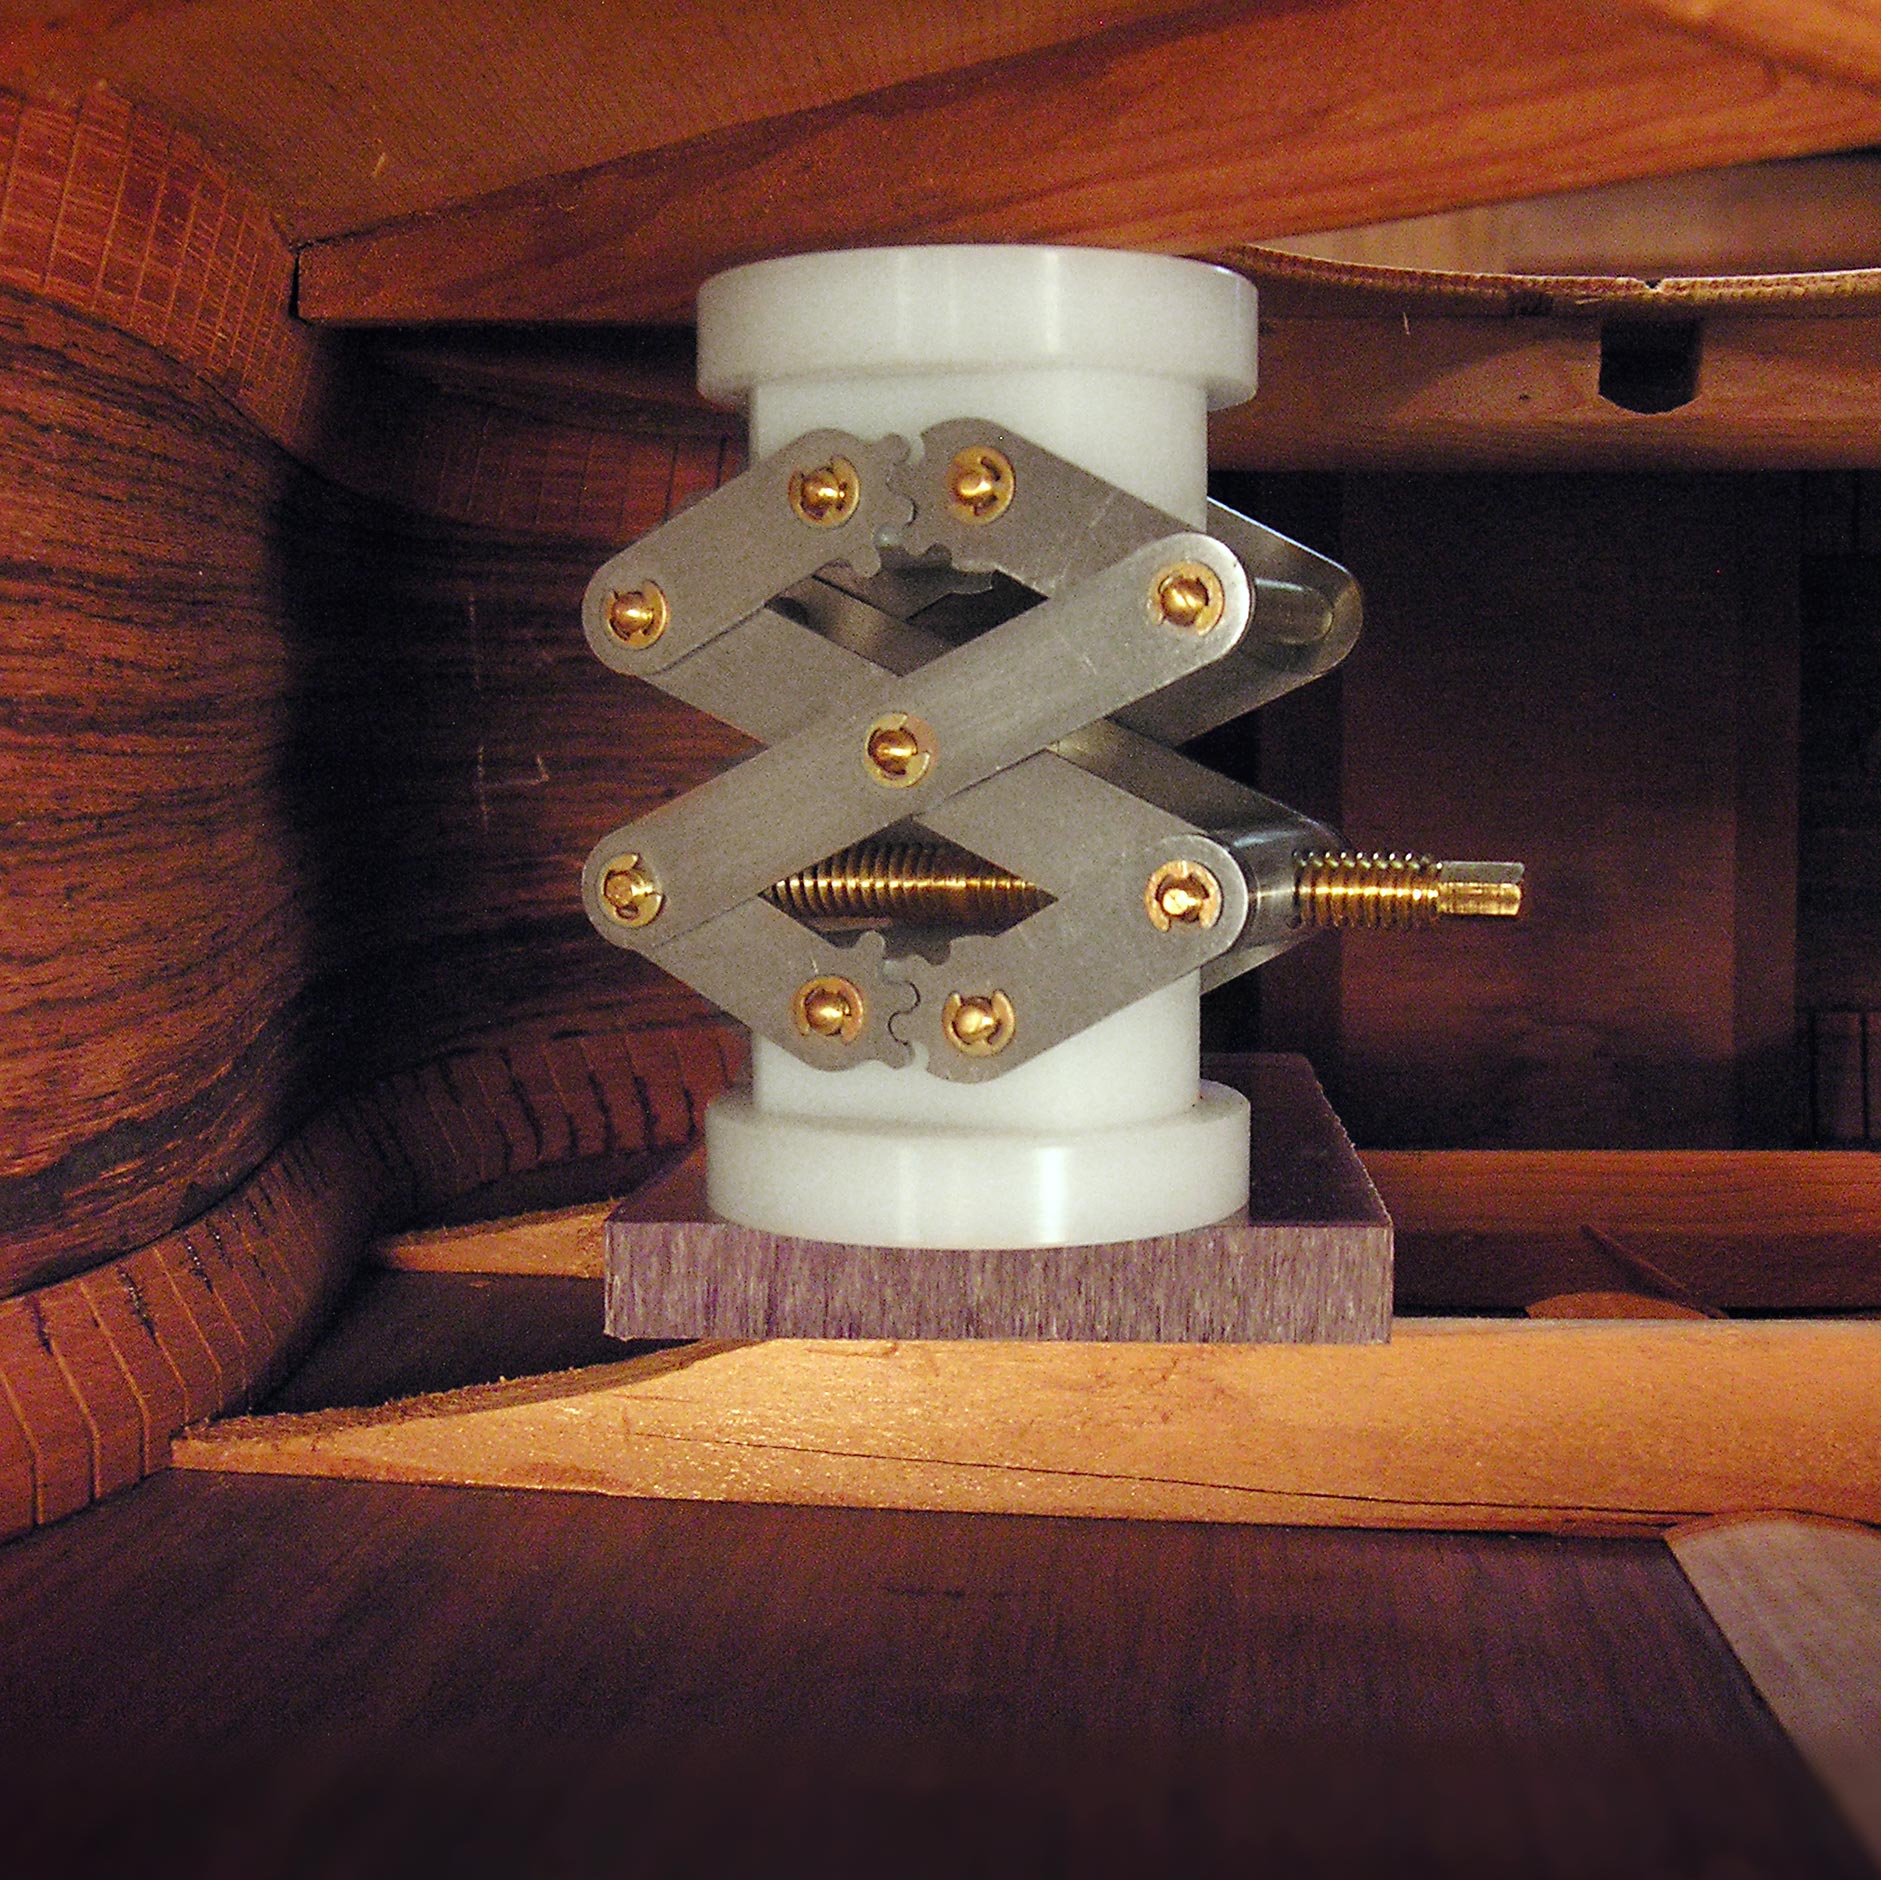
I'm ready to go. I've cleaned up the tool and sanded to about 4,000 Grit Micro-Mesh. Make it nice and smooth and clean again. There's the cellophane tape. I've got my glue loaded into it and I'm ready to apply some glue. Now the glue I'm using is Fish Glue mixed with about one quarter of very hot water to thin it down just a little bit. Now to clamp this part, I'll use the Scissor Jack. It's got a notch in the block of wood to sit over that brace and the jack goes right on top of that, nice pressure there. And a little baby cam come in here. That brace is not coming loose again.
Results
Well, you saw the demo. Now let's see how it came out on the real thing. One thing I didn't point out on the demo is that I cut some paper towel to lay in there and catch any glue if it dribbled down. And I caught one.
Let's see what we got. Looking in the mirror, it looks great. You can see that caul has stayed in place, which I wanted. And she's glued right up to the top. All the way out to the end like I wanted. This one's still loose and I'll get it next. And there's a little bit of stain in the red spruce top from the glue and the water clean up. I'll smooth that in with a block of wood with some 220 grit sandpaper on it. Feather it in.


