Installing an endpin jack
Ever have trouble installing an endpin jack? Did you chip the guitar’s finish, or drill the hole out-of-square? Did you goof up on a customer’s guitar? Been there, done that. Read on
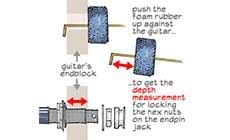
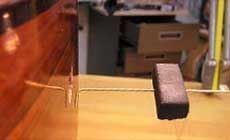
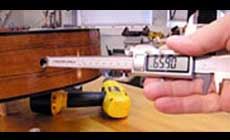
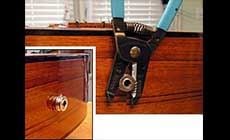
I’ve been installing endpin jacks in acoustics since they first came on the scene, and I’ll admit to chipping the finish on a few before I developed my technique. This was ’way back before the right tools came along, too: our endpin jack reamer and output jack wrench have done a lot to save my customers’ guitars since then! I used these last week to install a Fishman Acoustic Matrix in this nice little classical guitar I found at a yard sale. I’d try holding the guitar between my knees, and go at it with my hand drill. What a wrestling match! Sometimes I’d have somebody else pull the trigger while I tried to keep the drill lined up. Man, I got some crooked holes back then. These days I have a guitar repair vise on my bench to grip the neck, but to tell you the truth sometimes my bench is so cluttered with tools that there’s no place to lay the body on it. I suppose I could always thoroughly clean my bench, but that’s just not going to happen! So I made a neat little padded gizmo to help me out: While the vise holds the guitar by the neck, the body is supported on a little carpeted rest, about the size of a paperback book. This is on a dowel that sits in a hole in my benchtop. Even when the bench is covered with tools, I have a safe support for the guitar that holds it up above the clutter. With the guitar supported this way, I keep it from squirming with one hand, while my other hand reams the hole with our endpin jack reamer in a hand drill. The reamer makes drilling a 1/2" hole unnecessary. Most endpins are installed in a tapered hole to match the taper of the endpin. The reamer follows the existing hole, enlarging it by degree until the large, non-tapered, cutting flutes complete the bore to 1/2" (the outer diameter of endpin jacks). A small piece of brass bent into an L-shape can measure the thickness of the end block. Poke it through a piece of foam rubber, and you have a depth gauge. Hook the L on the inner surface of the end block, and slide the rubber up against the guitar. Lift it out, and measure the thickness you’re dealing with. Of course, it’s easiest to use a digital caliper: just place a block of wood inside, and slide end of the caliper up to it to measure. The double-ended output jack wrench is the only spanner I’ve found that’s slim enough to fit in the space between the guitar and whatever’s holding the jack in place as the hex-nut is tightened. This wrench is only .075" thick, and it has a 1/2" end and 14mm end. I’ve poked a scribe through the jack to hold it while tightening the nut. The last step is to screw on the strap button. Fishman’s instructions say to finger-tighten it, but I’ve found that these buttons tend to work loose. My buddy Frank Ford gave me a tip that works well: he uses a pair of wire strippers to grab and tighten the strap button. They nestle down in the recess where the strap goes, and I find they don’t leave a mark (even if they did, it would be hidden down deep in the strap groove). If you don’t want to touch that shiny new strap button with a metal tool, I understand. In that case, try wrapping the button with a strip of leather or a wide rubber band to get a better grip as you finger-tighten it.Endpin jack installation:
I used to wrestle with installing endpin jacks, but now I’ve got this simple way to do it

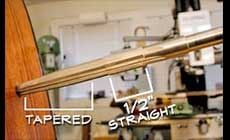
Using a reamer instead of a drill for an endpin jack hole

Drilling that 1/2" hole through the end block used to make me nervous:
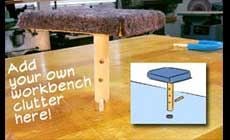
Benchtop riser
Use a reamer, not a drill bit
Quick, cheap depth gauge