How to shim a guitar neck so the strings don't hit the frets
Issue 323 January 24, 2019
Sometimes a guitar's neck angle is just not right, and the strings don't clear the frets the way they should. Erick Coleman shows the right way to shim a neck to correct the angle.
Erick’s fixing an interesting archtop made by Sano in Italy.
- The difference between Gibson and Fender neck angles
- People stuff all sorts of stuff into their neck pocket!
- The downside to sticking a guitar pick in there
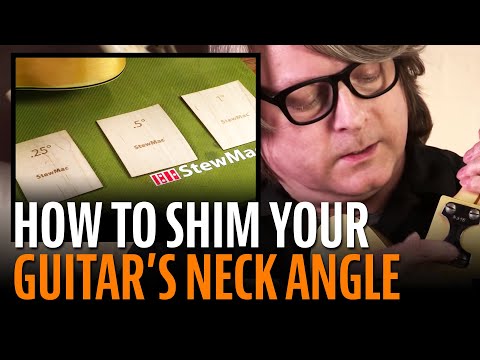
- Tapered wood shims developed by Dan Erlewine
Video Transcription
[on-screen text reads: StewMac tools + ideas for guitarmaking. Shimming A Neck To Adjust Its Angle]
Erick Coleman: Neck angle: it's a key ingredient to any good playing guitar. If you have an angle that is underset, it can cause the guitar to have really high action, particularly in the upper registers, so it's important that the neck angle of the instrument that you have matches the design. Gibson's Les Paul, for instance, if you look at it here, Gibson shoots for around a four degree angle. Sometimes they end up closer to three and a half. This one happens to be about five degrees, and that's kicked back to clear the design, the top carve, and the type of hardware that they used on their guitars.
Whereas a Fender, you're going to see lower profile hardware and electronics, so the neck doesn't need the angle that you see on a Gibson guitar. But sometimes you will see a shim underneath there with a bolt on neck. Occasionally, they need a little help in order to get even playability all the way up and down the neck.
The use of neck shims isn't anything new at all. Fender was doing it in the 1950s and '60s to accommodate for variations in neck pocket depth, and in the '70s, they even came up with a little neck tilt adjustment, and many other manufacturers adopted that and have a similar method that they use to this day. Here is an example of a '60s version of a Fender shim. This came out of a Music Master that I have. And then usually I see things like a piece of cardboard or a couple cut up guitar picks stuffed underneath there.
Those work, but what they end up doing is they leave a little bit of a gap between the bottom of the neck and the pocket. You just kind of see that. And in that gap, you don't get very good coupling of your parts. You want your neck and your body to be really tight together. You don't want any kind of gaps there, because that affects the overall tone and sustain of the guitar.
Another thing that can happen with that gap is it can introduce moisture into that pocket, which can slightly swell up the tongue of the neck here and make the fret line uneven, so you really want a good, nice fitting joint with no gap at all between the bottom of the neck and the pocket.
Full pocket neck shim blanks
Dan Erlewine developed the idea of a full pocket neck shim with a measured angle that tapers down to nothing. Here's an interesting example. It is an Italian arch top guitar made by a company named Santa. Plays pretty nice till you get up to the 12th fret, and it doesn't play at all. When I look at it, you can really see what's going on here. The neck angle is too shallow for the pickup and the bridge that they have on this particular instrument.
The pickup, which is adjustable, it doesn't have much of a range of adjustments, so even at its lowest setting, can't get it out of the way enough to get it playable. And then even if I could, the bridge is at its lowest adjustment point, so I probably couldn't dial in the action that way. But the cool thing is it's a bolt on neck, so we'll be able to take the neck off this and change the angle without having to go through a big old ordeal. In addition to the Fender type shims we sell for guitar and bass, we also offer blank versions that can be trimmed, shaped, and drilled to match any pocket and hole pattern [on screen text reads: Blank Neck Shims for Guitar - stewmac.com].
Checking the neck angle
Okay, I'm checking the neck angle with an Angle Gauge here, and that's showing me that this one is currently set to about three and a half degrees, and we're going to need considerably more than that in order to clear this neck pickup. These shims come in three different sizes. We have a quarter degree, a half degree, and one degree. I can tell that the quarter degree is too thin to do us any kind of good in this situation. The half degree, I could probably get away with. But instead, I'm going to go with the one degree just to be safe. That's going to give us the clearance over the pickup and allow us to have some little extra bridge height there as well.
Okay. Lift the neck up out of the pocket here. Oh, look at that. There's a shim in there. You see that? But it didn't really do much. It's real thin. And if you look closely in the pocket, can you see the shape of the shim? It was actually just pressed into the wood, so it didn't do any good at all. They tried.
Measuring the neck pocket width and corner radius
I have my one degree shim, and the first step is to just do a basic mark out of the width of the neck pocket, making a little line. I'm just going to start cutting through. I'm using a fresh blade. You can also trim this with scissors if you want, but I like using a knife. That gives us the width that we need. Now, we need to figure out the corner radius. I'm going to go in with a Radius Gauge 17/64 is what they just showing up at. I've got that set here on the opposite side of the tool. I'm just going to draw those in. You don't have to be perfect with these. It doesn't have to be a 100 percent match, but you just want it to be pretty close so it takes up most of that pocket.
Prepping the guitar neck shim
And what I like to do is go in with my sharp razor knife, just cut off that little corner a little bit, and that way, set up the little pieces of sandpaper here, and then just round these guys over to the line [Erick is rounding out the corners of the blanks by rubbing the corners on the sandpaper]. If you have a belt sander that works real quick, but this maple isn't very thick, so it doesn't take long to get to the point where you want to get.
Now, we're going to put this in the pocket. All right, we got a good fit there. The next step is to temporarily put the neck on so I can trace around the trim line for the rest of the template, as well as mark the neck bolt holes. I'm using what's called a transfer punch, and so that puts the center on a hole that you're trying to drill through. You don't want to push too hard because you don't want to split that maple apart, making sure you're leaving just a little mark.
Okay. Now, we have our drill through holes, and I like to just touch them up a little bit with my pencil, just so they're a little easier to see when I get them over to the drill press to drill. And then, I'm going to trim these edges off. All right, now we have a good fit.
Drill the neck bolt holes
Now it's time to drill our holes for the neck bolts. To drill the holes, I use the slowest speed that my drill press would run. I used a brad point bit. You'll notice I'm holding my fingers really close to the hole, and this helps hold that thin wood down and keep it from chipping. Okay, let's go put this neck back on.
Installing the new shim and the guitar neck
Okay. Neck's on, shims in place. Before I string it up, I'm just going to take a quick look at it with the straight edge to make sure that we're in the range that I'd like to see it in, and it's looking great. We have probably close to an eighth of an inch clearance over the pickup, which is awesome, and we have considerably more height over the saddle, so instead of being adjusted almost all the way down, now we're going to be able to adjust it a little bit taller in its range, and probably sound a little better to boot.
That's what we want to see. That's what the next shim does, and it's done its job great on this. Can't wait to get strings on it and play it. I'm no jazz player, but sounds pretty neat to me. The shim made a huge difference. It was super easy to install. It was a really quick job too. You guys saw pretty much the entire thing there. I did it in less than 20 minutes, I'd say.
All right, this one's going home. If you liked this video on the topics we cover, hit that subscribe button and you'll receive more in your inbox.