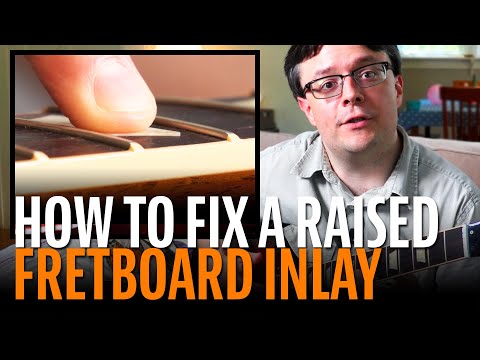
How to fix a raised fretboard inlay
Issue 336 August 22, 2019
Learn how to quickly and easily fix a raised fretboard inlay with only a little wax paper, some Super Glue and a standard guitar capo. Includes pro tips on how to best approach this issue, and how to select the perfect super glue that will provide a strong, long lasting bond that will last for many years.
- You don’t always have to remove a popped-up inlay in order to fix it
- Use the right glue: one that wicks under the inlay
- Some repairs can be done without a lot of expensive tools
- It’s fun to do it yourself!
Here's what's covered in the video:
How to easily fix a raised fretboard inlay
Hi. I'm James. I work for StewMac. Here's a little project that I want to do. The inlay on my Firebird has popped up and I can really feel it when I play. It's been this way for a while. I haven't known how to fix it so, I talked to Dan Erlewine and he said, “Not a problem.” It should be something that's maybe just a 15-minute fix. So, he's going to show me how to do it. It's a beauty. I love these. I've had two. That’s your loose inlay? You don't have to worry about this. It's not a big deal. It's not as common on a brand new guitar as I've seen. We had one come in about a month ago. It's an easy fix and Blake did it. So, Blake can you show you how to fix it.
Raised inlays don’t always have to be removed to be fixed
This inlay lays right back down with some light pressure. This is what we hope for because now we don't have to try to remove it. Whenever we start removing inlays, we always run the risk of causing some “chip out” along the rosewood and it just creates another problem that we don't want to encounter. So we're going to use Number 10 super glue. It's the thinnest, most watery superglue that we have and, really it's the only glue that can get down along the edge of this. It’s going to wick itself down underneath and we'll clamp it and we should be rollin’. If I were doing this in the workshop, I’d put a caul under the neck and use an F-clamp and a radius block to apply even pressure down onto the inlay. But, do you have a capo with you? I think I have one in my case so, I'll check. Ok, cool. While you do that, I will grab some wax paper.
Use your capo as a clamp
I think we can just do this with a capo as our clamp. It’s kind of what it is, already. You know most people at home don't have all the clamps that we have in our shop. So, I think we could just put some glue in there and put our wax paper down so our capo doesn't stick to our glue. Then we’ll just capo clamp that edge that’s lifted up and that should do it, I think.
Do a dry run before using glue
So, let’s run through the steps. We’ll place our wax paper down and pretend that there’s glue on it. I have this piece of wood here. This is just a really thin piece of scrap wood but you can also use cardboard or a really dense piece of foam. This adds a little bit more pressure right here on this popped up end. Then, we're going to put the capo on and go, and that should be it. Bu,t we want to try to do this as fast as we can. It's important to do a dry run without glue and rehearse what you're going to do a couple of times so it's smooth and easy. This super glue dries really fast and you don't want to fumble around.
Wax keeps the glue from penetrating the fingerboard
You need to wax both the top of the inlay and the wood around it to protect it from the super glue. You need to make sure that you don't get any wax down inside the glue joint that could prevent glue from entering and bonding. I'm brushing across the inlay and around that joint while I'm pressing it down, making sure I don't get any wax down inside the joint. The water thin glue wicks down in the joint and under the inlay and hardens really fast. So, you need to be able to clamp quickly. So, I’ve got my piece of wax paper right over top. Then like I have my wooden shim in place where I need it. And then I clamp it down with my capo. Well, James, I think it's been just about ten minutes. Ready to check this guy out? I am. I'm looking forward to it. Alright. Capo off. Wood off. I think we're good. There's some glue there. Yeah. Oh yeah. The corner is not sticking out anymore. That's amazing. Yeah. I didn't think it would be that easy to fix this. I wish I wouldn’t have waited so long to get it fixed. Well, you know, good repairs don't have to be complicated or take a long time.
Clean up with a razor blade, naphtha and lemon oil
The final step is cleaning up any excess glue and wax that can be removed using a sharp razor blade as a scraper. This is the safest way because chemicals like acetone can melt binding and plastic inlays. Take a little steel wool and let’s polish this boy up. I'm just trying to get some of these scratches that were originally in this fingerboard out and I'm going with the grain. Take a little bit of Naphtha right here. That’s nice and starting to blend in pretty well. I'm going to take a little bit of lemon oil and put it on all those frets that I just touched and give them a little oil; a little saturation. Hey guys. How did it come out? Excellent. It came out really nice. I can't even feel it anymore. I can bend up in here and I don't get caught any more. I love a Firebird. They're awesome. Yeah. I had a ‘93 and it came with the banjo tuners on it; RB 250 clunky things. And I put the early Steinbergers on that and I loved it. I wish I wouldn't have sold it. You know, we have these at StewMac now; we’re carrying the Steinberger tuners. I’ve got these on an acoustic guitar, an old Gibson J-35; people would kill me. They're 40:1 gear ratio. They're really good. Yeah. And they lock, too.
What we did to fix this raised inlay
Blake. Tell our friends what the steps were that you went through that I missed. We waxed off everything. We ran our glue and applied some wax paper, a wooden caul, and then our capo, and did it as fast as we could. We waited about 10 minutes, came through, scraped up with a razor blade, polished it with a little bit of steel wool, cleaned off the dust with a little bit of naphtha and put some lemon oil in there and blended it up. And you can't see it. Killer job. Yeah, it's awesome. It came out perfect. Subscribe to our YouTube channel for this and tons of other great trade secrets.


