How to blend new lacquer into old using flash coats
Issue 290 July 27, 2017
Make new lacquer coats blend invisibly into the existing finish by adding “flash coats” of thinned-down lacquer. Dan Erlewine shows you how.
- Dan’s hiding a repair in a Gibson finish
- Dan’s flash-coat recipe
- Sanding out between coats
- Buffing to a high gloss
Video Transcription
[on-screen text reads: Blend new lacquer into old with flash coats - StewMac]
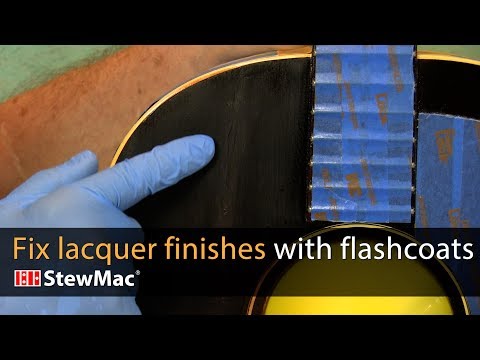
Dan Erlewine: Here's a long scratch and an old Gibson guitar that's been glued, drop filled and leveled, and I'm about to spray lacquer over that to melt it into the original finish. To do that, I use what's called a flash coat because if I just sprayed lacquer on that and laid it on the old finish, it's going to have a little line when you sand it out. With the flash coat, you melt the new lacquer into the old and it chemically bonds and you can sand it in buffet and there's no line.
Prepare the flash coat
The flash coat is a mixture of some Retarder, regular Lacquer Thinner and Lacquer. It's mostly these two with only a little lacquer in just to give it body so when you spray it clings, otherwise the thinners would just run all over the place. And here's how you mix it. I put in some thinner, about two parts. I put in some retarder, about two parts. Then I put in some lacquer, about one part.
Airbrush the flash coat and lacquer
So what I'm going to start with is the flash coat and this airbrush. Spray it on that finish in this area to soften it so it accepts the lacquer, which is in that gun. Hang it up and quickly get the lacquer. Hang it up, go back to the flash coat, especially on the edges, and blend it in. Here's what it looks like about three minutes after we just sprayed it, if the camera can get that. It's shiny, but it looks thin because the solvents have gone away now and left a thin layer of lacquer. And we're trying to fill lacquer in around that crater of repair that I did.
Repeat airbrushing process and sand
I'm going to wait about an hour and a half and repeat this operation at least once more and then sand [Dan is sanding the area with the high spot]. It's hitting that high spot [on-screen text reads: 400-grit Sandpaper - stewmac.com] .
I'm mixing a little black lacquer so that I can touch up that area and hide it even more. Because the lacquer pigment [on-screen text reads: ColorTone Pigment - stewmac.com] is concentrated and quite thick, you start with some thinner and add the pigment to it and then mix it in and add the lacquer to get a good coverage [Airbrush Outfit - stewmac.com].
Buff to a high gloss
It's been a couple weeks since I sprayed this last [on-screen text reads: Micro-Mesh Soft Touch Pads] and it's plenty dry and I've sanded it out with some 800 Gold first. Then I went over to wet sanding with warm water and some dish soap. That's so smooth, it's ready to buff. Then I'm going to use a medium compound on this one and a nice fine one on that one. That's the clean wheel. This has done a few frets, as you can see.
That's looking pretty good for a beat up old guitar. I've got lots more work to do down here. I just wanted to go ahead with this one and buff it out and show you how to do it. Considering what we started with, I think that looks mighty fine.


